1. ElasticSearch 安装
1.1 下载 ElasticSearch
ES安装包下载地址:https://www.elastic.co/cn/downloads/elasticsearch 历史版本:https://www.elastic.co/cn/downloads/past-releases#elasticsearch
1.2 安装
1、执行解压操作
将 ElasticSearch 解压到 opt 文件夹下;使用tar -zxvf解压;
$ tar -zxvf elasticsearch-7.4.0-linux-x86_64.tar.gz
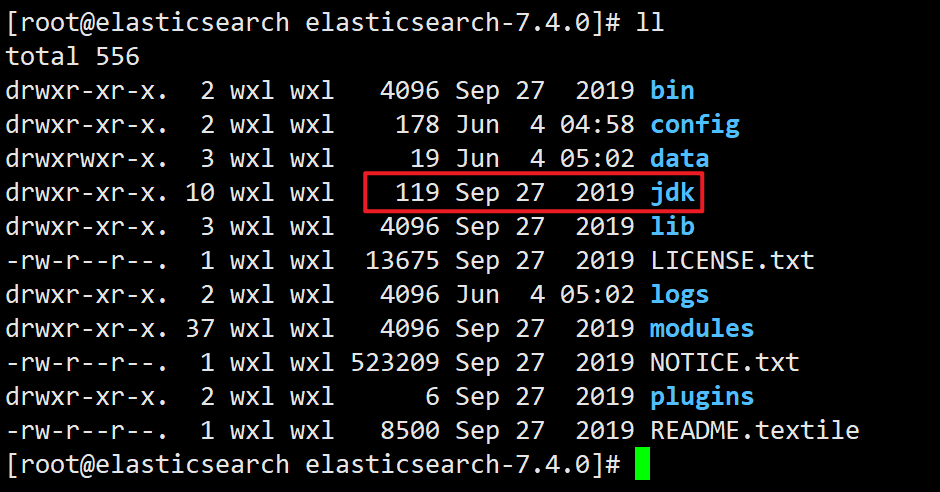
解压后会发现有一个 jdk 目录,ES 版本和 Jdk 版本是有强依赖关系的,所以推荐使用内置 JDK;
2、修改 elasticsearch.yml 文件
$ vim /opt/elasticsearch-7.4.0/config/elasticsearch.yml
对上个配置文件,进行如下的配置信息写入:
###### wxl 0919 ElasticSerach Config File ######cluster.name: my-applicationnode.name: node-1network.host: 0.0.0.0http.port: 9200cluster.initial_master_nodes: ["node-1"]
配置 yml 文件需要注意的一点:内容与冒号之间要有个空格;
3、启动ES
$ ./elasticsearch -d
随着就有报错信息:因为安全问题,ES 不允许 root 用户直接运行,所以需要创建新用户;
4、创建普通用户
在 root 用户中创建新用户,执行如下命令;
$ useradd wxl # 新增 wxl 用户$ passwd wxl # 为 wxl 用户设置密码
之后,在 opt 目录里为 wxl 用户授权:
$ chown -R wxl:wxl elasticsearch-7.4.0/
5、修改配置文件
新创建的 wxl 用户最大可创建文件数太小,最大虚拟内存太小,切换到 root 用户,编辑下列文件,添加类似如下内容;
# 切换到 root 用户$ su root# 1.===最大可创建文件数太小===$ vim /etc/security/limits.conf# 在文件末尾增加下面内容wxl soft nofile 65535wxl hard nofile 65535# ==========================================$ vim /etc/security/limits.d/20-nproc.conf# 在文件末尾增加下面内容wxl soft nofile 65535wxl hard nofile 65535* hard nproc 4096# 注:* 代表 Linux 所有用户名称# 2.===最大虚拟内存太小===$ vim /etc/sysctl.conf# 在文件中增加下面内容$ vm.max_map_count=655360# 重新加载,输入下面命令$ sysctl -p
6、普通用户启动ES
切换到 wxl 用户去启动
$ su wxl
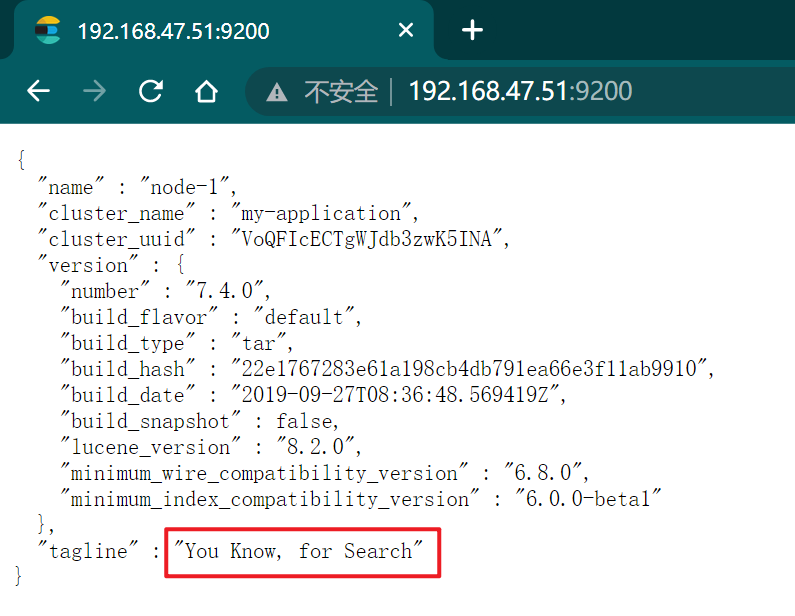
浏览器输入:IP + 9200,会提示 Json 提示信息:信息有 ES 版本,Lucene 版本;
2. ES 辅助插件安装
2.1 Postman 安装
2.2 Kibana 安装
1、什么是 Kibana
Kibana 是一个针对 ElasticSearch 的开源分析及可视化平台,用来搜索、查看交互存储在 ES 索引中的数据;是ES 官方推荐使用的工具;
Kibana 历史版本下载:https://www.elastic.co/cn/downloads/past-releases
2、安装 Kibana
$ tar -xzf kibana-7.14.1-linux-x86_64.tar.gz
3、修改 Kibana 配置
$ vim /opt/kibana-7.4.0-linux-x86_64/config/kibana.yml
server.port: 5601server.host: "0.0.0.0"server.name: "kibana-aliCloud"elasticsearch.hosts: ["http://127.0.0.1:9200"]elasticsearch.requestTimeout: 99999
启动后,浏览器输入地址:http://192.168.47.51:5601/ 即可访问;

