0 准备实验环境
为CentOS配置本地软件仓库(光盘)
(1)给CentOS虚拟机放入CentOS安装光盘镜像(ISO光盘)
(2)完成如下的文件操作
[root@localhost ~]# cd /etc/yum.repos.d/[root@localhost yum.repos.d]# lsCentOS-Base.repo CentOS-Debuginfo.repo CentOS-Media.repo CentOS-Vault.repoCentOS-CR.repo CentOS-fasttrack.repo CentOS-Sources.repo CentOS-x86_64-kernel.repo[root@localhost yum.repos.d]# mkdir backup[root@localhost yum.repos.d]# lsbackup CentOS-Debuginfo.repo CentOS-Sources.repoCentOS-Base.repo CentOS-fasttrack.repo CentOS-Vault.repoCentOS-CR.repo CentOS-Media.repo CentOS-x86_64-kernel.repo[root@localhost yum.repos.d]# mv *.repo ./backup/[root@localhost yum.repos.d]# lsbackup[root@localhost yum.repos.d]# cp ./backup/CentOS-Media.repo ./[root@localhost yum.repos.d]# lsbackup CentOS-Media.repo
(3)编辑CentOS-Media.repo文件,内容如下
[root@localhost yum.repos.d]# vi CentOS-Media.repo,修改如下两项内容,然后保存
gpgcheck=0enabled=1
(4)创建/meida/cdrom目录,并将/dev/cdrom挂在到这个目录下
[root@localhost yum.repos.d]# cd /media[root@localhost media]# ls[root@localhost media]# mkdir ./cdrom[root@localhost media]# mount /dev/cdrom /media/cdrommount: /dev/sr0 写保护,将以只读方式挂载
(5)更新YUM仓库配置信息
[root@localhost media]# yum clean all[root@localhost media]# yum list
1 Apache httpd的安装
1.1 使用如下的命令之一来完成httpd的安装
[root@localhost media]# yum install -y httpd
也采用组件的安装方法。
#yum group install “Web Server”或#yum group install “Basic Web Server”
1.2 开始以使用下列命令之一来启动httpd服务和查询运行状态
[root@localhost media]# systemctl start httpd#httpd是apache webserver的服务程序名,start表示启动该服务[root@localhost media]# systemctl enable httpd#enable表示将httpd设置为开机自启动服务[root@localhost media]# systemctl status httpd#status用来查询服务程序的运行状态,active(running)表示服务正常● httpd.service - The Apache HTTP ServerLoaded: loaded (/usr/lib/systemd/system/httpd.service; enabled; vendor preset: disabled)Active: active (running) since 二 2022-05-10 08:36:20 CST; 1min 53s agoDocs: man:httpd(8)man:apachectl(8)Main PID: 4424 (httpd)Status: "Total requests: 0; Current requests/sec: 0; Current traffic: 0 B/sec"Tasks: 6CGroup: /system.slice/httpd.service├─4424 /usr/sbin/httpd -DFOREGROUND├─4425 /usr/sbin/httpd -DFOREGROUND├─4426 /usr/sbin/httpd -DFOREGROUND├─4427 /usr/sbin/httpd -DFOREGROUND├─4428 /usr/sbin/httpd -DFOREGROUND└─4429 /usr/sbin/httpd -DFOREGROUND5月 10 08:36:20 localhost.localdomain systemd[1]: Starting The Apache HTTP Server...5月 10 08:36:20 localhost.localdomain httpd[4424]: AH00558: httpd: Could not reliably determine ...age5月 10 08:36:20 localhost.localdomain systemd[1]: Started The Apache HTTP Server.Hint: Some lines were ellipsized, use -l to show in full.
或者
#apachectl start //启动httpd服务
#apachectl stop //停止httpd 服务
#apachectl graceful //重新加载配置文件
1.3 关闭防火墙(为了简化服务配置)
[root@localhost media]# systemctl stop firewalld#stop表示关闭防火墙[root@localhost media]# systemctl disable firewalld#disable表示开机时防火墙不启动
1.4 关闭SELinux服务
[root@localhost media]# setenforce 0#使用这种方式修改selinux后,重启之后selinux会自动启动
或者
修改/etc/selinux/config配置文件,将如下内容进行修改,并保存。这样就会持久关闭selinux
SELINUX=disabled
1.5 网站的访问测试
在客户端的浏览器上输入http://服务器的IP地址,能够看到apache的测试页面则表示httpd安装成功。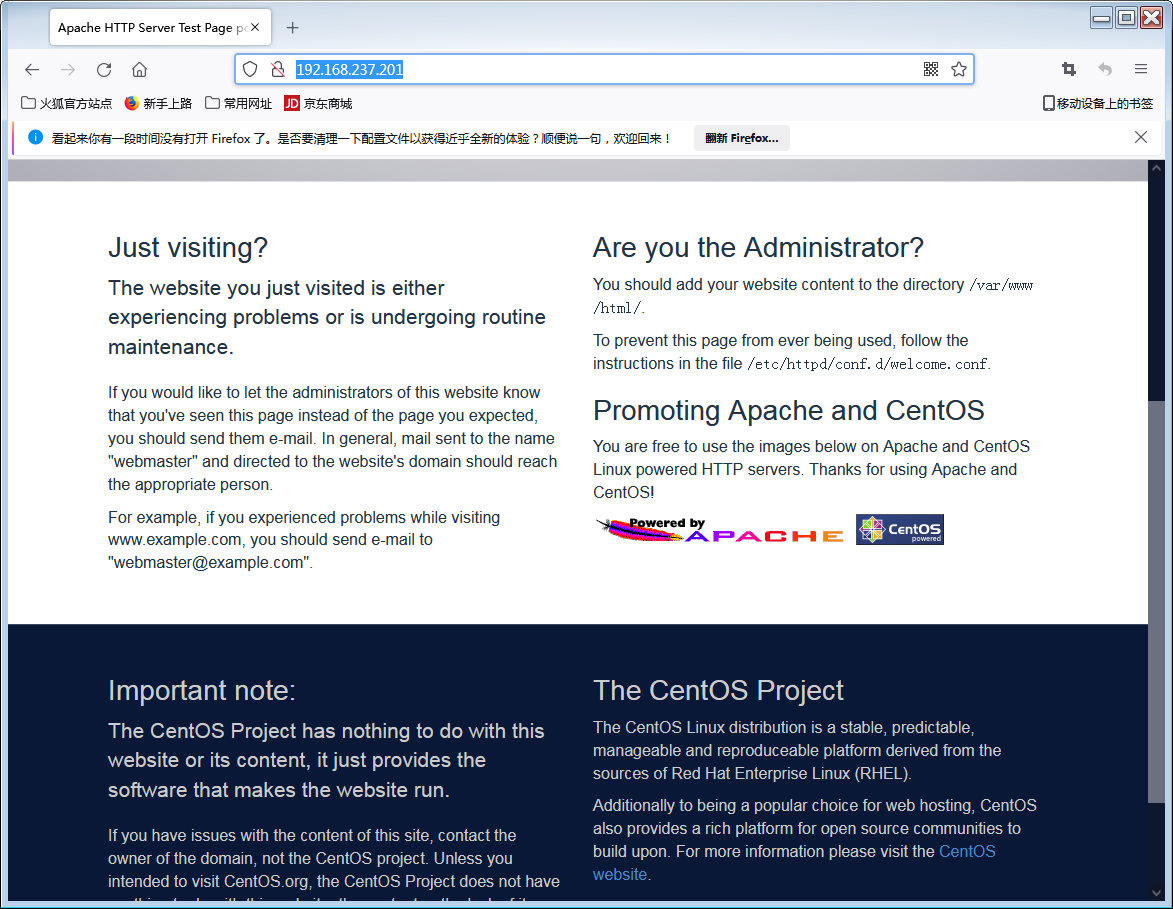
说明:
(1)默认的RHEL/CentOS的Apahce httpd服务器包含基本的设置,不需要做任何的修改即可使用。
(2) 默认的网站根目录是/var/www/html。
(3)如果默认网站没有index.html,则显示/usr/share/httpd/noindex/index.html,此项目有/etc/httpd/conf.d/welcome.conf来确定。
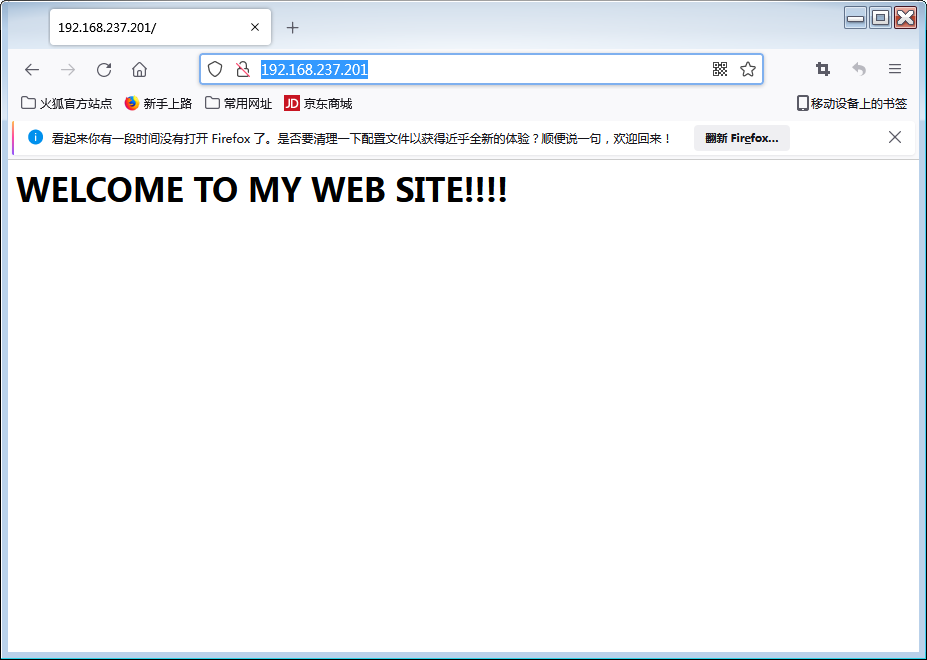
可以在/var/www/html目录中发布index.html来发布自己的网页,如下
[root@localhost media]# cd /var/www/html[root@localhost html]# ls[root@localhost html]# touch index.html[root@localhost html]# ls -l总用量 0-rw-r--r--. 1 root root 0 5月 10 08:53 index.html[root@localhost html]# vi index.html
编辑index.html网页的内容如下,然后保存
<h1>WELCOME TO MY WEB SITE!!!!</h1>
2.了解httpd的配置文件
2.1 httpd配置文件的基本内容
(1)httpd服务器程序的配置文件包含在一下三个目录中:/etc/httpd/conf、/etc/httpd/conf.d、/etc/httpd/conf.modules.d。
(2)httpd服务程序的主配置文件/etc/httpd/conf/httpd.conf,另外/etc/httpd/conf.d/ssl.conf也是一个主要的配置文件。
(3)在主配置文件httpd.conf中,通过如下指令(IncludeOptional )将外部配置文件的配置指令导入进来:
IncludeOptional conf.d/.conf
Include conf.modules.d/.conf
(4)在配置文件中使用“容器”概念来容纳诸如“目录”、“虚拟主机”、“文件”、“模块”等内容,以便对他们来进行设置。
<容器名称>配置的内容</容器名称>
(5)配置文件中包含大量的httpd程序可以理解的配置指令。
(6)配置文件的内容可以归纳三个部分:全局配置、主服务配置、虚拟机主机配置。
(7)如果想要了解httpd配置文件的详细细节,可以参考如下的网址:https://httpd.apache.org/docs/2.4/
2.2 httpd.conf中的常用指令介绍
2.2.1 常用全局配置指令和主服务配置指令
(1)ServerRoot
这个指令用来定义httpd的配置文件、错误文件、日志文件的根目录。后续出现的相对路径都是以此目录为根目录的。注意定义了目录是不能使用/来结尾。默认值是:/etc/httpd。
(2)Timeout
超时设置。用来设置接受和发送数据时的超时设置,默认时间单位是秒。例如:
Timemout 300
(3) ServerAdmin
设置管理员邮件地址,例如:ServerAdmin root@lzy.edu.cn
(4) ServerName
设置主机名称和端口号,可以使用IP地址,例如:
ServerName www.xyz.com:80
ServerName 192.168.8.201:80
(5) Linsten
设置监听端口,可以写多个,语法如下:
Listen [ IP-ADDRESS:] portnumber [ protocol ]
例如:
Listen 80
Listen 8000
Listen 192.168.8.201:80
Listen 192.168.8.202:8000
(6) DocumentRoot
设置主页文档,默认是/var/www/html。如果要指定DocumentRoot,在没有掌握SELinux配置之前,请关闭SELinux(#setenforce 0),否则会出现访问权限错误问题。
例如:DocumentRoot /webroot
(7) DirectoryIndex
设置首页,可以有多个,空格分隔,例如:
DirectoryIndex index.html index.php start.html
(8) AddDefaultCharset
设置网页编码,默认是UTF-8,中文可以是GB2312或GB10830。如果网页是多种编码混用,可将这条指令注释掉。
2.2.2 httpd.conf配置文件中的目录设置
1 目录设置的要点
(1)需要对目录进行配置之后才能正确访问网站目录的文件内容。
(2)目录的访问权限是在
<Directory “目录名称”>控制语句</Directory>
(3)详细的控制指令说明可以在官方的说明文档中查阅得到。
2 常用的目录设置指令
(1)Options指令
Options FollowSymLinks | Indexes | MultiViews | ExecCGI | Includes | IncludesNoExec | ALL
FollowSymLinks 允许在目录中使用符号连接
Indexes 允许查看目录列表
ALL 除了MultiViews之外所有特性
(2)AllowOverride指令
用于指定.htaccess文件中可以覆盖的指令类型,其语法:
AllowOverride All | None | 指令类型1 [指令类型2]
例如:
AllowOverride None
AllowOverride All
(3)Order指令
用于设置Allow和Deny的处理顺序,它的设置有两种形式。
Order allow,deny(白名单制)
默认为deny,先匹配allow,再匹配deny,若allow和deny均匹配,则为deny。
Order deny,allow(黑名单制)
默认为allow,先匹配deny,再匹配allow,若allow和deny均匹配,则为allow。
示例:
1)允许所有客户端访问
Order allow,deny
Allow from all
2)拒绝IP地址为10.20.30.40和来自hei.com域的客户端访问,其他客户端可以正常访问
Order deny,allow
Deny from 10.20.30.40
Deny from hei.com
(3)仅允许192.168.8.0/24网段的客户端·访问,但其中的192.168.8.100不能访问。
Order allow,deny
Allow from 192.168.8.0/24
Deny from 192.168.8.100
(4)Require指令
Require指令用于判断目录的授权访问方式,常见的授权访问方式有:
Require all granted #无条件允许访问
Require all denied #无条件拒绝访问
Require user userid [userid] … #需要用户userid的身份认证
Require group group-name [group-name] #需要组用户的身份认证
Require valid-user #需要合法用户的身份认证
Require ip 10 172.20 192.168.2 #允许特定IP网段的客户端访问2.2.3 httpd.conf配置文件的测试命令
可以使用如下命令来测试httpd.conf配置文件的语法是否正确
[root@localhost conf]# apachectl -tSyntax OK
或者
[root@localhost conf]# apachectl configtestSyntax OK
可以使用如下命令查看httpd的配置情况
[root@localhost conf]# httpd -SVirtualHost configuration:ServerRoot: "/etc/httpd"Main DocumentRoot: "/wwwroot"Main ErrorLog: "/etc/httpd/logs/error_log"Mutex authdigest-opaque: using_defaultsMutex proxy-balancer-shm: using_defaultsMutex rewrite-map: using_defaultsMutex authdigest-client: using_defaultsMutex proxy: using_defaultsMutex authn-socache: using_defaultsMutex default: dir="/run/httpd/" mechanism=defaultMutex mpm-accept: using_defaultsPidFile: "/run/httpd/httpd.pid"Define: _RH_HAS_HTTPPROTOCOLOPTIONSDefine: DUMP_VHOSTSDefine: DUMP_RUN_CFGUser: name="apache" id=48Group: name="apache" id=48
2.2.4 httpd的日志文件
1 httpd的日志文件存放在/etc/httpd/logs(实际连接到/var/log/httpd)。
2 标准的日志文件有: access_log、error_log。
3 日志的格式是可以自定义。2.2.5 练习题1
搭建一台内部Web服务器(网页目录压缩包为www.xyz.com.rar),采用服务器名称和端口号为www.xyz.com:8080,首页面为start.html,管理员邮箱为root@xyz.com,网页采用默认编码为UTF-8,网站根目录在/wwwroot,httpd配置根目录在/etc/httpd,连接超时间设置为180s,只允许192.168.8.0/24网段的客户端访问。
3 设置虚拟目录的指令
3.1 设置虚拟目录的指令
Alias 虚拟目录名 “实际目录名”
说明:
(1)虚拟目录名的根目录是DocumentRoot指定的目录。
(2)设置好虚拟目录的定义后,还要定义虚拟目录对应的实际目录的访问授权。
3.2 设置虚拟目录的示例
Alias /vdir “/xyz”
Options FollowSymLinks Indexes
AllowOverride None
Allow from all
Require all granted
3.3 练习题2
在练习题1的基础上完成下面的操作。将connection.rar中的网页文件复制到/connection目录中,然后将/connection目录作为网站的虚拟目录/vd。通过网站首页的“案例展示”链接到/vd/index.html页面。
4 设置目录访问的身份认证
4.1 设置目录访问的身份认证的过程
1 可以通过用户名和口令来验证对Web页面的访问。
2 创建口令访问需要先创建用户(用户组)和口令数据库。
3 在需要口令保护的目录容器中添加口令验证指令。
4.2 创建httpd访问用户名(用户组)和口令数据库
1 使用htpasswd命令来创建用户名和口令数据库
#htpasswd [-c] 口令数据库文件名 用户名
其中, -c 用于创建口令数据库文件,如果已经创建了口令数据库文件,则取消-c选项。
例如:
#htpasswd –c /etc/httpd/webpass user01
#htpasswd /etc/httpd/webpass user02
2 创建用户组
建立 /etc/httpd/grouppass(其中/etc/httpd/grouppass为组文件名),按如下方式添加行。
组名称:用户名1 用户名2
例如:
webgroup: user01 user02
3 在目录容器中添加访问控制指令
在需要口令认证的目录容器中添加访问控制指令,其形式如下:
AuthType Basic #指定认证类型为Basic类型
AuthBasicProvider file #指定基本认证类型提供者是文件
AuthName “Access Authentication” #设置认证的名称
AuthUserFile “/etc/httpd/webpass” #指定用户认证的文件名
AuthGroupFile “/etc/httpd/grouppass” #指定定义组的文件名
Require user user01 #指定允许访问的用户名
Require valid-user #指定允许访问的合法定义的用户
Require group webgroup #指定允许访问的组名
4.3 练习题3
在练习题2的基础上完成下面的操作。要求进入/vd虚拟目录是要进行用户身份和口令的认证。要求设置用户组webusers,其中包括用户名user01、user02、user03。
5 配置虚拟主机(一台主机发布多个网站)
5.1 配置基于不同IP地址的虚拟主机
1 为主机配置多个IP地址
(1)可以是多张网卡,也可是是一张网卡。
(2)可以使用ifconfig命令来配置IP地址,例如:
ifconfig <网卡名称> :<子接口号> IP地址/前缀 up
(3)可以使用ip address命令来配置IP地址,例如:
ip address add
(4)可以通过创建网卡子接口的配置文件,然后配置IP地址。
2 为各虚拟主机准备网站根目录和网页文件
略
3 修改httpd.conf配置文件
(1)添加对多个IP地址的的监听,例如:
Listen IP地址:端口号
(2)添加导入虚拟主机配置文件的指令
IncludeOptional conf.d/*.conf
4 创建虚拟主机的配置文件
在conf.d/目录中创建配置文件vhost.conf,为不同的虚拟主机创建对应的配置信息,其格式可以参考以下形式:
ServerName <服务器名称>
DocumentRoot <虚拟主机网站的根目录>
Options Indexes FollowSymLinks
AllowOverride None
Require all granted
5 测试配置文件和重启httpd服务
#apachectl –t
#systemctl restart httpd
#firewall-cmd —permanent —add-interface=<网卡名称>:<子接口号>
5.2 配置基于不同端口的虚拟主机
1 为主机配置一个IP地址
略
2 为各虚拟主机准备网站根目录和网页文件
略
3 修改httpd.conf配置文件
(1)添加对多个端口的监听,例如:
Listen IP地址:端口号
(2)添加导入虚拟主机配置文件的指令
IncludeOptional conf.d/*.conf
4 创建虚拟主机的配置文件
在conf.d/目录中创建配置文件vhost.conf,为不同的虚拟主机创建对应的配置信息,其格式可以参考以下形式:
ServerName <服务器名称>
DocumentRoot <虚拟主机网站的根目录>
Options Indexes FollowSymLinks
AllowOverride None
Require all granted
5 测试配置文件和重启httpd服务
#apachectl –t
#systemctl restart httpd
#firewall-cmd —permanent —add-port=端口/tcp
5.3 配置基于域名的虚拟主机
1 为主机配置一个IP地址和一个端口
略
2 为各虚拟主机准备网站根目录和网页文件
略
3 修改httpd.conf配置文件
(1)添加对IP和端口的监听,例如:
Listen IP地址:端口号
(2)添加导入虚拟主机配置文件的指令
IncludeOptional conf.d/.conf
*4 创建3个网站
[root@webserver yum.repos.d]# mkdir /www[root@webserver yum.repos.d]# mkdir /www/site1[root@webserver yum.repos.d]# mkdir /www/site2[root@webserver yum.repos.d]# mkdir /www/site3[root@webserver yum.repos.d]# echo "<h1>WELCOME TO SITE 1 </h1>" > /www/site1/index.html[root@webserver yum.repos.d]# echo "<h1>WELCOME TO SITE 2 </h1>" > /www/site2/index.html[root@webserver yum.repos.d]# echo "<h1>WELCOME TO SITE 3 </h1>" > /www/site3/index.html[root@webserver yum.repos.d]# cat /www/site2/index.html<h1>WELCOME TO SITE 2 </h1>[root@webserver yum.repos.d]# cat /www/site3/index.html<h1>WELCOME TO SITE 3 </h1>[root@webserver yum.repos.d]# cat /www/site1/index.html<h1>WELCOME TO SITE 1 </h1>[root@webserver yum.repos.d]# tree /www/www├── site1│ └── index.html├── site2│ └── index.html└── site3└── index.html
4 创建虚拟主机的配置文件
在conf.d/目录中创建配置文件vhost.conf,为不同的虚拟主机创建对应的配置信息,其格式可以参考以下形式:
<VirtualHost IP地址:端口号>ServerName <服务器名称>DocumentRoot <虚拟主机网站的根目录><Directory “虚拟主机网站的根目录”>Options Indexes FollowSymLinksAllowOverride NoneRequire all granted</Directory></VirtualHost>
例如:虚拟机主机1的vhost1.conf配置文件如下:
<VirtualHost 192.168.237.202:80>ServerName web1.xyz.comDocumentRoot "/www/site1"<Directory "/www/site1">Options Indexes FollowSymLinksAllowOverride NoneRequire all granted</Directory>DiretoryIndex "index.html"</VirtualHost>
虚拟机主机2的vhost2.conf配置文件如下:
<VirtualHost 192.168.237.202:80>ServerName web2.xyz.comDocumentRoot "/www/site2"<Directory "/www/site2">Options Indexes FollowSymLinksAllowOverride NoneRequire all granted</Directory>DiretoryIndex "index.html"</VirtualHost>
虚拟机主机3的vhost3.conf配置文件如下:
<VirtualHost 192.168.237.202:80>ServerName web3.xyz.comDocumentRoot "/www/site3"<Directory "/www/site3">Options Indexes FollowSymLinksAllowOverride NoneRequire all granted</Directory>DiretoryIndex "index.html"</VirtualHost>
5 测试配置文件和重启httpd服务
#apachectl –t
#systemctl restart httpd
5.4 练习题 4
使用提供的三个网站素材,通过以下三种不同方式实现虚拟主机的配置:
- 使用多个不同的IP地址来实现
- 使用同一个IP地址,通过多个端口来实现
- 使用一个IP地址和80端口,通过多个域名来实现。

若有收获,就点个赞吧
0 人点赞
