多线程的实现步骤
方式2:实现Runnable 接口
- 定义一个MyRunnable类实现Runnable 接口
- 在MyRunnable类中重写run()方法
- 创建MyRunnable类对象
- 创建Thread类对象,把MyRunnable对象作为构造方法的参数
启动线程
/*方式2:实现Runnable 接口● 定义一个MyRunnable类实现Runnable 接口● 在MyRunnable类中重写run()方法● 创建MyRunnable类对象● 创建Thread类对象,把MyRunnable对象作为构造方法的参数● 启动线程*///1、定义一个MyRunnable类实现Runnable 接口class MyRunnable implements Runnable{//2、重写run()方法public void run(){for(int i=0;i<10;i++)System.out.println(Thread.currentThread().getName()+":"+i+"次 优先级"+Thread.currentThread().getPriority());try {Thread.sleep(1000);//休眠1000ms} catch (InterruptedException e) {throw new RuntimeException(e);}}}public class MyRunnableDemo {public static void main(String[] args) {//3、创建Runnable对象MyRunnable my=new MyRunnable();//4、创建Thread类对象,把MyRunnable对象作为构造方法的参数//Thread(Runnable target)Thread t1=new Thread(my);//执行默认参数名Thread t2=new Thread(my);//Thread(Runnable target,String name)Thread t3=new Thread(my,"高铁");//设置线程名称Thread t4=new Thread(my,"火车");//5、启动线程t1.start();//未设置优先级,默认为5try {t1.join(); //t1线程执行完毕之后才能执行其他} catch (InterruptedException e) {throw new RuntimeException(e);}//设置优先级t2.setPriority(10);t3.setPriority(1);t4.setPriority(5);t2.start();t3.start();t4.start();}}Thread-0:0次 优先级5Thread-0:1次 优先级5Thread-0:2次 优先级5Thread-0:3次 优先级5Thread-0:4次 优先级5Thread-0:5次 优先级5Thread-0:6次 优先级5Thread-0:7次 优先级5Thread-0:8次 优先级5Thread-0:9次 优先级5Thread-1:0次 优先级10Thread-1:1次 优先级10Thread-1:2次 优先级10高铁:0次 优先级1Thread-1:3次 优先级10火车:0次 优先级5Thread-1:4次 优先级10高铁:1次 优先级1高铁:2次 优先级1Thread-1:5次 优先级10火车:1次 优先级5Thread-1:6次 优先级10高铁:3次 优先级1Thread-1:7次 优先级10火车:2次 优先级5高铁:4次 优先级1高铁:5次 优先级1Thread-1:8次 优先级10高铁:6次 优先级1火车:3次 优先级5高铁:7次 优先级1Thread-1:9次 优先级10高铁:8次 优先级1火车:4次 优先级5火车:5次 优先级5高铁:9次 优先级1火车:6次 优先级5火车:7次 优先级5火车:8次 优先级5火车:9次 优先级5
通过 Thread 类的构造函数
public Thread(Runnable target)
可以将一个Runnable 接口对象传递给线程,线程在调度时将自动调用Runnable 接口对象的run方法。public class Thread implements Runnable {private Runnable target;public Thread() {…}public Thread( Runnable target ) {…}public void run(){if (target!=null)target.run(); 转而执行Runnable的target对象的run()方法}}
```java import java.util.*; class TimePrinter implements Runnable { int pauseTime; // 中间休息时间 String name; // 名称标识 public TimePrinter(int x , String n) {
pauseTime = x;name = n;
} public void run() {
while(true) {System.out.println(name + ": " +Calendar.getInstance().getTime());try {Thread.sleep(pauseTime);} catch (InterruptedException e) {throw new RuntimeException(e);}}
} public static void main(String args[ ]) {
Thread tp1 = new Thread( new TimePrinter(1000, "Fast") ); 【思考】此处为什么用Thread ?用TimePrinter或Runnable可以吗?暂时理解TimePrinter没有start()方法tp1.start();Thread tp2 = new Thread(new TimePrinter(3000, "Slow"));tp2.start();
} }
Slow: Sun May 15 16:37:52 CST 2022 Fast: Sun May 15 16:37:52 CST 2022 Fast: Sun May 15 16:37:53 CST 2022 Fast: Sun May 15 16:37:54 CST 2022 Slow: Sun May 15 16:37:55 CST 2022 Fast: Sun May 15 16:37:55 CST 2022 Fast: Sun May 15 16:37:56 CST 2022 Fast: Sun May 15 16:37:57 CST 2022 Slow: Sun May 15 16:37:58 CST 2022 Fast: Sun May 15 16:37:58 CST 2022 Fast: Sun May 15 16:37:59 CST 2022 Fast: Sun May 15 16:38:00 CST 2022 Slow: Sun May 15 16:38:01 CST 2022 Fast: Sun May 15 16:38:01 CST 2022 ……
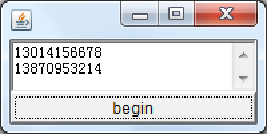
```javaimport java.awt.*;import java.awt.event.*;public class Winning extends Frame implements Runnable {String phoneNumber[ ] = { "15031204532", "13014156678", "13870953214", "13943123322", "18114156528" };TextArea disp = new TextArea(4, 50); // 用来显示滚动号码int pos = 0; //记录滚动到的索引位置boolean flag; // 控制线程停止的标记变量Button onoff; //启动、停止按钮public static void main(String[ ] args) {new Winning( );}public Winning( ) {add("Center", disp);onoff = new Button("begin");add("South", onoff);onoff.addActionListener(new ActionListener( ) {public void actionPerformed(ActionEvent e){if (e.getActionCommand( ).equals("begin")){flag = true;onoff.setLabel("end");(new Thread(Winning.this)).start( );}else{flag = false; //设置线程停止标记onoff.setLabel("begin");}}});setSize(200, 100);setVisible(true);}public void run( ){while (flag){int n = phoneNumber.length;pos = (int) (Math.random( ) * n);String message = phoneNumber[pos] + "\n"+ phoneNumber[(pos + 1) % n];disp.setText(message);}}}


