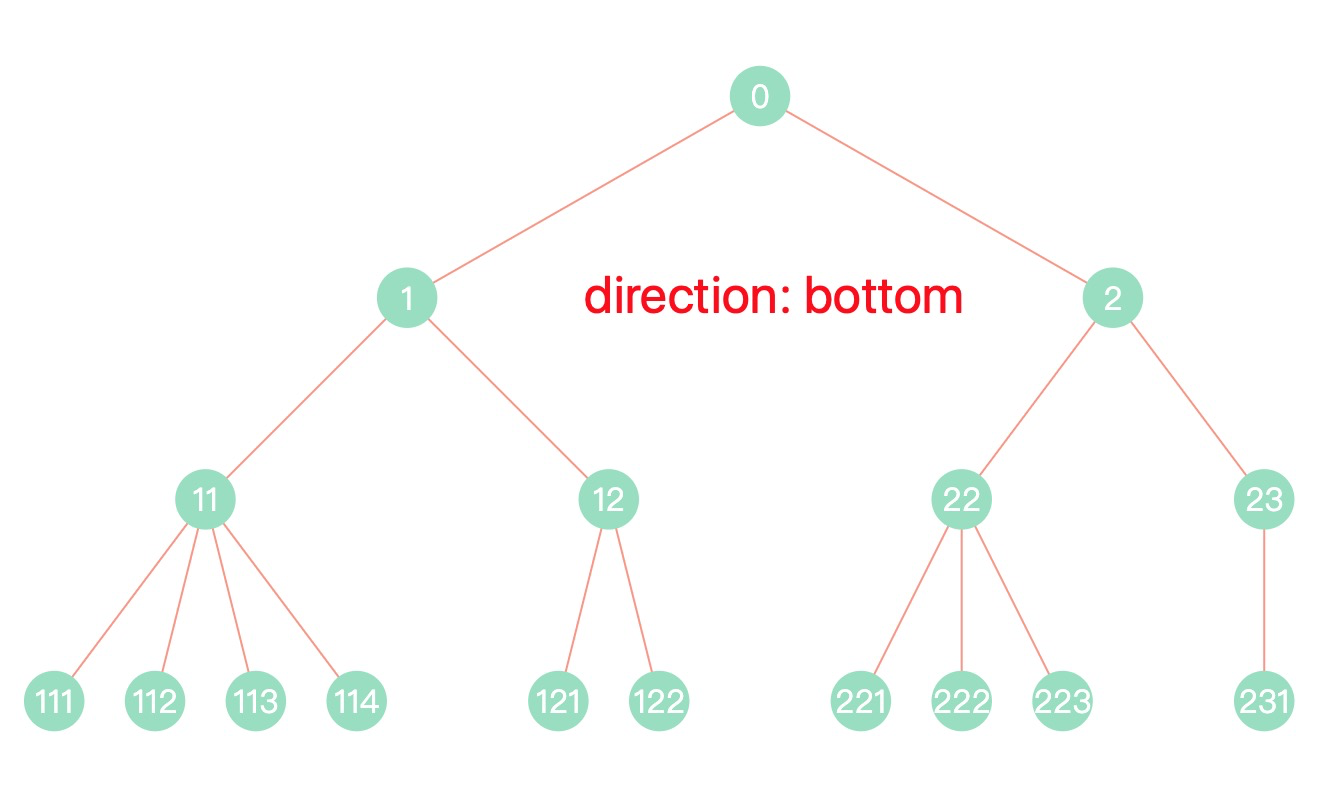
最近在做企业风控相关的产品,常常涉及企业上下游行业、企业关联关系等信息的展示,为了更好地表达这些关系,我们常常使用树形图来描述这些关系,如下图所示:
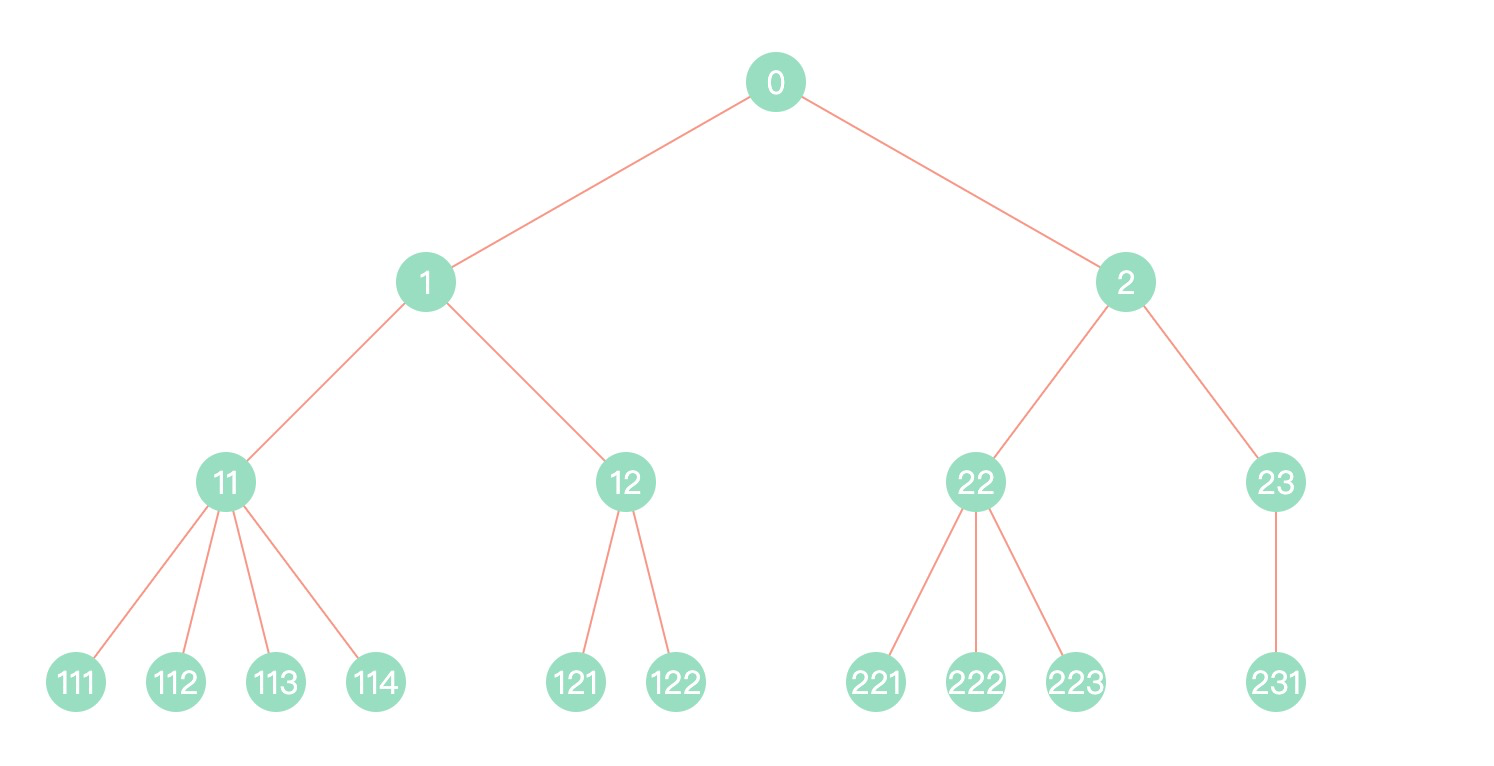
我们期望这个树形布局有以下特点:
- 同一层级节点在同一水平线上;
- 父节点位置始终在子节点中间位置;
- 子节点不允许重叠;
- 相邻节点有一定间距,且不同父节点的相邻节点加大间距区分。
传统的树形布局通常将子节点按照兄弟节点的最大宽度分开(一个节点的最大宽度即以该节点为根的树所占的最大宽度)。这样做虽然代码上容易实现,只要在每个节点保存该子树的最大宽度即可,但是视觉上不够美观,比较浪费空间。在某些传统布局甚至限制子节点的数目。
而这种布局与传统的树形布局有很大不同,它做到了在布局上节点与节点尽可能地紧凑,而且始终保持对称性和任意子节点数目。
实现我们期望的树形布局,最关键的一步是怎么从最底层一步步推导出全树节点的位置。
算法的实现步骤如下:
- 遍历树形结构数据,得出树形节点 id 和 节点的映射关系、以及一个二维数组保存了每一个层级的节点;
- 遍历二维数组:计算底层节点位置,向上修正父节点位置,得出节点数组;
- 遍历节点数组,计算出连接线数组,得出图形数据。
接下来我们就通过代码来具体实现:
第一步:数据准备
我们先准备一份树形结构数据:
const treeNodes = [{id: '0',name: '0',children: [{id: '1',name: '1',children: [{id: '11',name: '11',children: [{id: '111',name: '111'},{id: '112',name: '112'},{id: '113',name: '113'},{id: '114',name: '114'}]},{id: '12',name: '12',children: [{id: '121',name: '121'},{id: '122',name: '122'},]}]},{id: '2',name: '2',children: [{id: '22',name: '22',children: [{id: '221',name: '221'},{id: '222',name: '222'},{id: '223',name: '223'},]},{id: '23',name: '23',children: [{id: '231',name: '231'}]}]}]}];
第二步:计算层级
定义节点数据类型
interface INode {id: string | number,name: string | number,children?: Array<INode>,parentId?: string | number,depth?: number,x?: number,y?: number}
遍历数据,计算出节点二维数组,以及节点 hash 表,用于映射节点:
export function iterator(treeNodes: Array<INode>, rootId = 'root'): {matrix: Array<Array<INode>>,hash: {}} | void {if (!treeNodes || !treeNodes.length) return;/*** matrix [* 0 [ node(0) ],* 1 [ node(1), node(2), node(3) ],* 2 [ node(11), node(12), node(13), node(21), node(22), node(23) ],* 3 [ node(111), node(112), node(113), node(121), node(122), node(123), ... ]* ]*/let matrix: Array<Array<INode>> = [];/*** hash {* [node.id]: node* ...* }*/let hash = {};let stack: Array<INode> = [];// 第一层节点入栈for (let i = 0, len = treeNodes.length; i < len; i++) {// 增加属性treeNodes[i].parentId = rootId;treeNodes[i].depth = 0; // 从 0 开始// 剔除 children 属性后存入 matrixconst { children, ...rest } = treeNodes[i];matrix[0] = matrix[0] || [];matrix[0].push({ ...rest });// 保留 children 属性用于遍历stack.push(treeNodes[i]);}let item;while(stack.length) {item = stack.shift(); // 出栈hash[item.id] = item; // 存入 hashif (item.children && item.children.length) {item.children.forEach(child => {// 增加属性child.parentId = item.id;child.depth = item.depth + 1;// 剔除 children 属性后存入 matrixconst { children: _children, ...rest } = child;matrix[child.depth] = matrix[child.depth] || [];matrix[child.depth].push({ ...rest });});stack = item.children.concat(stack);}}return {hash,matrix};}
第三步:计算节点位置
主体函数结构如下:
function getLayout(origin: { x: number, y: number},offset: { offsetDepth: number, offsetNode: number },direction: 'top' | 'right' | 'bottom' | 'left' = 'right'): {nodes: Array<INode>,links: Array<ILink>} {// codes goes here}
参数说明:
- origin: 图形坐标轴原点 (x, y), 如下图所示:
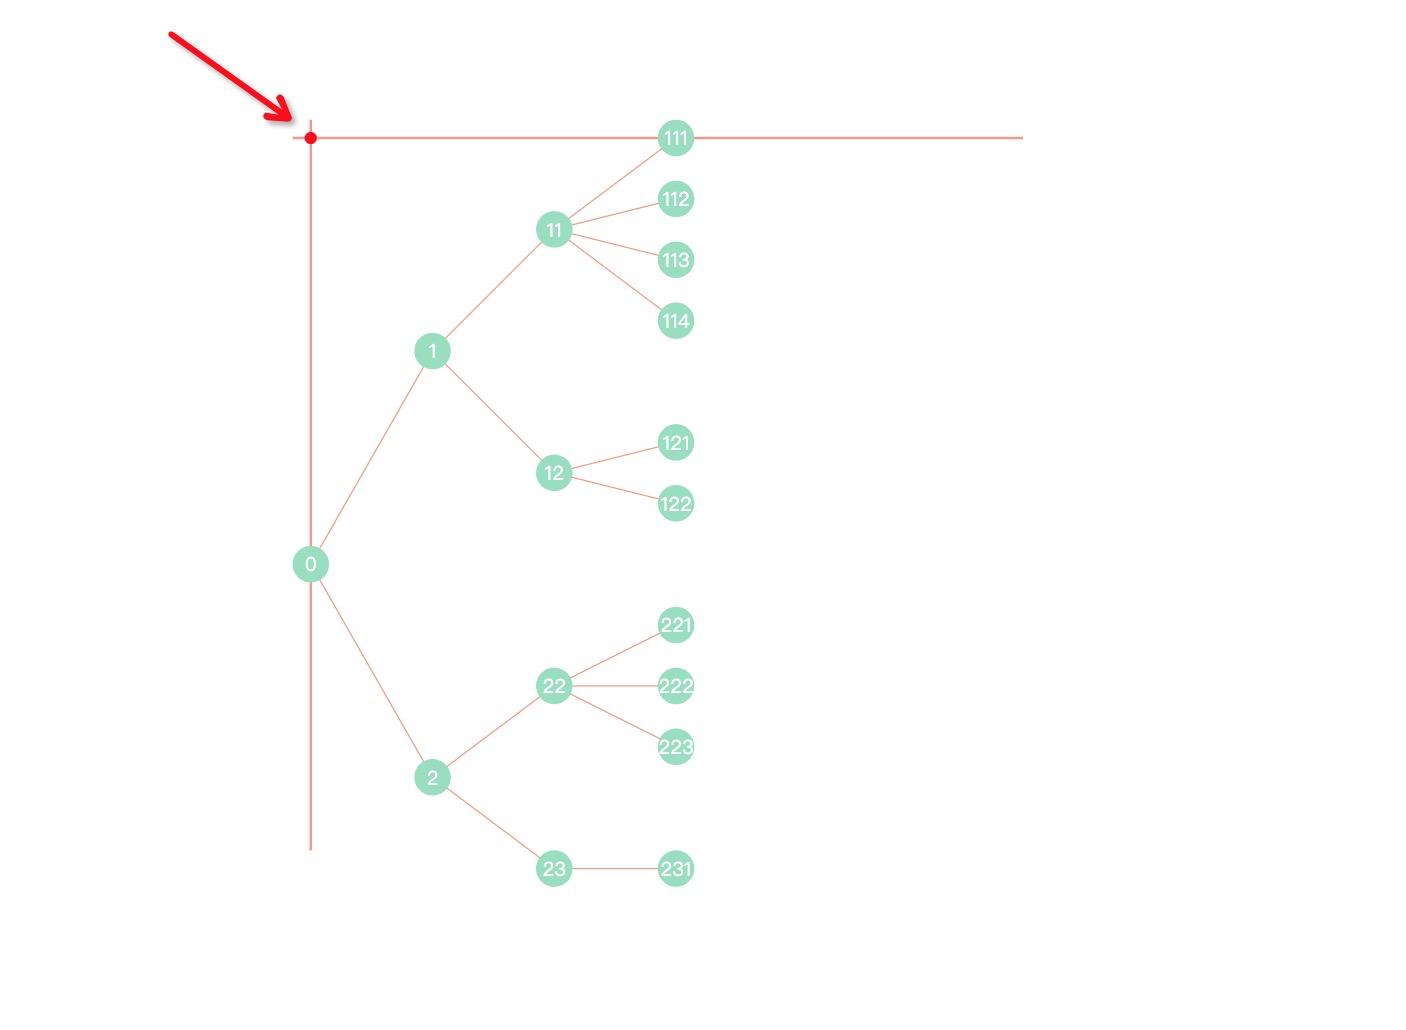
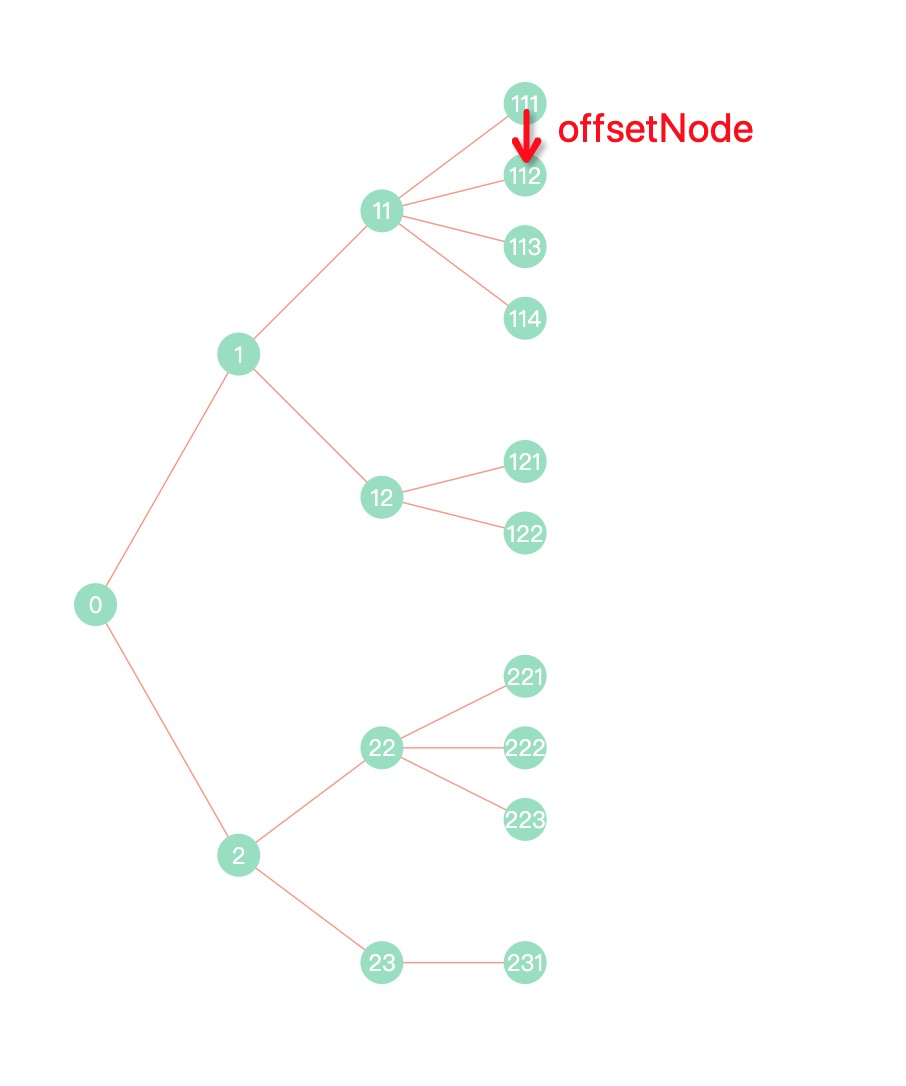
- offset:层级和节点偏移量

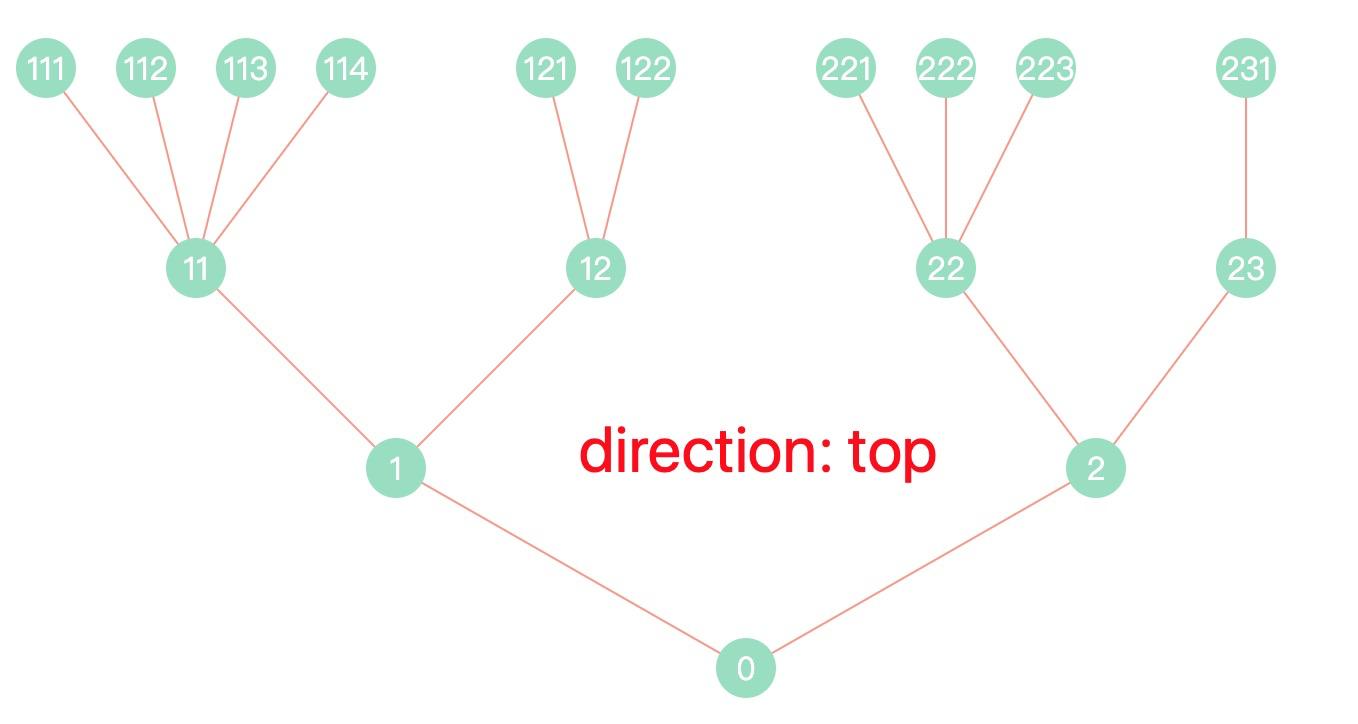
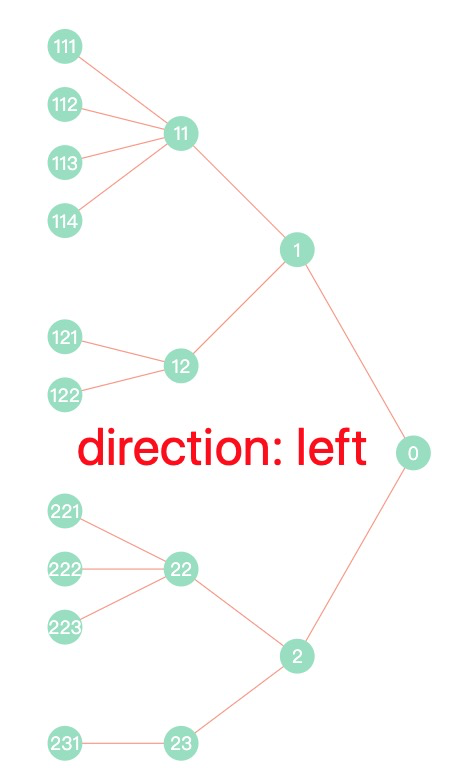
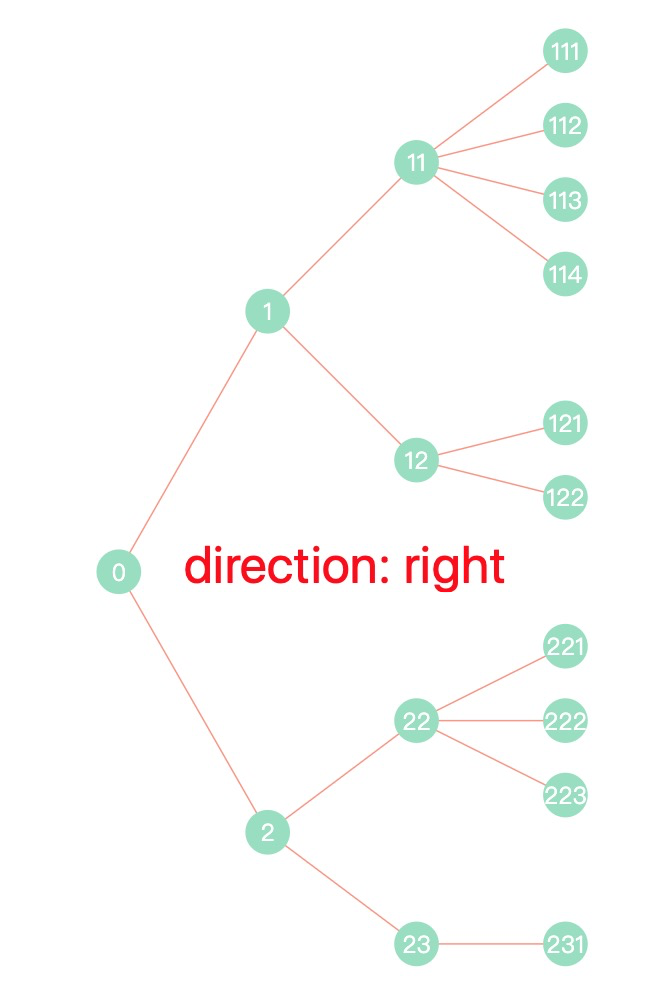
- direction: 树形排列方向,可选:’top’ | ‘right’ | ‘bottom’ | ‘left’,默认为 ‘right’ 向右排列
const { x, y } = origin;const { offsetDepth, offsetNode } = offset;const nodes: Array<INode> = [];// 计算节点:从底层往上遍历for (let i = matrix.length - 1; i > -1; i -= 1) {let row = matrix[i];let group = {};let groupNodes: Array<INode> = [];// 成组row.forEach((item: INode) => {if (item.parentId) {group[item.parentId] = group[item.parentId] || [];group[item.parentId].push(item);}});Object.keys(group).forEach((item) => {groupNodes = groupNodes.concat(group[item], [ ...new Array(1) ]) // 组与组之间填充空节点,用于分割})let positionNode = y; // 节点位置let positionDepth = x; // 层级位置let axisNode = 'y'; // 节点计算轴let axisDepth = 'x'; // 层级计算轴let positive = 1; // 排列顺序if (direction === 'bottom' || direction === 'top') {positionNode = x;positionDepth = y;axisNode = 'x';axisDepth = 'y';}if (direction === 'left' || direction === 'top') positive = -1;groupNodes.forEach((node: INode) => {// 层级位置计算if (node) {node[axisDepth] = positionDepth + i * offsetDepth * positive;}// 节点位置计算if (node && hash[node.id]) {// 节点位置计算if (typeof hash[node.id][axisNode] === 'undefined') {node[axisNode] = positionNode; // 节点位置}// 节点位置修正if (typeof hash[node.id][axisNode] !== 'undefined') {node[axisNode] = hash[node.id][axisNode] / hash[node.id].children.length;}positionNode = node[axisNode] + offsetNode; // 增加间距// 叠加子节点位置,存入父节点数据if (node.parentId && hash[node.parentId]) {if (typeof hash[node.parentId][axisNode] === 'undefined') {hash[node.parentId][axisNode] = node[axisNode]} else {hash[node.parentId][axisNode] += node[axisNode]}}}// 空节点增加间距if (!node) positionNode += offsetNode;// 存入节点if (node) nodes.push(node);});}
第四步:计算连接线
interface ILink {source: INode,target: INode}
// 计算连接线const links: Array<ILink> = [];const map = {};nodes.forEach(node => {map[node.id] = node;})nodes.forEach(node => {if (node.parentId && map[node.parentId]) {links.push({ source: map[node.parentId], target: node});}})// 返回图形数据return { links, nodes };
最终效果
这样就可以实现任意方向排列的树形图了

若有收获,就点个赞吧
0 人点赞
