一、集合
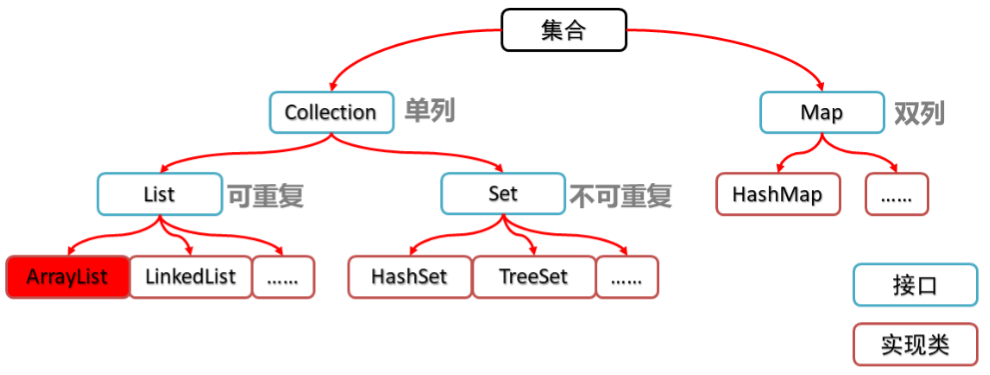
1.1、集合的体系结构
(1)集合类的特点
- 特点:提供一种存储空间可变的存储模型,存储的数据容量可以随时发生改变
-
(2)collection集合的概述和基本使用
Collection集合概述
- 是单例集合的顶层接口,它表示一组对象,这些对象也称为Collection的元素
- JDK 不提供此接口的任何直接实现,它提供更具体的子接口(如Set和List)实现
Collection集合基本使用
public class CollectionDemo01 {public static void main(String[] args) {//创建Collection集合的对象Collection<String> c = new ArrayList<String>();//添加元素:boolean add(E e)c.add("hello");c.add("world");c.add("java");//输出集合对象System.out.println(c);}}
Collection集合接口的常用方法 | 方法名 | 功能说明 | | —- | —- | | boolean add(E e) | 添加元素 | | boolean remove(Object o) | 从集合中移除指定的元素 | | void clear() | 清空集合中的元素 | | boolean contains(Object o) | 判断集合中是否存在指定的元素 | | boolean isEmpty() | 判断集合是否为空 | | int size() | 集合的长度,也就是集合中元素的个数 |
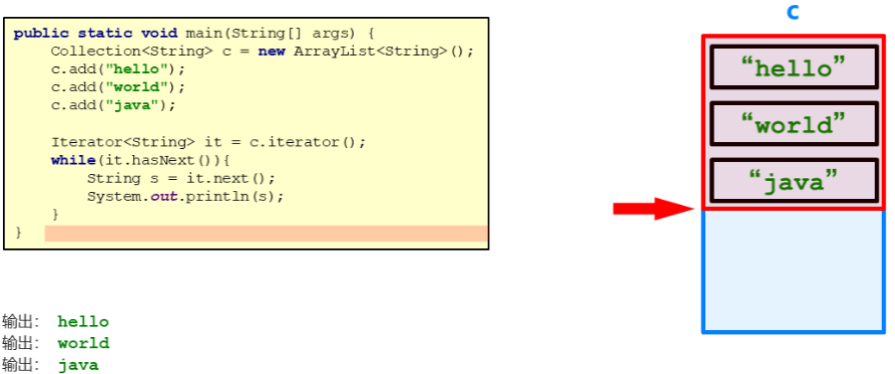
Collcetion集合的遍历
- 迭代器的介绍
- 迭代器,集合的专用遍历方式
- Iterator
iterator():返回此集合中元素的迭代器,通过集合的iterator()方法得到 - 迭代器是通过集合的iterator()方法得到的,所以我们说它是依赖于集合而存在的
- 迭代器的介绍
迭代器遍历集合代码演示
public class IteratorDemo {public static void main(String[] args) {//创建集合对象Collection<String> c = new ArrayList<>();//添加元素c.add("hello");c.add("world");c.add("java");c.add("javaee");//Iterator<E> iterator():返回此集合中元素的迭代器,通过集合的iterator()方法得到Iterator<String> it = c.iterator();//用while循环改进元素的判断和获取while (it.hasNext()) {String s = it.next();System.out.println(s);}}}
-
(3)collection集合使用的案例
案例需求:创建一个存储学生对象的集合,存储3个学生对象,使用程序实现在控制台遍历该集合
代码实现 ```java / 学生类 / public class Student { private String name; private int age;
//空参构造方法 public Student() { }
//全参构造方法 public Student(String name, int age) {
this.name = name;this.age = age;
}
//============================= //相对全局变量的set&get方法 public String getName() {
return name;
}
public void setName(String name) {
this.name = name;
}
public int getAge() {
return age;
}
public void setAge(int age) {
this.age = age;
} }
/
测试类
/
public class CollectionDemo {
public static void main(String[] args) {
//创建Collection集合对象
Collection
//创建学生对象并利用全参构造方法给全局变量赋值Student s1 = new Student("林青霞", 30);Student s2 = new Student("张曼玉", 35);Student s3 = new Student("王祖贤", 33);//把学生添加到集合c.add(s1);c.add(s2);c.add(s3);//遍历集合(迭代器方式)Iterator<Student> it = c.iterator();while (it.hasNext()) {Student s = it.next();System.out.println(s.getName() + "," + s.getAge());}}
}
<a name="4PzN0"></a>## 1.2、list集合接口<a name="1O1dG"></a>### (1)list集合接口的认识- list集合接口的概述- 有序集合(也称为序列),用户可以精确控制列表中每个元素的插入位置。用户可以通过整数索引访问元素,并搜索列表中的元素- 与Set集合不同,列表通常允许重复的元素- List集合接口特点- 有索引- 可以存储重复元素- 元素存取有序- list集合接口的特有的方法| 方法名 | 功能说明 || --- | --- || void add(int index,E element) | 在此集合中的指定位置插入指定的元素 || E remove(int index) | 删除指定索引处的元素,返回被删除的元素 || E set(int index,E element) | 修改指定索引处的元素,返回被修改的元素 || E get(int index) | 返回指定索引处的元素 |<a name="uxEtM"></a>### (2)list集合接口案例:存储学生对象并遍历- 案例需求:创建一个存储学生对象的集合,存储3个学生对象,使用程序实现在控制台遍历该集合- 代码实现```java/*学生类*/public class Student {private String name;private int age;//空参构造方法public Student() {}//全参构造方法public Student(String name, int age) {this.name = name;this.age = age;}//相关的属性的get&set方法public String getName() {return name;}public void setName(String name) {this.name = name;}public int getAge() {return age;}public void setAge(int age) {this.age = age;}}/*测试类*/public class ListDemo {public static void main(String[] args) {//创建List集合对象List<Student> list = new ArrayList<Student>();//创建学生对象Student s1 = new Student("林青霞", 30);Student s2 = new Student("张曼玉", 35);Student s3 = new Student("王祖贤", 33);//把学生添加到集合list.add(s1);list.add(s2);list.add(s3);//迭代器方式Iterator<Student> it = list.iterator();while (it.hasNext()) {Student s = it.next();System.out.println(s.getName() + "," + s.getAge());}System.out.println("--------");//for循环方式for(int i=0; i<list.size(); i++) {Student s = list.get(i);System.out.println(s.getName() + "," + s.getAge());}}}
(3)并发修改异常(使用迭代器出现的异常)
- 出现的原因
- 迭代器遍历的过程中,通过集合对象修改了集合中的元素,造成了迭代器获取元素中判断预期修改值和实际修改值不一致,则会出现:ConcurrentModificationException
- 解决的方案
- 用for循环遍历,然后用集合对象做对应的操作即可
示例代码
public class ListDemo {public static void main(String[] args) {//创建集合对象List<String> list = new ArrayList<String>();//添加元素list.add("hello");list.add("world");list.add("java");//遍历集合,得到每一个元素,看有没有"world"这个元素,如果有,我就添加一个"javaee"元素,请写代码实现// Iterator<String> it = list.iterator();// while (it.hasNext()) {// String s = it.next();// if(s.equals("world")) {// list.add("javaee");// }// }for(int i=0; i<list.size(); i++) {String s = list.get(i);if(s.equals("world")) {list.add("javaee");}}//输出集合对象System.out.println(list);}}
(4)列表迭代器
ListIterator的介绍
- 通过List集合的listIterator()方法得到,所以说它是List集合特有的迭代器
- 用于允许程序员沿任一方向遍历的列表迭代器,在迭代期间修改列表,并获取列表中迭代器的当前位置
示例代码
public class ListIteratorDemo {public static void main(String[] args) {//创建集合对象List<String> list = new ArrayList<String>();//添加元素list.add("hello");list.add("world");list.add("java");//获取列表迭代器ListIterator<String> lit = list.listIterator();while (lit.hasNext()) {String s = lit.next();if(s.equals("world")) {lit.add("javaee");}}System.out.println(list);}}
(5)增强for循环
作用:简化数组和Collection集合的遍历
- 原理:jdk5之后出现的,其内部原理是一个iterator迭代器
- 使用增强for循环的前提: 实现了iterable接口的类才可以使用
- 增强for循环使用注意事项:增强for循环的变量是第三方变量,修改第三方变量不会影响集合的元素
定义格式
for(元素数据类型 变量名 : 数组/集合对象名) {循环体;}
示例代码
public class ForDemo {public static void main(String[] args) {int[] arr = {1,2,3,4,5};for(int i : arr) {System.out.println(i);}System.out.println("--------");String[] strArray = {"hello","world","java"};for(String s : strArray) {System.out.println(s);}System.out.println("--------");List<String> list = new ArrayList<String>();list.add("hello");list.add("world");list.add("java");for(String s : list) {System.out.println(s);}System.out.println("--------");//内部原理是一个Iterator迭代器/*for(String s : list) {if(s.equals("world")) {list.add("javaee"); //ConcurrentModificationException}}*/}}
(6)案例:三种遍历方式
三种遍历方式的使用场景:
- 如果需要操作索引(比如根据索引判断或查找元素),使用普通for循环
- 如果需要删除集合元素,使用迭代器
- 如果仅仅只是想遍历,使用增强for循环
案例需求:创建一个存储学生对象的集合,存储3个学生对象,使用程序实现在控制台遍历该集合 ```java / 学生类 / public class Student { private String name; private int age;
public Student() { }
public Student(String name, int age) {
this.name = name;this.age = age;
}
public String getName() {
return name;
}
public void setName(String name) {
this.name = name;
}
public int getAge() {
return age;
}
public void setAge(int age) {
this.age = age;
} }
/
测试类
/
public class ListDemo {
public static void main(String[] args) {
//创建List集合对象
List
//创建学生对象Student s1 = new Student("林青霞", 30);Student s2 = new Student("张曼玉", 35);Student s3 = new Student("王祖贤", 33);//把学生添加到集合list.add(s1);list.add(s2);list.add(s3);//迭代器:集合特有的遍历方式Iterator<Student> it = list.iterator();while (it.hasNext()) {Student s = it.next();System.out.println(s.getName()+","+s.getAge());}System.out.println("--------");//普通for:带有索引的遍历方式for(int i=0; i<list.size(); i++) {Student s = list.get(i);System.out.println(s.getName()+","+s.getAge());}System.out.println("--------");//增强for:最方便的遍历方式for(Student s : list) {System.out.println(s.getName()+","+s.getAge());}}
}
<a name="5OxMm"></a>## 1.3、数据结构和list集合接口的实现类<a name="YhZ9H"></a>### (1)常见的数据及分类- 数据结构之栈和队列- 栈结构(stack /stæk/):先进后出- 队列结构(queue /kjuː/):先进先出- 数据结构之数组和链表- 数组结构:查询快,增删慢(相对于链表而言的)- 链表结构:查询慢,增删快(相对于数组而言的)<a name="7XIzs"></a>### (2)list集合接口的实现类- list集合接口的子类的特点- ArrayList集合:底层是数组结构实现;查询快,增删慢(相对于链表而言的)- LinkedList集合:底层是链表结构(双向链表)实现:链表结构:查询慢,增删快(相对于数组而言的)- ArrayList集合相关的三种遍历方式案例- 需求:创建一个存储学生对象的集合,存储3个学生对象,使用程序实现在控制台遍历该集合- 代码实现```java/*学生类*/public class Student {private String name;private int age;public Student() {}public Student(String name, int age) {this.name = name;this.age = age;}public String getName() {return name;}public void setName(String name) {this.name = name;}public int getAge() {return age;}public void setAge(int age) {this.age = age;}}/*测试类*/public class ArrayListDemo {public static void main(String[] args) {//创建ArrayList集合对象ArrayList<Student> array = new ArrayList<Student>();//创建学生对象Student s1 = new Student("林青霞", 30);Student s2 = new Student("张曼玉", 35);Student s3 = new Student("王祖贤", 33);//把学生添加到集合array.add(s1);array.add(s2);array.add(s3);//迭代器:集合特有的遍历方式Iterator<Student> it = array.iterator();while (it.hasNext()) {Student s = it.next();System.out.println(s.getName() + "," + s.getAge());}System.out.println("--------");//普通for:带有索引的遍历方式for(int i=0; i<array.size(); i++) {Student s = array.get(i);System.out.println(s.getName() + "," + s.getAge());}System.out.println("--------");//增强for:最方便的遍历方式for(Student s : array) {System.out.println(s.getName() + "," + s.getAge());}}}
(3)LinkedList集合特有的成员方法
| 方法名 | 功能说明 |
|---|---|
| public void addFirst(E e) | 在该列表开头插入指定的元素 |
| public void addLast(E e) | 将指定的元素追加到此列表的末尾 |
| public E getFirst() | 返回此列表中的第一个元素 |
| public E getLast() | 返回此列表中的最后一个元素 |
| public E removeFirst() | 从此列表中删除并返回第一个元素 |
| public E removeLast() | 从此列表中删除并返回最后一个元素 |
1.4、set集合接口
(1)set集合接口的认识
- set集合接口的特点:
- 元素存取无序
- 没有索引、只能通过迭代器或增强for循环遍历
- 不能存储重复元素
set集合接口的基本使用
/*往集合中添加元素,并遍历集合*/public class SetDemo {public static void main(String[] args) {//创建集合对象Set<String> set = new HashSet<String>();//添加元素set.add("hello");set.add("world");set.add("java");//不包含重复元素的集合set.add("world");//遍历for(String s : set) {System.out.println(s);}}}
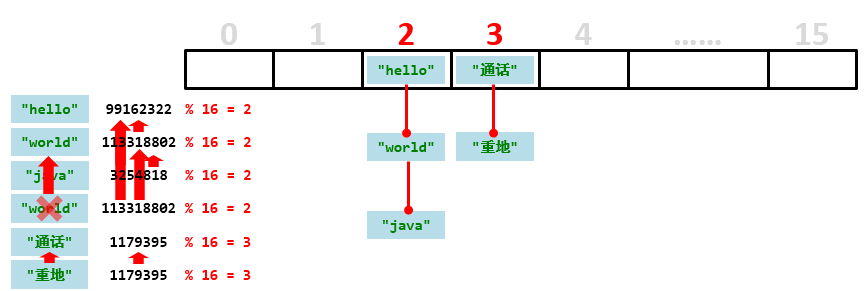
哈希值
- 哈希值的简介:是JDK根据对象的地址或者字符串或者数字算出来的int类型的数值
- 如何获取哈希值:Object类中的public int hashCode():返回对象的哈希码值
- 哈希值的特点:同一个对象多次调用hashCode()方法返回的哈希值是相同的;默认情况下,不同对象的哈希值是不同的。而重写hashCode()方法,可以实现让不同对象的哈希值相同
示例代码 ```java / 学生类 / public class Student { private String name; private int age;
public Student() { }
public Student(String name, int age) { this.name = name; this.age = age; }
public String getName() { return name; }
public void setName(String name) { this.name = name; }
public int getAge() { return age; }
public void setAge(int age) { this.age = age; }
@Override public int hashCode() { return 0; } }
/ 测试类 / public class HashDemo { public static void main(String[] args) { //创建学生对象 Student s1 = new Student(“林青霞”,30);
//同一个对象多次调用hashCode()方法返回的哈希值是相同的System.out.println(s1.hashCode()); //1060830840System.out.println(s1.hashCode()); //1060830840System.out.println("--------");Student s2 = new Student("林青霞",30);//默认情况下,不同对象的哈希值是不相同的//通过方法重写,可以实现不同对象的哈希值是相同的System.out.println(s2.hashCode()); //2137211482System.out.println("--------");System.out.println("hello".hashCode()); //99162322System.out.println("world".hashCode()); //113318802System.out.println("java".hashCode()); //3254818System.out.println("world".hashCode()); //113318802System.out.println("--------");System.out.println("重地".hashCode()); //1179395System.out.println("通话".hashCode()); //1179395}
}
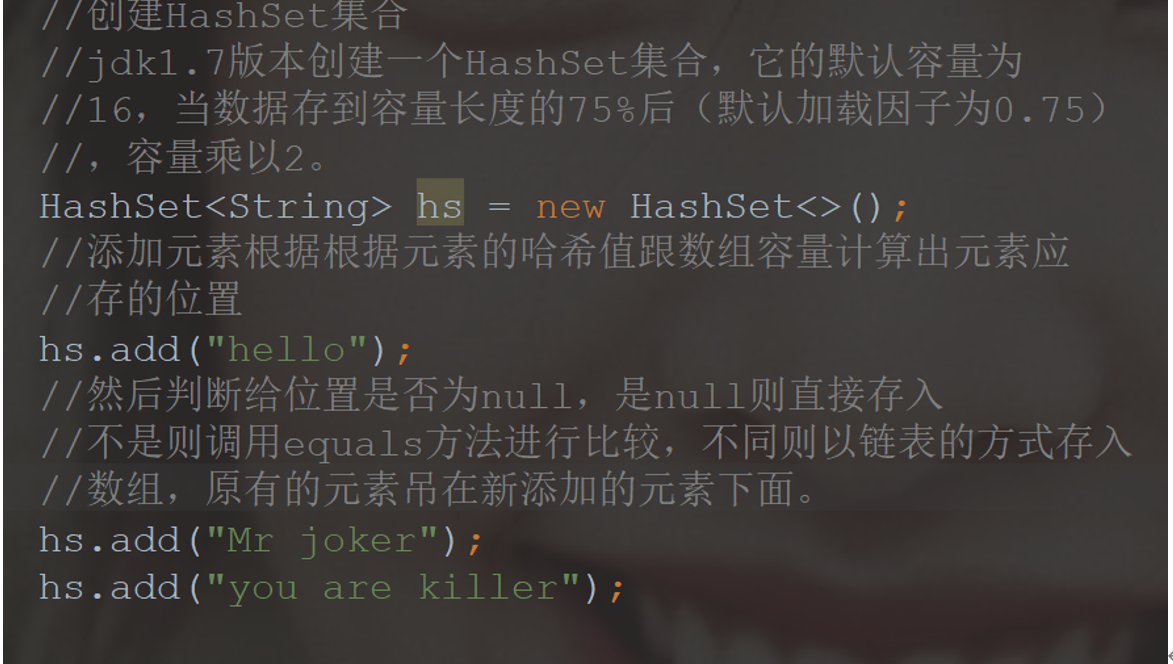
<a name="yq4u5"></a>### (2)HashSet集合的概述与特点- HashSet集合的特点- 底层数据结构是哈希表- 对集合的迭代顺序不作任何保证,也就是说不保证存储和取出的元素顺序一致(无序性)- 没有带索引的方法,所以不能使用普通for循环遍历- 由于是Set集合,所以是不包含重复元素的集合( 可以去除重复)- HashSet集合的基本使用```javapublic class HashSetDemo01 {public static void main(String[] args) {//创建集合对象HashSet<String> hs = new HashSet<String>();//添加元素hs.add("hello");hs.add("world");hs.add("java");hs.add("world");//遍历for(String s : hs) {System.out.println(s);}}}
(3)HashSet集合集合保证元素唯一性的源码分析
HashSet集合保证元素唯一性的原理
- 根据对象的哈希值计算存储位置
- 如果当前位置没有元素则直接存入
- 如果当前位置有元素存在,则进入第二步
- 当前元素的元素和已经存在的元素比较哈希值
- 如果哈希值不同,则将当前元素进行存储
- 如果哈希值相同,则进入第三步
- 通过equals()方法比较两个元素的内容
- 如果内容不相同,则将当前元素进行存储
- 如果内容相同,则不存储当前元素
- HashSet集合保证元素唯一性的图解
- HashSet集合案例:存储学生对象并遍历
- 需求:创建一个存储学生对象的集合,存储多个学生对象,使用程序在控制台遍历输出,特别说明,学生对象的成员变量值相同,我们就认为是同一个对象
代码实现 ```java / 学生类 / public class Student { private String name; private int age;
public Student() { }
public Student(String name, int age) { this.name = name; this.age = age; }
public String getName() { return name; }
public void setName(String name) { this.name = name; }
public int getAge() { return age; }
public void setAge(int age) { this.age = age; }
@Override public boolean equals(Object o) { if (this == o) return true; if (o == null || getClass() != o.getClass()) return false;
Student student = (Student) o;
if (age != student.age) return false; return name != null ? name.equals(student.name) : student.name == null; }
@Override public int hashCode() { //通过成员变量name获取哈希值,相同的成员变量获得到的哈希值是相同的 int result = name != null ? name.hashCode() : 0; //如果成员变量age也相同,则哈希值就一定相同,哈希值相同则表示是同一个对象了, //就符合我们的要求了 result = 31 * result + age; return result; } }
- 根据对象的哈希值计算存储位置
/
测试类
/
public class HashSetDemo02 {
public static void main(String[] args) {
//创建HashSet集合对象
HashSet
//创建学生对象Student s1 = new Student("林青霞", 30);Student s2 = new Student("张曼玉", 35);Student s3 = new Student("王祖贤", 33);Student s4 = new Student("王祖贤", 33);//把学生添加到集合hs.add(s1);hs.add(s2);hs.add(s3);hs.add(s4);//遍历集合(增强for)for (Student s : hs) {System.out.println(s.getName() + "," + s.getAge());}}
}
<a name="lDlJg"></a>### (4)LinkedHashSet集合的概述和特点- LinkedHashSet集合特点- 哈希表和链表实现的Set接口,具有可预测的迭代次序- 由链表保证元素有序,也就是说元素的存储和取出顺序是一致的- 由哈希表保证元素唯一,也就是说没有重复的元素- LinkedHashSet集合基本使用```javapublic class LinkedHashSetDemo {public static void main(String[] args) {//创建集合对象LinkedHashSet<String> linkedHashSet = new LinkedHashSet<String>();//添加元素linkedHashSet.add("hello");linkedHashSet.add("world");linkedHashSet.add("java");linkedHashSet.add("world");//遍历集合for(String s : linkedHashSet) {System.out.println(s);}}}
1.5、set集合的排序
(1)TreeSet集合的排序分类
- TreeSet集合排序的概述
- 可以按照一定的规则进行排序,来实现元素有序,具体排序方式取决于构造方法
- TreeSet():根据其元素的自然排序进行排序
- TreeSet(Comparator comparator) :根据指定的比较器进行排序
- 可以按照一定的规则进行排序,来实现元素有序,具体排序方式取决于构造方法
- 自然排序Comparable的使用
- 案例需求:存储学生对象并遍历,创建TreeSet集合使用无参构造方法
- 案例要求:按照年龄从小到大排序,年龄相同时,按照姓名的字母顺序排序
- 实现步骤:
- 用TreeSet集合存储自定义对象,无参构造方法使用的是自然排序对元素进行排序的
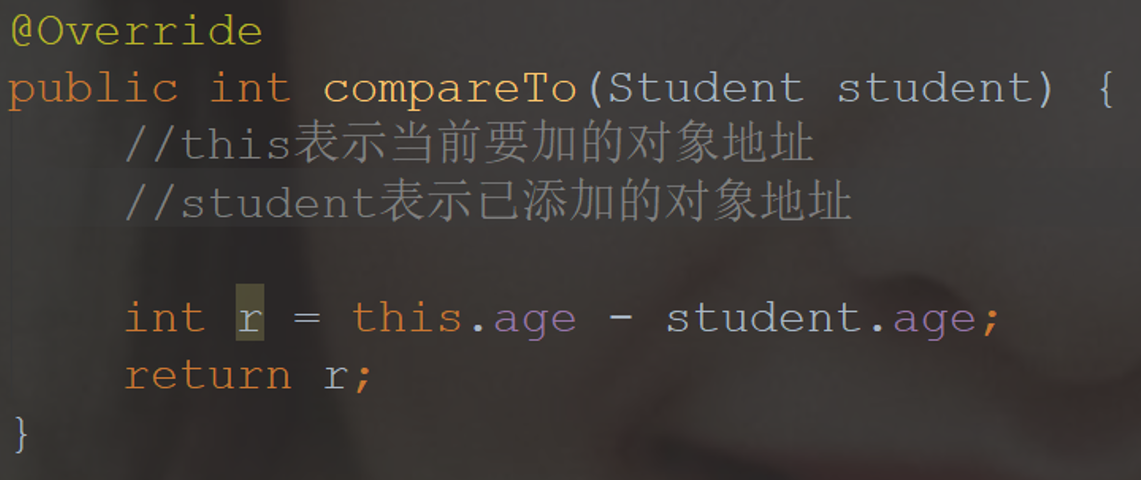
- 自然排序,就是让元素所属的类实现Comparable接口,重写compareTo(T o)方法
- 重写方法时,一定要注意排序规则必须按照要求的主要条件和次要条件来写
- 自然排序的步骤图解
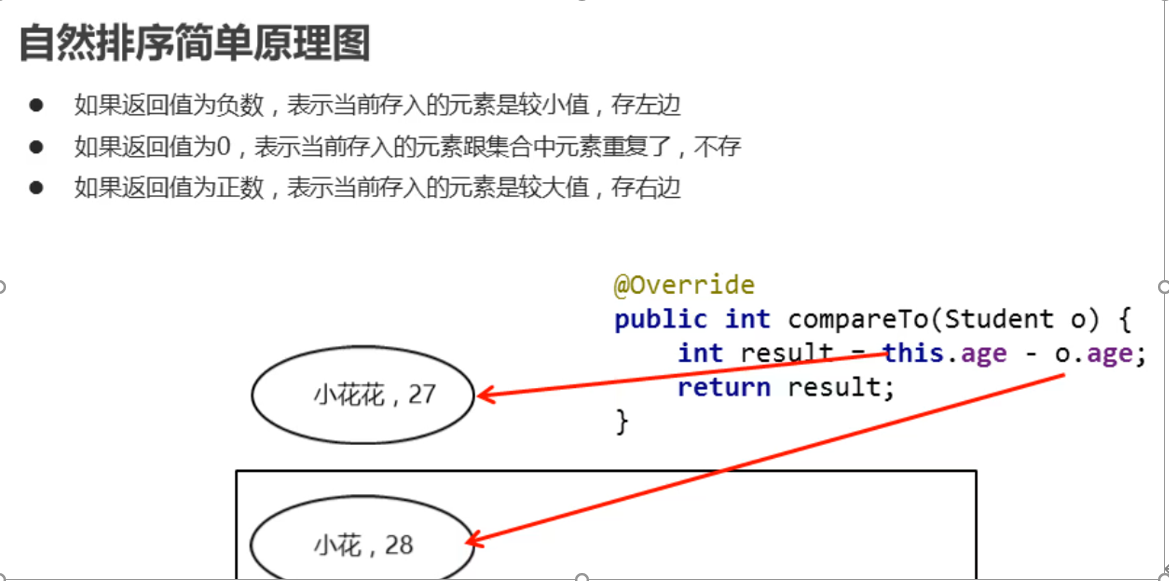
代码实现
/*学生类*/public class Student implements Comparable<Student> {private String name;private int age;public Student() {}public Student(String name, int age) {this.name = name;this.age = age;}public String getName() {return name;}public void setName(String name) {this.name = name;}public int getAge() {return age;}public void setAge(int age) {this.age = age;}@Overridepublic int compareTo(Student s) {// return 0;// return 1;// return -1;//按照年龄从小到大排序int num = this.age - s.age;// int num = s.age - this.age;//年龄相同时,按照姓名的字母顺序排序int num2 = num==0?this.name.compareTo(s.name):num;return num2;}}
/*测试类*/public class TreeSetDemo02 {public static void main(String[] args) {//创建集合对象TreeSet<Student> ts = new TreeSet<Student>();//创建学生对象Student s1 = new Student("xishi", 29);Student s2 = new Student("wangzhaojun", 28);Student s3 = new Student("diaochan", 30);Student s4 = new Student("yangyuhuan", 33);Student s5 = new Student("linqingxia",33);Student s6 = new Student("linqingxia",33);//把学生添加到集合ts.add(s1);ts.add(s2);ts.add(s3);ts.add(s4);ts.add(s5);ts.add(s6);//遍历集合for (Student s : ts) {System.out.println(s.getName() + "," + s.getAge());}}}
(2)比较其排序Comparator的使用
- 案例需求
- 存储学生对象并遍历,创建TreeSet集合使用带参构造方法
- 要求:按照年龄从小到大排序,年龄相同时,按照姓名的字母顺序排序
- 实现步骤
- 用TreeSet集合存储自定义对象,带参构造方法使用的是比较器排序对元素进行排序的
- 比较器排序,就是让集合构造方法接收Comparator的实现类对象,重写compare(T o1,T o2)方法
- 重写方法时,一定要注意排序规则必须按照要求的主要条件和次要条件来写
代码实现 ```java / 学生类 / public class Student { private String name; private int age;
public Student() { }
public Student(String name, int age) {
this.name = name;this.age = age;
}
public String getName() {
return name;
}
public void setName(String name) {
this.name = name;
}
public int getAge() {
return age;
}
public void setAge(int age) {
this.age = age;
} }
/
测试类
/
public class TreeSetDemo {
public static void main(String[] args) {
//创建集合对象
TreeSet
//创建学生对象Student s1 = new Student("xishi", 29);Student s2 = new Student("wangzhaojun", 28);Student s3 = new Student("diaochan", 30);Student s4 = new Student("yangyuhuan", 33);Student s5 = new Student("linqingxia",33);Student s6 = new Student("linqingxia",33);//把学生添加到集合ts.add(s1);ts.add(s2);ts.add(s3);ts.add(s4);ts.add(s5);ts.add(s6);//遍历集合for (Student s : ts) {System.out.println(s.getName() + "," + s.getAge());}}
}
<a name="he6MQ"></a>### (3)排序案例:成绩排序- 案例需求:用TreeSet集合存储多个学生信息(姓名,语文成绩,数学成绩),并遍历该集合- 要求:按照总分从高到低出现- 代码实现```java/*学生类*/public class Student {private String name;private int chinese;private int math;public Student() {}public Student(String name, int chinese, int math) {this.name = name;this.chinese = chinese;this.math = math;}public String getName() {return name;}public void setName(String name) {this.name = name;}public int getChinese() {return chinese;}public void setChinese(int chinese) {this.chinese = chinese;}public int getMath() {return math;}public void setMath(int math) {this.math = math;}public int getSum() {return this.chinese + this.math;}}/*测试类*/public class TreeSetDemo {public static void main(String[] args) {//创建TreeSet集合对象,通过比较器排序进行排序TreeSet<Student> ts = new TreeSet<Student>(new Comparator<Student>() {@Overridepublic int compare(Student s1, Student s2) {// int num = (s2.getChinese()+s2.getMath())-(s1.getChinese()+s1.getMath());//主要条件int num = s2.getSum() - s1.getSum();//次要条件int num2 = num == 0 ? s1.getChinese() - s2.getChinese() : num;int num3 = num2 == 0 ? s1.getName().compareTo(s2.getName()) : num2;return num3;}});//创建学生对象Student s1 = new Student("林青霞", 98, 100);Student s2 = new Student("张曼玉", 95, 95);Student s3 = new Student("王祖贤", 100, 93);Student s4 = new Student("柳岩", 100, 97);Student s5 = new Student("风清扬", 98, 98);Student s6 = new Student("左冷禅", 97, 99);// Student s7 = new Student("左冷禅", 97, 99);Student s7 = new Student("赵云", 97, 99);//把学生对象添加到集合ts.add(s1);ts.add(s2);ts.add(s3);ts.add(s4);ts.add(s5);ts.add(s6);ts.add(s7);//遍历集合for (Student s : ts) {System.out.println(s.getName() + "," + s.getChinese() + "," + s.getMath() + "," + s.getSum());}}}
(4)不重复的随机数案例
- 案例需求:编写一个程序,获取10个1-20之间的随机数,要求随机数不能重复,并在控制台输出
代码实现
public class SetDemo {public static void main(String[] args) {//创建Set集合对象// Set<Integer> set = new HashSet<Integer>();Set<Integer> set = new TreeSet<Integer>();//创建随机数对象Random r = new Random();//判断集合的长度是不是小于10while (set.size()<=10) {//产生一个随机数,添加到集合int number = r.nextInt(20) + 1;set.add(number);}//遍历集合for(Integer i : set) {System.out.println(i);}}}
1.6、Map集合接口
(1)Map集合接口的认识
- Map集合接口的特点及概述
- interface Map
- 键不能重复,值可以重复;
- 键和值是一一对应的,每个键只能找到自己对应的值
- (键+值)这个整体我们称之为“键值对”或者“键值对对象”,在Java中叫做“Entry /ˈentri/ 对象”
- 元素存取是无序的
- interface Map
Map集合接口的基本的使用
public class MapDemo01 {public static void main(String[] args) {//创建集合对象Map<String,String> map = new HashMap<String,String>();//V put(K key, V value) 将指定的值与该映射中的指定键相关联map.put("itheima001","林青霞");map.put("itheima002","张曼玉");map.put("itheima003","王祖贤");map.put("itheima003","柳岩");//输出集合对象System.out.println(map);}}
Map集合接口的常用方法 | 方法名 | 功能说明 | | —- | —- | | V put(K key,V value) | 添加元素 | | V remove(Object key) | 根据键删除键值对元素 | | void clear() | 移除所有的键值对元素 | | boolean containsKey(Object key) | 判断集合是否包含指定的键 | | boolean containsValue(Object value) | 判断集合是否包含指定的值 | | boolean isEmpty() | 判断集合是否为空 | | int size() | 集合的长度,也就是集合中键值对的个数 |
Map集合接口的获取数据的功能 | 方法名 | 功能说明 | | —- | —- | | V get(Object key) | 根据键获取值 | | Set
keySet() | 获取所有键的集合 | | Collection values() | 获取所有值的集合 | | Set 示例代码
public class MapDemo03 {public static void main(String[] args) {//创建集合对象Map<String, String> map = new HashMap<String, String>();//添加元素map.put("张无忌", "赵敏");map.put("郭靖", "黄蓉");map.put("杨过", "小龙女");//V get(Object key):根据键获取值// System.out.println(map.get("张无忌"));// System.out.println(map.get("张三丰"));//Set<K> keySet():获取所有键的集合// Set<String> keySet = map.keySet();// for(String key : keySet) {// System.out.println(key);// }//Collection<V> values():获取所有值的集合Collection<String> values = map.values();for(String value : values) {System.out.println(value);}}}
(2)Map集合的遍历方式
方式一:调用keySet方法,返回Map集合中所有的键并封装到一个Set集合类型的对象中, 然后用增强for循环遍历在里面调用Map集合对象调用get方法
代码示例
public class MapDemo01 {public static void main(String[] args) {//创建集合对象Map<String, String> map = new HashMap<String, String>();//添加元素map.put("张无忌", "赵敏");map.put("郭靖", "黄蓉");map.put("杨过", "小龙女");//获取所有键的集合。用keySet()方法实现Set<String> keySet = map.keySet();//遍历键的集合,获取到每一个键。用增强for实现for (String key : keySet) {//根据键去找值。用get(Object key)方法实现String value = map.get(key);System.out.println(key + "," + value);}}}
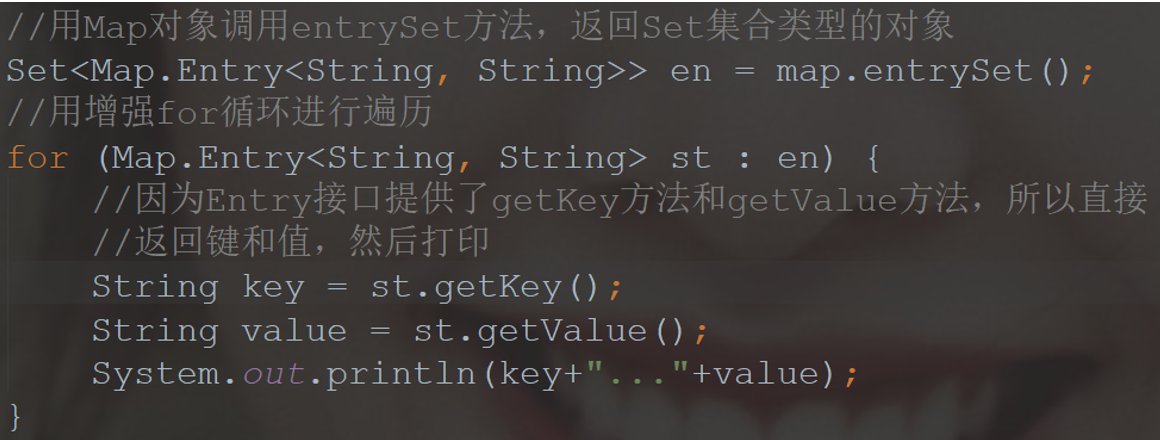
方式二:调用Set
代码示例
public class MapDemo02 {public static void main(String[] args) {//创建集合对象Map<String, String> map = new HashMap<String, String>();//添加元素map.put("张无忌", "赵敏");map.put("郭靖", "黄蓉");map.put("杨过", "小龙女");//获取所有键值对对象的集合Set<Map.Entry<String, String>> entrySet = map.entrySet();//遍历键值对对象的集合,得到每一个键值对对象for (Map.Entry<String, String> me : entrySet) {//根据键值对对象获取键和值String key = me.getKey();String value = me.getValue();System.out.println(key + "," + value);}}}
方法三:通过map.entrySet返回的set集合中的迭代器进行遍历。
//方法三System.out.println("通过Map.entrySet使用iterator遍历key和value:");Iterator<Map.Entry<String, String>> it = map.entrySet().iterator();while (it.hasNext()) {Map.Entry<String, String> entry = it.next();System.out.println("key= " + entry.getKey() + " and value= " + entry.getValue());}
方法四:通过map中的values方法进行遍历所有的value,但不能遍历key
//第四种System.out.println("通过Map.values()遍历所有的value,但不能遍历key");for (String v : map.values()) {System.out.println("value= " + v);}}
(3)Map集合接口的案例
- 案例需求:创建一个HashMap集合,键是学号(String),值是学生对象(Student)。存储三个键值对元素,并遍历
代码示例 ```java / 学生类 / public class Student { private String name; private int age;
public Student() { }
public Student(String name, int age) {
this.name = name;this.age = age;
}
public String getName() {
return name;
}
public void setName(String name) {
this.name = name;
}
public int getAge() {
return age;
}
public void setAge(int age) {
this.age = age;
} }
/ 测试类 / /* 需求: 创建一个HashMap集合,键是学号(String),值是学生对象(Student)。存储三个键值对元素,并遍历
思路:1:定义学生类2:创建HashMap集合对象3:创建学生对象4:把学生添加到集合5:遍历集合方式1:键找值方式2:键值对对象找键和值
*/
public class HashMapDemo {
public static void main(String[] args) {
//创建HashMap集合对象
HashMap
//创建学生对象Student s1 = new Student("林青霞", 30);Student s2 = new Student("张曼玉", 35);Student s3 = new Student("王祖贤", 33);//把学生添加到集合hm.put("itheima001", s1);hm.put("itheima002", s2);hm.put("itheima003", s3);//方式1:键找值Set<String> keySet = hm.keySet();for (String key : keySet) {Student value = hm.get(key);System.out.println(key + "," + value.getName() + "," + value.getAge());}System.out.println("--------");//方式2:键值对对象找键和值Set<Map.Entry<String, Student>> entrySet = hm.entrySet();for (Map.Entry<String, Student> me : entrySet) {String key = me.getKey();Student value = me.getValue();System.out.println(key + "," + value.getName() + "," + value.getAge());}}
}
- 案例需求二:创建一个HashMap集合,键是学生对象(Student),值是居住地 (String)。存储多个元素,并遍历。- 要求保证键的唯一性:如果学生对象的成员变量值相同,我们就认为是同一个对象- 代码示例```java/*学生类*/public class Student {private String name;private int age;public Student() {}public Student(String name, int age) {this.name = name;this.age = age;}public String getName() {return name;}public void setName(String name) {this.name = name;}public int getAge() {return age;}public void setAge(int age) {this.age = age;}@Overridepublic boolean equals(Object o) {if (this == o) return true;if (o == null || getClass() != o.getClass()) return false;Student student = (Student) o;if (age != student.age) return false;return name != null ? name.equals(student.name) : student.name == null;}/**重新设定哈希规则*/@Overridepublic int hashCode() {int result = name != null ? name.hashCode() : 0;result = 31 * result + age;return result;}}/*测试类*/public class HashMapDemo {public static void main(String[] args) {//创建HashMap集合对象HashMap<Student, String> hm = new HashMap<Student, String>();//创建学生对象Student s1 = new Student("林青霞", 30);Student s2 = new Student("张曼玉", 35);Student s3 = new Student("王祖贤", 33);Student s4 = new Student("王祖贤", 33);//把学生添加到集合hm.put(s1, "西安");hm.put(s2, "武汉");hm.put(s3, "郑州");hm.put(s4, "北京");//遍历集合Set<Student> keySet = hm.keySet();for (Student key : keySet) {String value = hm.get(key);System.out.println(key.getName() + "," + key.getAge() + "," + value);}}}
(4)ArrayList集合嵌套HashMap集合案例
- 案例需求:创建一个ArrayList集合,存储三个元素,每一个元素都是HashMap
- 每一个HashMap的键和值都是String,并遍历。
代码示例
public class ArrayListIncludeHashMapDemo {public static void main(String[] args) {//创建ArrayList集合ArrayList<HashMap<String, String>> array = new ArrayList<HashMap<String, String>>();//创建HashMap集合,并添加键值对元素HashMap<String, String> hm1 = new HashMap<String, String>();hm1.put("孙策", "大乔");hm1.put("周瑜", "小乔");//把HashMap作为元素添加到ArrayList集合array.add(hm1);HashMap<String, String> hm2 = new HashMap<String, String>();hm2.put("郭靖", "黄蓉");hm2.put("杨过", "小龙女");//把HashMap作为元素添加到ArrayList集合array.add(hm2);HashMap<String, String> hm3 = new HashMap<String, String>();hm3.put("令狐冲", "任盈盈");hm3.put("林平之", "岳灵珊");//把HashMap作为元素添加到ArrayList集合array.add(hm3);//遍历ArrayList集合for (HashMap<String, String> hm : array) {Set<String> keySet = hm.keySet();for (String key : keySet) {String value = hm.get(key);System.out.println(key + "," + value);}}}}
(5)统计字符出现的次数
案例需求:键盘录入一个字符串,要求统计字符串中每个字符串出现的次数。举例:键盘录入“aababcabcdabcde” 在控制台输出:“a(5)b(4)c(3)d(2)e(1)”
代码实现
public class HashMapDemo {public static void main(String[] args) {//键盘录入一个字符串Scanner sc = new Scanner(System.in);System.out.println("请输入一个字符串:");String line = sc.nextLine();//创建HashMap集合,键是Character,值是Integer// HashMap<Character, Integer> hm = new HashMap<Character, Integer>();TreeMap<Character, Integer> hm = new TreeMap<Character, Integer>();//遍历字符串,得到每一个字符for (int i = 0; i < line.length(); i++) {char key = line.charAt(i);//拿得到的每一个字符作为键到HashMap集合中去找对应的值,看其返回值Integer value = hm.get(key);if (value == null) {//如果返回值是null:说明该字符在HashMap集合中不存在,就把该字符作为键,1作为值存储hm.put(key,1);} else {//如果返回值不是null:说明该字符在HashMap集合中存在,把该值加1,然后重新存储该字符和对应的值value++;hm.put(key,value);}}//遍历HashMap集合,得到键和值,按照要求进行拼接StringBuilder sb = new StringBuilder();Set<Character> keySet = hm.keySet();for(Character key : keySet) {Integer value = hm.get(key);sb.append(key).append("(").append(value).append(")");}String result = sb.toString();//输出结果System.out.println(result);}}
1.7、Conllections集合工具类的使用
(1)Conllections集合工具类的功能介绍
Conllections工具类的常用方法 | 方法名 | 功能说明 | | —- | —- | | public static void sort(List
list) | 将指定的列表按升序排序 | | public static void reverse(List<?> list) | 反转指定列表中元素的顺序 | | public static void shuffle(List<?> list) | 使用默认的随机源随机排列指定的列表 | 示例代码
public class CollectionsDemo01 {public static void main(String[] args) {//创建集合对象List<Integer> list = new ArrayList<Integer>();//添加元素list.add(30);list.add(20);list.add(50);list.add(10);list.add(40);//public static <T extends Comparable<? super T>> void sort(List<T> list):将指定的列表按升序排序// Collections.sort(list);//public static void reverse(List<?> list):反转指定列表中元素的顺序// Collections.reverse(list);//public static void shuffle(List<?> list):使用默认的随机源随机排列指定的列表Collections.shuffle(list);System.out.println(list);}}
(2)Conllections工具类的案例
案例需求:ArrayList存储学生对象,使用Collections对ArrayList进行排序
- 要求:按照年龄从小到大排序,年龄相同时,按照姓名的字母顺序排序
代码实现 ```java / 学生类 / public class Student { private String name; private int age;
public Student() { }
public Student(String name, int age) {
this.name = name;this.age = age;
}
public String getName() {
return name;
}
public void setName(String name) {
this.name = name;
}
public int getAge() {
return age;
}
public void setAge(int age) {
this.age = age;
} }
/
测试类
/
public class CollectionsDemo02 {
public static void main(String[] args) {
//创建ArrayList集合对象
ArrayList
//创建学生对象Student s1 = new Student("linqingxia", 30);Student s2 = new Student("zhangmanyu", 35);Student s3 = new Student("wangzuxian", 33);Student s4 = new Student("liuyan", 33);//把学生添加到集合array.add(s1);array.add(s2);array.add(s3);array.add(s4);//使用Collections对ArrayList集合排序//sort(List<T> list, Comparator<? super T> c)Collections.sort(array, new Comparator<Student>() {@Overridepublic int compare(Student s1, Student s2) {//按照年龄从小到大排序,年龄相同时,按照姓名的字母顺序排序int num = s1.getAge() - s2.getAge();int num2 = num == 0 ? s1.getName().compareTo(s2.getName()) : num;return num2;}});//遍历集合for (Student s : array) {System.out.println(s.getName() + "," + s.getAge());}}
}
<a name="VOnRC"></a>### (3)利用Conllections工具类模拟斗地主的发牌,看牌洗牌的操作- 案例需求:通过程序实现斗地主过程中的洗牌,发牌和看牌- 代码实现```javapublic class PokerDemo {public static void main(String[] args) {//创建一个牌盒,也就是定义一个集合对象,用ArrayList集合实现ArrayList<String> array = new ArrayList<String>();//往牌盒里面装牌/*♦2,♦3,♦4...♦K,♦A♣2,...♥2,...♠2,...小王,大王*///定义花色数组String[] colors = {"♦", "♣", "♥", "♠"};//定义点数数组String[] numbers = {"2", "3", "4", "5", "6", "7", "8", "9", "10", "J", "Q", "K", "A"};for (String color : colors) {for (String number : numbers) {array.add(color + number);}}array.add("小王");array.add("大王");//洗牌,也就是把牌打撒,用Collections的shuffle()方法实现Collections.shuffle(array);// System.out.println(array);//发牌,也就是遍历集合,给三个玩家发牌ArrayList<String> lqxArray = new ArrayList<String>();ArrayList<String> lyArray = new ArrayList<String>();ArrayList<String> fqyArray = new ArrayList<String>();ArrayList<String> dpArray = new ArrayList<String>();for (int i = 0; i < array.size(); i++) {String poker = array.get(i);if (i >= array.size() - 3) {dpArray.add(poker);} else if (i % 3 == 0) {lqxArray.add(poker);} else if (i % 3 == 1) {lyArray.add(poker);} else if (i % 3 == 2) {fqyArray.add(poker);}}//看牌,也就是三个玩家分别遍历自己的牌lookPoker("林青霞", lqxArray);lookPoker("柳岩", lyArray);lookPoker("风清扬", fqyArray);lookPoker("底牌", dpArray);}//看牌的方法public static void lookPoker(String name, ArrayList<String> array) {System.out.print(name + "的牌是:");for (String poker : array) {System.out.print(poker + " ");}System.out.println();}}/*升级版*/public class PokerDemo {public static void main(String[] args) {//创建HashMap,键是编号,值是牌HashMap<Integer, String> hm = new HashMap<Integer, String>();//创建ArrayList,存储编号ArrayList<Integer> array = new ArrayList<Integer>();//创建花色数组和点数数组String[] colors = {"♦", "♣", "♥", "♠"};String[] numbers = {"3", "4", "5", "6", "7", "8", "9", "10", "J", "Q", "K", "A", "2"};//从0开始往HashMap里面存储编号,并存储对应的牌。同时往ArrayList里面存储编号int index = 0;for (String number : numbers) {for (String color : colors) {hm.put(index, color + number);array.add(index);index++;}}hm.put(index, "小王");array.add(index);index++;hm.put(index, "大王");array.add(index);//洗牌(洗的是编号),用Collections的shuffle()方法实现Collections.shuffle(array);//发牌(发的也是编号,为了保证编号是排序的,创建TreeSet集合接收)TreeSet<Integer> lqxSet = new TreeSet<Integer>();TreeSet<Integer> lySet = new TreeSet<Integer>();TreeSet<Integer> fqySet = new TreeSet<Integer>();TreeSet<Integer> dpSet = new TreeSet<Integer>();for (int i = 0; i < array.size(); i++) {int x = array.get(i);if (i >= array.size() - 3) {dpSet.add(x);} else if (i % 3 == 0) {lqxSet.add(x);} else if (i % 3 == 1) {lySet.add(x);} else if (i % 3 == 2) {fqySet.add(x);}}//调用看牌方法lookPoker("林青霞", lqxSet, hm);lookPoker("柳岩", lySet, hm);lookPoker("风清扬", fqySet, hm);lookPoker("底牌", dpSet, hm);}//定义方法看牌(遍历TreeSet集合,获取编号,到HashMap集合找对应的牌)public static void lookPoker(String name, TreeSet<Integer> ts, HashMap<Integer, String> hm) {System.out.print(name + "的牌是:");for (Integer key : ts) {String poker = hm.get(key);System.out.print(poker + " ");}System.out.println();}}
二、泛型和可变参数
2.1、泛型的概述和优点
(1)泛型的认识
- 泛型概述
- 是JDK5中引入的特性,它提供了编译时类型安全检测机制,该机制允许在编译时检测到非法的类型它的本质是参数化类型,也就是说所操作的数据类型被指定为一个参数。一提到参数,最熟悉的就是定义方法时有形参,然后调用此方法时传递实参。那么参数化类型怎么理解呢?顾名思义,就是将类型由原来的具体的类型参数化,然后在使用/调用时传入具体的类型。这种参数类型可以用在类、方法和接口中,分别被称为泛型类、泛型方法、泛型接口
- 泛型定义格式
- <类型>:指定一种类型的格式。这里的类型可以看成是形参
- <类型1,类型2…>:指定多种类型的格式,多种类型之间用逗号隔开。这里的类型可以看成是形参
- 将来具体调用时候给定的类型可以看成是实参,并且实参的类型只能是引用数据类型
泛型的优点
定义格式
修饰符 class 类名<类型> { }
示例代码 ```java public class Generic
{ //成员变量的类型用泛型表示 private T t; public T getT() {
return t;
}
public void setT(T t) {
this.t = t;
} }
/
测试类
/
public class GenericDemo {
public static void main(String[] args) {
//创建泛型类对象时必须自定具体的类型
Generic
Generic<Integer> g2 = new Generic<Integer>();g2.setT(30);System.out.println(g2.getT());Generic<Boolean> g3 = new Generic<Boolean>();g3.setT(true);System.out.println(g3.getT());}
}
<a name="orCSU"></a>### (3)泛型方法的使用和定义- 定义格式```java修饰符 <类型> 返回值类型 方法名(类型 变量名) { }
- 示例代码
- 带有泛型方法的类
```java
public class Generic {
public
void show(T t) { System.out.println(t); } }
- 带有泛型方法的类
```java
public class Generic {
public
/
测试类
/
public class GenericDemo {
public static void main(String[] args) {
Generic g = new Generic();
g.
<a name="CGxlQ"></a>### (4)泛型接口的使用和定义- 定义格式```java修饰符 interface 接口名<类型> { }
- 示例代码
```java
/
泛型接口
/
public interface Generic
{ void show(T t); }
/
泛型接口的实现类
/
public class GenericImpl
/
测试类
/
public class GenericDemo {
public static void main(String[] args) {
Generic
Generic<Integer> g2 = new GenericImpl<Integer>();g2.show(30);}
}
<a name="A5Khb"></a>### (5)类型通配符- 类型通配符的作用- 为了表示各种泛型List的父类,可以使用类型通配符- 类型通配符的分类- 类型通配符:<?>- List<?>:表示元素类型未知的List,它的元素可以匹配任何的类型- 这种带通配符的List仅表示它是各种泛型List的父类,并不能把元素添加到其中- 类型通配符上限:<? extends 类型>- List<? extends Number>:它表示的类型是Number或者其子类型- 类型通配符下限:<? super 类型>- List<? super Number>:它表示的类型是Number或者其父类型- 类型通配符的基本使用```javapublic class GenericDemo {public static void main(String[] args) {//类型通配符:<?>List<?> list1 = new ArrayList<Object>();List<?> list2 = new ArrayList<Number>();List<?> list3 = new ArrayList<Integer>();System.out.println("--------");//类型通配符上限:<? extends 类型>// List<? extends Number> list4 = new ArrayList<Object>();List<? extends Number> list5 = new ArrayList<Number>();List<? extends Number> list6 = new ArrayList<Integer>();System.out.println("--------");//类型通配符下限:<? super 类型>List<? super Number> list7 = new ArrayList<Object>();List<? super Number> list8 = new ArrayList<Number>();// List<? super Number> list9 = new ArrayList<Integer>();}}
2.2、可变参数
(1)可变参数的认识
- 可变参数介绍
- 可变参数又称参数个数可变,用作方法的形参出现,那么方法参数个数就是可变的了
可变参数定义格式
修饰符 返回值类型 方法名(数据类型… 变量名) { }
可变参数的注意事项
- 这里的变量其实是一个数组
- 如果一个方法有多个参数,包含可变参数,可变参数要放在最后
可变参数的基本使用 ```java public class ArgsDemo01 { public static void main(String[] args) {
System.out.println(sum(10, 20));System.out.println(sum(10, 20, 30));System.out.println(sum(10, 20, 30, 40));System.out.println(sum(10,20,30,40,50));System.out.println(sum(10,20,30,40,50,60));System.out.println(sum(10,20,30,40,50,60,70));System.out.println(sum(10,20,30,40,50,60,70,80,90,100));
}
// public static int sum(int b,int… a) { // return 0; // }
public static int sum(int... a) {int sum = 0;for(int i : a) {sum += i;}return sum;}
}
<a name="biNbx"></a>### (2)可变参数的应用- Arrays工具类中有一个静态方法:- public static <T> List<T> asList(T... a):返回由指定数组支持的固定大小的列表- 返回的集合不能做增删操作,可以做修改操作- List接口中有一个静态方法:- public static <E> List<E> of(E... elements):返回包含任意数量元素的不可变列表- 返回的集合不能做增删改操作- Set接口中有一个静态方法:- public static <E> Set<E> of(E... elements) :返回一个包含任意数量元素的不可变集合- 在给元素的时候,不能给重复的元素- 返回的集合不能做增删操作,没有修改的方法- 示例代码```javapublic class ArgsDemo02 {public static void main(String[] args) {//public static <T> List<T> asList(T... a):返回由指定数组支持的固定大小的列表// List<String> list = Arrays.asList("hello", "world", "java");////// list.add("javaee"); //UnsupportedOperationException//// list.remove("world"); //UnsupportedOperationException// list.set(1,"javaee");//// System.out.println(list);//public static <E> List<E> of(E... elements):返回包含任意数量元素的不可变列表// List<String> list = List.of("hello", "world", "java", "world");////// list.add("javaee");//UnsupportedOperationException//// list.remove("java");//UnsupportedOperationException//// list.set(1,"javaee");//UnsupportedOperationException//// System.out.println(list);//public static <E> Set<E> of(E... elements) :返回一个包含任意数量元素的不可变集合// Set<String> set = Set.of("hello", "world", "java","world"); //IllegalArgumentException//Set<String> set = Set.of("hello", "world", "java");// set.add("javaee");//UnsupportedOperationException// set.remove("world");//UnsupportedOperationException//System.out.println(set);}}
三、file类
3.1、file类的认识与使用
(1)file类的认识
- File类介绍
- 它是文件和目录路径名的抽象表示
- 文件和目录是可以通过File封装成对象的
- 对于File而言,其封装的并不是一个真正存在的文件,仅仅是一个路径名而已。它可以是存在的,也可以是不存在的。将来是要通过具体的操作把这个路径的内容转换为具体存在的
File类的构造方法 | 方法名 | 功能说明 | | —- | —- | | File(String pathname) | 通过将给定的路径名字符串转换为抽象路径名来创建新的 File实例 | | File(String parent, String child) | 从父路径名字符串和子路径名字符串创建新的 File实例 | | File(File parent, String child) | 从父抽象路径名和子路径名字符串创建新的 File实例 |
示例代码
public class FileDemo01 {public static void main(String[] args) {//File(String pathname):通过将给定的路径名字符串转换为抽象路径名来创建新的 File实例。File f1 = new File("E:\\itcast\\java.txt");System.out.println(f1);//File(String parent, String child):从父路径名字符串和子路径名字符串创建新的 File实例。File f2 = new File("E:\\itcast","java.txt");System.out.println(f2);//File(File parent, String child):从父抽象路径名和子路径名字符串创建新的 File实例。File f3 = new File("E:\\itcast");File f4 = new File(f3,"java.txt");System.out.println(f4);}}
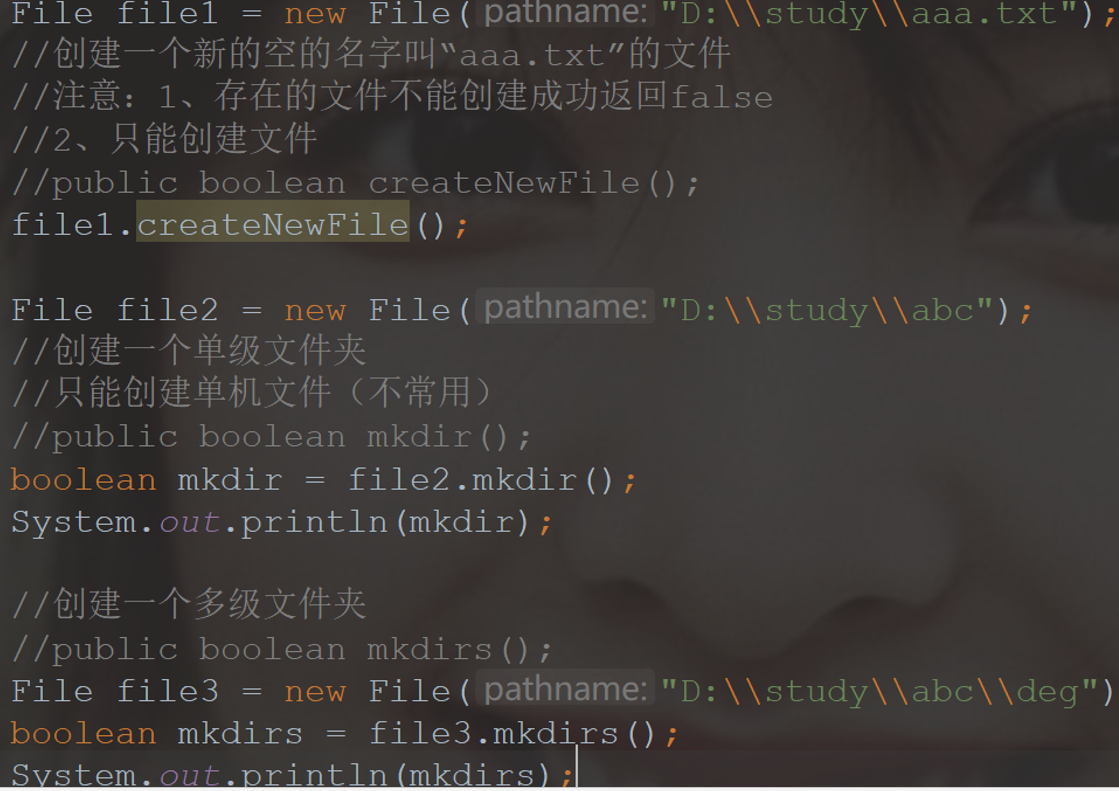
File类的常用方法 | 方法名 | 功能说明 | | —- | —- | | public boolean createNewFile() | 当具有该名称的文件不存在时,创建一个由该抽象路径名命名的新空文件(注意:如果文件所在的文件夹不存在“abc\\a.txt路径中abc不存在”,则会报错) | | public boolean mkdir() | 创建由此抽象路径名命名的目录 | | public boolean mkdirs() | 创建由此抽象路径名命名的目录,包括任何必需但不存在的父目录 | | length() | 返回文件的字节大小 | | lastModified() | 获取最后一次的修改时间,毫秒值 |
示例代码 ```java package com.xiaoha.day14_advanced;
import java.io.File; import java.io.IOException;
/**
- File类测试 *
- @author HausenLee
@date 2021/05/13 */ public class FileTest01 { public static void main(String[] args) throws IOException {
//需求1:在在当前项目模块下创建一个目录JavaSEFile f2 = new File("JavaSE");System.out.println(f2.mkdir());System.out.println("--------");//需求2:在当前项目模块下的“JavaSE”目录下创建一个多级目录JavaSE\\testFile f3 = new File("JavaSE\\test");
// System.out.println(f3.mkdir());//返回结果为false,说明该方法不能创建多级文件目录
System.out.println(f3.mkdirs());System.out.println("--------");//需求4:在当前项目模块下的JavaSE下的test下创建一个文件javase.txtFile f4 = new File("JavaSE\\test\\javase.txt");
// System.out.println(f4.mkdir());
System.out.println(f4.createNewFile());
} } ```
File类常用的判断方法 | 方法名 | 功能说明 | | —- | —- | | public boolean isDirectory() | 测试此抽象路径名表示的File是否为目录 | | public boolean isFile() | 测试此抽象路径名表示的File是否为文件 | | public boolean exists() | 测试此抽象路径名表示的File是否存在 |
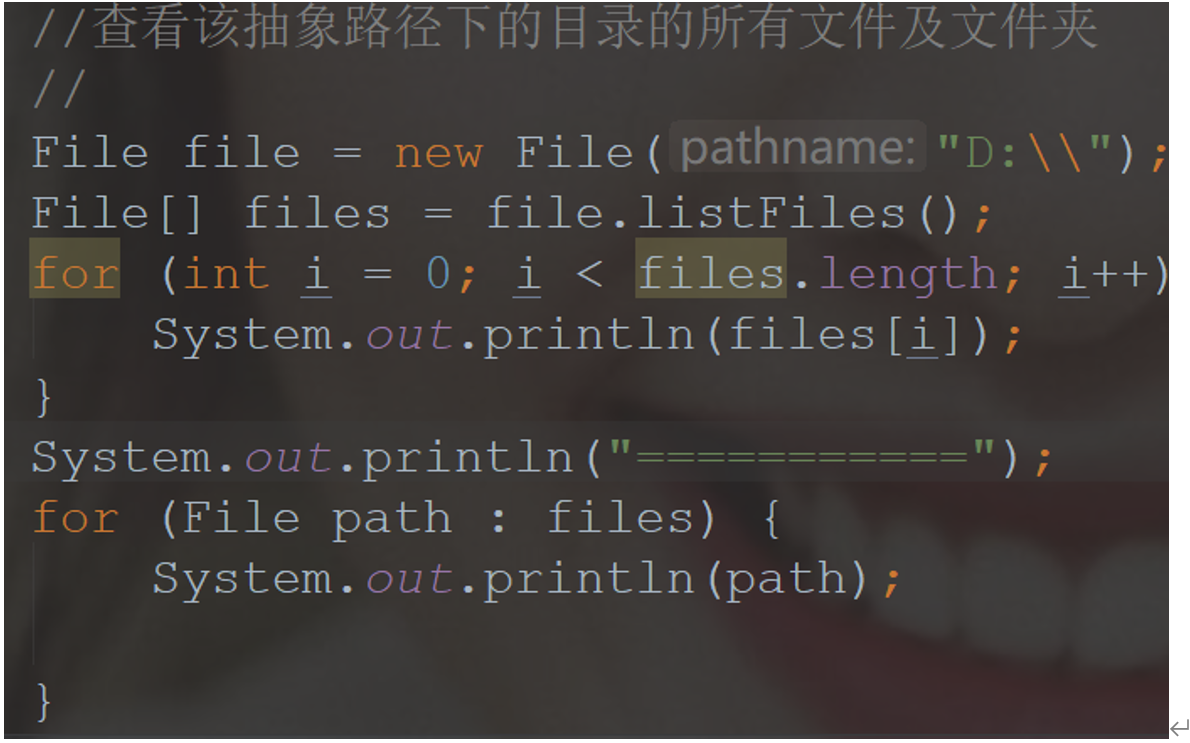
File类常用的获取方法 | 方法名 | 功能说明 | | —- | —- | | public String getAbsolutePath() | 返回此抽象路径名的绝对路径名字符串 | | public String getPath() | 将此抽象路径名转换为路径名字符串 | | public String getName() | 返回由此抽象路径名表示的文件或目录的名称 | | public String[] list() | 返回此抽象路径名表示的目录中的文件和目录的名称字符串数组 | | public File[] listFiles() | 返回此抽象路径名表示的目录中的文件和目录的File对象数组 |
相对路径和绝对路径
- 相对路径:指的是当前项目下的; 不完整的路径,不确定,可以找多个资源
- 绝对路径:从磁盘开始下的路径, 一个完整的路径,只能确定唯一的资源
- 示例代码
```java
public class FileDemo04 {
public static void main(String[] args) {
//创建一个File对象File f = new File("myFile\\java.txt");
// public boolean isDirectory():测试此抽象路径名表示的File是否为目录 // public boolean isFile():测试此抽象路径名表示的File是否为文件 // public boolean exists():测试此抽象路径名表示的File是否存在 System.out.println(f.isDirectory()); System.out.println(f.isFile()); System.out.println(f.exists());
// public String getAbsolutePath():返回此抽象路径名的绝对路径名字符串 // public String getPath():将此抽象路径名转换为路径名字符串 // public String getName():返回由此抽象路径名表示的文件或目录的名称 System.out.println(f.getAbsolutePath()); System.out.println(f.getPath()); System.out.println(f.getName()); System.out.println(“————“);
// public String[] list():返回此抽象路径名表示的目录中的文件和目录的名称字符串数组 // public File[] listFiles():返回此抽象路径名表示的目录中的文件和目录的File对象数组 File f2 = new File(“E:\itcast”);
String[] strArray = f2.list();for(String str : strArray) {System.out.println(str);}System.out.println("--------");File[] fileArray = f2.listFiles();for(File file : fileArray) {
// System.out.println(file); // System.out.println(file.getName()); if(file.isFile()) { System.out.println(file.getName()); } } } }
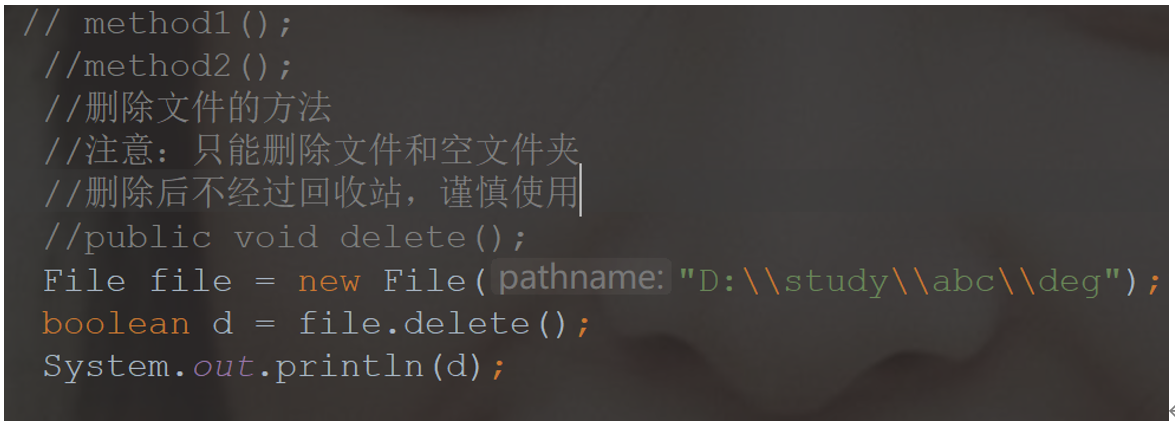
- File类的删除方法- public boolean delete():删除由此抽象路径名表示的文件或目录- 示例代码```javapublic class FileDemo03 {public static void main(String[] args) throws IOException {// File f1 = new File("E:\\itcast\\java.txt");//需求1:在当前模块目录下创建java.txt文件File f1 = new File("myFile\\java.txt");// System.out.println(f1.createNewFile());//需求2:删除当前模块目录下的java.txt文件System.out.println(f1.delete());System.out.println("--------");//需求3:在当前模块目录下创建itcast目录File f2 = new File("myFile\\itcast");// System.out.println(f2.mkdir());//需求4:删除当前模块目录下的itcast目录System.out.println(f2.delete());System.out.println("--------");//需求5:在当前模块下创建一个目录itcast,然后在该目录下创建一个文件java.txtFile f3 = new File("myFile\\itcast");// System.out.println(f3.mkdir());File f4 = new File("myFile\\itcast\\java.txt");// System.out.println(f4.createNewFile());//需求6:删除当前模块下的目录itcastSystem.out.println(f4.delete());System.out.println(f3.delete());}}
(2)File类的使用——递归
- 递归的介绍
- 以编程的角度来看,递归指的是方法定义中调用方法本身的现象
- 把一个复杂的问题层层转化为一个与原问题相似的规模较小的问题来求解
- 递归策略只需少量的程序就可描述出解题过程所需要的多次重复计算
递归的基本使用
public class DiGuiDemo {public static void main(String[] args) {//回顾不死神兔问题,求第20个月兔子的对数//每个月的兔子对数:1,1,2,3,5,8,...int[] arr = new int[20];arr[0] = 1;arr[1] = 1;for (int i = 2; i < arr.length; i++) {arr[i] = arr[i - 1] + arr[i - 2];}System.out.println(arr[19]);System.out.println(f(20));}/*递归解决问题,首先就是要定义一个方法:定义一个方法f(n):表示第n个月的兔子对数那么,第n-1个月的兔子对数该如何表示呢?f(n-1)同理,第n-2个月的兔子对数该如何表示呢?f(n-2)StackOverflowError:当堆栈溢出发生时抛出一个应用程序递归太深*/public static int f(int n) {if(n==1 || n==2) {return 1;} else {return f(n - 1) + f(n - 2);}}}
递归的注意事项
案例需求:用递归求5的阶乘,并把结果在控制台输出
代码实现
public class DiGuiDemo01 {public static void main(String[] args) {//调用方法int result = jc(5);//输出结果System.out.println("5的阶乘是:" + result);}//定义一个方法,用于递归求阶乘,参数为一个int类型的变量public static int jc(int n) {//在方法内部判断该变量的值是否是1if(n == 1) {//是:返回1return 1;} else {//不是:返回n*(n-1)!return n*jc(n-1);}}}
(4)递归遍历文件夹
案例需求
- 给定一个路径(E:\itcast),通过递归完成遍历该目录下所有内容,并把所有文件的绝对路径输出在控制台
代码实现
public class DiGuiDemo02 {public static void main(String[] args) {//根据给定的路径创建一个File对象// File srcFile = new File("E:\\itcast");File srcFile = new File("E:\\itheima");//调用方法getAllFilePath(srcFile);}//定义一个方法,用于获取给定目录下的所有内容,参数为第1步创建的File对象public static void getAllFilePath(File srcFile) {//获取给定的File目录下所有的文件或者目录的File数组File[] fileArray = srcFile.listFiles();//遍历该File数组,得到每一个File对象if(fileArray != null) {for(File file : fileArray) {//判断该File对象是否是目录if(file.isDirectory()) {//是:递归调用getAllFilePath(file);} else {//不是:获取绝对路径输出在控制台System.out.println(file.getAbsolutePath());}}}}}
(5)统计文件的种类个数
代码实现 ```java public static void main(String[]args){ File file = new File(“要统计文件种类个数的文件夹路径”); //定义map集合进行统计文件种类的个数;键存文件的后缀名,值存对应的文件种类个数 Map
//定义递归的方法
public static void getCount(Map
<a name="cXo9g"></a>### (6)递归——数组的快排```javapackage com.HomeWork.QianwutianHomeWork.Test;/*数组的快排*/public class digui1 {public static void main(String[] args) {//定义一个数组,随便添加几个元素int arr[]={2,5,4,7,6,1,3};//定义左指针int left = 0;//定义右指针int reght = arr.length-1;//调用快排方法,将数组、左右指针传过去kuaipai(arr,left,reght);for (int i = 0; i < arr.length; i++) {System.out.print(arr[i]+" ");}}//定义快排的方法进行递归private static void kuaipai(int[] arr, int left, int reght) {if (reght<left){//如果右边的指针小于左边的指针//结束方法return;}//定义临时的左指针,用于递归程序的运算int left0 = left;//定义临时的右指针,用于递归程序的运算int reght0 = reght;//定义基准指元素int ben = arr[left0];while (left!=reght){//如果做指针不等于右指针就不结束循环while (ben <=arr[reght]&&left<reght){reght--;}while (ben >=arr[left]&&left<reght){left++;}int t = arr[reght];arr[reght]=arr[left];arr[left]=t;}int t = arr[left];arr[left]=arr[left0];arr[left0]=t;kuaipai(arr,left0,reght-1);kuaipai(arr,left+1,reght0);}}package com.Study.Qianwutian.Binarr;/*快排*/public class quicksort {public static void main(String[] args) {int arr[] = {6, 4, 8, 3, 7, 9, 2,};int left = 0, right = arr.length - 1;//quickSort(arr,left,right);for (int i = 0; i < arr.length; i++) {System.out.print(arr[i]+" ");}}private static void quickSort(int[] arr, int left, int right) {if (left>right){return;}//把左右索引的值临时存储int left0 = left;int right0 = right;//定义基准数int ben = arr[left0];//因为两个指针超中间靠,迟早会相遇(相等)//相等了就跳出循环执行下一步基准数的归位while (left!=right) {//从右边开始while (ben <= arr[right]&&left<right) {//要找的数比基准数大,则不进行交换 操作//然后右指针进行减减right--;}//从左边开始while (ben >= arr[left]&&left<right) {//要找的数比基准数小,则不进行交换 操作//然后右指针进行加加;left++;}//到这一步后,说明找到需要交换的数据//执行数据交换int t = arr[left];arr[left] = arr[right];arr[right] = t;}//跳出循环后,说明左右指针相遇(即相等)//执行基准数归位int t = arr[left];arr[left] = arr[left0];arr[left0] = t;quickSort(arr,left0,right-1);quickSort(arr,left+1,right0);}}
3.2、IO流和Stream流
(1)IO流的认识
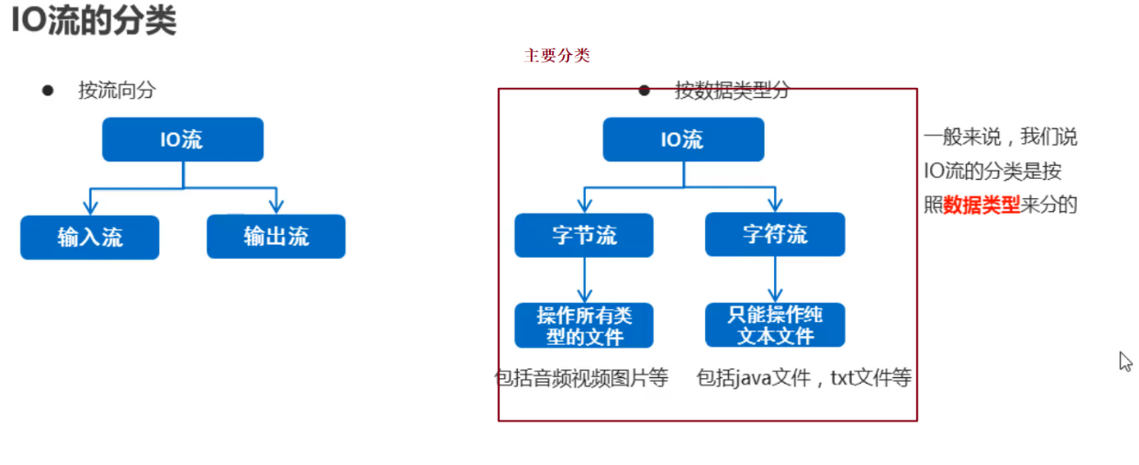
IO流的概述和分类
- IO流介绍:IO:输入/输出(Input可以将数据从本地文件中读取出来/Output可以将数据从内存中保存到本地文件);流:是一种抽象概念,是对数据传输的总称。也就是说数据在设备间的传输称为流,流的本质是数据传输
- IO流就是用来处理设备间数据传输问题的。常见的应用:文件复制;文件上传;文件下载
- IO流的分类
字节流抽象基类
- InputStream:这个抽象类是表示字节输入流的所有类的超类
- OutputStream:这个抽象类是表示字节输出流的所有类的超类
- 子类名特点:子类名称都是以其父类名作为子类名的后缀
- 字节输出流
- FileOutputStream(String name):创建文件输出流以指定的名称写入文件(参数为字符串的路径)
- 使用字节输出流写数据的步骤
- 创建字节输出流对象(调用系统功能创建了文件,创建字节输出流对象,让字节输出流对象指向文件)
- 调用字节输出流对象的写数据方法
- 释放资源(关闭此文件输出流并释放与此流相关联的任何系统资源)
示例代码
public class FileOutputStreamDemo01 {public static void main(String[] args) throws IOException {//创建字节输出流对象//FileOutputStream(String name):创建文件输出流以指定的名称写入文件FileOutputStream fos = new FileOutputStream("myByteStream\\fos.txt");/*做了三件事情:A:调用系统功能创建了文件B:创建了字节输出流对象C:让字节输出流对象指向创建好的文件*///void write(int b):将指定的字节写入此文件输出流fos.write(97);//相当于在文件中写了一个小写的a// fos.write(57);// fos.write(55);//最后都要释放资源//void close():关闭此文件输出流并释放与此流相关联的任何系统资源。fos.close();}}
(3)字节流写数据的三种方法
写数据的重载方法 | 方法名 | 功能说明 | | —- | —- | | void write(int b) | 将指定的字节写入此文件输出流 一次写一个字节数据 | | void write(byte[] b) | 将 b.length字节从指定的字节数组写入此文件输出流 一次写一个字节数组数据 | | void write(byte[] b, int off, int len) | 将 len字节从指定的字节数组开始,从偏移量off开始写入此文件输出流 一次写一个字节数组的部分数据 |
示例代码 ```java public class FileOutputStreamDemo02 { public static void main(String[] args) throws IOException {
//FileOutputStream(String name):创建文件输出流以指定的名称写入文件FileOutputStream fos = new FileOutputStream("myByteStream\\fos.txt");//new File(name)
// FileOutputStream fos = new FileOutputStream(new File(“myByteStream\fos.txt”));
//FileOutputStream(File file):创建文件输出流以写入由指定的 File对象表示的文件
// File file = new File(“myByteStream\fos.txt”); // FileOutputStream fos2 = new FileOutputStream(file); // FileOutputStream fos2 = new FileOutputStream(new File(“myByteStream\fos.txt”));
//void write(int b):将指定的字节写入此文件输出流
// fos.write(97); // fos.write(98); // fos.write(99); // fos.write(100); // fos.write(101);
// void write(byte[] b):将 b.length字节从指定的字节数组写入此文件输出流 // byte[] bys = {97, 98, 99, 100, 101}; //byte[] getBytes():返回字符串对应的字节数组 byte[] bys = “abcde”.getBytes(); // fos.write(bys);
//void write(byte[] b, int off, int len):将 len字节从指定的字节数组开始,从偏移量off开始写入此文件输出流
// fos.write(bys,0,bys.length);参数2表示从数组byte[] b 的第几个索引开始写,int len 表示要写的数据长度
fos.write(bys,1,3);//释放资源fos.close();}
}
- 字节流写数据的两个小问题- 字节流写数据如何实现换行- windows:\r\n- linux:\n- mac:\r- 字节流写数据如何实现追加写入- public FileOutputStream(String name,boolean append)- 创建文件输出流以指定的名称写入文件。如果第二个参数为true ,则字节将写入文件的末尾而不是开头- 示例代码```javapublic class FileOutputStreamDemo03 {public static void main(String[] args) throws IOException {//创建字节输出流对象// FileOutputStream fos = new FileOutputStream("myByteStream\\fos.txt");FileOutputStream fos = new FileOutputStream("myByteStream\\fos.txt",true);//写数据for (int i = 0; i < 10; i++) {fos.write("hello".getBytes());fos.write("\r\n".getBytes());}//释放资源fos.close();}}
- 字节流写数据加异常处理的方式
- try-catch-finally
- 代码示例 ```java try{ 可能出现异常的代码; }catch(异常类名 变量名){ 异常的处理代码; }finally{ 执行所有清除操作; }
//finally特点:被finally控制的语句一定会执行,除非JVM退出
public class FileOutputStreamDemo04 { public static void main(String[] args) { //加入finally来实现释放资源 FileOutputStream fos = null; try { fos = new FileOutputStream(“myByteStream\fos.txt”); fos.write(“hello”.getBytes()); } catch (IOException e) { e.printStackTrace(); } finally { if(fos != null) { try { fos.close(); } catch (IOException e) { e.printStackTrace(); } } } } }
<a name="axeen"></a>### (4)字节流读数据(一次读一个字节)- 字节输入流- FileInputStream(String name):通过打开与实际文件的连接来创建一个FileInputStream ,该文件由文件系统中的路径名name命名- 字节输入流读取数据的步骤- 创建字节输入流对象- 调用字节输入流对象的读数据方法- 释放资源- 示例代码```javapackage com.xiaoha.day14_advanced;import java.io.File;import java.io.FileInputStream;import java.io.IOException;/*** 字节流读取文件操作** @author HausenLee* @date 2021/05/13*/public class StreamReaderTest01 {public static void main(String[] args) {File file = new File("D:\\IdeaProjects\\java-se-study\\JavaSE\\test\\javase.txt");FileInputStream fis = null;try{//创建字节输入流对象//构造方法一:FileInputStream(String name)//FileInputStream fis = new FileInputStream("myByteStream\\fos.txt");//构造方法二:FileInputStream(File file)fis = new FileInputStream(file);int by;/*fis.read():读数据by=fis.read():把读取到的数据赋值给byby != -1:判断读取到的数据是否是-1*/while ((by=fis.read())!=-1) {System.out.print((char)by);}}catch(IOException e){e.printStackTrace();}finally{//释放资源try {if(fis!=null){fis.close();}} catch (IOException e) {e.printStackTrace();}}}}
(5)字节流复制文本文件
- 案例需求:把“E:\itcast\窗里窗外.txt”复制到模块目录下的“窗里窗外.txt”
- 实现步骤
- 复制文本文件,其实就把文本文件的内容从一个文件中读取出来(数据源),然后写入到另一个文件中(目的地)
- 数据源:E:\itcast\窗里窗外.txt —- 读数据 —- InputStream —- FileInputStream
- 目的地:myByteStream\窗里窗外.txt —- 写数据 —- OutputStream —- FileOutputStream
代码实现
public class CopyTxtDemo {public static void main(String[] args) throws IOException {//根据数据源创建字节输入流对象FileInputStream fis = new FileInputStream("E:\\itcast\\窗里窗外.txt");//根据目的地创建字节输出流对象FileOutputStream fos = new FileOutputStream("myByteStream\\窗里窗外.txt");//读写数据,复制文本文件(一次读取一个字节,一次写入一个字节)int by;while ((by=fis.read())!=-1) {fos.write(by);}//释放资源fos.close();fis.close();}}
读数据优化之小数组
- public int read(byte[] b):从输入流读取最多b.length个字节的数据
- 返回的是读入缓冲区的总字节数,也就是实际的读取字节个数
示例代码
public class FileInputStreamDemo02 {public static void main(String[] args) throws IOException {//创建字节输入流对象FileInputStream fis = new FileInputStream("myByteStream\\fos.txt");/*hello\r\nworld\r\n第一次:hello第二次:\r\nwor第三次:ld\r\nr*/byte[] bys = new byte[1024]; //1024及其整数倍int len;while ((len=fis.read(bys))!=-1) {System.out.print(new String(bys,0,len));}//释放资源fis.close();}}
(6)字节流复制图片
案例需求:把“E:\itcast\mn.jpg”复制到模块目录下的“mn.jpg”
- 实现步骤
- 根据数据源创建字节输入流对象
- 根据目的地创建字节输出流对象
- 读写数据,复制图片(一次读取一个字节数组,一次写入一个字节数组)
- 释放资源
代码实现
public class CopyJpgDemo {public static void main(String[] args) throws IOException {//根据数据源创建字节输入流对象FileInputStream fis = new FileInputStream("E:\\itcast\\mn.jpg");//根据目的地创建字节输出流对象FileOutputStream fos = new FileOutputStream("myByteStream\\mn.jpg");//读写数据,复制图片(一次读取一个字节数组,一次写入一个字节数组)byte[] bys = new byte[1024];int len;while ((len=fis.read(bys))!=-1) {fos.write(bys,0,len);}//释放资源fos.close();fis.close();}}
(7)字符流的认识
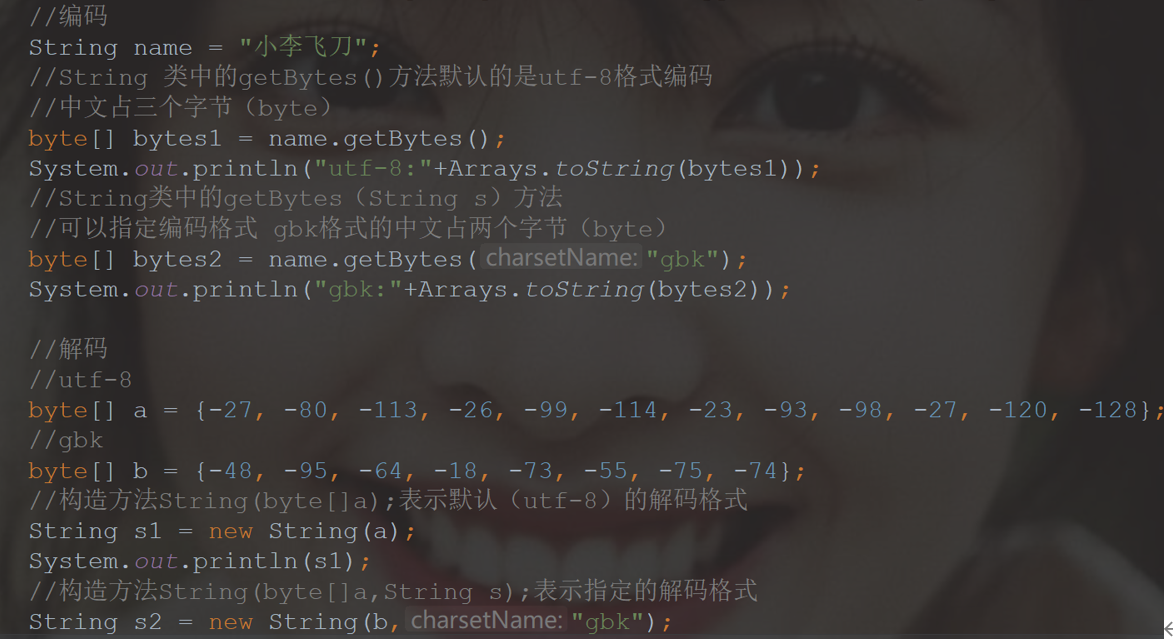
- 字符流的作用:为了解决字节流存数据出现的乱码现象而存在的
- 编码和解码
- 字符流和字节流的使用场景
- 想要进行拷贝,一律使用字节流或字节缓冲流
- 想要把文本文件中的数据读到内存中,请使用字符输入流;想要把内存中的数据写到文本文件中,请使用字符输出流。
UTF-8编码表与GBK编码表的区别
构造方法 | 方法名 | 功能说明 | | —- | —- | | FileWriter(File file) | 给一个File对象构造一个FileWriter对象 | | FileWriter(File file,Boolean append) | 一个方法的重载方法,起到追加写数据的效果 | | FileWriter(String FileName) | 给一个指定的文件的路径,构造一个FileWriter对象 |
常用的成员方法 | 方法名 | 功能说明 | | —- | —- | | void write(int c) | 写一个字符 | | void write(char[]cbuf) | 写出一个字符数组 | | void write(char[]cbuf , int off, int len) | 写出一个字符数组的一部分 | | void write(String str) | 写出一个字符串 | | void write(String str , int off , int len) | 写出一个字符串的一部分 |
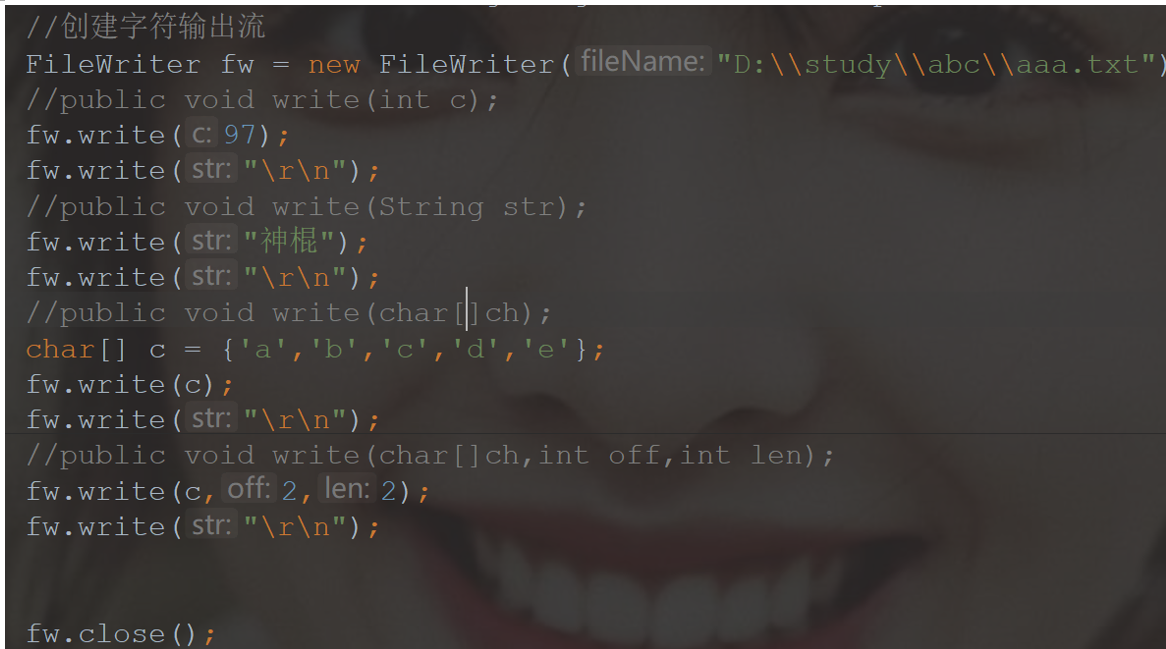
- 字符输出流中的flush()方法和close()方法 | 方法名 | 功能说明 | | —- | —- | | flush() | 刷新流,还可以继续写数据 | | close() | 关闭流,释放资源,但是在关闭流之前,会先刷新流,一旦关闭流,就不能写数据了 |
(9)字符输入流的认识
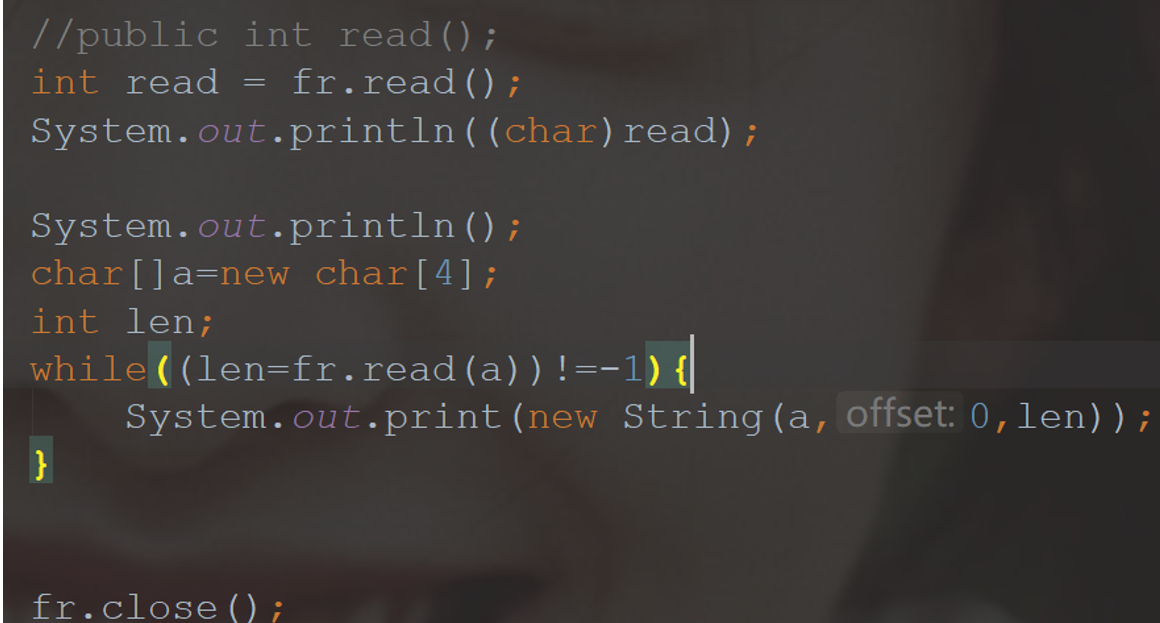
构造方法 | 方法名 | 功能说明 | | —- | —- | | FileReader(File file) | 创建一个新的FileReader对象,通过给定的File对象 | | FileReader(String fileName) | 通过给定的文件的路径创建一个FileReader对象 |
常见的读数据的方法的使用案例
字符流文本复制操作 ```java package com.xiaoha.day14_advanced;
import java.io.File; import java.io.FileReader; import java.io.FileWriter; import java.io.IOException;
/**
- 利用字符流复制文本文件 *
- @author HausenLee
- @date 2021/05/13
*/
public class TextCopy {
public static void main(String[] args) {
} } ```File fileSource = new File("D:\\IdeaProjects\\java-se-study\\JavaSE\\test\\javase.txt");File fileTarget= new File("D:\\IdeaProjects\\java-se-study\\JavaSE\\test\\TEST_TEXT.txt");FileWriter fw = null;FileReader fr = null;try{fr = new FileReader(fileSource);fw = new FileWriter(fileTarget);char[]chars = new char[1024];int len;while((len=fr.read(chars))!=-1){fw.write(chars,0,len);}}catch(IOException e){e.printStackTrace();}finally {if(fw!=null&&fr!=null){try{fr.close();fw.close();}catch(IOException e){e.printStackTrace();}}}
- 缓冲输出流
- 常用写数据的方法:和字符输出流的一样
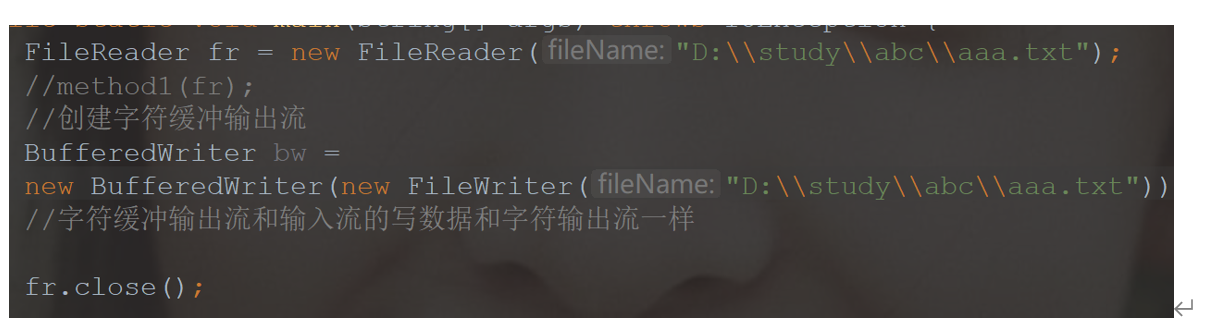
缓冲输入流
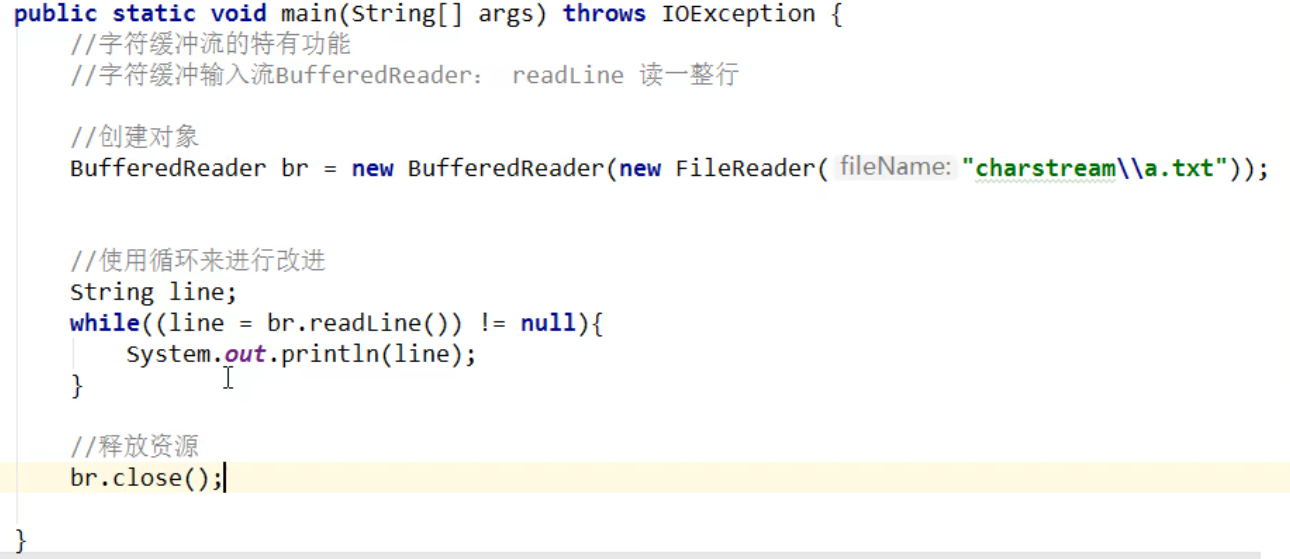
BufferedWriter:
- void newLine():写一行行分隔符,行分隔符字符串由系统属性定义(通俗来讲就是换行)
- BufferedReader
- String readLine():读一行文字,结果包含了行的内容的字符串,不包括行终止字符,如果流的结尾已经到达,则为null
- 示例代码
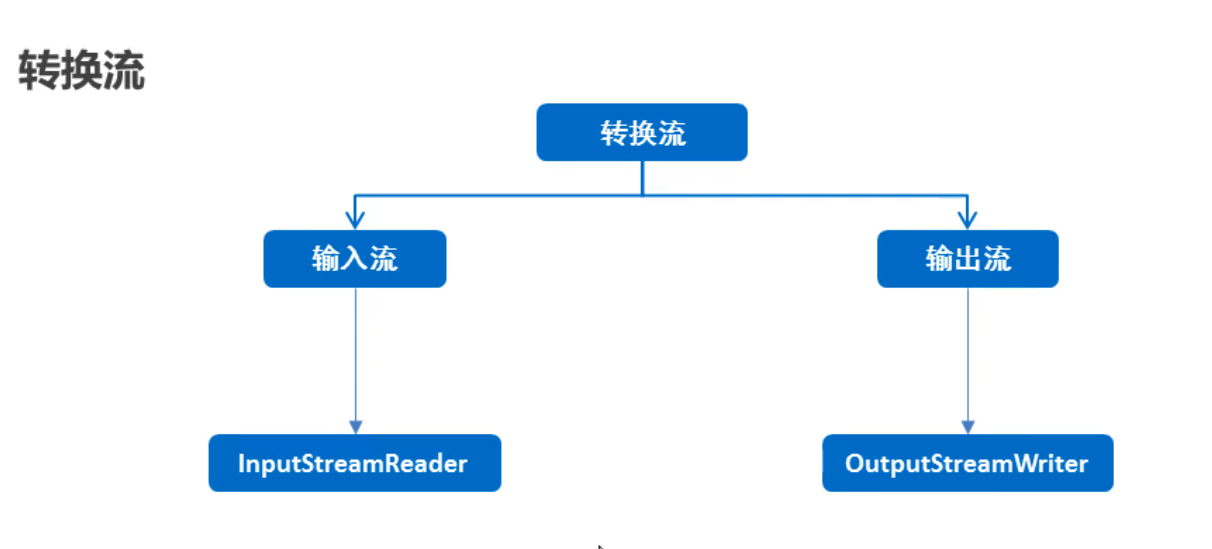
(11)转换流
- 转换流的认识
- 读的过程中是将字节流转换为字符流读到内存中,写的过程是将字符流转换为字节流写到硬盘中
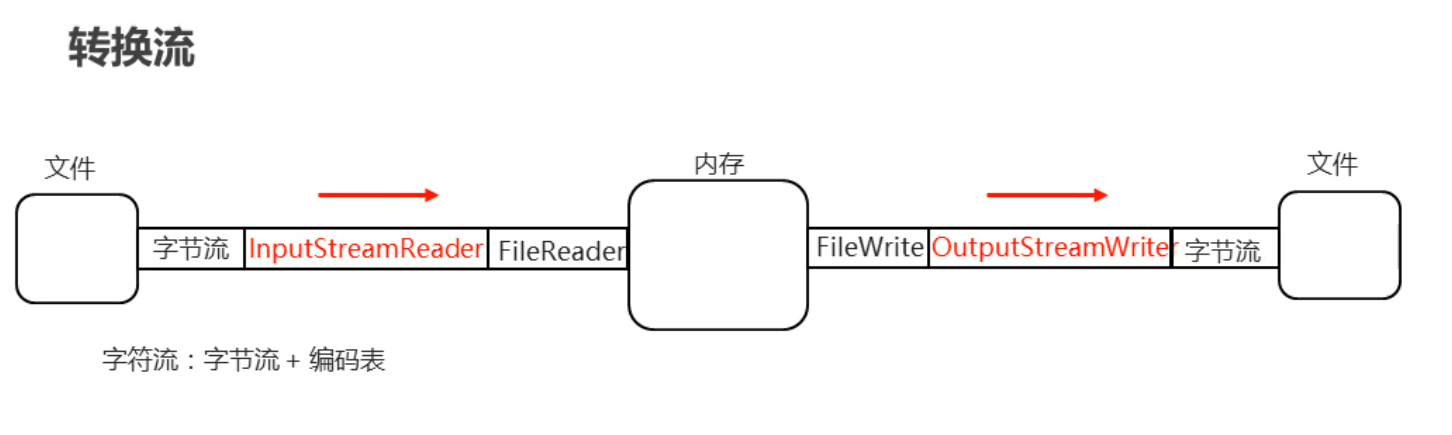
- 转换流的分类
- 转换流的使用
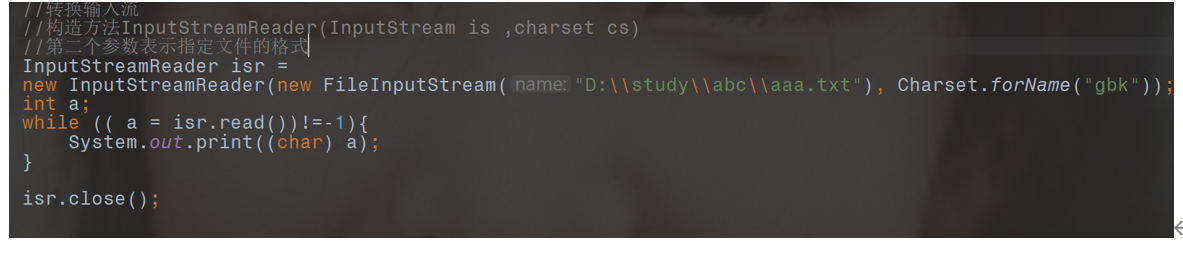
- 读的过程中是将字节流转换为字符流读到内存中,写的过程是将字符流转换为字节流写到硬盘中
(12)对象操作流
- 对象操作流的分类
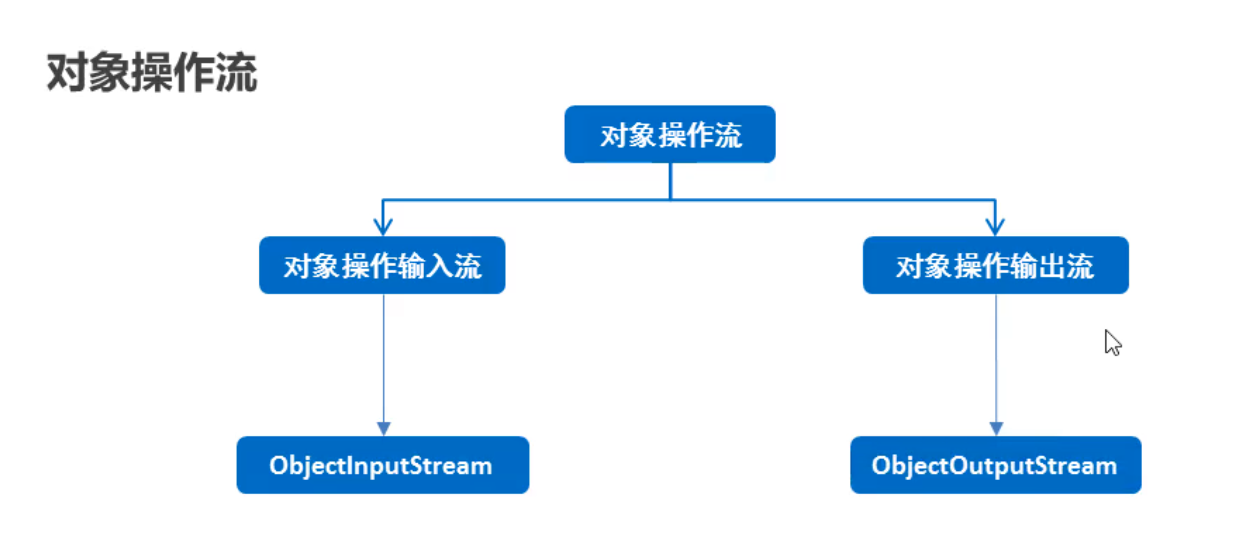
- 对象操作输出流(对象序列化):就是将对象写到本地文件中,或者在网络中传输对象
- 对象操作输入流(对象反序列化流):把写到本地文件中的对象读到内存中,或者接收网络中传输的对象
- 对象操作流的使用注意事项
- 给对象所属的类定义一个serialVersionUID:public static final long serialVersionUID= xxxL;
- 被transient和static关键修饰的成员变量:成员变量中被这个关键字修饰表示该成员变量不参与序列化的过程
(13)properties集合
- Properties介绍
- 是一个Map体系的集合类
- Properties可以保存到流中或从流中加载
- 属性列表中的每个键及其对应的值都是一个字符串
Properties基本使用(作为Map集合使用案例)
public class PropertiesDemo01 {public static void main(String[] args) {//创建集合对象// Properties<String,String> prop = new Properties<String,String>(); //错误Properties prop = new Properties();//存储元素prop.put("itheima001", "林青霞");prop.put("itheima002", "张曼玉");prop.put("itheima003", "王祖贤");//遍历集合Set<Object> keySet = prop.keySet();for (Object key : keySet) {Object value = prop.get(key);System.out.println(key + "," + value);}}}
properties集合特有的方法 | 方法名 | 功能说明 | | —- | —- | | Object setProperty(String key, String value) | 设置集合的键和值,都是String类型,底层调用 Hashtable方法 put | | String getProperty(String key) | 使用此属性列表中指定的键搜索属性 | | Set
stringPropertyNames() | 从该属性列表中返回一个不可修改的键集,其中键及其对应的值是字符串 | 示例代码 ```java public class PropertiesDemo02 { public static void main(String[] args) {
//创建集合对象Properties prop = new Properties();//Object setProperty(String key, String value):设置集合的键和值,都是String类型,底层调用Hashtable方法putprop.setProperty("itheima001", "林青霞");/*Object setProperty(String key, String value) {return put(key, value);}Object put(Object key, Object value) {return map.put(key, value);}*/prop.setProperty("itheima002", "张曼玉");prop.setProperty("itheima003", "王祖贤");//String getProperty(String key):使用此属性列表中指定的键搜索属性
// System.out.println(prop.getProperty(“itheima001”)); // System.out.println(prop.getProperty(“itheima0011”));
// System.out.println(prop);
//Set<String> stringPropertyNames():从该属性列表中返回一个不可修改的键集,其中键及其对应的值是字符串Set<String> names = prop.stringPropertyNames();for (String key : names) {
// System.out.println(key); String value = prop.getProperty(key); System.out.println(key + “,” + value); } } }
<a name="zj37N"></a>### (14)properties集合与io流相结合的使用- 和IO流结合的方法| 方法名 | 功能说明 || --- | --- || void load(InputStream inStream) | 从输入字节流读取属性列表(键和元素对) || void load(Reader reader) | 从输入字符流读取属性列表(键和元素对) || void store(OutputStream out, String comments) | 将此属性列表(键和元素对)写入此 Properties表中,以适合于使用 load(InputStream)方法的格式写入输出字节流 || void store(Writer writer, String comments) | 将此属性列表(键和元素对)写入此 Properties表中,以适合使用 load(Reader)方法的格式写入输出字符流 |- 示例代码```javapublic class PropertiesDemo03 {public static void main(String[] args) throws IOException {//把集合中的数据保存到文件// myStore();//把文件中的数据加载到集合myLoad();}private static void myLoad() throws IOException {Properties prop = new Properties();//void load(Reader reader):FileReader fr = new FileReader("myOtherStream\\fw.txt");prop.load(fr);fr.close();System.out.println(prop);}private static void myStore() throws IOException {Properties prop = new Properties();prop.setProperty("itheima001","林青霞");prop.setProperty("itheima002","张曼玉");prop.setProperty("itheima003","王祖贤");//void store(Writer writer, String comments):FileWriter fw = new FileWriter("myOtherStream\\fw.txt");prop.store(fw,null);fw.close();}}
(15)properties集合案例之游戏次数
- 案例需求
- 实现猜数字小游戏只能试玩3次,如果还想玩,提示:游戏试玩已结束,想玩请充值
- 分析步骤
- 写一个游戏类,里面有一个猜数字的小游戏
- 写一个测试类,测试类中有main()方法,main()方法中写如下代码:
- 从文件中读取数据到Properties集合,用load()方法实现
- 文件已经存在:game.txt
- 里面有一个数据值:count=0
- 通过Properties集合获取到玩游戏的次数
- 判断次数是否到到3次了
- 如果到了,给出提示:游戏试玩已结束,想玩请充值
- 如果不到3次:次数+1,重新写回文件,用Properties的store()方法实现玩游戏
代码实现
public class PropertiesTest {public static void main(String[] args) throws IOException {//从文件中读取数据到Properties集合,用load()方法实现Properties prop = new Properties();FileReader fr = new FileReader("myOtherStream\\game.txt");prop.load(fr);fr.close();//通过Properties集合获取到玩游戏的次数String count = prop.getProperty("count");int number = Integer.parseInt(count);//判断次数是否到到3次了if(number >= 3) {//如果到了,给出提示:游戏试玩已结束,想玩请充值(www.itcast.cn)System.out.println("游戏试玩已结束,想玩请充值(www.itcast.cn)");} else {//玩游戏GuessNumber.start();//次数+1,重新写回文件,用Properties的store()方法实现number++;prop.setProperty("count",String.valueOf(number));FileWriter fw = new FileWriter("myOtherStream\\game.txt");prop.store(fw,null);fw.close();}}}
(16)Stream流的认识
- 作用:
- 简化集合的使用代码
- Stream流的获取方法
- 单列集合:可以使用Collection接口中的默认方法stream();生成流:Default Stream
stream(); - 双列集合:间接的生成流:可以通过keySet或者entrySet获取一个Set集合,再获取stream流
- 数组:通过Arrays类中的静态方法stream生成流。
- 同种数据类型的多个数据:
- 1,2,3,4,5……
- “aaa”, “bbb” , “ccc”……
- 使用Stream.of(T…values);生成流。
- 单列集合:可以使用Collection接口中的默认方法stream();生成流:Default Stream
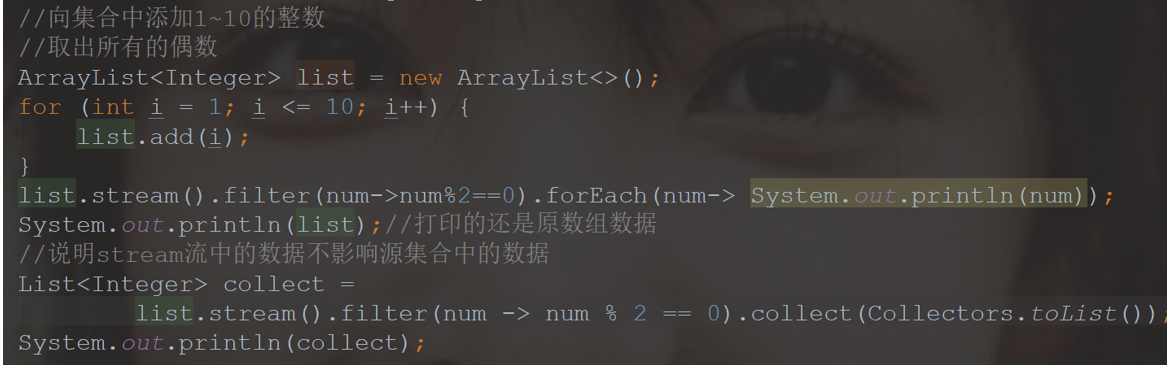
Stream流的常见中间操作方法
- Stream
limit(long maxSize): 截取指定参数个数的数据(参数为几,就保前
几个数据)。
- Stream
skip(long n); 跳过指定参数个数的数据(参数为几,就除去前几个
数据,保留后面的数据。
- static
Stream concat(Stream a, Stream b); 合并a和b两个流为一个
流
- Stream
distinct(); 去除流中的重复的元素 。依赖(hashCode和equals方
法。
- Stream
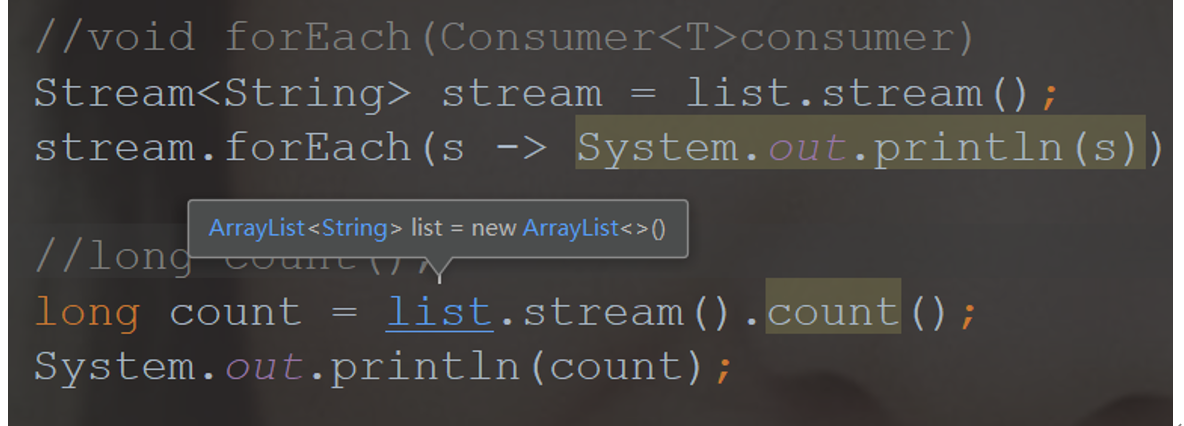
常见的结尾操作方法
- void forEach(Consumer
consumer); 参数为接口且接口中只有一个抽象方
法,因此可以使用lambda表达式(该方法底层是对stream流里的数据进行了
循环遍历,并循环调用Consumer接口中的抽象方法,把每个数据传入到Consumer接口中的抽象方法中,因此我们只要重写抽象方法用输出语句打印参数就可以。)- long count(); 返回此流中的元素数
- 收集方法
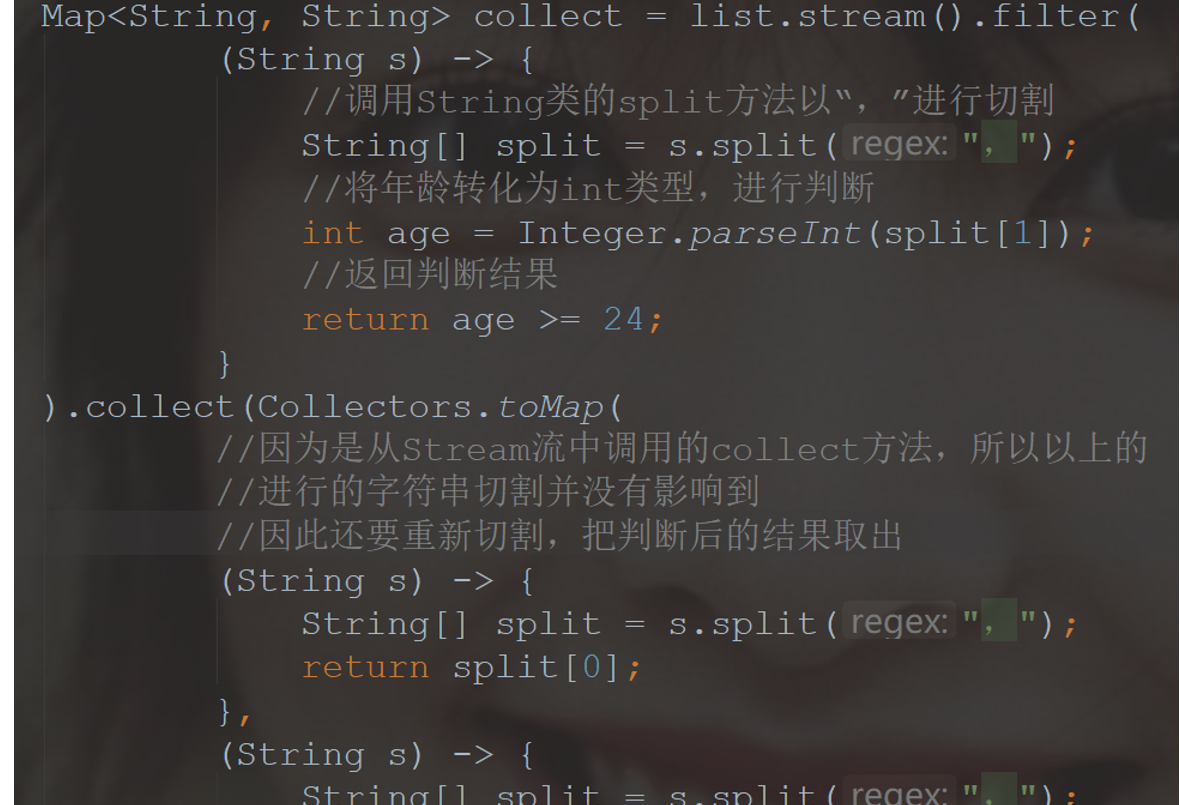
- void forEach(Consumer

若有收获,就点个赞吧
0 人点赞
