调试普通函数
通过在命令上增加 --debug 参数即可调试。
$ f invoke -f [函数名] --debug
在 VSCode 中调试
VSCode 已经通过 auto attach 能力比较容易的支持了调试(不需要配置),打开方式如下。
:::info
- 1、必须在 VSCode 中启动才能 auto attach(按 command+shift+P,打 auto attach 开启自动附加进程)
 :::
:::
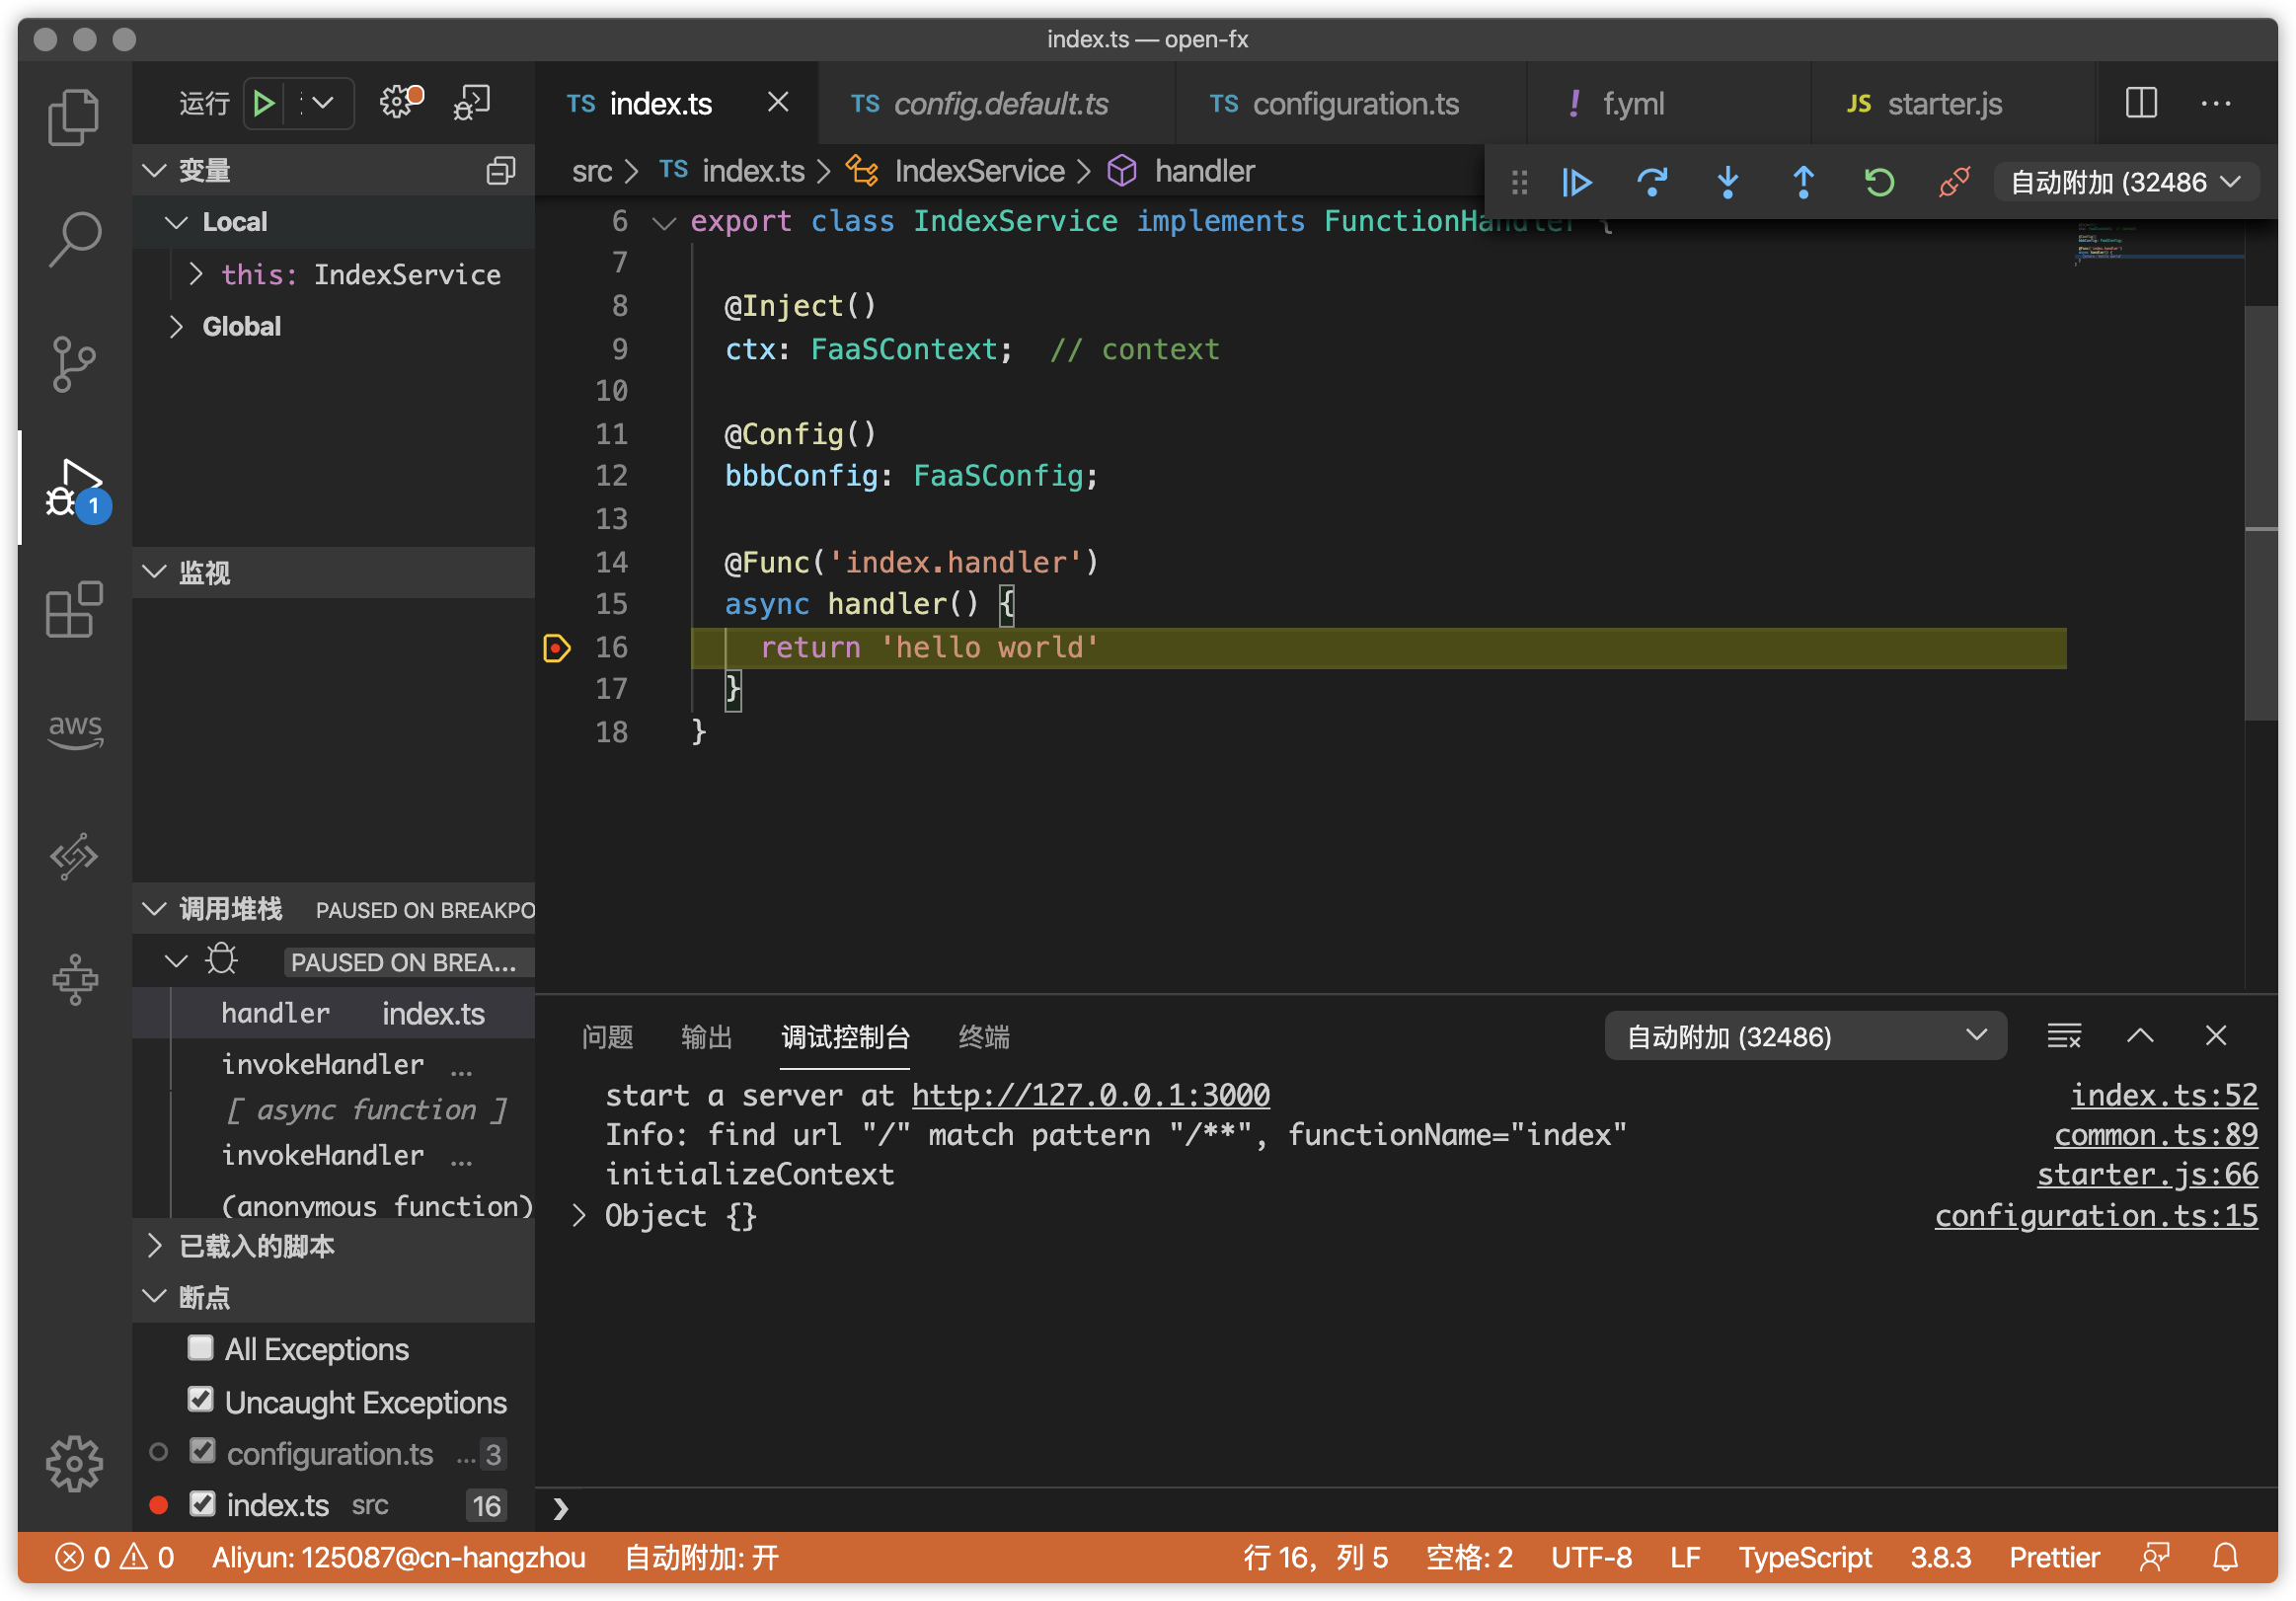
打开后,加入断点,在 VSCode 的命令行中执行 $ f invoke -f [函数名] --debug 命令即可。
效果如下: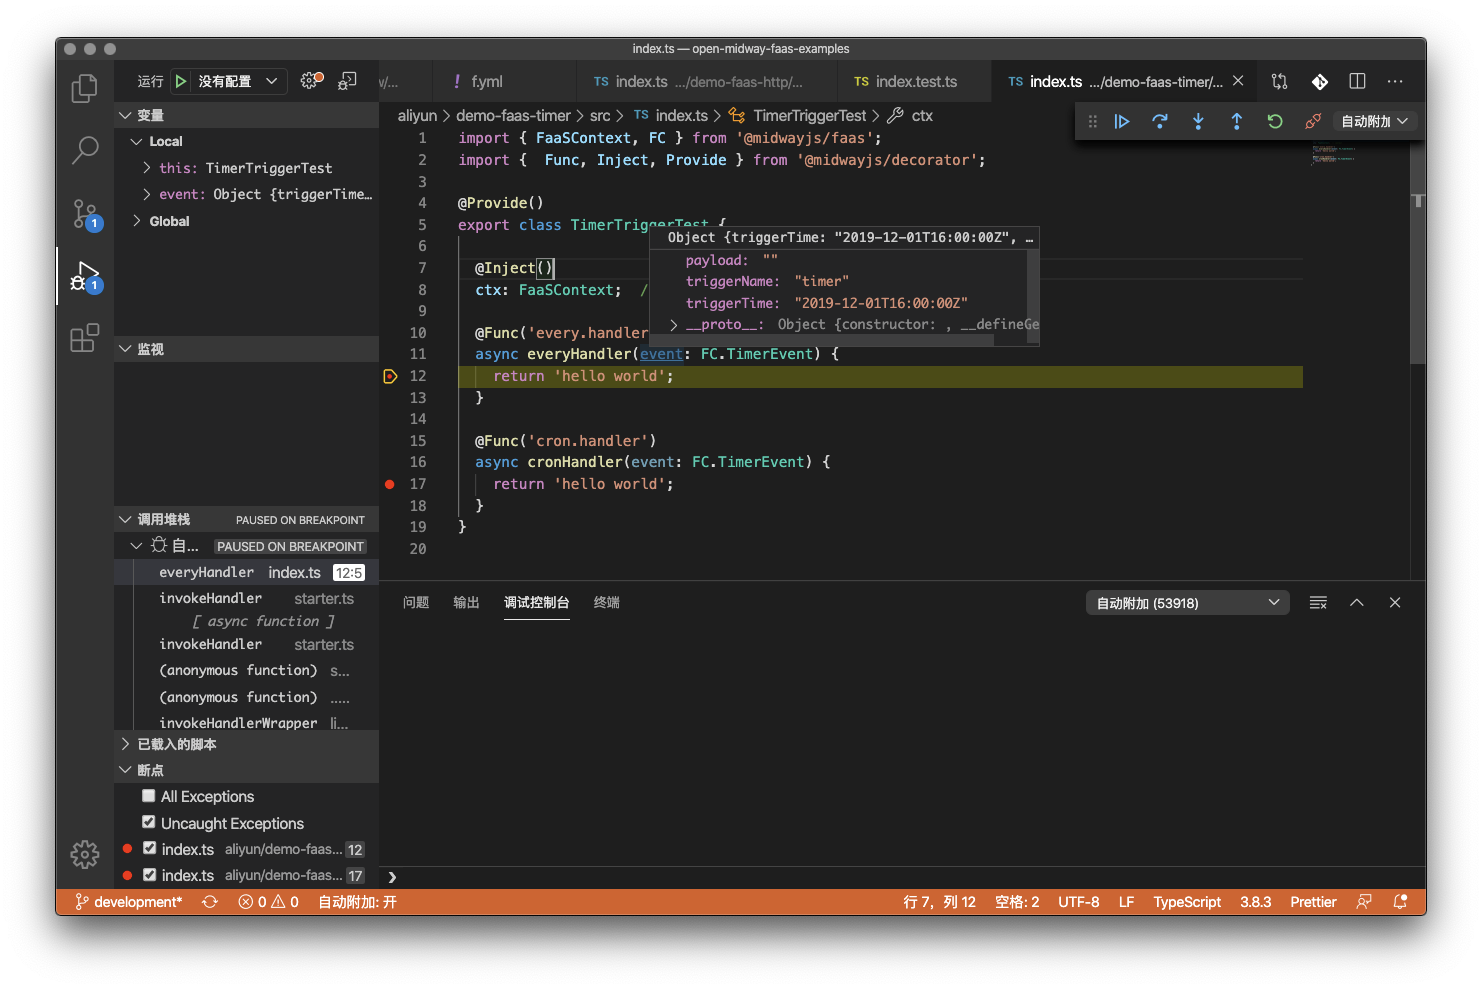
在 WebStorm/Idea 中调试
JetBrain 系列的 IDE 需要配置命令,开启调试。
1、先在 package.json 中配置命令。
{"name": "midway-faas-hello-world","version": "1.0.0","scripts": {"debug": "f invoke -f index --debug"}}
开始配置 IDE。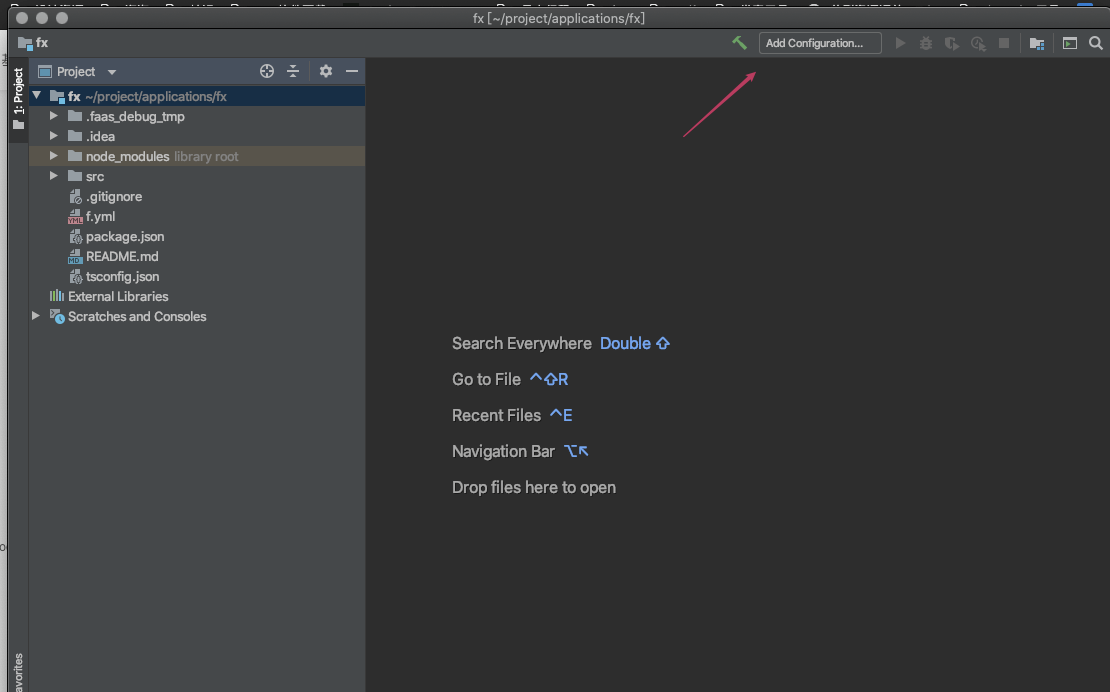
配置 npm 命令,选择上面的 debug 。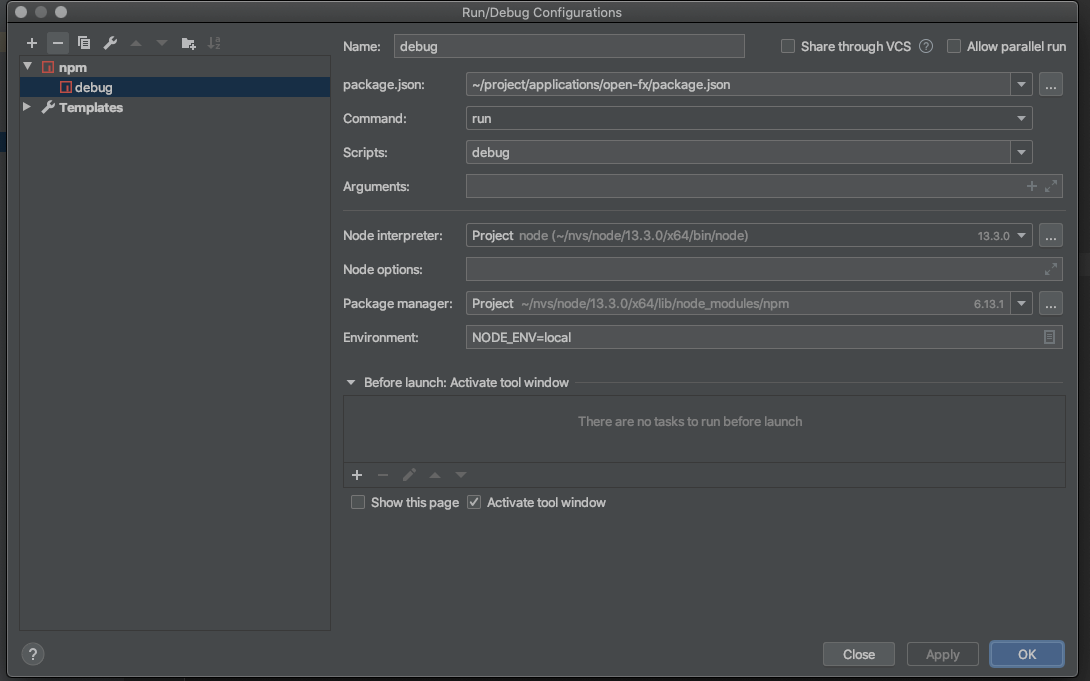
在代码上断点后执行调试即可。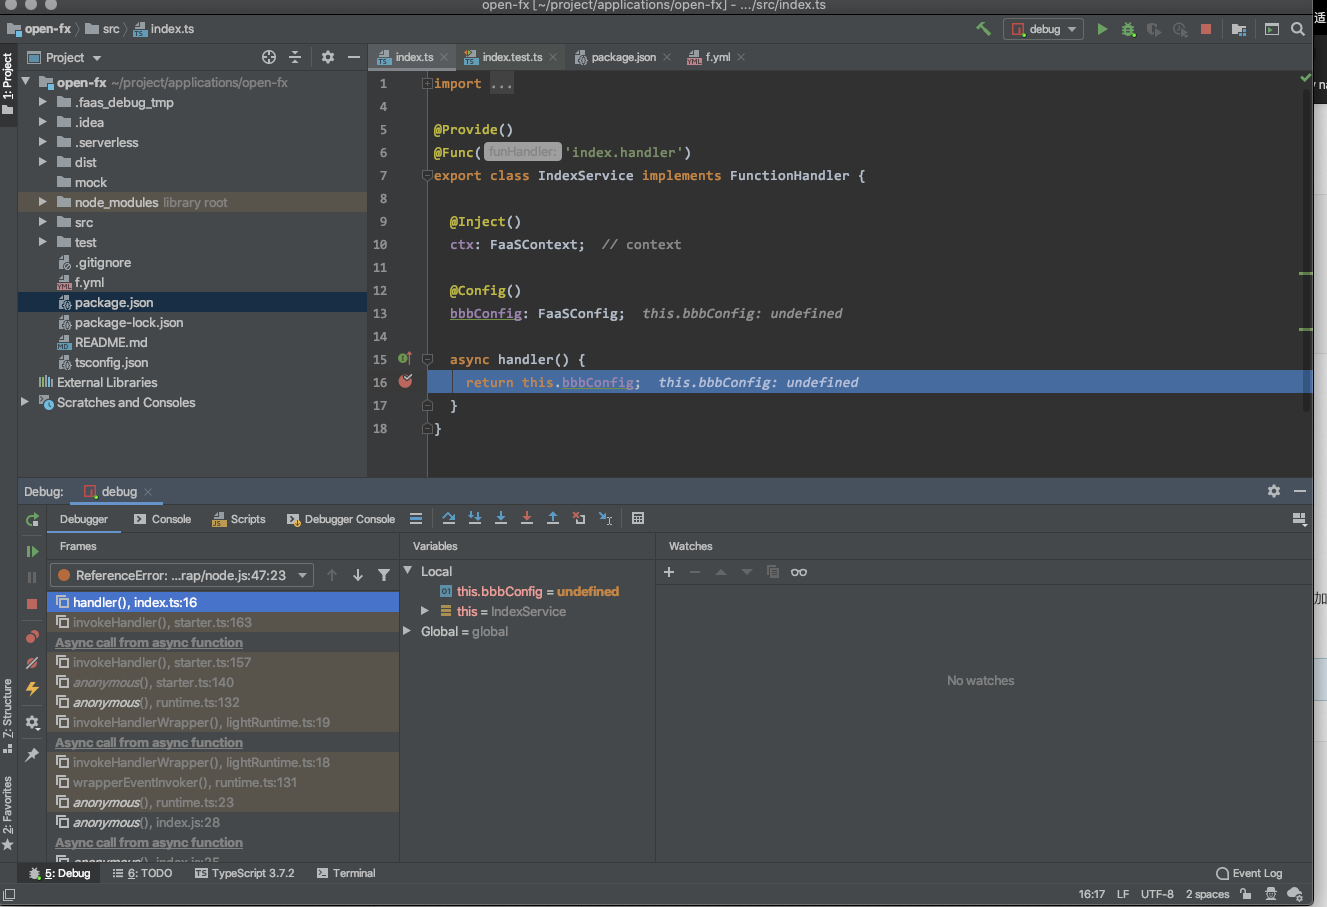
调试 HTTP,API 网关函数
同理,调试 HTTP 也只需要加入 --debug 参数即可。
命令为:
$ f invoke -p$ f invoke -p 3000 // 默认端口 3000,可以修改$ f invoke -p 8080 --debug // 调试模式启动服务
在 VSCode 中调试
VSCode 已经通过 auto attach 能力比较容易的支持了调试(不需要配置),打开方式如下。
:::info
- 1、必须在 VSCode 中启动才能 auto attach(按 command+shift+P,打 auto attach 开启自动附加进程)
:::
打开后,加入断点,在 VSCode 的命令行中执行 $ f invoke -p --debug 命令即可,默认以 3000 端口启动。
效果如下:
在 WebStorm/Idea 中调试
和普通函数相同,JetBrain 系列的 IDE 需要配置命令,开启调试。
1、先在 package.json 中配置命令。
{"name": "midway-faas-hello-world","version": "1.0.0","scripts": {"dev": "f invoke -p"}}
然后按照函数的配置方式,配置 dev 命令即可。
这里无需传递 --debug 参数,编辑器会自动传递调试参数。
示例如下: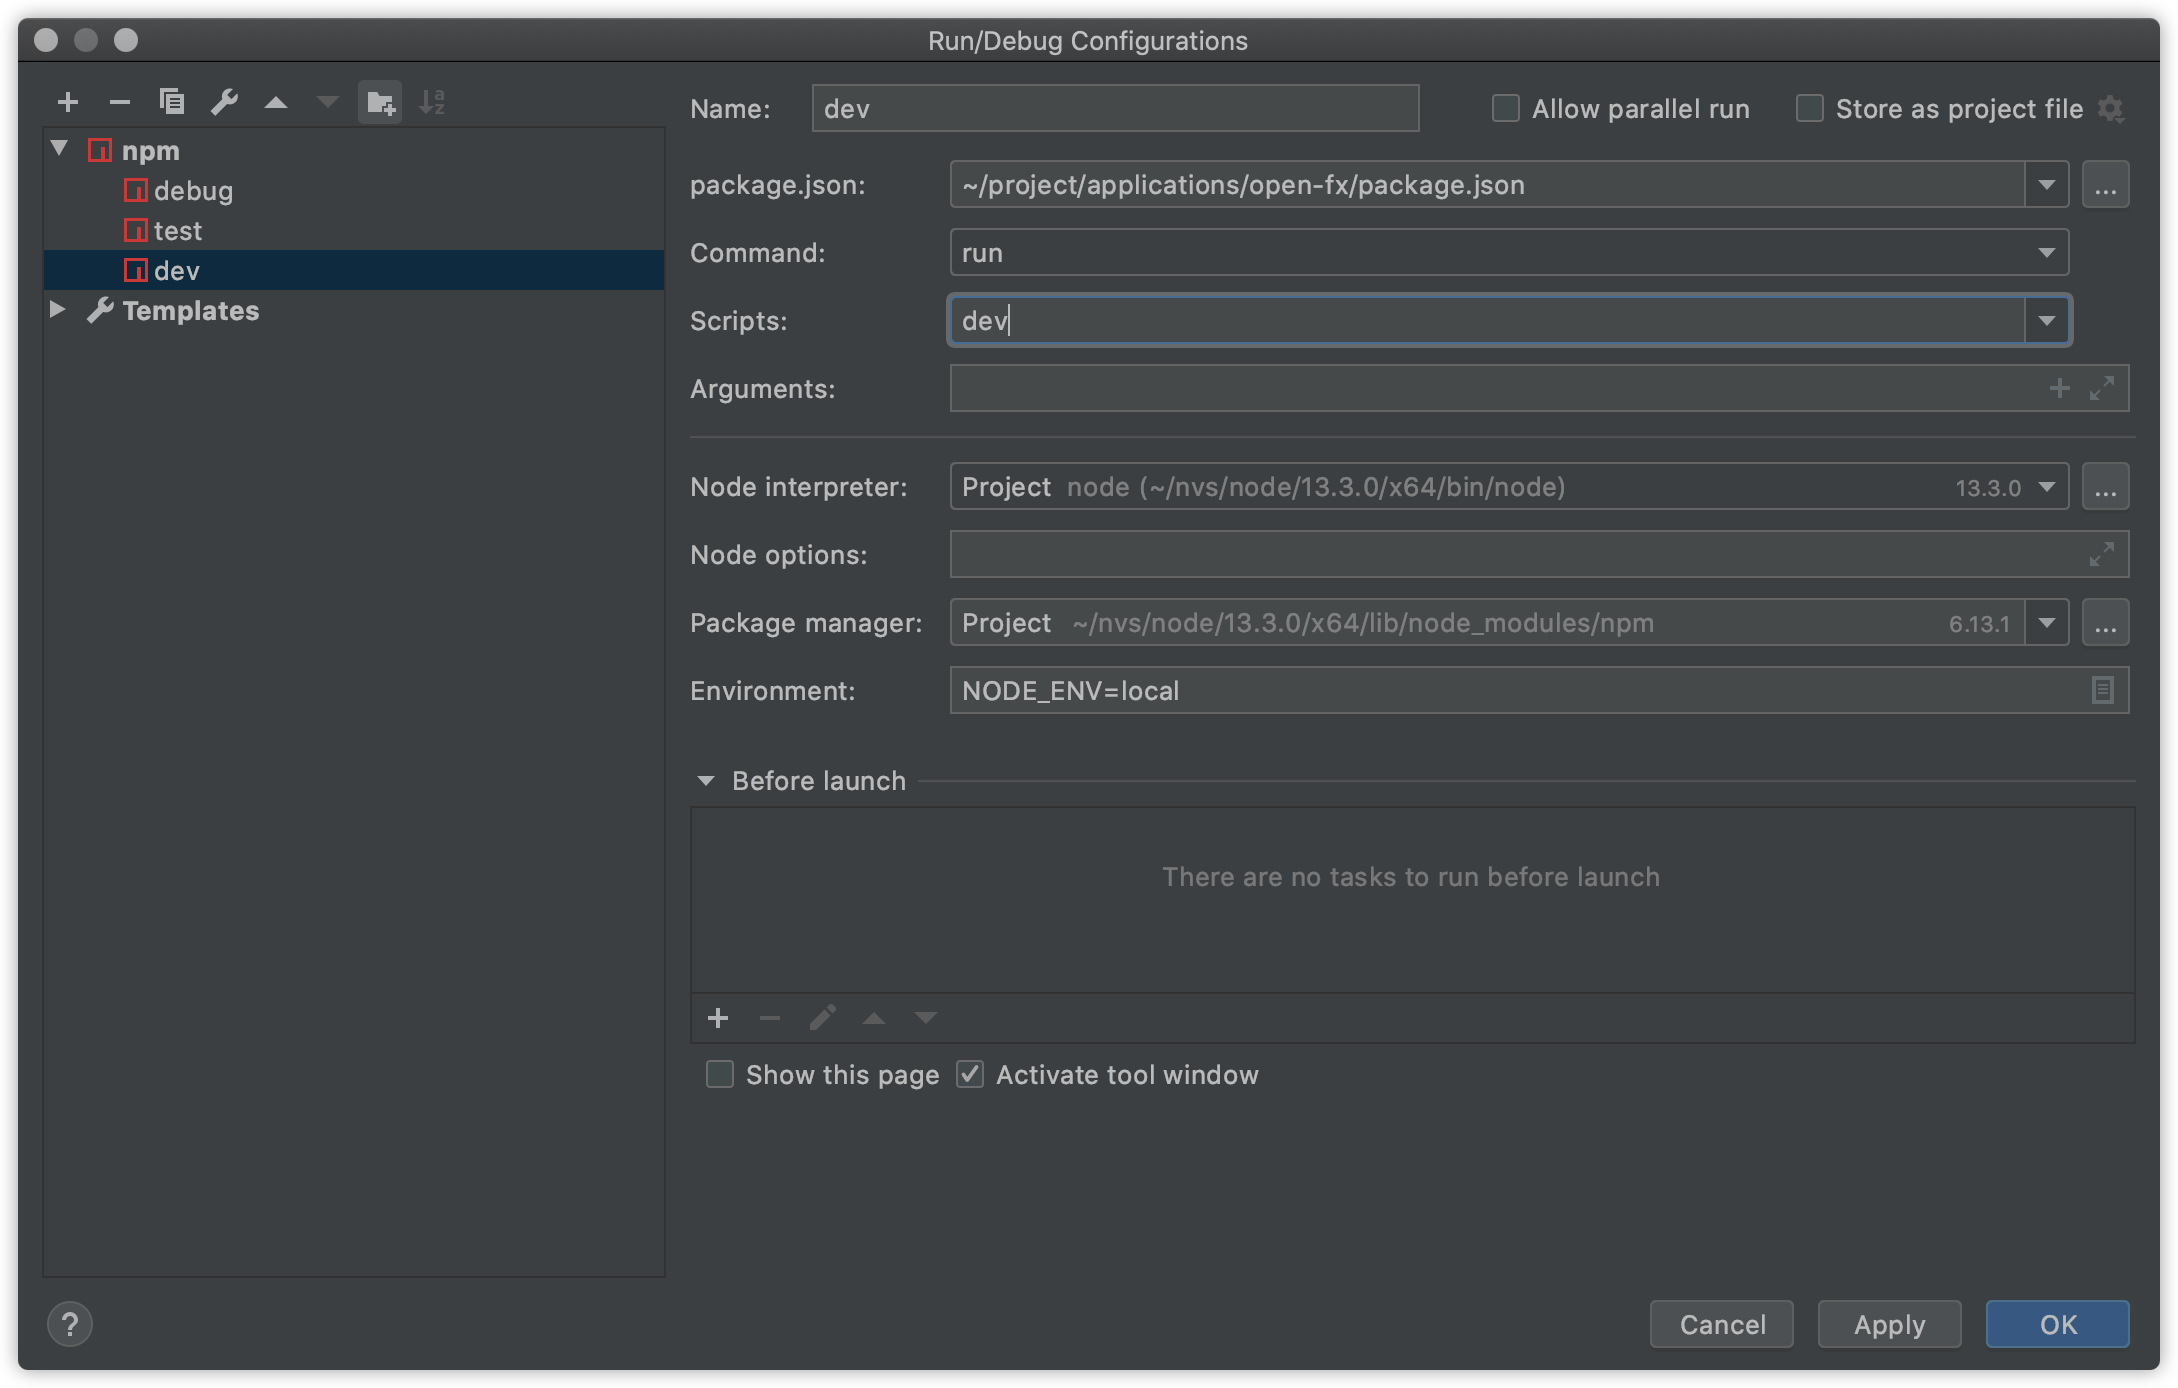
调试模式下: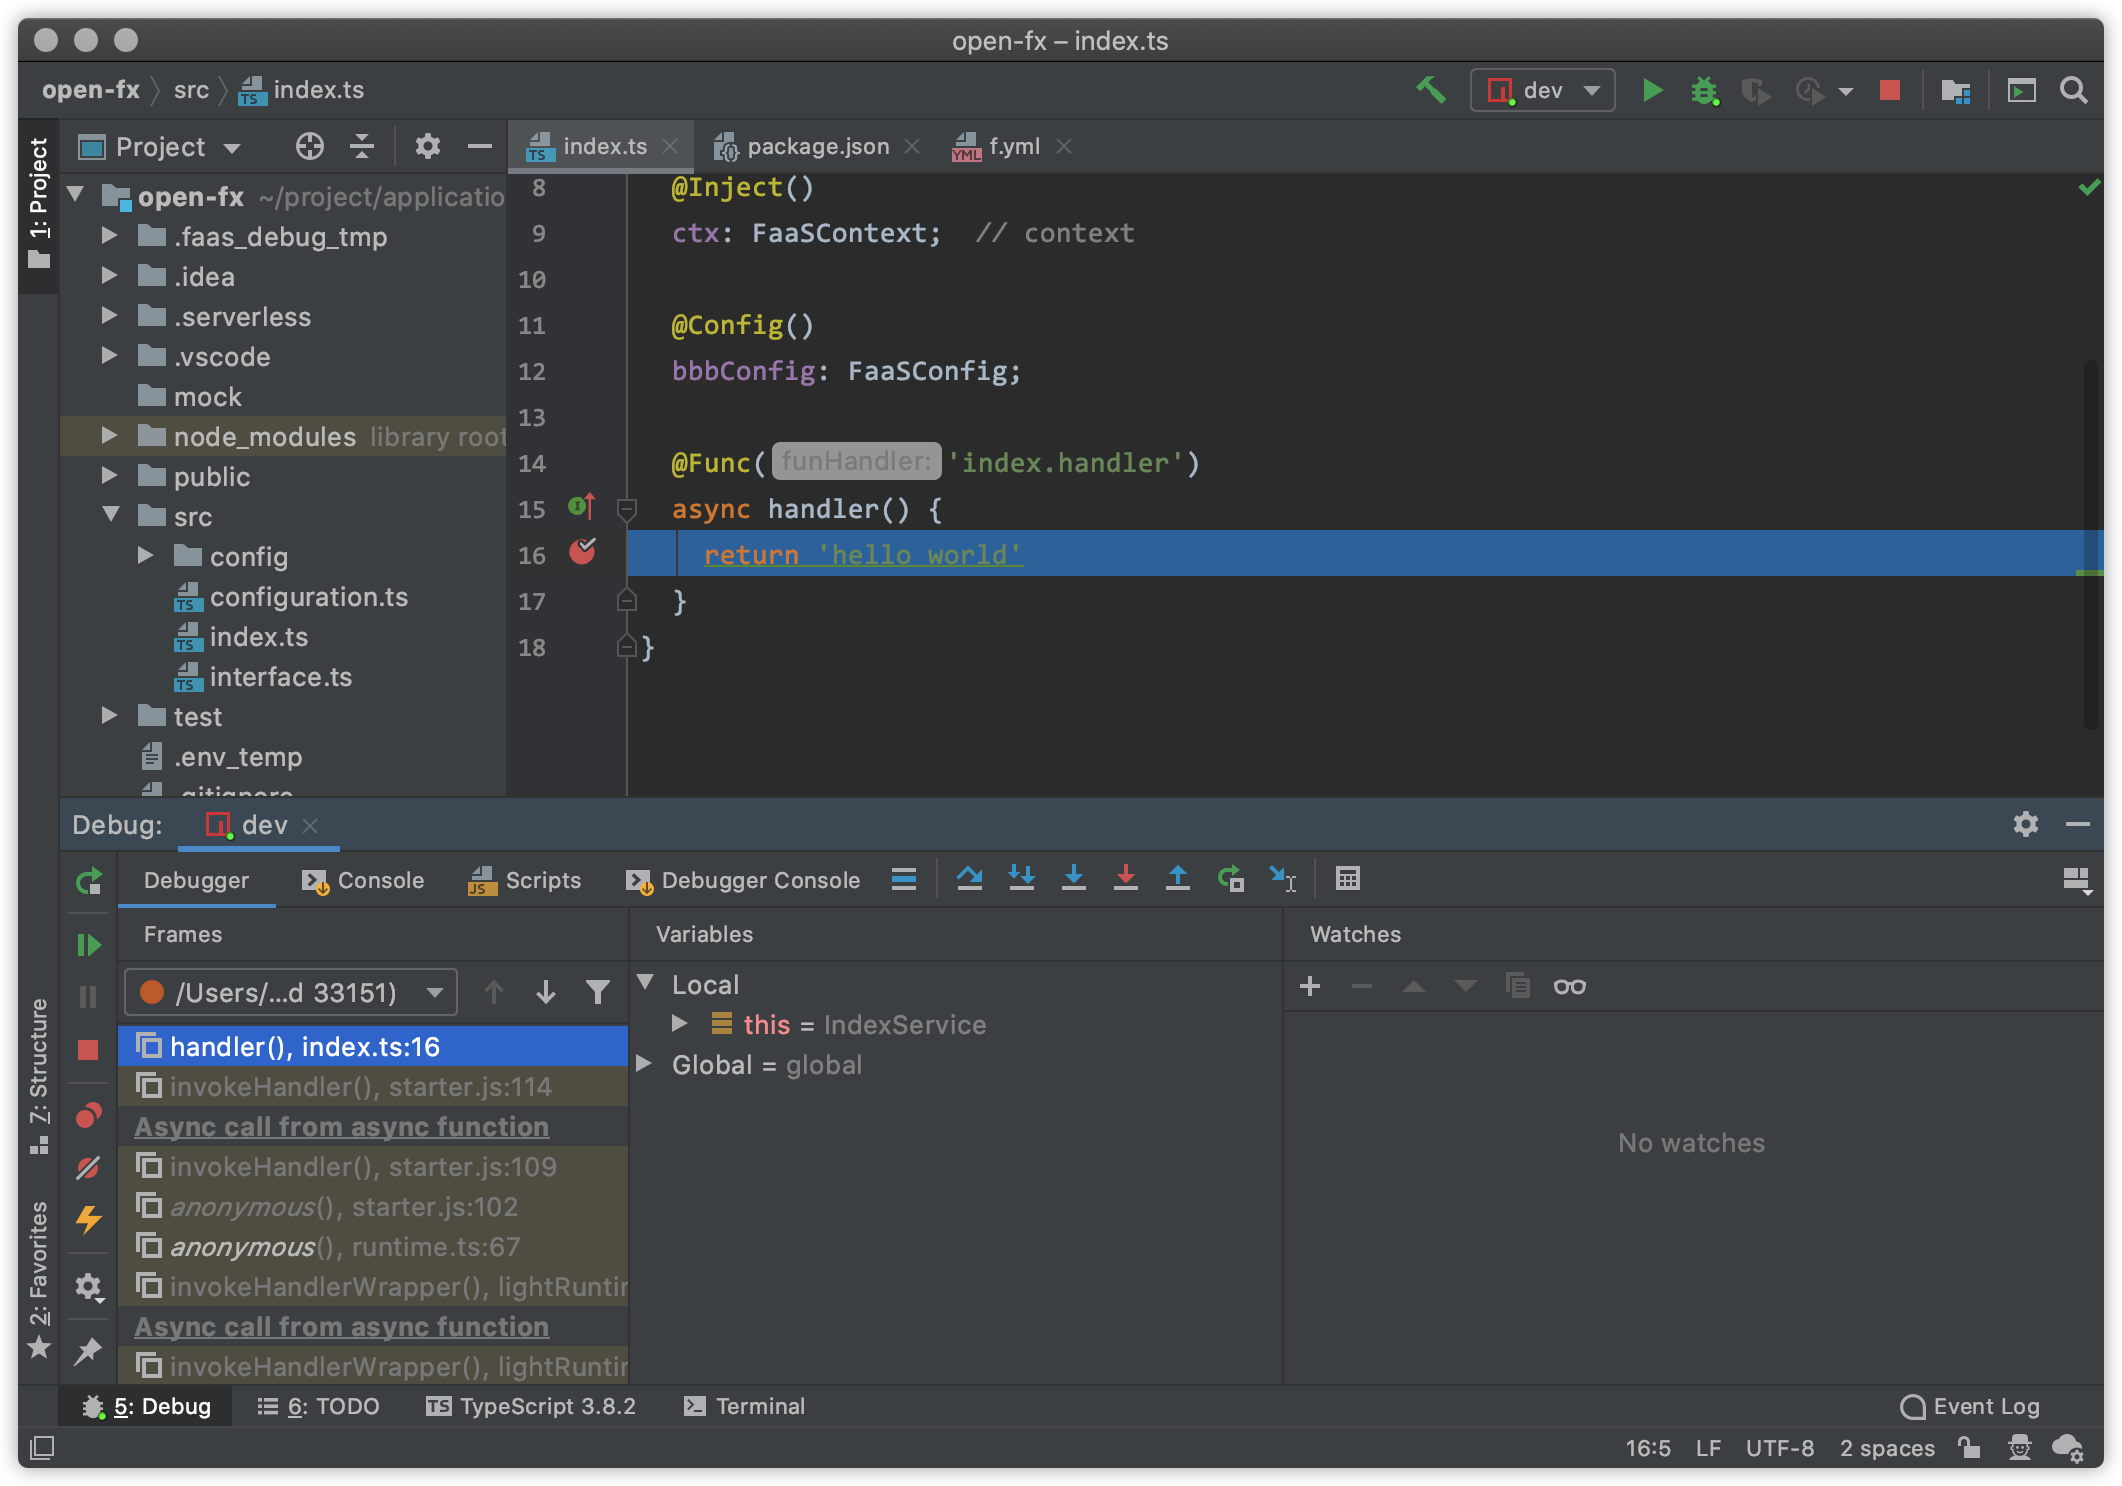
欢迎关注 ➡️ 

若有收获,就点个赞吧
0 人点赞
