预备知识
效果图
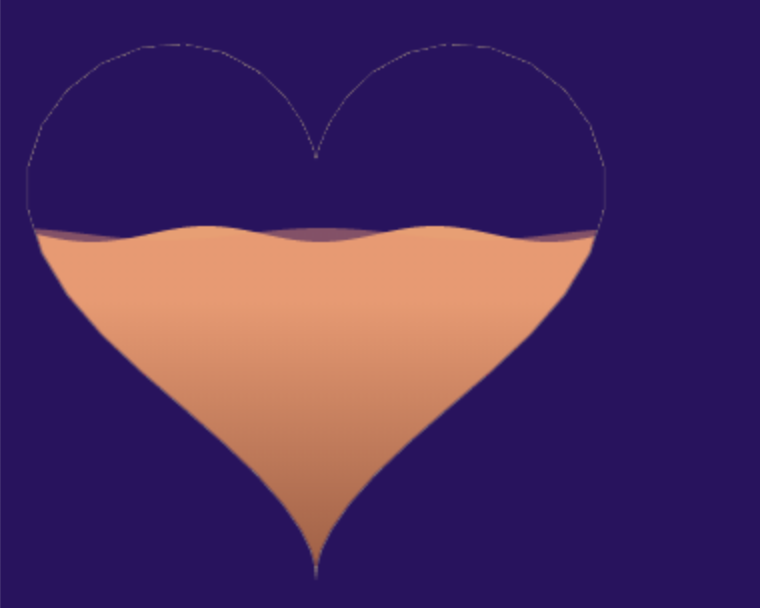
- 有波浪滚动效果
- 有爱心有细长的尖
波浪效果的原理
利用 视觉差 产出波浪的效果,由两个正弦曲线做相对运动
正弦曲线公式
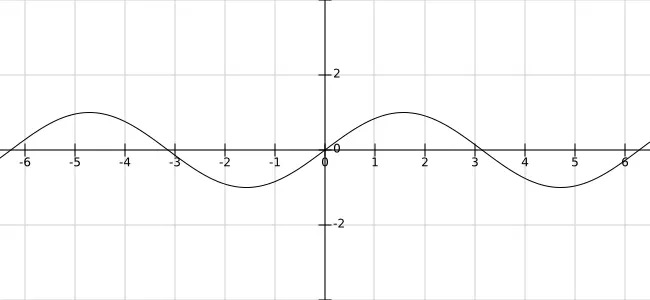
正弦曲线公式:y = A sin(Bx + C) + D
A 控制振幅,A 值越大,波峰和波谷越大,A 值越小,波峰和波谷越小;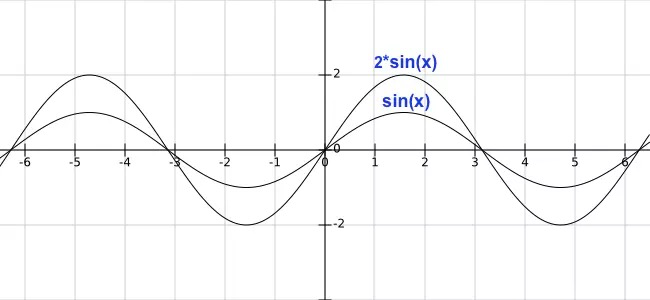
B 值会影响周期,B 值越大,那么周期越短,B 值越小,周期越长。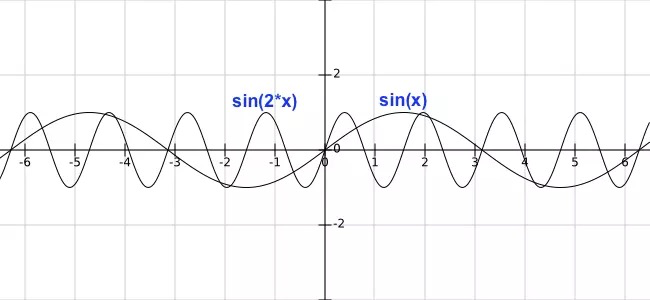
C 值会影响图像左右移动,C 值为正数,图像右移,C 值为负数,图像左移。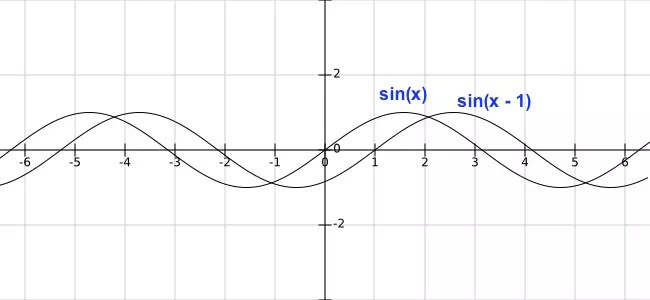
D 值控制上下移动。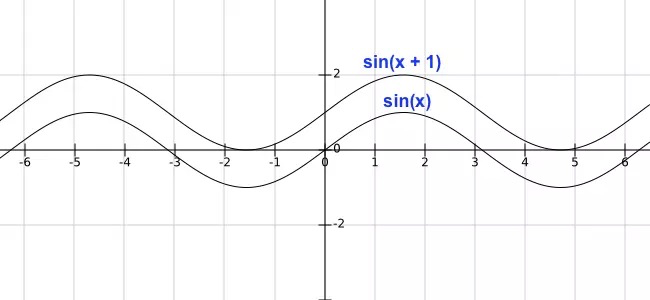
振幅:控制波浪的高度
周期:控制波浪的宽度
相移:控制波浪的水平移动
垂直位移:控制水位的高度
动画效果的实现主要是利用相移,通过不断水平移动曲线,产出波浪移动的感觉,然后可以绘制多条曲线,
曲线之间通过控制属性(高度、宽度、移动速度),产生视觉差,就会有波浪起伏的感觉了。
桃心的方程
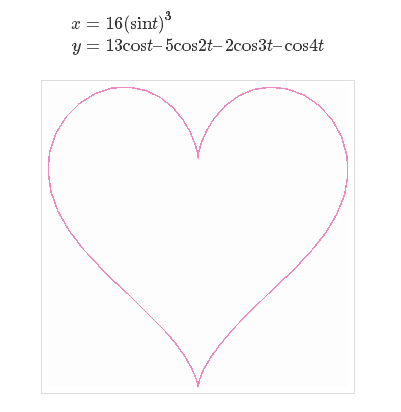
桃心的方程在网上可以找到
波浪的特性
绘制桃心
const canvas = document.getElementById("ydtyest");const ctx = canvas.getContext("2d");const drawHeart = (ctx, x = 150, y = 130, a = 9) => {}//绘制心形状drawHeart(ctx);
获取桃心的绘制点
根据桃心的方程,将桃心拆分多份,获取每个断点(绘制点)的坐标
const drawHeart = (ctx, x = 150, y = 130, a = 9) => {//所有心上小点的集合const vectors = [];const partNum = 50; //绘制的点数,点数越多,图形越细腻for (let i = 0; i < partNum; i++) {//设置一下心上两点之间的角度 具体分成多少份const step = i / partNum * (Math.PI * 2);const vector = {x: a * (16 * Math.pow(Math.sin(step), 3)),y: a * (13 * Math.cos(step) - 5 * Math.cos(2 * step) - 2 * Math.cos(3 * step) - Math.cos(4 *step))}vectors.push(vector);}}
画桃心
拿到桃心的点集合后,就可以开始绘制桃心
const drawHeart = (ctx, x = 150, y = 130, a = 9) => {//...ctx.save();ctx.beginPath();ctx.translate(x, y); //平移桃心图形。通过公式获取的部分点在坐标轴的其他象限,看不到ctx.rotate(Math.PI);//旋转桃心,因为一开始绘制的桃心的倒的for (let i = 0; i < partNum; i++) {const vector = vectors[i];ctx.lineTo(vector.x, vector.y);}ctx.strokeStyle = "rgba(186,165,130,0.6)";ctx.lineWidth = 2;ctx.stroke();ctx.restore();ctx.clip();//为使后面的波浪只在桃心内显示}//绘制心形状drawHeart(ctx);
画曲线的原理:曲线其实也是由多个点连线组成的,点越多,曲线越顺滑
绘制波浪
定义波浪的类及属性
class Wave {constructor({canvasWidth, //轴长canvasHeight, //轴高waveWidth = 0.055, //波浪的宽度 == BwaveHeight = 6, //设置波浪的高度 == Aspeed = 0.04,xOffset = 0, //水平的位置 == Ccolors = ["#F39C6B", "#A0563B"]}) {this.points = [];this.startX = 0;this.colors = colors;this.canvasWidth = canvasWidth;this.canvasHeight = canvasHeight;this.waveWidth = waveWidth;this.waveHeight = waveHeight;this.speed = speed;this.xOffset = xOffset;}}
更新波浪的坐标
class Wave{//...//更新当前的波浪update({nowRange} = {}) {this.points = [];const {startX,canvasWidth,canvasHeight,waveWidth,waveHeight,speed,xOffset} = this;//nowrRange == Dfor (let x = startX; x < startX + canvasWidth; x += 20 / canvasWidth) {//y = A sin(Bx + C) + D//y = 波浪高度 * sin(x*波浪的宽度 + 水平位移)const y = waveHeight * Math.sin((startX + x) * waveWidth + xOffset);const dY = canvasHeight * (1 - (nowRange / 100));this.points.push([x, y + dY])}this.xOffset += this.speed;}}
绘制波浪方法
图形的绘制方法放在图形的类中
class Wave{//...//进行波浪内部的绘制draw(ctx) {ctx.save();const points = this.points;ctx.beginPath();for (let i = 0; i < points.length; i++) {//point = {x:,y:}const point = points[i];ctx.lineTo(point[0], point[1]);}//跟踪一下他的linetoctx.lineTo(this.canvasWidth,this.canvasHeight);ctx.lineTo(this.startX,this.canvasHeight);ctx.fillStyle = this.getChartColor(ctx);ctx.fill();ctx.restore();}}
设置波浪的渐变色
class Wave{//...getChartColor(ctx) {const radius = this.canvasWidth / 2;const grd = ctx.createLinearGradient(radius, radius, radius, this.canvasHeight);grd.addColorStop(0, this.colors[0]);grd.addColorStop(1, this.colors[1]);return grd;}}
把波浪绘制到桃心里
//声明两个波浪this.wave1 = new Wave({canvasWidth: 300,canvasHeight: 300,waveWidth: 0.055,waveHeight: 4,speed: 0.04,xOffset: 0, //初始化的偏移});this.wave2 = new Wave({canvasWidth: 300,canvasHeight: 300,waveWidth: 0.04,waveHeight: 3,speed: 0.02,colors : ["rgba(243,145,107,0.48)", "rgba(160,86,59,0.48)"],xOffset: 2, //初始化的偏移});let nowRange = 0;let rangeRange = 60;const draw = () => {//清空ctx.clearRect(0,0,300,300);if (nowRange <= rangeRange) {nowRange += 1;}//把波浪绘制到心里//更新当前的位置this.wave1.update({nowRange});//重新绘制当前的相移动this.wave1.draw(ctx);this.wave2.update({nowRange});this.wave2.draw(ctx);window.requestAnimationFrame(draw);}draw();
小结
1.容易把图形画反,需要调整绘制的顺序
2.每次重新绘制前,都要将画板清空
源码:
yd-wave.zip

若有收获,就点个赞吧
0 人点赞
