前言:
在 Flutter 应用中,导航栏切换页面后默认情况下会丢失原页面状态,即每次进入页面时都会重新初始化状态,如果在initState中打印日志,会发现每次进入时都会输出,显然这样增加了额外的开销,并且带来了不好的用户体验。
在正文之前,先看一些常见的 App 导航,以喜马拉雅 FM 为例:

它拥有一个固定的底部导航以及首页的顶部导航,可以看到不管是点击底部导航切换页面还是在首页左右侧滑切换页面,之前的页面状态都是始终维持的,下面就具体介绍下如何在 flutter 中实现类似喜马拉雅的导航效果
第一步:实现固定的底部导航
在通过flutter create生成的项目模板中,我们先简化一下代码,将MyHomePage提取到一个单独的home.dart文件,并在Scaffold脚手架中添加bottomNavigationBar底部导航,在body中展示当前选中的子页面。
/// home.dartimport 'package:flutter/material.dart';import './pages/first_page.dart';import './pages/second_page.dart';import './pages/third_page.dart';class MyHomePage extends StatefulWidget {@override_MyHomePageState createState() => _MyHomePageState();}class _MyHomePageState extends State<MyHomePage> {final items = [BottomNavigationBarItem(icon: Icon(Icons.home), title: Text('首页')),BottomNavigationBarItem(icon: Icon(Icons.music_video), title: Text('听')),BottomNavigationBarItem(icon: Icon(Icons.message), title: Text('消息'))];final bodyList = [FirstPage(), SecondPage(), ThirdPage()];int currentIndex = 0;void onTap(int index) {setState(() {currentIndex = index;});}@overrideWidget build(BuildContext context) {return Scaffold(appBar: AppBar(title: Text('demo'),),bottomNavigationBar: BottomNavigationBar(items: items,currentIndex: currentIndex,onTap: onTap),body: bodyList[currentIndex]);}}
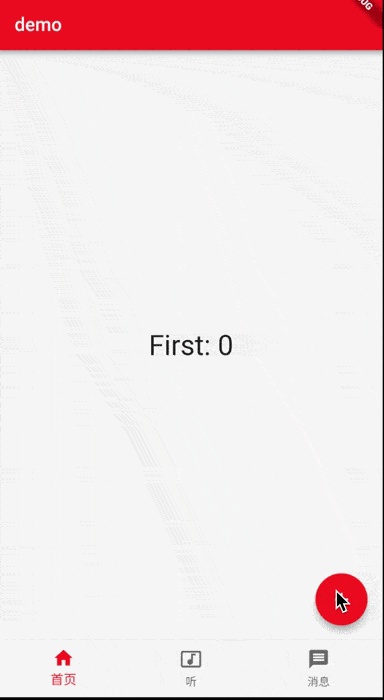
其中的三个子页面结构相同,均显示一个计数器和一个加号按钮,以first_page.dart为例:
/// first_page.dartimport 'package:flutter/material.dart';class FirstPage extends StatefulWidget {@override_FirstPageState createState() => _FirstPageState();}class _FirstPageState extends State<FirstPage> {int count = 0;void add() {setState(() {count++;});}@overrideWidget build(BuildContext context) {return Scaffold(body: Center(child: Text('First: $count', style: TextStyle(fontSize: 30))),floatingActionButton: FloatingActionButton(onPressed: add,child: Icon(Icons.add),));}}
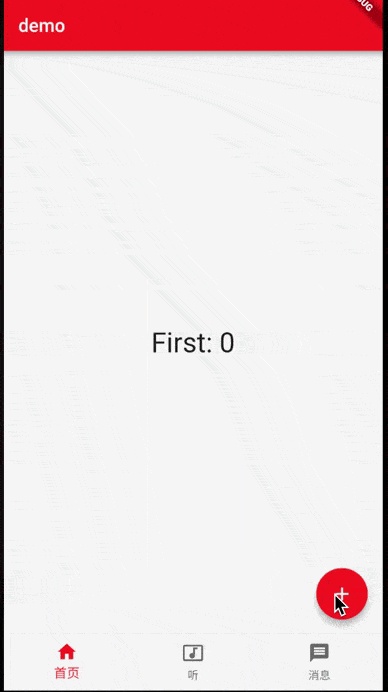
当前效果如下:
第二步:实现底部导航切换时保持原页面状态
可能有些小伙伴在搜索后会开始直接使用官方推荐的AutomaticKeepAliveClientMixin,通过在子页面的 State 类重写wantKeepAlive为true 。 然而,如果你的代码和我上面的类似,body 中并没有使用PageView或TabBarView,很不幸的告诉你,踩到坑了,这样是无效的,原因后面再详述。现在我们先来介绍另外两种方式:
① 使用IndexedStack实现IndexedStack继承自Stack,它的作用是显示第index个child,其它child在页面上是不可见的,但所有child的状态都被保持,所以这个Widget可以实现我们的需求,我们只需要将现在的body用IndexedStack包裹一层即可
/// home.dartclass _MyHomePageState extends State<MyHomePage> {.........@overrideWidget build(BuildContext context) {return Scaffold(appBar: AppBar(title: Text('demo'),),bottomNavigationBar: BottomNavigationBar(items: items, currentIndex: currentIndex, onTap: onTap),// body: bodyList[currentIndex]body: IndexedStack(index: currentIndex,children: bodyList,));}
保存后再次测试一下
② 使用Offstage实现Offstage的作用十分简单,通过一个参数来控制child是否显示,所以我们同样可以组合使用Offstage来实现该需求,其实现原理与IndexedStack类似
/// home.dartclass _MyHomePageState extends State<MyHomePage> {.........@overrideWidget build(BuildContext context) {return Scaffold(appBar: AppBar(title: Text('demo'),),bottomNavigationBar: BottomNavigationBar(items: items, currentIndex: currentIndex, onTap: onTap),// body: bodyList[currentIndex],body: Stack(children: [Offstage(offstage: currentIndex != 0,child: bodyList[0],),Offstage(offstage: currentIndex != 1,child: bodyList[1],),Offstage(offstage: currentIndex != 2,child: bodyList[2],),],));}}
在上面的两种方式中都可以实现保持原页面状态的需求,但这里有一些开销上的问题,有经验的小伙伴应该能发现当应用第一次加载的时候,所有子页状态都被实例化了(>这里的细节并不是因为我直接把子页实例化放在bodyList里…<),如果在子页State的initState中打印日志,可以在终端看到一次性输出了所有子页的日志。下面就介绍另一种通过继承AutomaticKeepAliveClientMixin的方式来更好的实现保持状态。
第三步:实现首页的顶部导航
首先我们通过配合使用TabBar+TabBarView+AutomaticKeepAliveClientMixin来实现顶部导航(注意:TabBar和TabBarView需要提供controller,如果自己没有定义,则必须使用DefaultTabController包裹)。此处也可以选择使用PageView,后面会介绍。
我们先在home.dart文件移除Scaffold脚手架中的appBar顶部工具栏,然后开始重写首页first_page.dart:
/// first_page.dartimport 'package:flutter/material.dart';import './recommend_page.dart';import './vip_page.dart';import './novel_page.dart';import './live_page.dart';class _TabData {final Widget tab;final Widget body;_TabData({this.tab, this.body});}final _tabDataList = <_TabData>[_TabData(tab: Text('推荐'), body: RecommendPage()),_TabData(tab: Text('VIP'), body: VipPage()),_TabData(tab: Text('小说'), body: NovelPage()),_TabData(tab: Text('直播'), body: LivePage())];class FirstPage extends StatefulWidget {@override_FirstPageState createState() => _FirstPageState();}class _FirstPageState extends State<FirstPage> {final tabBarList = _tabDataList.map((item) => item.tab).toList();final tabBarViewList = _tabDataList.map((item) => item.body).toList();@overrideWidget build(BuildContext context) {return DefaultTabController(length: tabBarList.length,child: Column(children: <Widget>[Container(width: double.infinity,height: 80,padding: EdgeInsets.fromLTRB(20, 24, 0, 0),alignment: Alignment.centerLeft,color: Colors.black,child: TabBar(isScrollable: true,indicatorColor: Colors.red,indicatorSize: TabBarIndicatorSize.label,unselectedLabelColor: Colors.white,unselectedLabelStyle: TextStyle(fontSize: 18),labelColor: Colors.red,labelStyle: TextStyle(fontSize: 20),tabs: tabBarList),),Expanded(child: TabBarView(children: tabBarViewList,// physics: NeverScrollableScrollPhysics(), // 禁止滑动))],));}}
其中推荐页、VIP 页、小说页、直播页的结构仍和之前的首页结构相同,仅显示一个计数器和一个加号按钮,以推荐页recommend_page.dart为例:
/// recommend_page.dartimport 'package:flutter/material.dart';class RecommendPage extends StatefulWidget {@override_RecommendPageState createState() => _RecommendPageState();}class _RecommendPageState extends State<RecommendPage> {int count = 0;void add() {setState(() {count++;});}@overridevoid initState() {super.initState();print('recommend initState');}@overrideWidget build(BuildContext context) {return Scaffold(body:Center(child: Text('首页推荐: $count', style: TextStyle(fontSize: 30))),floatingActionButton: FloatingActionButton(onPressed: add,child: Icon(Icons.add),));}}
保存后测试,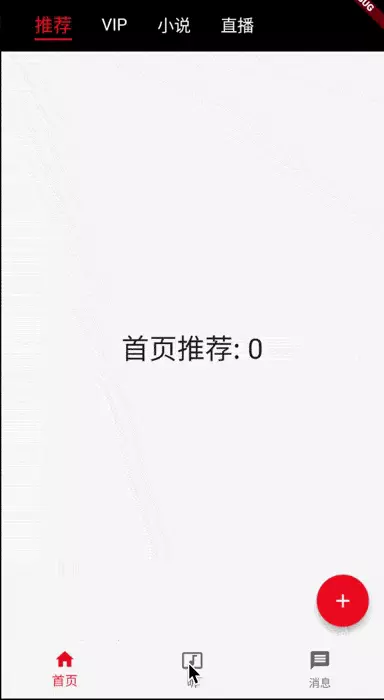
可以看到,现在添加了首页顶部导航,且默认支持左右侧滑,接下来再进一步的完善状态保持
第四步:实现首页顶部导航切换时保持原页面状态
③ 使用AutomaticKeepAliveClientMixin实现
写到这里已经很简单了,我们只需要在首页导航内需要保持页面状态的子页State中,继承AutomaticKeepAliveClientMixin并重写wantKeepAlive为true即可。notes:Subclasses must implement wantKeepAlive, and their build methods must call super.build (the return value will always return null, and should be ignored)
以首页推荐recommend_page.dart为例:
/// recommend_page.dartimport 'package:flutter/material.dart';class RecommendPage extends StatefulWidget {@override_RecommendPageState createState() => _RecommendPageState();}class _RecommendPageState extends State<RecommendPage>with AutomaticKeepAliveClientMixin {int count = 0;void add() {setState(() {count++;});}@overridebool get wantKeepAlive => true;@overridevoid initState() {super.initState();print('recommend initState');}@overrideWidget build(BuildContext context) {super.build(context);return Scaffold(body:Center(child: Text('首页推荐: $count', style: TextStyle(fontSize: 30))),floatingActionButton: FloatingActionButton(onPressed: add,child: Icon(Icons.add),));}}
再次保存测试,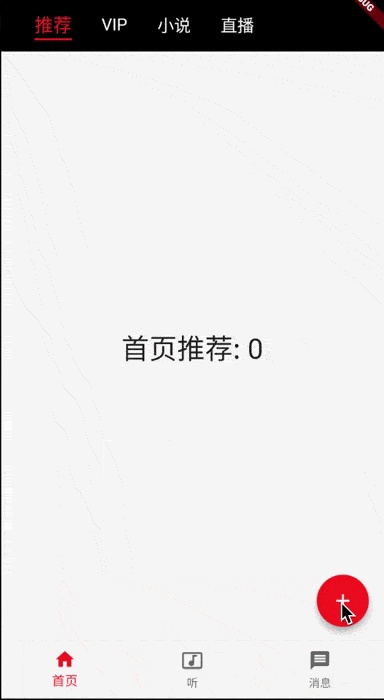
现在已经可以看到,不管是切换底部导航还是切换首页顶部导航,所有的页面状态都可以被保持,并且在应用第一次加载时,终端只看到recommend initState的日志,第一次切换首页顶部导航至 vip 页面时,终端输出vip initState,当再次返回推荐页时,不再输出recommend initState。
所以,使用TabBarView+AutomaticKeepAliveClientMixin这种方式既实现了页面状态的保持,又具有类似惰性求值的功能,对于未使用的页面状态不会进行实例化,减小了应用初始化时的开销。
更新
前面在底部导航介绍了使用IndexedStack和Offstage两种方式实现保持页面状态,但它们的缺点在于第一次加载时便实例化了所有的子页面State。为了进一步优化,下面我们使用PageView+AutomaticKeepAliveClientMixin重写之前的底部导航,其中PageView和TabBarView的实现原理类似,具体选择哪一个并没有强制要求。更新后的home.dart文件如下:
/// home.dartimport 'package:flutter/material.dart';import './pages/first_page.dart';import './pages/second_page.dart';import './pages/third_page.dart';class MyHomePage extends StatefulWidget {@override_MyHomePageState createState() => _MyHomePageState();}class _MyHomePageState extends State<MyHomePage> {final items = [BottomNavigationBarItem(icon: Icon(Icons.home), title: Text('首页')),BottomNavigationBarItem(icon: Icon(Icons.music_video), title: Text('听')),BottomNavigationBarItem(icon: Icon(Icons.message), title: Text('消息'))];final bodyList = [FirstPage(), SecondPage(), ThirdPage()];final pageController = PageController();int currentIndex = 0;void onTap(int index) {pageController.jumpToPage(index);}void onPageChanged(int index) {setState(() {currentIndex = index;});}@overrideWidget build(BuildContext context) {return Scaffold(bottomNavigationBar: BottomNavigationBar(items: items, currentIndex: currentIndex, onTap: onTap),// body: bodyList[currentIndex],body: PageView(controller: pageController,onPageChanged: onPageChanged,children: bodyList,physics: NeverScrollableScrollPhysics(), // 禁止滑动));}}
然后在bodyList的子页State中继承AutomaticKeepAliveClientMixin并重写wantKeepAlive,以second_page.dart为例:
/// second_page.dartimport 'package:flutter/material.dart';class SecondPage extends StatefulWidget {@override_SecondPageState createState() => _SecondPageState();}class _SecondPageState extends State<SecondPage>with AutomaticKeepAliveClientMixin {int count = 0;void add() {setState(() {count++;});}@overridebool get wantKeepAlive => true;@overridevoid initState() {super.initState();print('second initState');}@overrideWidget build(BuildContext context) {super.build(context);return Scaffold(body: Center(child: Text('Second: $count', style: TextStyle(fontSize: 30))),floatingActionButton: FloatingActionButton(onPressed: add,child: Icon(Icons.add),));}}
Ok,更新后保存运行,应用第一次加载时不会输出second initState,仅当第一次点击底部导航切换至该页时,该子页的State被实例化。
至此,如何实现一个类似的 底部 + 首页顶部导航 完结 ~

若有收获,就点个赞吧
0 人点赞
