相对布局。有两种选择:
相对父级容器确定自身位置;
相对兄弟元素确定自身位置。
相对父级容器定位
默认在左上角
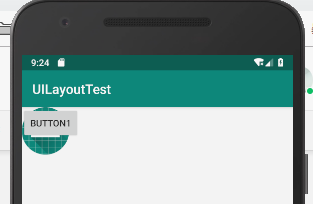
下面最外层容器是 RelativeLayout 布局,宽高都适合手机屏一样的。内部有两个控件 Button 和 ImageView,如果子控件没有添加相对定位相关属性,默认都是位于父容器左上角的。
<RelativeLayoutandroid:layout_height="match_parent"android:layout_width="match_parent"xmlns:android="http://schemas.android.com/apk/res/android"><Buttonandroid:layout_height="wrap_content"android:layout_width="wrap_content"android:text="Button1"/><ImageViewandroid:layout_width="wrap_content"android:layout_height="wrap_content"android:src="@mipmap/ic_launcher"/></RelativeLayout>
子控件没写相对定位相关属性,默认都会位于父容器左上角,多个子控件位置会重叠。
相对父容器定位相关属性
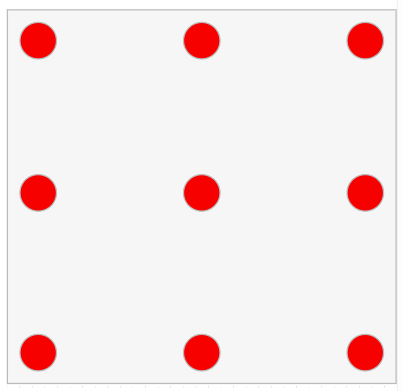
android:layout_alignParentTop="true"android:layout_alignParentBottom="true"android:layout_alignParentLeft="true"android:layout_alignParentRight="true"android:layout_centerHorizontal="true" 相对父容器水平居中android:layout_centerVertical="true" 相对父容器垂直居中android:layout_centerInParent="true" 相对父容器垂直+水平居中android:layout_alignParentEnd="true"android:layout_alignParentStart="true"
�
子控件只能位于父容器下面红圈所在位置。上下左右或拐角的位置。
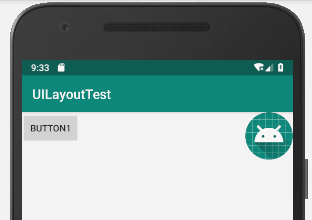
场景一:左右
<RelativeLayoutandroid:layout_height="match_parent"android:layout_width="match_parent"xmlns:android="http://schemas.android.com/apk/res/android"><Buttonandroid:layout_height="wrap_content"android:layout_width="wrap_content"android:layout_alignParentLeft="true"android:text="Button1"/><ImageViewandroid:layout_width="wrap_content"android:layout_height="wrap_content"android:layout_alignParentRight="true"android:src="@mipmap/ic_launcher"/></RelativeLayout>
上述代码两个子控件一个在左边,一个在右边。
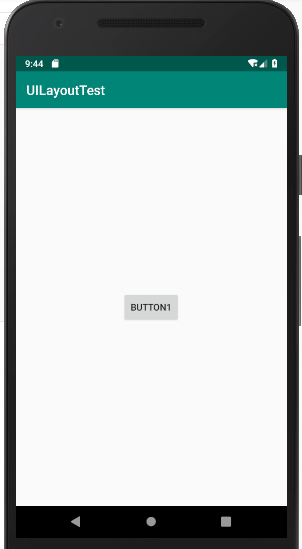
场景二:垂直水平居中
<RelativeLayoutandroid:layout_height="match_parent"android:layout_width="match_parent"xmlns:android="http://schemas.android.com/apk/res/android"><Buttonandroid:layout_height="wrap_content"android:layout_width="wrap_content"android:layout_centerInParent="true"android:text="Button1"/></RelativeLayout>
只有 layout_centerInParent 时控件相对于父容器垂直水平居中。
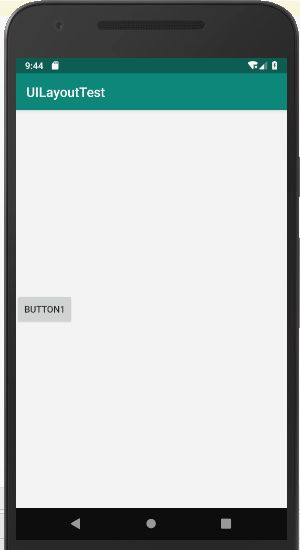
场景三:左居中
<RelativeLayoutandroid:layout_height="match_parent"android:layout_width="match_parent"xmlns:android="http://schemas.android.com/apk/res/android"><Buttonandroid:layout_height="wrap_content"android:layout_width="wrap_content"android:layout_alignParentLeft="true"android:layout_centerInParent="true"android:text="Button1"/></RelativeLayout>
layout_alignParentLeft 设置子控件位于父容器左边位置,layout_centerInParent 设置子控件在左边居中,如下:
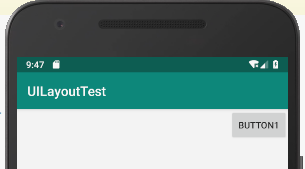
场景四:右上
<RelativeLayoutandroid:layout_height="match_parent"android:layout_width="match_parent"xmlns:android="http://schemas.android.com/apk/res/android"><Buttonandroid:layout_height="wrap_content"android:layout_width="wrap_content"android:layout_alignParentRight="true"android:layout_alignParentTop="true"android:text="Button1"/></RelativeLayout>
同时设置 layout_alignParentTop 和 layout_alignParentRight 设置子控件右上角,以此类推。
相对兄弟元素定位
android:layout_toLeftOf="@id/button_1"android:layout_toRightOf="@id/button_1"android:layout_above="@id/button_1"android:layout_below="@id/button_1"
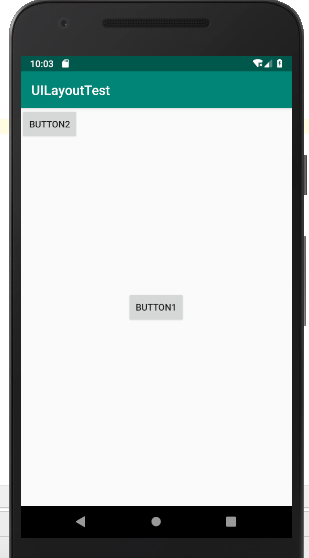
场景一:默认位置
<RelativeLayoutandroid:layout_height="match_parent"android:layout_width="match_parent"xmlns:android="http://schemas.android.com/apk/res/android"><Buttonandroid:id="@+id/button_1"android:layout_height="wrap_content"android:layout_width="wrap_content"android:layout_centerInParent="true"android:text="Button1"/><Buttonandroid:layout_height="wrap_content"android:layout_width="wrap_content"android:text="Button2"/></RelativeLayout>
Button1 按钮垂直水平居中,Button2 按钮没有设置任何相对定位,默认居于父容器左上角,这一点做两层意思表达:
Button2 默认水平位置居左;
Button2 默认垂直位置居上。
场景二:相对兄弟元素改变水平位置
<RelativeLayoutandroid:layout_height="match_parent"android:layout_width="match_parent"xmlns:android="http://schemas.android.com/apk/res/android"><Buttonandroid:id="@+id/button_1"android:layout_height="wrap_content"android:layout_width="wrap_content"android:layout_centerInParent="true"android:text="Button1"/><Buttonandroid:layout_height="wrap_content"android:layout_width="wrap_content"android:layout_toLeftOf="@id/button_1"android:text="Button2"/></RelativeLayout>
Button2 添加 layout_toLeftOf 属性,值为 Button1 的 ID 值,作用为水平位置相对于 Button1 移动到它的左边。看到 left/right 左右左右肯定是水平位置改变咯。此时垂直位置并未改变,仍然垂直居上。
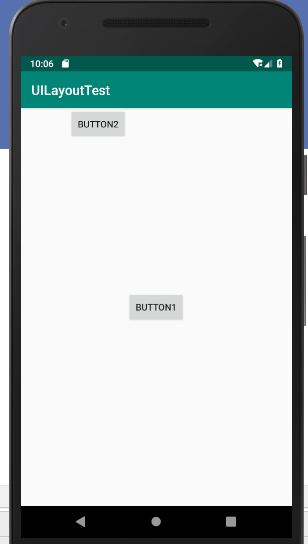
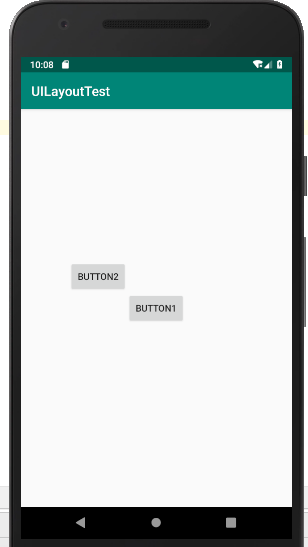
场景三:在场景二基础上修改垂直位置
<RelativeLayoutandroid:layout_height="match_parent"android:layout_width="match_parent"xmlns:android="http://schemas.android.com/apk/res/android"><Buttonandroid:id="@+id/button_1"android:layout_height="wrap_content"android:layout_width="wrap_content"android:layout_centerInParent="true"android:text="Button1"/><Buttonandroid:layout_height="wrap_content"android:layout_width="wrap_content"android:layout_toLeftOf="@id/button_1"android:layout_above="@id/button_1"android:text="Button2"/></RelativeLayout>
可以看到在场景二基础上 Button2 又添加了 layout_above 属性,看到 above/below 上下上下只改变垂直方向位置。Button2 的垂直方向改变到 Button1 的上方,结合场景二,即 Button2 位于 Button1 的左上角。
实际应用
应用一:小说列表页面
<LinearLayoutandroid:layout_height="100dp"android:layout_width="match_parent"android:paddingHorizontal="20dp"android:paddingVertical="10dp"android:background="#cccccc"xmlns:android="http://schemas.android.com/apk/res/android"><ImageViewandroid:layout_width="wrap_content"android:layout_height="match_parent"android:padding="10dp"android:src="@mipmap/ic_launcher"/><RelativeLayoutandroid:layout_width="0dp"android:layout_height="match_parent"android:paddingVertical="10dp"android:layout_weight="1"><TextViewandroid:layout_height="wrap_content"android:layout_width="wrap_content"android:text="兵者"android:textSize="20sp"/><TextViewandroid:layout_height="wrap_content"android:layout_width="wrap_content"android:text="作者:七品"android:textSize="16dp"android:layout_alignParentBottom="true"android:layout_alignParentRight="true"/><TextViewandroid:layout_width="wrap_content"android:layout_height="wrap_content"android:text="更新时间: 2018-11-23"android:textSize="16dp"android:layout_alignParentBottom="true"android:layout_alignParentLeft="true"/></RelativeLayout></LinearLayout>
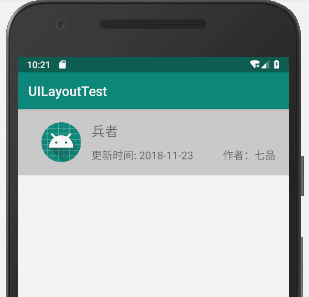
说明:
- 最外层是 LinearLayout 布局,将一行分为左右两个部分;
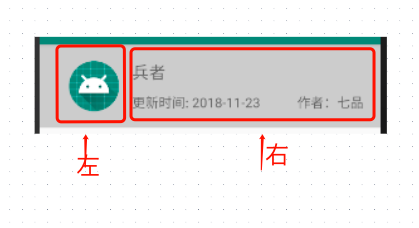
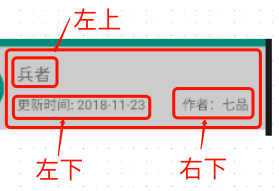
- 右边布局用 RelativeLayout 相对布局,内部就三个子控件,一个相对父容器左上,一个相对父容器左下,一个相对父容器右下。

若有收获,就点个赞吧
0 人点赞
