- 说明
- 添加HiveServer2
- 安装配置Haproxy
- ——————————————————————————————————-
- Example configuration for a possible web application. See the
- full configuration options online.
- http://haproxy.1wt.eu/download/1.4/doc/configuration.txt">http://haproxy.1wt.eu/download/1.4/doc/configuration.txt
- ——————————————————————————————————-
- ——————————————————————————————————-
- Global settings
- ——————————————————————————————————-
- ——————————————————————————————————-
- common defaults that all the ‘listen’ and ‘backend’ sections will
- use if not designated in their block
- ——————————————————————————————————-
- contimeout 5000
- clitimeout 50000
- srvtimeout 50000
- listen status
- Hive Server2
说明
如果集群用户过多,Hive中只有一个HiveSever2负载会比较高,返回数据会变慢
如果在添加一个HiveServer,连接不同的HiveServer2还需要修改beeline连接串
综上,所以需要配置HiveServer2负载均衡
添加HiveServer2
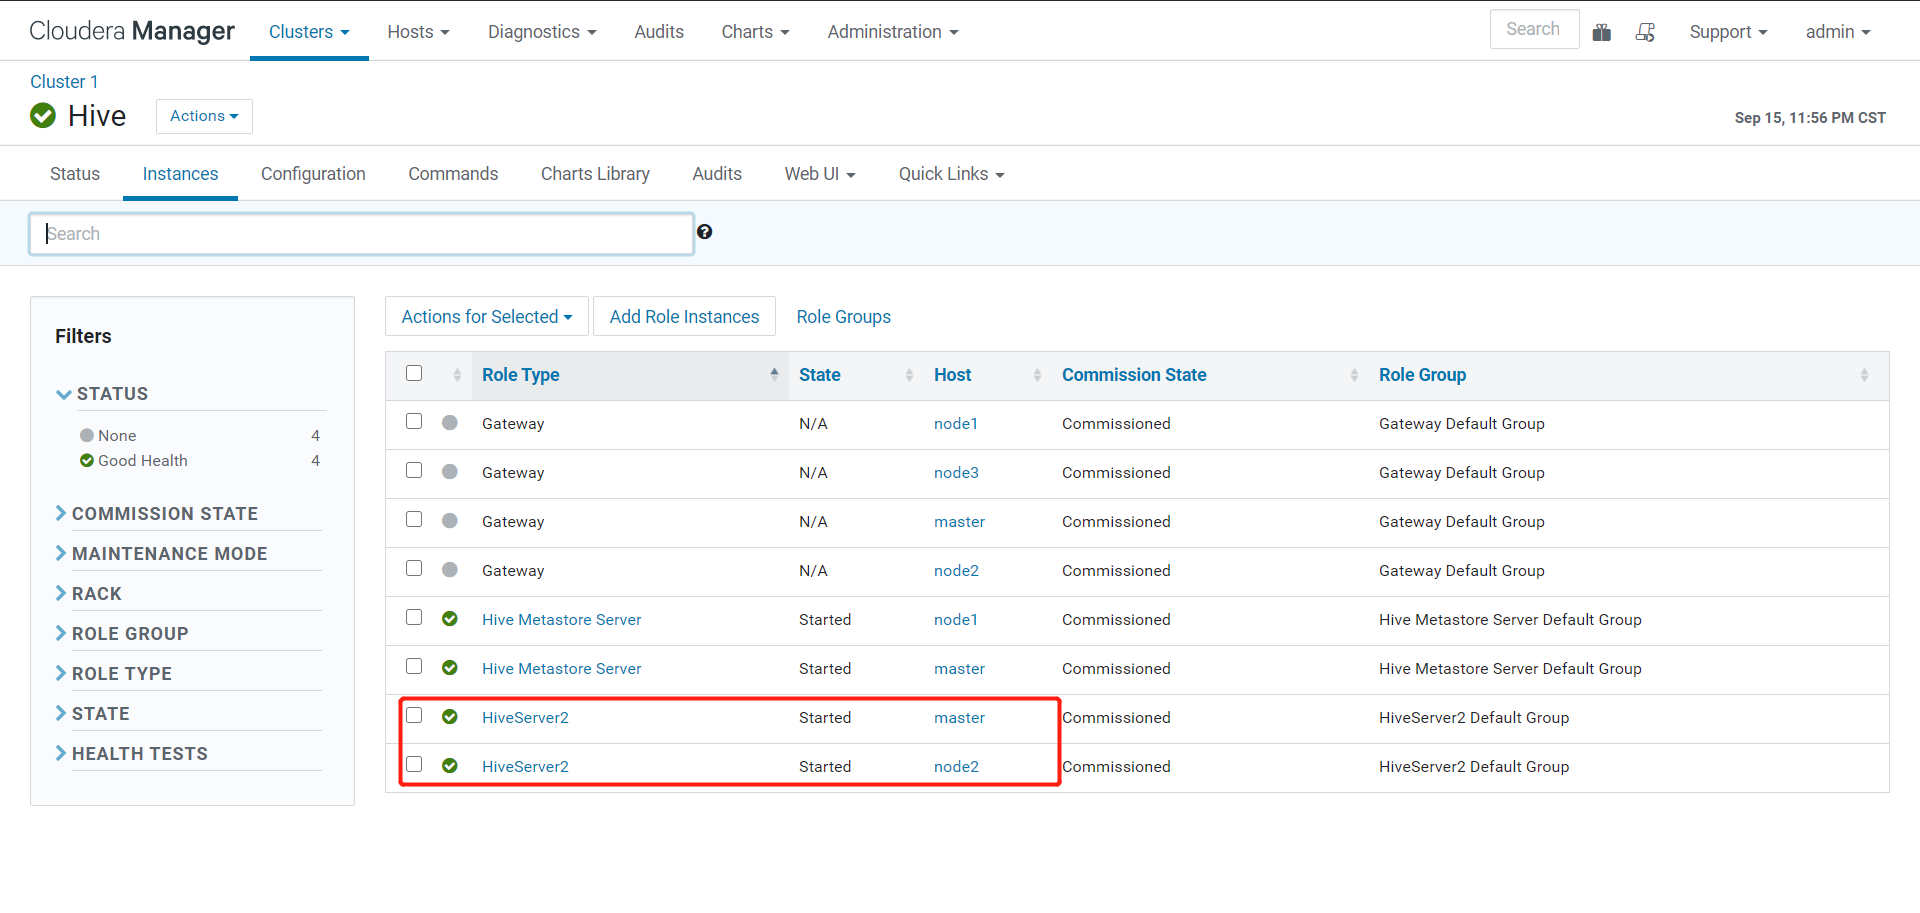
配置HiveServer2至少是需要两个HiveServer2角色的,如果没有就需要在添加一个了
进入CM管理页面 -> Hive组件 -> 实例 -> 添加实例角色 -> 选择一台节点安装HiveServer2
安装配置Haproxy
找一台主机安装Haproxy,一般来说是集群中的util节点或者边缘节点
yum install -y haproxy修改配置文件,将最下面的mater和node2改为自己HiveServer2 hostname ``` vim /etc/haproxy/haproxy.cfg
——————————————————————————————————-
Example configuration for a possible web application. See the
full configuration options online.
#
http://haproxy.1wt.eu/download/1.4/doc/configuration.txt
#
——————————————————————————————————-
——————————————————————————————————-
Global settings
——————————————————————————————————-
global
# to have these messages end up in /var/log/haproxy.log you will
# need to:
#
# 1) configure syslog to accept network log events.  This is done
#    by adding the '-r' option to the SYSLOGD_OPTIONS in
#    /etc/sysconfig/syslog
#
# 2) configure local2 events to go to the /var/log/haproxy.log
#   file. A line like the following can be added to
#   /etc/sysconfig/syslog
#
#    local2.*                       /var/log/haproxy.log
#
log         127.0.0.1 local0 info

chroot      /var/lib/haproxy
pidfile     /var/run/haproxy.pid
maxconn     4000
user        haproxy
group       haproxy
daemon

# turn on stats unix socket
stats socket /var/lib/haproxy/stats
——————————————————————————————————-
common defaults that all the ‘listen’ and ‘backend’ sections will
use if not designated in their block
——————————————————————————————————-
defaults mode http log global option httplog option dontlognull option http-server-close option forwardfor except 127.0.0.0/8 option redispatch retries 3 timeout http-request 10s timeout queue 1m timeout connect 10s timeout client 60m timeout server 60m timeout http-keep-alive 600s timeout check 10s maxconn 3000
contimeout 5000
clitimeout 50000
srvtimeout 50000
listen status
listen admin_stats stats enable bind *:8080 mode http option httplog log global maxconn 10 stats refresh 30s stats uri /admin?stats stats realm haproxy stats auth admin:admin stats hide-version stats admin if TRUE
Hive Server2
listen hive_server bind 0.0.0.0:10001 mode tcp option tcplog balance source server hive_server_01 master:10000 check server hive_server_02 node2:10000 check
3. 启动Haproxy
```shell
systemctl start haproxy
systemctl enable haproxy
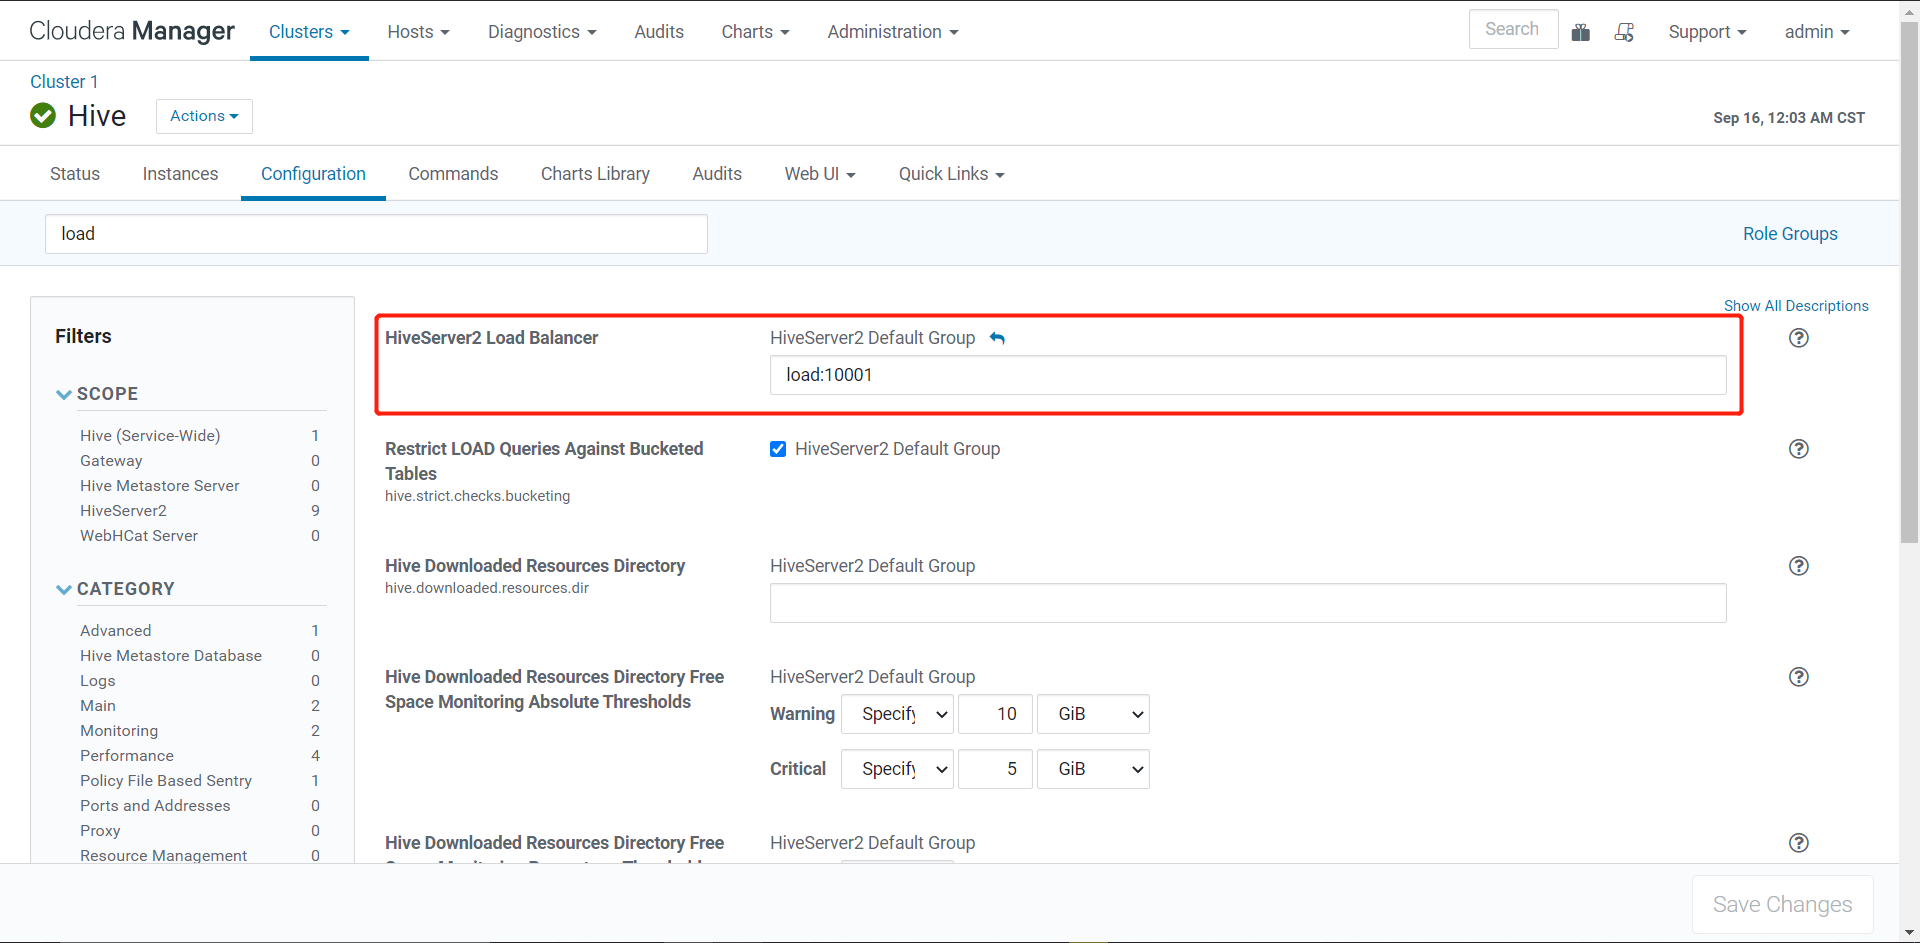
配置Hive
- 进入CM -> Hive -> 配置,搜索load,填写安装haproxy节点的hostname:10001,点击保存
- 通过CM进入Hue -> 点击配置 -> 搜索hue_safety_valve.ini,加如下配置,其中hive_server_host填写你自己负载均衡服务器
[beeswax]
hive_server_host=hostname
hive_server_port=10001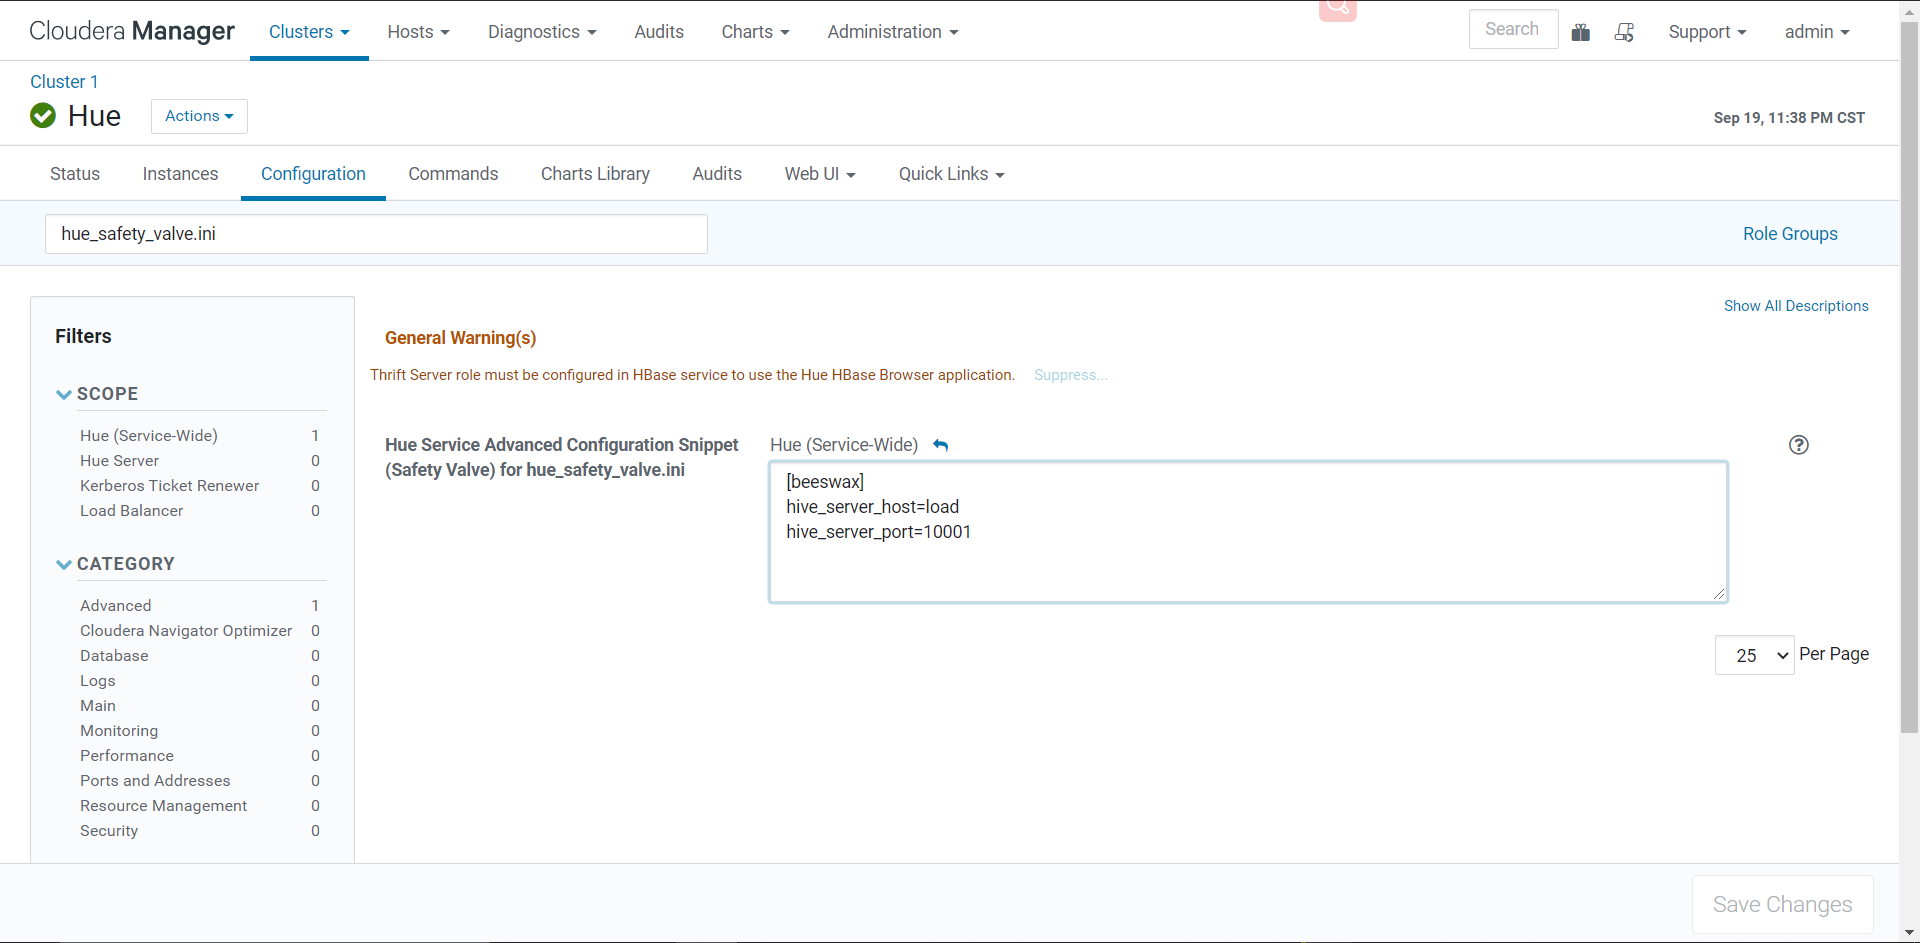
测试
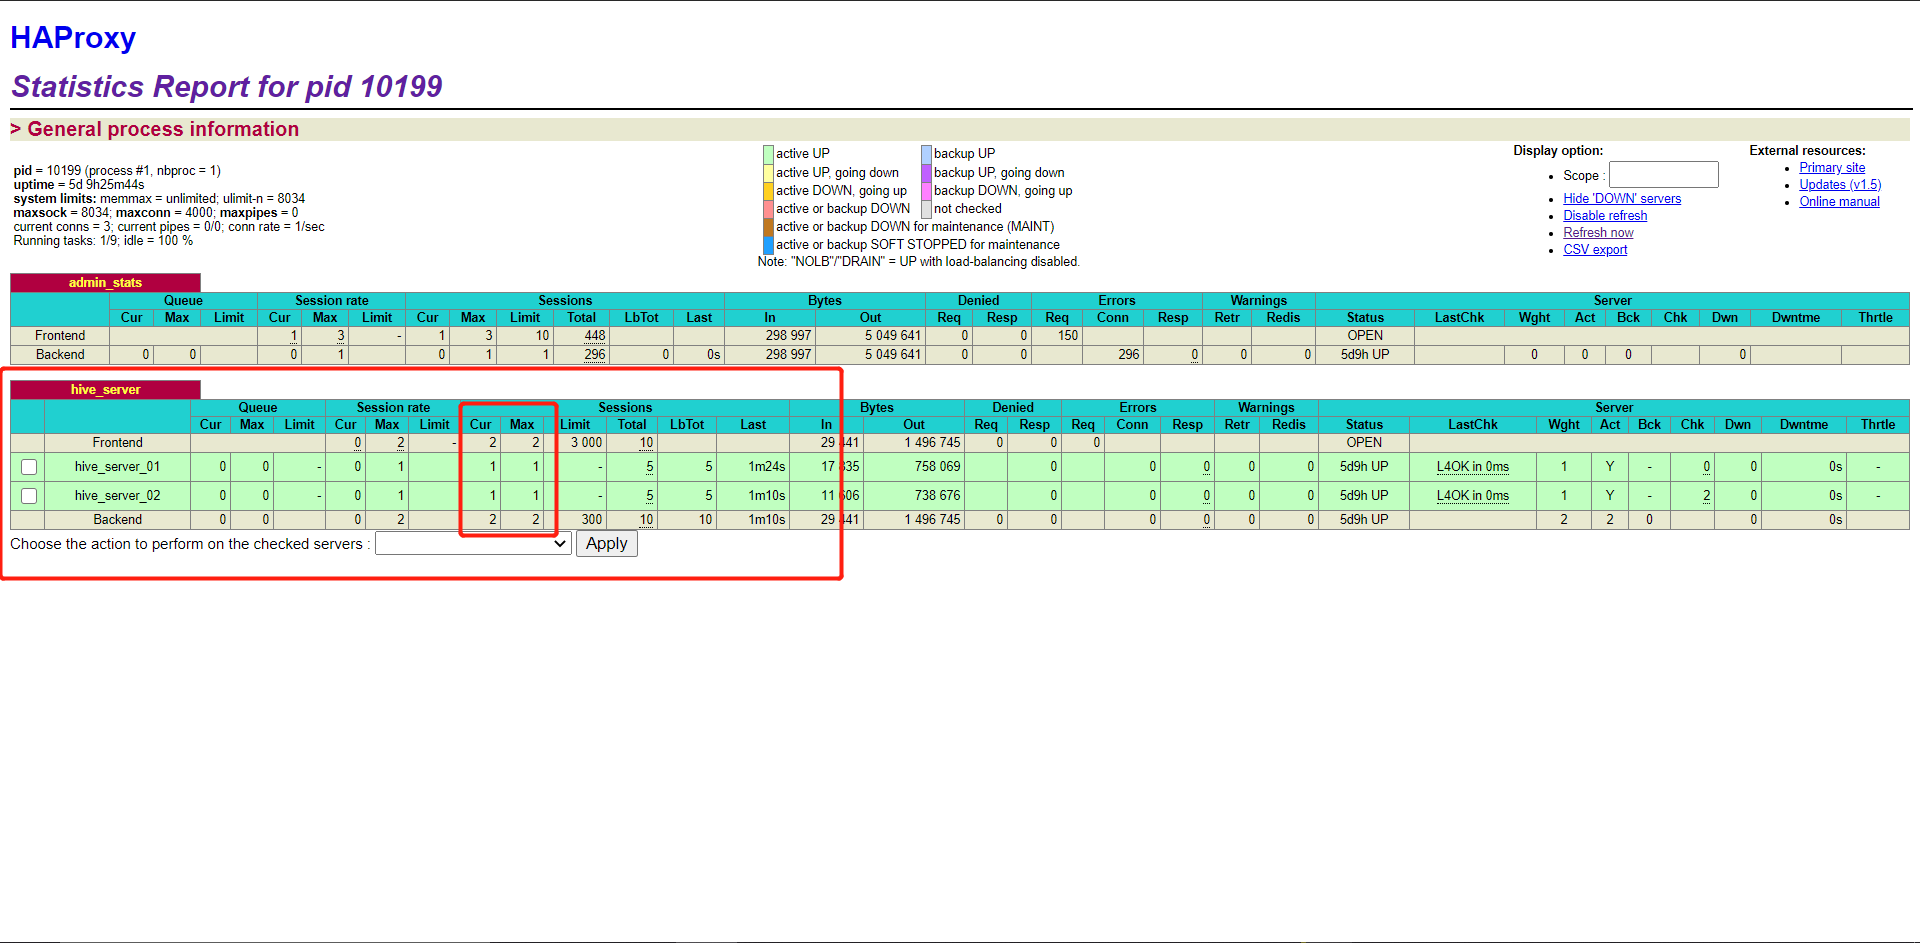
打开Haproxy监控页面,http://haproxyip:8080/admin?stats
使用不同主机连接Beeline
beeline -u "jdbc:hive2://load:10001/;principal=hive/load@FAYSON.COM"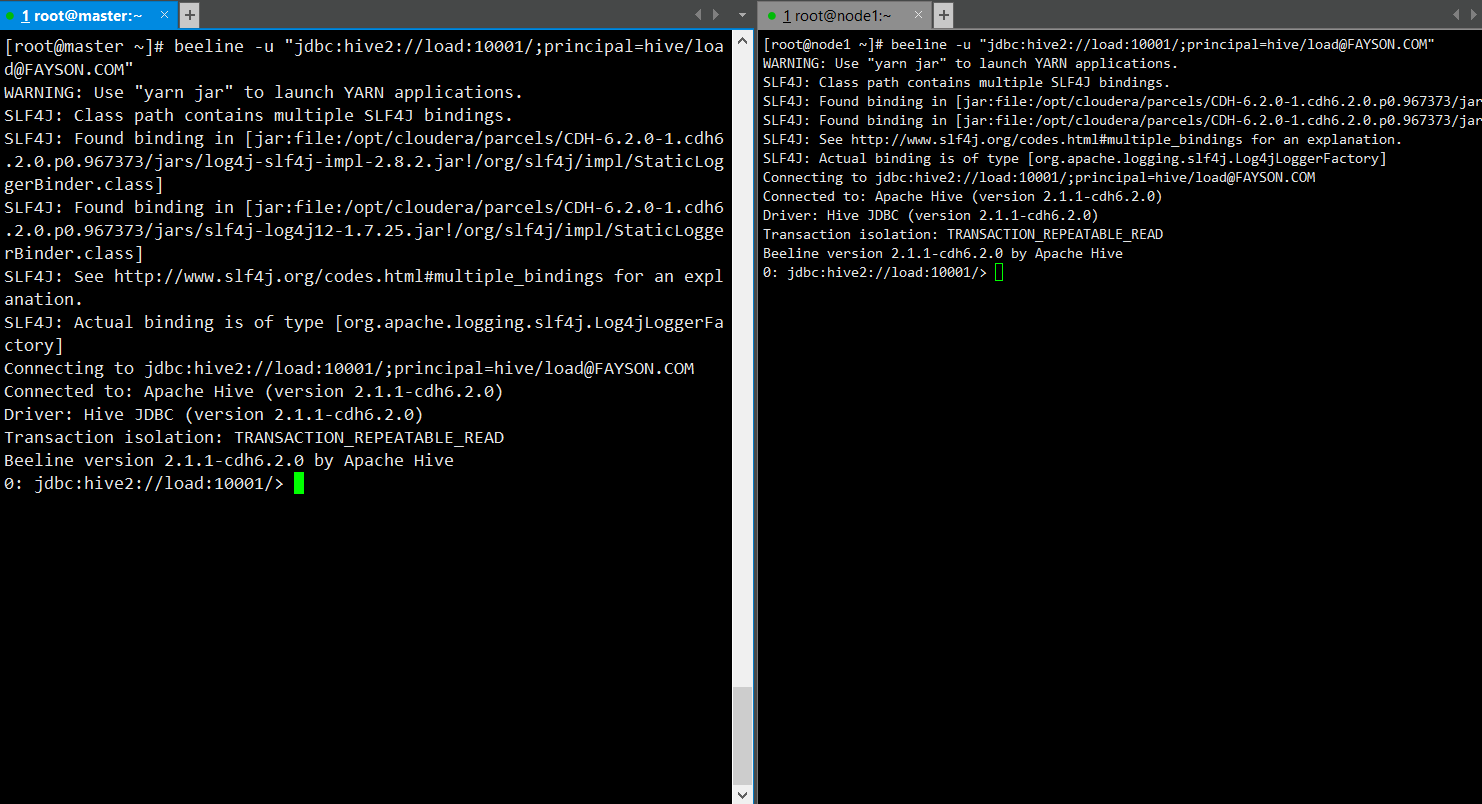
可以看到Haproxy成功将连接负载到不同的HiveServer2上面了
注意点
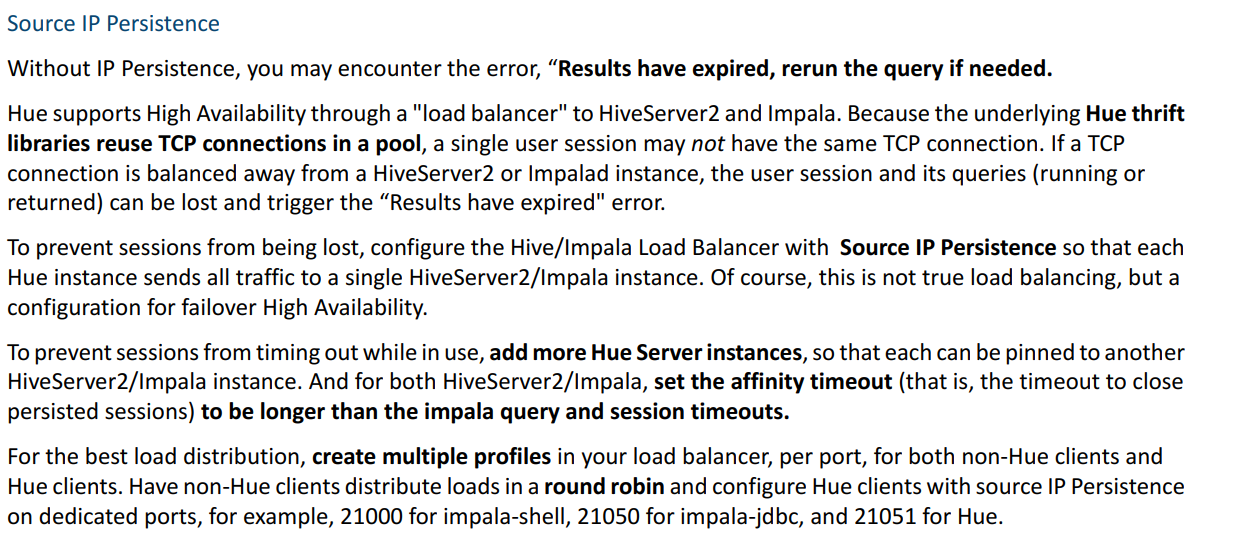
- 其中我们Haproxy负载均衡算法使用的是source,如果使用Round-robin等Hue会出现问题,具体如下,但是使用source可能导致某个HiveServer2负载不均衡,因为是因为IP Hash进行负载的,解决方法https://www.yuque.com/dangjuzhe/gak2qm/ywrweg
- 如果在配置完Haproxy后,需要指定连接某一台HiveServer2,可以使用下面这种语法,前面指定HiveServer2的IP,后面的认证使用负载均衡的
beeline -u "jdbc:hive2://master:10001/;principal=hive/load@FAYSON.COM"

若有收获,就点个赞吧
0 人点赞
