- 现有问题
- 安装Haproxy
- ——————————————————————————————————-
- Example configuration for a possible web application. See the
- full configuration options online.
- http://haproxy.1wt.eu/download/1.4/doc/configuration.txt">http://haproxy.1wt.eu/download/1.4/doc/configuration.txt
- ——————————————————————————————————-
- ——————————————————————————————————-
- Global settings
- ——————————————————————————————————-
- ——————————————————————————————————-
- common defaults that all the ‘listen’ and ‘backend’ sections will
- use if not designated in their block
- ——————————————————————————————————-
- contimeout 5000
- clitimeout 50000
- srvtimeout 50000
- listen status
- Hive Server2
- 关闭虚IP所在主机的Haproxy服务
- 查看虚IP是否可以飘逸到另一台Haproxy主机
现有问题
现在我们的Haproxy服务存在单点问题,也就是Haproxy服务一旦挂掉,就会导致用户连接不到Beeline,Hue服务也会出现问题
使用Keepalived来实现Haproxy的高可用,就是在两台服务器上部署Haproxy服务,当一个Haproxy服务出现问题,就立即切换到另一台Haproxy服务
安装Haproxy
我们需要找两台主机安装Haproxy,一般为util节点或者边缘节点,
# 两台主机都需要安装Haproxy服务yum install -y haproxy
两台主机的Haproxy配置文件保持一致 ```shell vim /etc/haproxy/haproxy.cfg
——————————————————————————————————-
Example configuration for a possible web application. See the
full configuration options online.
#
http://haproxy.1wt.eu/download/1.4/doc/configuration.txt
#
——————————————————————————————————-
——————————————————————————————————-
Global settings
——————————————————————————————————-
global
# to have these messages end up in /var/log/haproxy.log you will
# need to:
#
# 1) configure syslog to accept network log events.  This is done
#    by adding the '-r' option to the SYSLOGD_OPTIONS in
#    /etc/sysconfig/syslog
#
# 2) configure local2 events to go to the /var/log/haproxy.log
#   file. A line like the following can be added to
#   /etc/sysconfig/syslog
#
#    local2.*                       /var/log/haproxy.log
#
log         127.0.0.1 local0 info

chroot      /var/lib/haproxy
pidfile     /var/run/haproxy.pid
maxconn     4000
user        haproxy
group       haproxy
daemon

# turn on stats unix socket
stats socket /var/lib/haproxy/stats
——————————————————————————————————-
common defaults that all the ‘listen’ and ‘backend’ sections will
use if not designated in their block
——————————————————————————————————-
defaults mode http log global option httplog option dontlognull option http-server-close option forwardfor except 127.0.0.0/8 option redispatch retries 3 timeout http-request 10s timeout queue 1m timeout connect 10s timeout client 60m timeout server 60m timeout http-keep-alive 600s timeout check 10s maxconn 3000
contimeout 5000
clitimeout 50000
srvtimeout 50000
listen status
listen admin_stats stats enable bind *:8080 mode http option httplog log global maxconn 10 stats refresh 30s stats uri /admin?stats stats realm haproxy stats auth admin:admin stats hide-version stats admin if TRUE
Hive Server2
listen hive_server bind 0.0.0.0:10001 mode tcp option tcplog balance source server hive_server_01 master:10000 check server hive_server_02 node2:10000 check
3. 启动Haproxy服务,并设置开机自启
```shell
systemctl start haproxy
systemctl enable haproxy
安装Keepalived
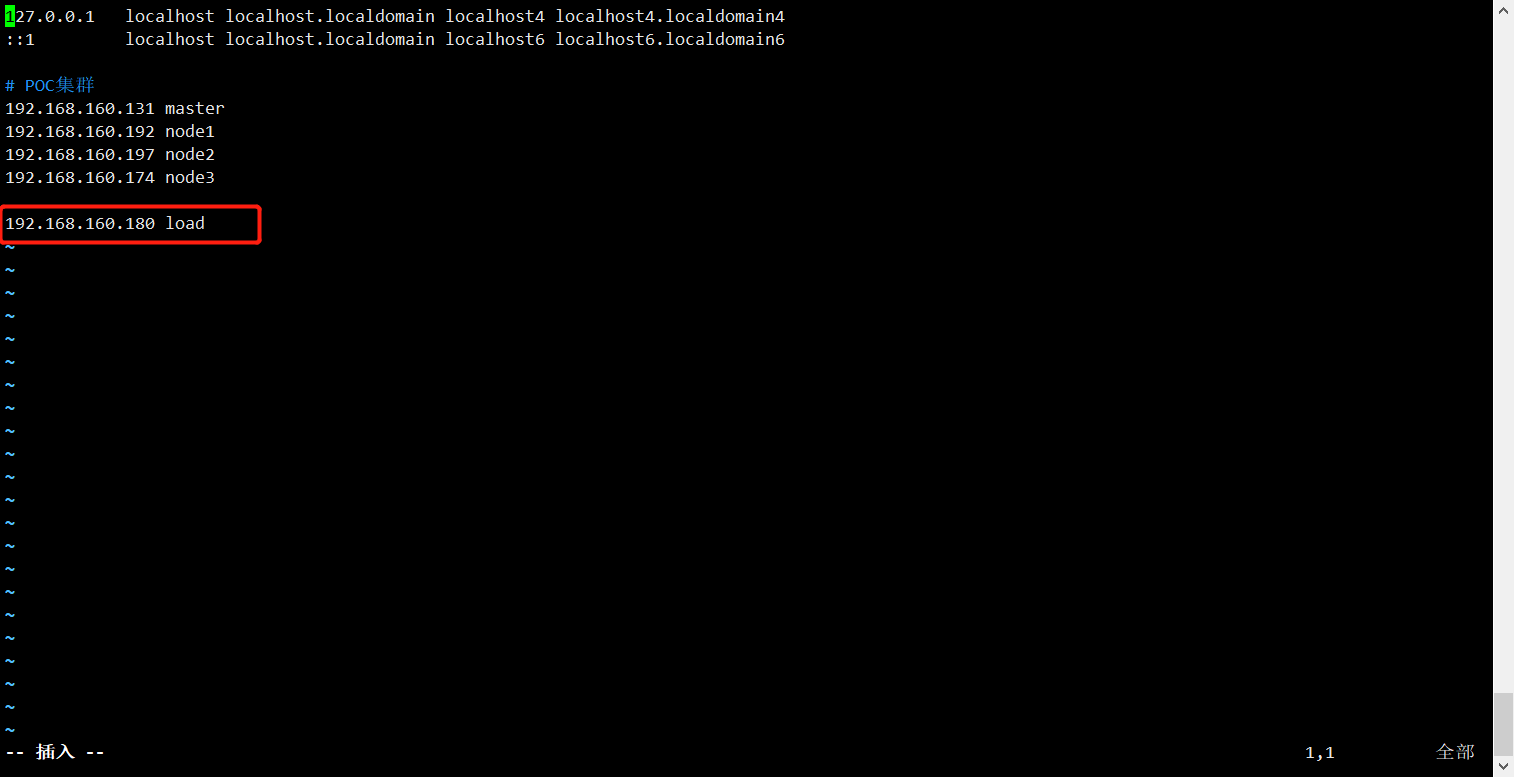
需要向网络管理员申请和Haproxy服务所在主机同网段的虚IP,我这里申请为192.168.160.180
并且在集群中所有主机的/etc/hosts中加入虚IP
两台主机都需要安装Keepalived
yum install -y keepalived修改配置文件,配置文件需要保持一致 ```shell vim /etc/keepalived/keepalived.conf
! Configuration File for keepalived
global_defs { router_id node2 #router_id可以自己定义,一般是主机的hostname,需要唯一 }
vrrp_script check_haproxy { script “/etc/keepalived/haproxy_check.sh” interval 5 weight -20 }
vrrp_instance HAProxy_HA { state BACKUP #在 haproxy-server 和 backup-haproxy 上均配置为 BACKUP interface ens160 virtual_router_id 51 #virtual_router_id 两台主机需要保持一致 priority 100 advert_int 2 nopreempt #不抢占模式,只在优先级高的机器上设置即可,优先级低的机器不设置
authentication {
    auth_type PASS
    auth_pass 1111
}
    unicast_src_ip 192.168.160.197    #填写本机的ip
    unicast_peer {
            192.168.160.131    # 填写另一台主机的ip
    }
track_script {
    check_haproxy
}

virtual_ipaddress {
    192.168.160.180 #HAProxy 的对外服务 IP,即 VIP
}
}
3. 配置检测脚本,两个主机都需要配置
```shell
vim /etc/keepalived/haproxy_check.sh

#!/bin/bash
A=`ps -C haproxy --no-header | wc -l`
if [ $A -eq 0 ];then
/etc/init.d/haproxy start
sleep 3
if [ `ps -C haproxy --no-header | wc -l ` -eq 0 ];then
/etc/init.d/keepalived stop
fi
fi
给检测脚本添加可执行权限
chmod +x /etc/keepalived/haproxy_check.sh两台主机都启动keepalived服务,并设置开机自启
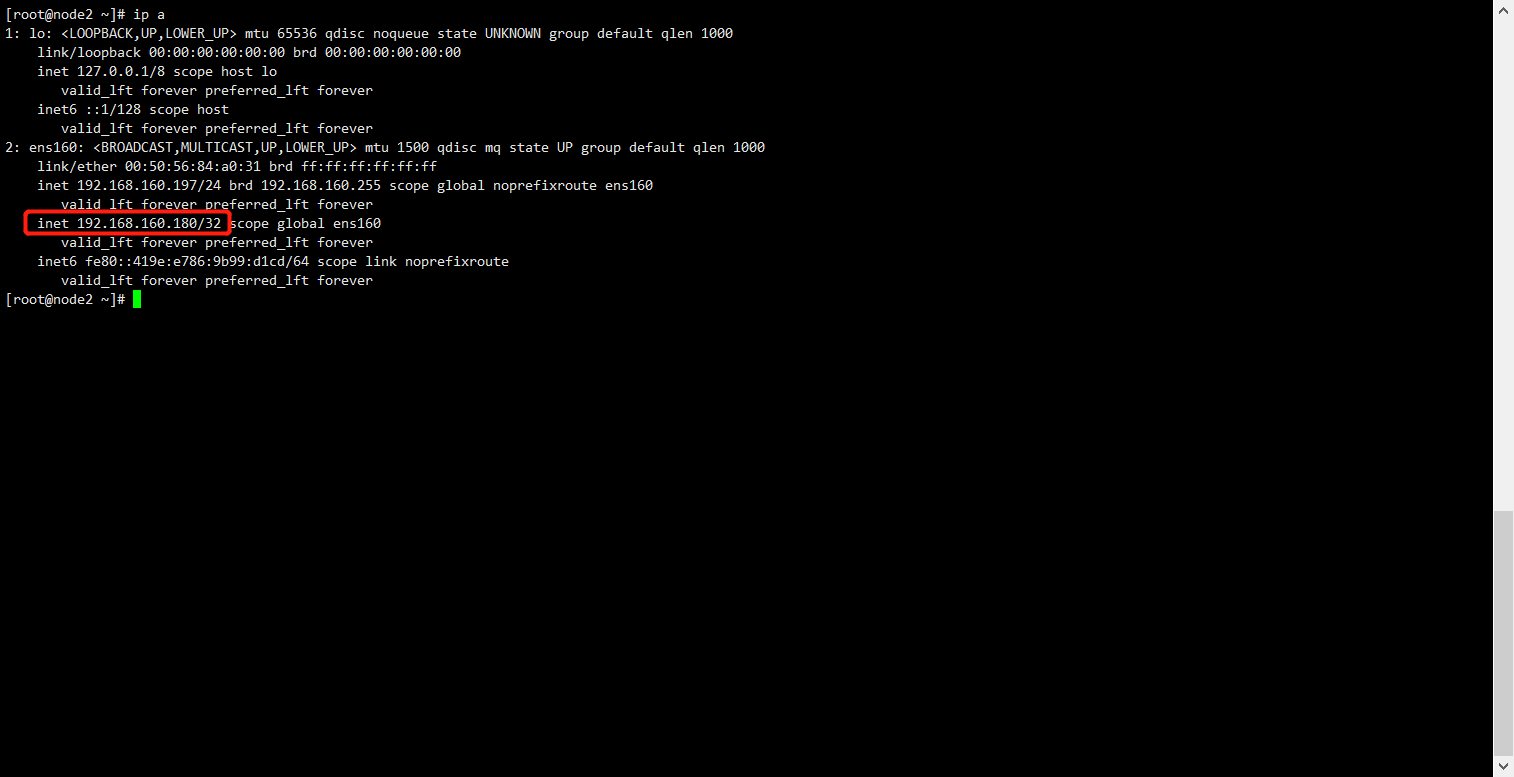
systemctl start keepalived
systemctl enable keepalived
查看一台主机发现虚IP以及成功绑定

测试Keepalived
- 测试使用虚IP是否可以访问Haproxy的状态页面
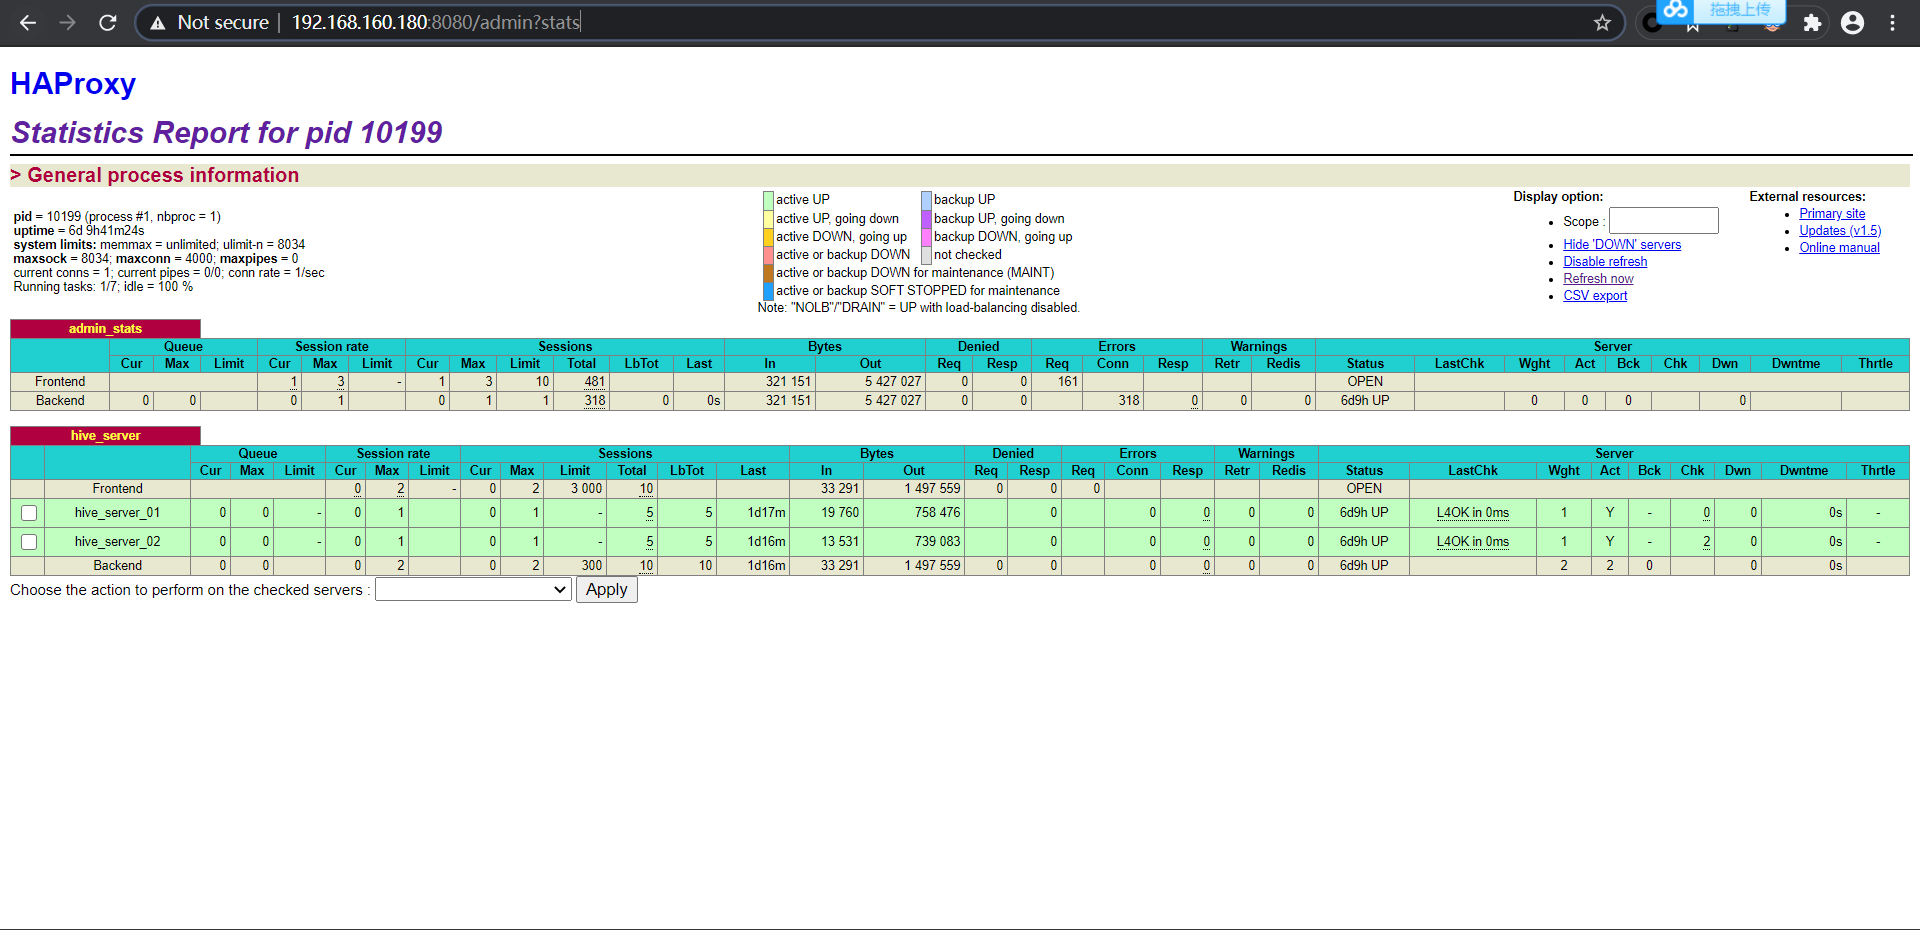
查看虚IP是否可以飘逸到另一台Haproxy主机
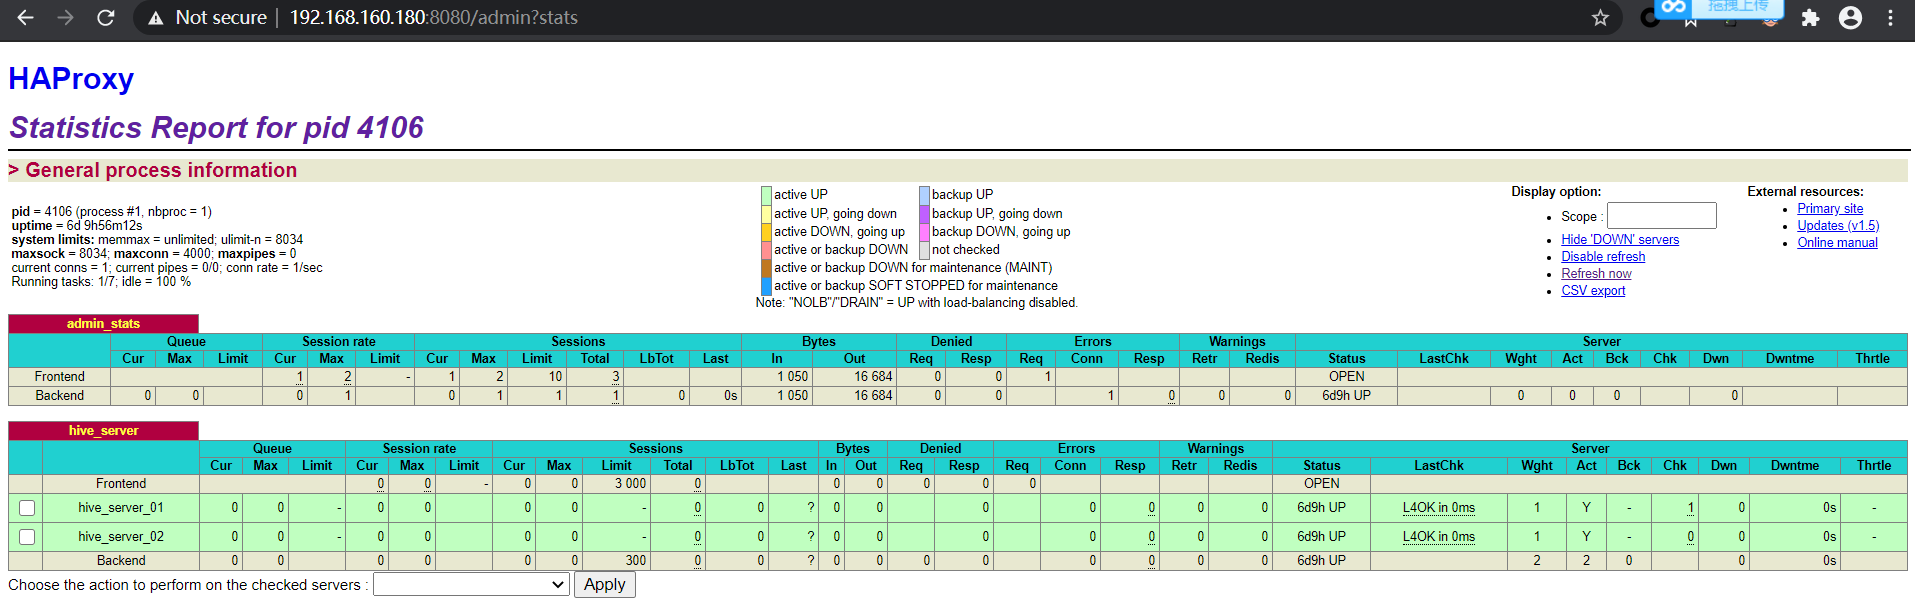
3. 再次使用虚IP访问Haproxy状态页面,依旧可以访问
<a name="XlxDK"></a>
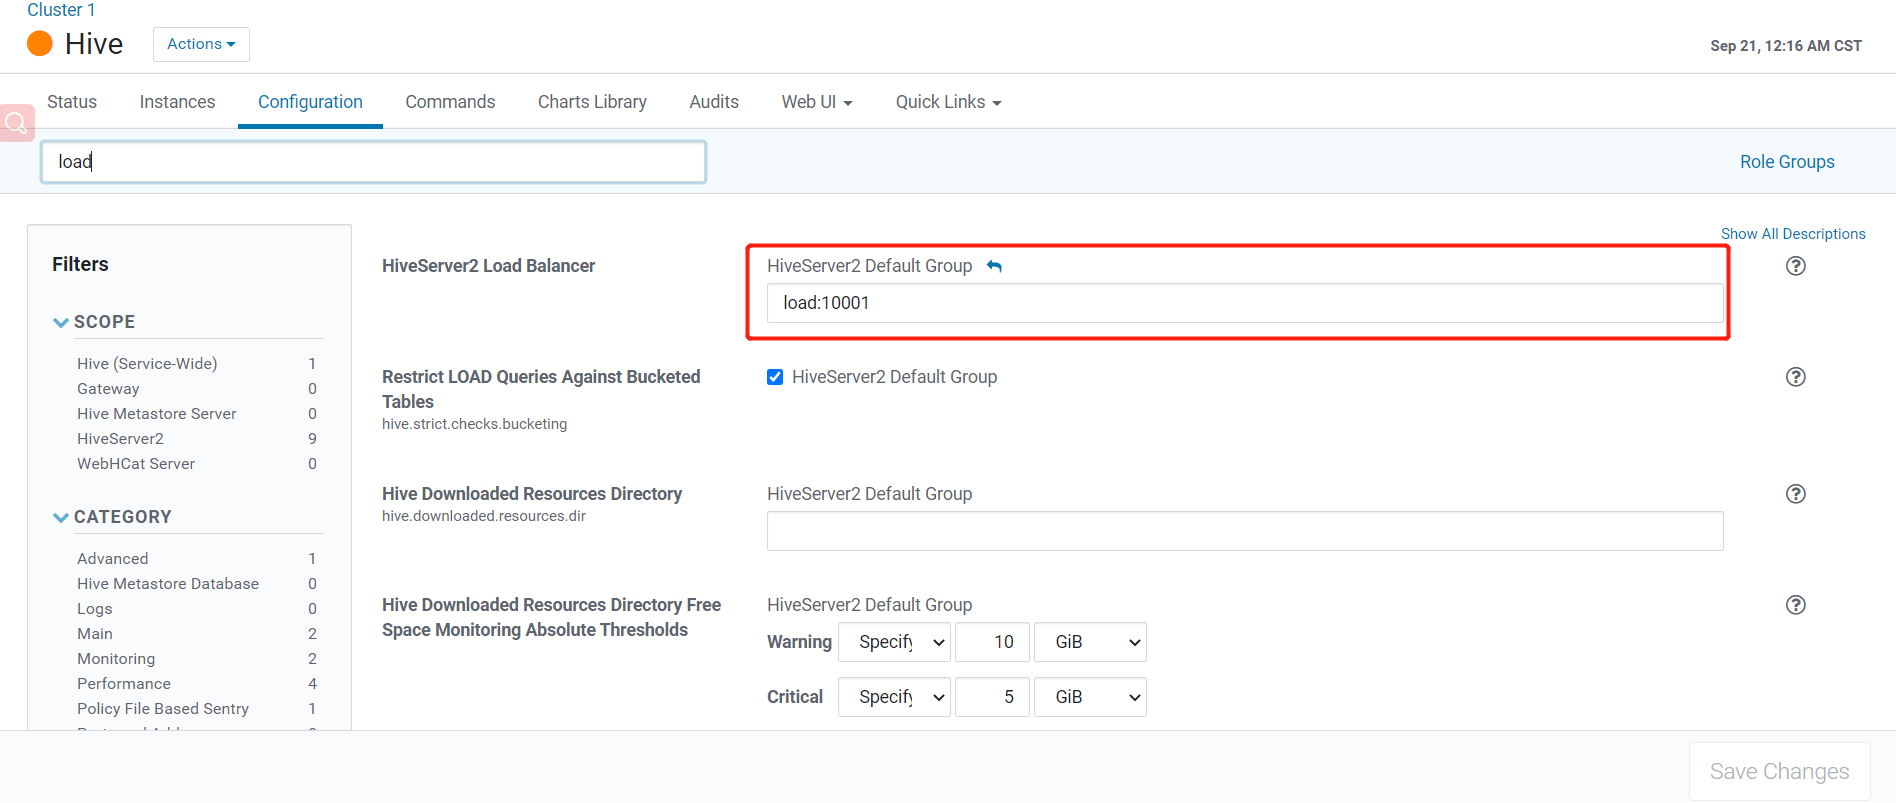
## 修改集群配置
1. 进入Hive -> 配置 -> 搜索HiveServer2 Load Balancer,参数修改为虚 IP:端口号
2. 进入Hue -> 配置 -> 搜索hue_safety_valve.ini,加如下配置,其中hive_server_host填写虚IP
[beeswax] hive_server_host=hostname hive_server_port=10001
3. 回到CM页面,重启相关服务
<a name="2aRao"></a>
## 测试Beeline和Hue
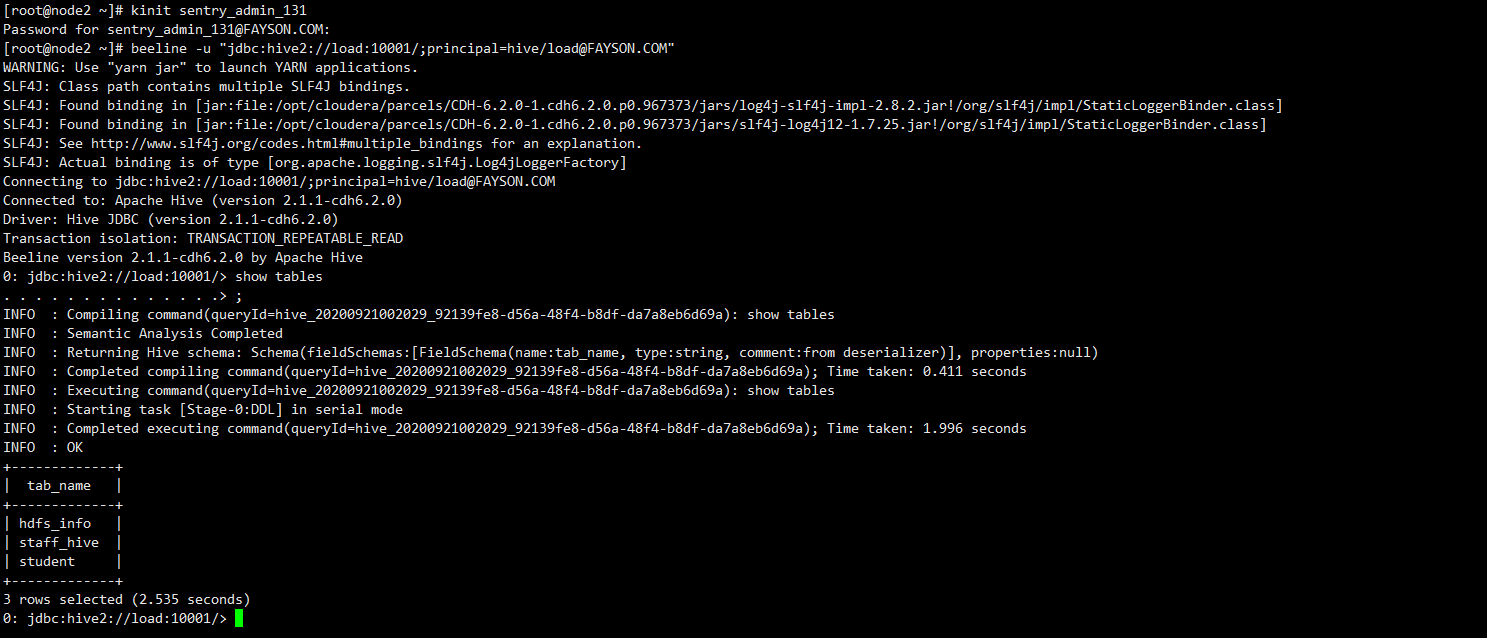
1. 将beeline连接串改为虚IP的连接串,连接HiveServer2
```shell
beeline -u "jdbc:hive2://load:10001/;principal=hive/load@FAYSON.COM"
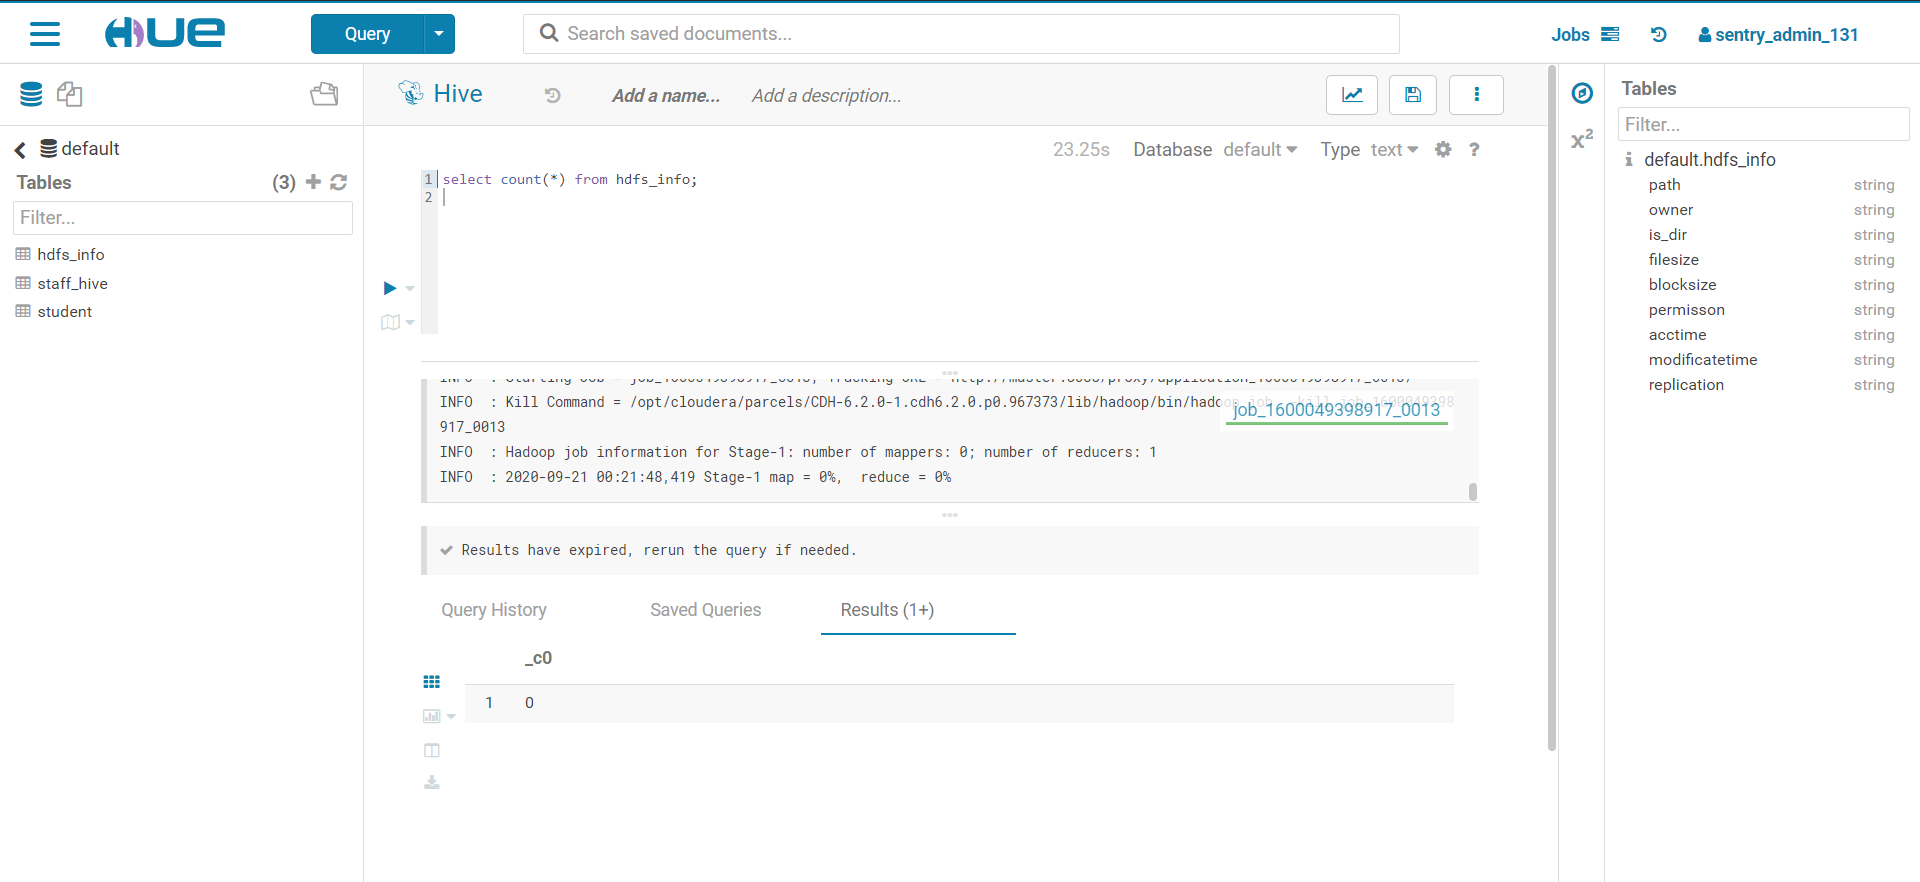
- 使用Hue提交一个查询任务
- 至此基于Keepalived实现Haproxy高可用配置完成了

若有收获,就点个赞吧
0 人点赞
