在 Ruby Qt 编程教程的这一部分中,我们将介绍布局管理器。
在设计应用的 GUI 时,我们决定要使用哪些组件以及如何在应用中组织这些组件。 为了组织我们的组件,我们使用专门的不可见对象,称为布局管理器。 Qt 中有几个选项。 我们可以使用绝对定位,内置布局管理器或创建自定义布局管理器。 我们还可以使用 Qt Designer 直观地构建布局。
Qt 有一些重要的内置布局管理器。 Qt::VBoxLayout类垂直排列小部件。 Qt::HBoxLayout水平排列小部件。 Qt::GridLayout类将小部件布置在网格中。 网格布局是最灵活的布局管理器。 框布局可以相互嵌套以创建复杂的布局。
绝对定位
在大多数情况下,程序员应使用布局管理器。 在某些情况下,我们可以使用绝对定位。 在绝对定位中,程序员以像素为单位指定每个小部件的位置和大小。 如果我们调整窗口大小,则小部件的大小和位置不会改变。 在各种平台上,应用看起来都不同,在 Linux 上看起来不错,在 Mac OS 上看起来不太正常。 在我们的应用中更改字体可能会破坏布局。 如果我们将应用翻译成另一种语言,则必须重做布局。 对于所有这些问题,仅在有理由时才使用绝对定位。
#!/usr/bin/ruby# ZetCode Ruby Qt tutorial## In this program, we lay out widgets# using absolute positioning.## author: Jan Bodnar# website: www.zetcode.com# last modified: September 2012require 'Qt'class QtApp < Qt::Widgetdef initializesupersetWindowTitle "Absolute"init_uiresize 300, 280move 300, 300showenddef init_uisetStyleSheet "QWidget { background-color: #414141 }"bardejov = Qt::Pixmap.new "bardejov.jpg"rotunda = Qt::Pixmap.new "rotunda.jpg"mincol = Qt::Pixmap.new "mincol.jpg"barLabel = Qt::Label.new selfbarLabel.setPixmap bardejovbarLabel.move 20, 20rotLabel = Qt::Label.new selfrotLabel.setPixmap rotundarotLabel.move 40, 160minLabel = Qt::Label.new selfminLabel.setPixmap mincolminLabel.move 170, 50endendapp = Qt::Application.new ARGVQtApp.newapp.exec
在此示例中,我们使用绝对定位显示了三幅图像。
barLabel = Qt::Label.new selfbarLabel.setPixmap bardejov
Qt::Label小部件用于保存图像。
barLabel.move 20, 20
我们使用move方法将标签放置在窗口上的x = 20,y = 20处。
调整窗口大小时,标签将保留其初始大小。
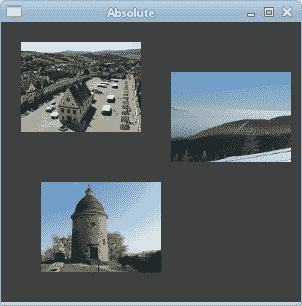
图:绝对定位
按钮示例
在下面的示例中,我们将在窗口的右下角放置两个按钮。
#!/usr/bin/ruby# ZetCode Ruby Qt tutorial## In this program, we use box layouts# to position two buttons in the# bottom right corner of the window.## author: Jan Bodnar# website: www.zetcode.com# last modified: September 2012require 'Qt'class QtApp < Qt::Widgetdef initializesupersetWindowTitle "Buttons"init_uiresize 330, 170move 300, 300showenddef init_uivbox = Qt::VBoxLayout.new selfhbox = Qt::HBoxLayout.newok = Qt::PushButton.new "OK", selfapply = Qt::PushButton.new "Apply", selfhbox.addWidget ok, 1, Qt::AlignRighthbox.addWidget applyvbox.addStretch 1vbox.addLayout hboxendendapp = Qt::Application.new ARGVQtApp.newapp.exec
我们使用嵌套框布局来获得我们想要的布局。
vbox = Qt::VBoxLayout.new selfhbox = Qt::HBoxLayout.new
我们使用一个垂直框和一个水平框。
ok = Qt::PushButton.new "OK", selfapply = Qt::PushButton.new "Apply", self
这是两个将进入窗口右下角的按钮。
hbox.addWidget ok, 1, Qt::AlignRight
我们将确定按钮放入水平框中。 第二个参数是stretch因子。 它将扩大分配给“确定”按钮的区域。 它会占用所有可用空间。 该区域内小风口的对齐方式由第三个参数控制。 Qt::AlignRight将按钮向右对齐。
vbox.addStretch 1
这条线创建了一个垂直扩展的白色空间,它将带有按钮的水平框推到底部。
vbox.addLayout hbox
水平框嵌套在垂直框中。
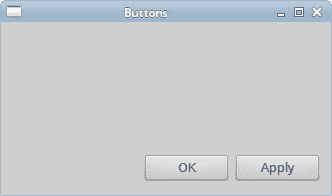
图:按钮示例
Windows 示例
以下是嵌套框布局更复杂的示例。
#!/usr/bin/ruby# ZetCode Ruby Qt tutorial## In this program, use box layouts# to create a Windows example## author: Jan Bodnar# website: www.zetcode.com# last modified: September 2012require 'Qt'class QtApp < Qt::Widgetdef initializesupersetWindowTitle "Windows"init_uiresize 350, 300move 300, 300showenddef init_uivbox = Qt::VBoxLayout.new selfvbox1 = Qt::VBoxLayout.newhbox1 = Qt::HBoxLayout.newhbox2 = Qt::HBoxLayout.newwindLabel = Qt::Label.new "Windows", selfedit = Qt::TextEdit.new selfedit.setEnabled falseactivate = Qt::PushButton.new "Activate", selfclose = Qt::PushButton.new "Close", selfhelp = Qt::PushButton.new "Help", selfok = Qt::PushButton.new "OK", selfvbox.addWidget windLabelvbox1.addWidget activatevbox1.addWidget close, 0, Qt::AlignTophbox1.addWidget edithbox1.addLayout vbox1vbox.addLayout hbox1hbox2.addWidget helphbox2.addStretch 1hbox2.addWidget okvbox.addLayout hbox2, 1setLayout vboxendendapp = Qt::Application.new ARGVQtApp.newapp.exec
在此布局中,我们使用两个垂直和水平框。
box = Qt::VBoxLayout.new self
这是示例的基本布局。
windLabel = Qt::Label.new "Windows", self
首先是标签小部件。 它只是转到垂直框的顶部。
vbox1.addWidget activatevbox1.addWidget close, 0, Qt::AlignTophbox1.addWidget edithbox1.addLayout vbox1vbox.addLayout hbox1
在窗口的中心部分,我们有一个文本编辑小部件和两个垂直排列的按钮。 这些按钮进入垂直框。 在此垂直框中,按钮与顶部对齐。 垂直框和文本编辑进入水平框。 该水平框转到标签窗口小部件正下方的基本垂直框。
hbox2.addWidget helphbox2.addStretch 1hbox2.addWidget okvbox.addLayout hbox2, 1
帮助和确定按钮进入另一个水平框。 这两个按钮之间有一个扩大的空白区域。 同样,水平框转到基本垂直框。
setLayout vbox
基本的垂直框设置为窗口的主要布局。
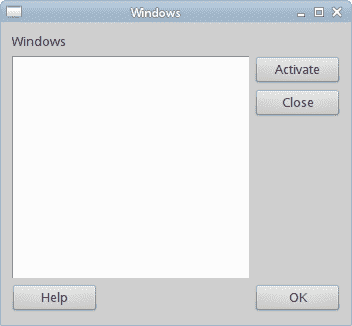
图:窗口示例
新文件夹示例
在最后一个示例中,我们使用Qt::GridLayout管理器创建“新文件夹”布局示例。
#!/usr/bin/ruby# ZetCode Ruby Qt tutorial## In this program, use the GridLayout# to create a New Folder example.## author: Jan Bodnar# website: www.zetcode.com# last modified: September 2012require 'Qt'class QtApp < Qt::Widgetdef initializesupersetWindowTitle "New Folder"init_uiresize 300, 300move 300, 300showenddef init_uigrid = Qt::GridLayout.new selfnameLabel = Qt::Label.new "Name", selfnameEdit = Qt::LineEdit.new selftext = Qt::TextEdit.new selfokButton = Qt::PushButton.new "OK", selfcloseButton = Qt::PushButton.new "Close", selfgrid.addWidget nameLabel, 0, 0grid.addWidget nameEdit, 0, 1, 1, 3grid.addWidget text, 1, 0, 2, 4grid.setColumnStretch 1, 1grid.addWidget okButton, 4, 2grid.addWidget closeButton, 4, 3endendapp = Qt::Application.new(ARGV)QtApp.newapp.exec
在我们的示例中,我们有一个标签,一行编辑,一个文本编辑和两个按钮。
grid = Qt::GridLayout.new self
我们创建Qt::GridLayout管理器的实例。
grid.addWidget nameLabel, 0, 0
我们将标签小部件放置在网格的第一个单元格中。 单元格从 0 开始计数。最后两个参数是行号和列号。
grid.addWidget nameEdit, 0, 1, 1, 3
线编辑窗口小部件位于第一行第二列。 最后两个参数是行跨度和列跨度。 在水平方向上,小部件将跨越三列。
grid.setColumnStretch 1, 1
该方法的参数是列号和拉伸因子。 在这里,我们将拉伸因子 1 设置到第二列。 这意味着此列将占用所有剩余空间。 之所以这样设置,是因为我们希望按钮保持其初始大小。

图:新文件夹 example
在 Ruby Qt 教程的这一部分中,我们提到了小部件的布局管理。

若有收获,就点个赞吧
0 人点赞
