spring 整合 RabbitMQ 3.9.11
rabbitmq 3.9.11
创建工程
不管用什么办法创建出一个空的工程出来,或者在已有工程里面创建一个新的module,下面只说创建新module的方法。
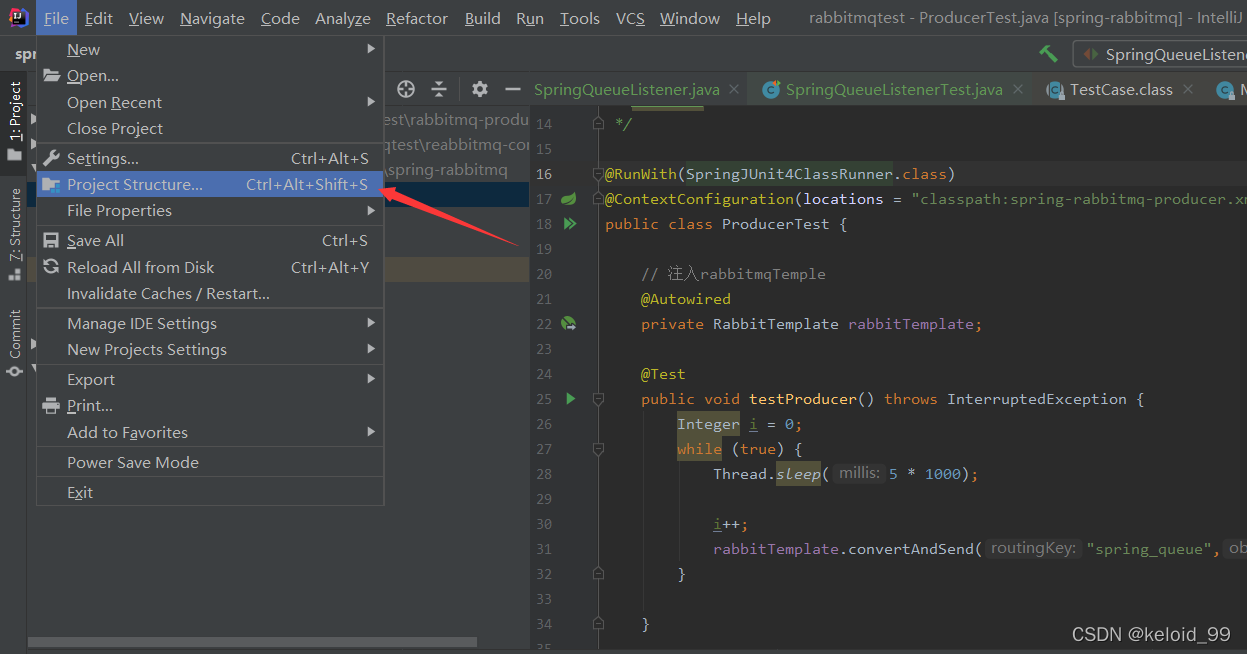
在菜单里选择Project Structure
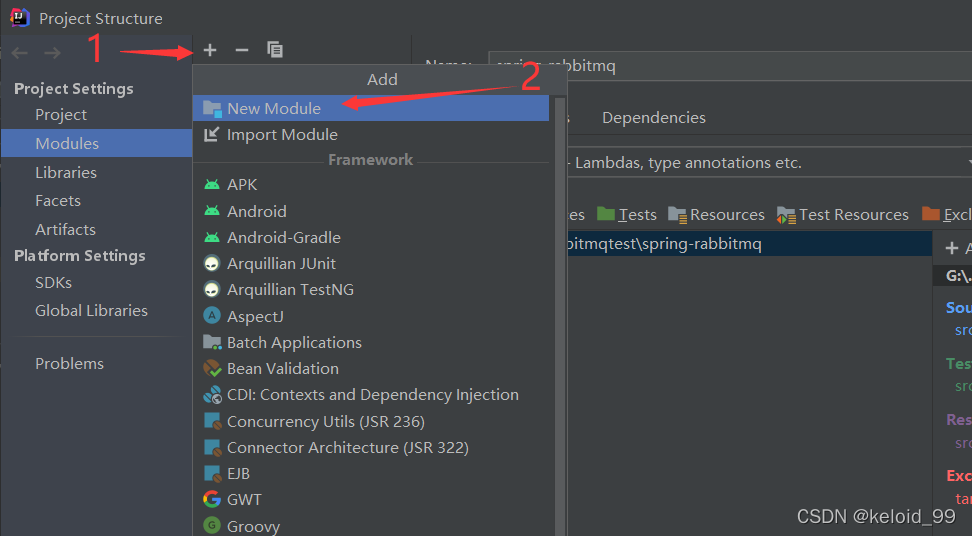
先点加号,再点New Module
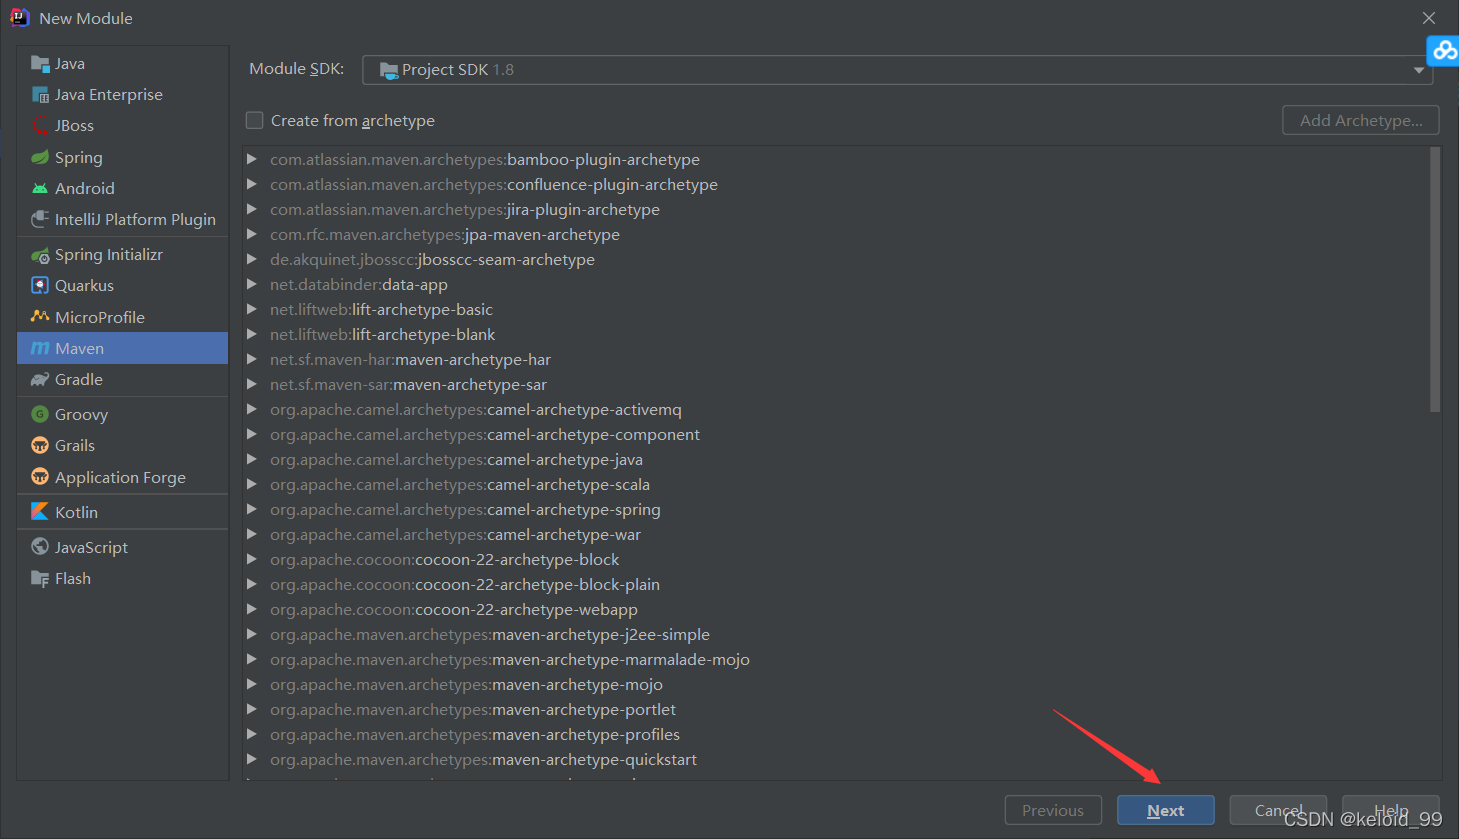
然后直接下一步
然后把Module名字,所在位置都填好之后直接finish
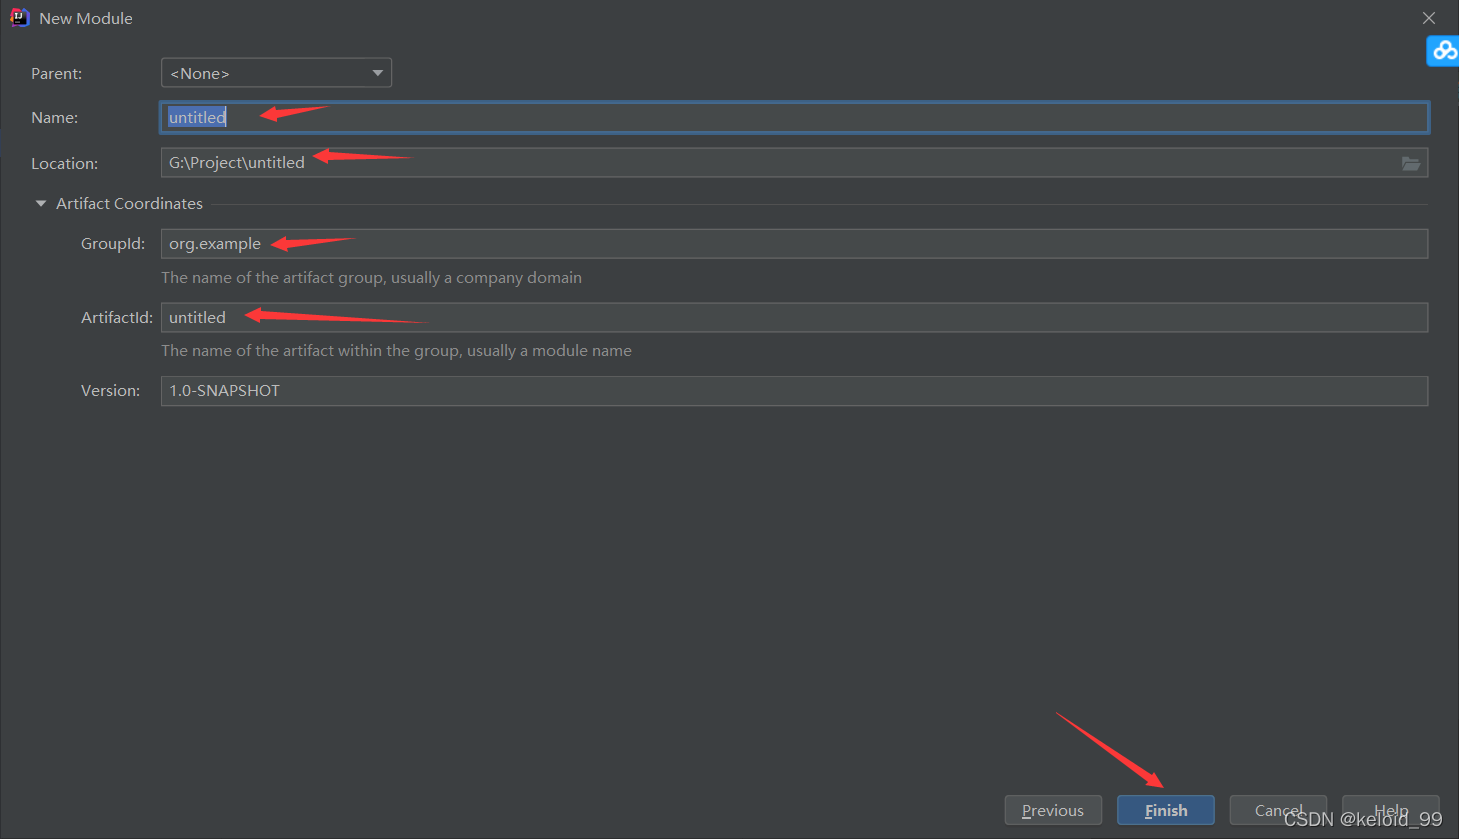
在idea中新建Module都是这么操作。
maven配置
直接把下面的配置信息根据需要粘贴到自己的pom.xml里面。
<?xml version="1.0" encoding="UTF-8"?><project xmlns="http://maven.apache.org/POM/4.0.0"xmlns:xsi="http://www.w3.org/2001/XMLSchema-instance"xsi:schemaLocation="http://maven.apache.org/POM/4.0.0 http://maven.apache.org/xsd/maven-4.0.0.xsd"><modelVersion>4.0.0</modelVersion><groupId>com.itheima</groupId><artifactId>spring-rabbitmq</artifactId><version>1.0-SNAPSHOT</version><dependencies><!--spring 上下文--><dependency><groupId>org.springframework</groupId><artifactId>spring-context</artifactId><version>5.2.10.RELEASE</version></dependency><!--spring整合amqp--><dependency><groupId>org.springframework.amqp</groupId><artifactId>spring-rabbit</artifactId><version>2.1.8.RELEASE</version></dependency><!--测试--><dependency><groupId>junit</groupId><artifactId>junit</artifactId><version>4.12</version></dependency><dependency><groupId>org.springframework</groupId><artifactId>spring-test</artifactId><version>5.2.10.RELEASE</version></dependency></dependencies><build><plugins><plugin><groupId>org.apache.maven.plugins</groupId><artifactId>maven-compiler-plugin</artifactId><version>3.8.0</version><configuration><source>1.8</source><target>1.8</target></configuration></plugin></plugins></build></project>
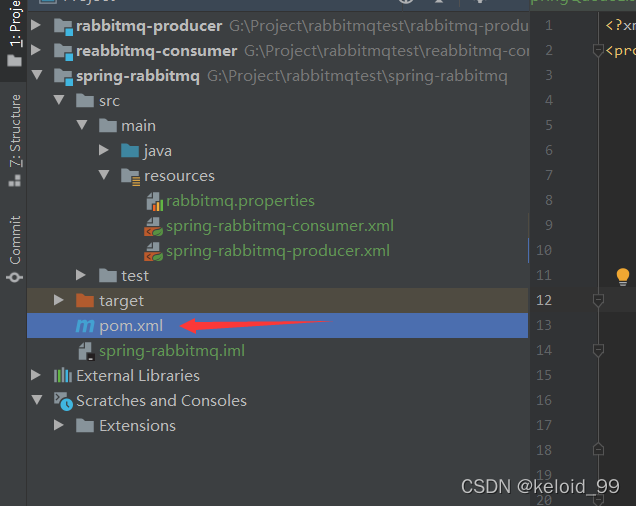
提醒一下:pom.xml的文件在下面这个位置
resource 配置文件
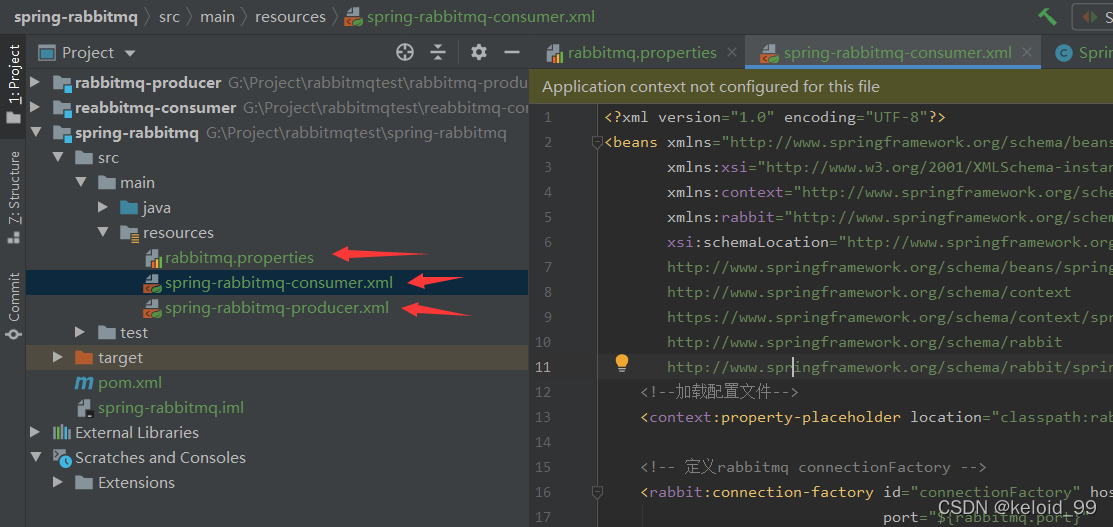
以下三个文件直接复制下面的代码就可以,把rabbitmq配置改成自己的就好了,bean什么的写成自己的
rabbitmq.properties
rabbitmq.host=127.5.19.118 (服务器ip)rabbitmq.port=5672 (rabbitmq端口)rabbitmq.username=admin (rabbitmq用户名)rabbitmq.password=11111 (rabbitmq密码)rabbitmq.virtual-host=/itcast (rabbitmq虚拟机)
spring-rabbitmq-consumer.xml
<?xml version="1.0" encoding="UTF-8"?><beans xmlns="http://www.springframework.org/schema/beans"xmlns:xsi="http://www.w3.org/2001/XMLSchema-instance"xmlns:context="http://www.springframework.org/schema/context"xmlns:rabbit="http://www.springframework.org/schema/rabbit"xsi:schemaLocation="http://www.springframework.org/schema/beanshttp://www.springframework.org/schema/beans/spring-beans.xsdhttp://www.springframework.org/schema/contexthttps://www.springframework.org/schema/context/spring-context.xsdhttp://www.springframework.org/schema/rabbithttp://www.springframework.org/schema/rabbit/spring-rabbit.xsd"><!--加载配置文件--><context:property-placeholder location="classpath:rabbitmq.properties"/><!-- 定义rabbitmq connectionFactory --><rabbit:connection-factory id="connectionFactory" host="${rabbitmq.host}"port="${rabbitmq.port}"username="${rabbitmq.username}"password="${rabbitmq.password}"virtual-host="${rabbitmq.virtual-host}"/><bean id="springQueueListener" class="com.itheima.springRabbitmq.consumer.SpringQueueListener"/><!-- <bean id="fanoutListener1" class="com.itheima.springRabbitmq.consumer.FanoutListener1"/>--><!-- <bean id="fanoutListener2" class="com.itheima.springRabbitmq.consumer.FanoutListener2"/>--><!-- <bean id="topicListenerStar" class="com.itheima.springRabbitmq.consumer.TopicListenerStar"/>--><!-- <bean id="topicListenerWell" class="com.itheima.springRabbitmq.consumer.TopicListenerWell"/>--><!-- <bean id="topicListenerWell2" class="com.itheima.springRabbitmq.consumer.TopicListenerWell2"/>--><rabbit:listener-container connection-factory="connectionFactory" auto-declare="true"><rabbit:listener ref="springQueueListener" queue-names="spring_queue"/><!-- <rabbit:listener ref="fanoutListener1" queue-names="spring_fanout_queue_1"/>--><!-- <rabbit:listener ref="fanoutListener2" queue-names="spring_fanout_queue_2"/>--><!-- <rabbit:listener ref="topicListenerStar" queue-names="spring_topic_queue_star"/>--><!-- <rabbit:listener ref="topicListenerWell" queue-names="spring_topic_queue_well"/>--><!-- <rabbit:listener ref="topicListenerWell2" queue-names="spring_topic_queue_well2"/>--></rabbit:listener-container></beans>
spring-rabbitmq-producer.xml
<?xml version="1.0" encoding="UTF-8"?><beans xmlns="http://www.springframework.org/schema/beans"xmlns:xsi="http://www.w3.org/2001/XMLSchema-instance"xmlns:context="http://www.springframework.org/schema/context"xmlns:rabbit="http://www.springframework.org/schema/rabbit"xsi:schemaLocation="http://www.springframework.org/schema/beanshttp://www.springframework.org/schema/beans/spring-beans.xsdhttp://www.springframework.org/schema/contexthttps://www.springframework.org/schema/context/spring-context.xsdhttp://www.springframework.org/schema/rabbithttp://www.springframework.org/schema/rabbit/spring-rabbit.xsd"><!--加载配置文件--><context:property-placeholder location="classpath:rabbitmq.properties"/><!-- 定义rabbitmq connectionFactory --><rabbit:connection-factory id="connectionFactory" host="${rabbitmq.host}"port="${rabbitmq.port}"username="${rabbitmq.username}"password="${rabbitmq.password}"virtual-host="${rabbitmq.virtual-host}"/><!--定义管理交换机、队列--><rabbit:admin connection-factory="connectionFactory"/><!--定义持久化队列,不存在则自动创建;不绑定到交换机则绑定到默认交换机默认交换机类型为direct,名字为:"",路由键为队列的名称--><rabbit:queue id="spring_queue" name="spring_queue" auto-declare="true"/><!-- ~~~~~~~~~~~~~~~~~~~~~~~~~~~~广播;所有队列都能收到消息~~~~~~~~~~~~~~~~~~~~~~~~~~~~ --><!--定义广播交换机中的持久化队列,不存在则自动创建--><rabbit:queue id="spring_fanout_queue_1" name="spring_fanout_queue_1" auto-declare="true"/><!--定义广播交换机中的持久化队列,不存在则自动创建--><rabbit:queue id="spring_fanout_queue_2" name="spring_fanout_queue_2" auto-declare="true"/><!--定义广播类型交换机;并绑定上述两个队列--><rabbit:fanout-exchange id="spring_fanout_exchange" name="spring_fanout_exchange" auto-declare="true"><rabbit:bindings><rabbit:binding queue="spring_fanout_queue_1"/><rabbit:binding queue="spring_fanout_queue_2"/></rabbit:bindings></rabbit:fanout-exchange><!-- ~~~~~~~~~~~~~~~~~~~~~~~~~~~~通配符;*匹配一个单词,#匹配多个单词 ~~~~~~~~~~~~~~~~~~~~~~~~~~~~ --><!--定义广播交换机中的持久化队列,不存在则自动创建--><rabbit:queue id="spring_topic_queue_star" name="spring_topic_queue_star" auto-declare="true"/><!--定义广播交换机中的持久化队列,不存在则自动创建--><rabbit:queue id="spring_topic_queue_well" name="spring_topic_queue_well" auto-declare="true"/><!--定义广播交换机中的持久化队列,不存在则自动创建--><rabbit:queue id="spring_topic_queue_well2" name="spring_topic_queue_well2" auto-declare="true"/><rabbit:topic-exchange id="spring_topic_exchange" name="spring_topic_exchange" auto-declare="true"><rabbit:bindings><rabbit:binding pattern="heima.*" queue="spring_topic_queue_star"/> <!--星号只能匹配一个单词--><rabbit:binding pattern="heima.#" queue="spring_topic_queue_well"/> <!--井号匹配多个单词--><rabbit:binding pattern="itcast.#" queue="spring_topic_queue_well2"/></rabbit:bindings></rabbit:topic-exchange><!--定义rabbitTemplate对象操作可以在代码中方便发送消息--><rabbit:template id="rabbitTemplate" connection-factory="connectionFactory"/></beans>
Producer
为了能测试执行代码,就写在测试类里面了。
rabbitTemplate.convertAndSend("spring_fanout_exchange","","fanout消息已经发送了"); 当中的 spring_fanout_exchange 是绑定的上面 spring-rabbitmq-producer.xml 当中的对应的bean (<rabbit:fanout-exchange id="spring_fanout_exchange" name="spring_fanout_exchange" auto-declare="true">),有关exchange绑定 queue的配置都在spring-rabbitmq-producer.xml当中。
package com.itheima.springRabbitmq;import org.junit.Test;import org.junit.runner.RunWith;import org.springframework.amqp.rabbit.core.RabbitTemplate;import org.springframework.beans.factory.annotation.Autowired;import org.springframework.test.context.ContextConfiguration;import org.springframework.test.context.junit4.SpringJUnit4ClassRunner;/*** @Author zhizekai* @Date 2022-1-11 15:48:45 15:48* @Version 2.0*/@RunWith(SpringJUnit4ClassRunner.class)@ContextConfiguration(locations = "classpath:spring-rabbitmq-producer.xml")public class ProducerTest {// 注入rabbitmqTemple@Autowiredprivate RabbitTemplate rabbitTemplate;@Testpublic void testProducer() throws InterruptedException {Integer i = 0;while (true) {Thread.sleep(5 * 1000);i++;rabbitTemplate.convertAndSend("spring_queue","消息发送了"+i);}}@Testpublic void testFanout() {rabbitTemplate.convertAndSend("spring_fanout_exchange","","fanout消息已经发送了");}@Testpublic void testTopic() {rabbitTemplate.convertAndSend("spring_topic_exchange","heima.heeh.haha","topic消息已经发送了");}}
Consumer
这个代码是跑起来自动监听的 ,实现一下MessageListener这个类,重写onMessage方法,message.getBody()就是消息内容
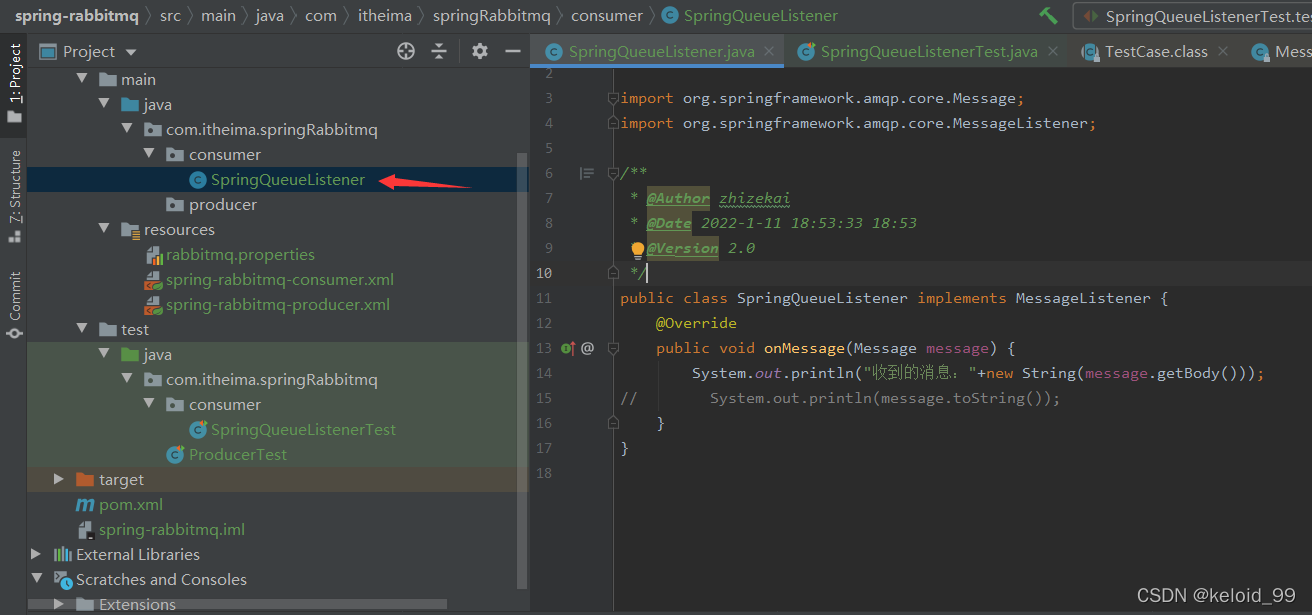
package com.itheima.springRabbitmq.consumer;import org.springframework.amqp.core.Message;import org.springframework.amqp.core.MessageListener;/*** @Author zhizekai* @Date 2022-1-11 18:53:33 18:53* @Version 2.0*/public class SpringQueueListener implements MessageListener {@Overridepublic void onMessage(Message message) {System.out.println("收到的消息:"+new String(message.getBody()));// System.out.println(message.toString());}}
测试代码
package com.itheima.springRabbitmq.consumer;import junit.framework.TestCase;import org.junit.Test;import org.junit.runner.RunWith;import org.springframework.beans.factory.annotation.Autowired;import org.springframework.test.context.ContextConfiguration;import org.springframework.test.context.junit4.SpringJUnit4ClassRunner;/*** @Author zhizekai* @Date 19:01* @Version 2.0*/@RunWith(SpringJUnit4ClassRunner.class)@ContextConfiguration(locations = "classpath:spring-rabbitmq-consumer.xml")public class SpringQueueListenerTest{@Testpublic void testOnMessage() throws InterruptedException {boolean flag = true;while (true) {Thread.sleep(5 * 1000);System.out.println("正在监听");}}}

