一、Gitlab简介
1.1.gitlab简介
官网: https://about.gitlab.com/
GitLab 是一个用于仓库管理系统的开源项目,使用Git作为代码管理工具,并在此基础上搭建起来的web服务。
GitLab和GitHub一样属于第三方基于Git开发的作品,免费且开源(基于MIT协议),与Github类似,可以注册用户,任意提交你的代码,添加SSHKey等等。不同的是,GitLab是可以部署到自己的服务器上,数据库等一切信息都掌握在自己手上,适合团队内部协作开发,你总不可能把团队内部的智慧总放在别人的服务器上吧?简单来说可把GitLab看作个人版的GitHub。
注意:使用VMware安装虚拟机,如果使用mobaXterm连接,需要找到ip地址,但是VMware上使用ip addr命令找到的地址是127.0.0.1,无法使用,需要使用dhclient -v命令,执行后会显示地址
二、Gitlab安装
环境centos 注意:安装gitlab服务,最低服务器配置要求为4G
2.1.B站教学安装
2.1.1.安装相关依赖
yum -y install policycoreutils openssh-server openssh-clients postfix
2.1.2.启动ssh服务&设置为开机启动
systemctl enable sshd && sudo systemctl start sshd
2.1.3.设置postfix
设置开机自启,并启动,postfix支持gitlab发信功能
systemctl enable postfix && sudo systemctl start postfix
2.1.4.开放ssh以及http服务
设置完毕,需要重新加载防火墙列表
注意:也可以直接关闭防火墙
firewall-cmd --add-service=ssh --permanentfirewall-cmd --add-service=http --permanentfirewall-cmd --reload
2.1.5.下载gitlab包
wget https://mirrors.tuna.tsinghua.edu.cn/gitlab-ce/yum/el6/gitlab-ce-12.4.2-ce.0.el6.x86 64.rpm
2.1.6.安装
rpm -i gitlab-ce-12.4.2-ce.0.el6.x86_64.rpm
如果遇到以下报错:
警告:gitlab-ce-11.0.3-ce.0.el7.x86_64.rpm: 头V4 RSA/SHA1 Signature, 密钥 ID f27eab47: NOKEY错误:依赖检测失败:policycoreutils-python 被 gitlab-ce-11.0.3-ce.0.el7.x86_64 需要[root@izbp191siji73ir3cjd0faz tools]# yum install policycoreutils-python
执行以下命令,并再次安装
yum install policycoreutils-pythonrpm -i gitlab-ce-11.0.3-ce.0.el7.x86_64.rpm
2.1.7.修改gitlab配置
vi /etc/gitlab/gitlab.rb
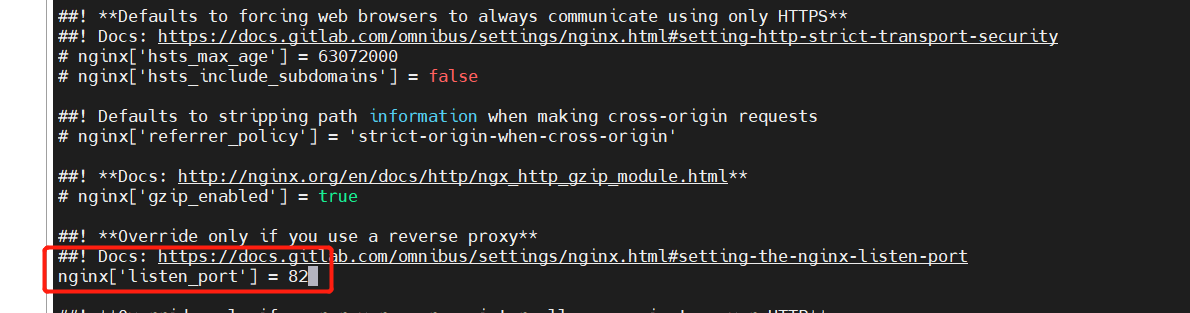
修改gitlab访问地址和端口,默认为80,我们改为82
external_url 'http://192.168.3.10:82'nginx['listen_port'] = 82

2.1.8.重载配置及启动gitlab
gitlab-ctl reconfiguregitlab-ctl restart
2.1.9.把端口添加到防火墙
如防火墙已关闭,跳过
firewall-cmd --zone=public --add-port=82/tcp --permanentfirewall-cmd --reload
2.1.10.重新部署,并访问
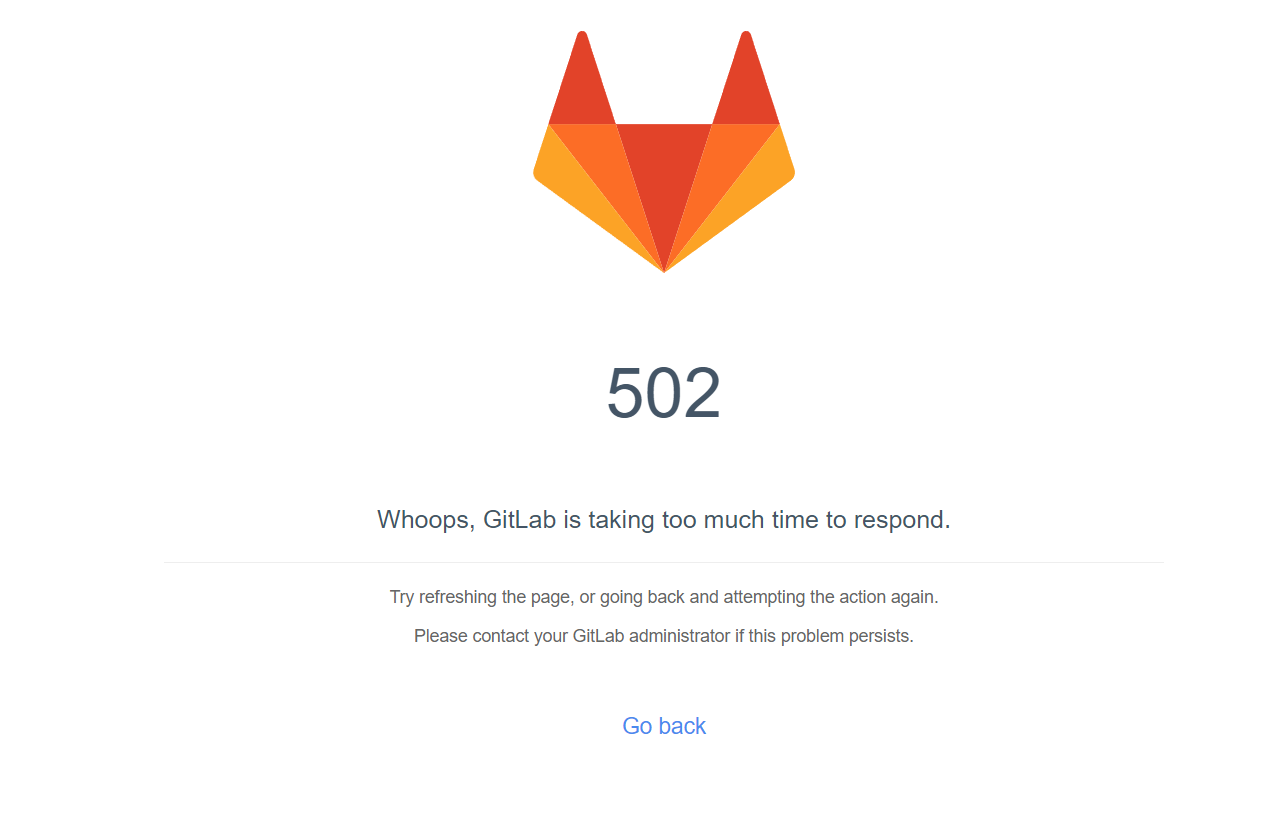
注意:这是正常现象,因为gitlab服务需要启动时间较长,需要等待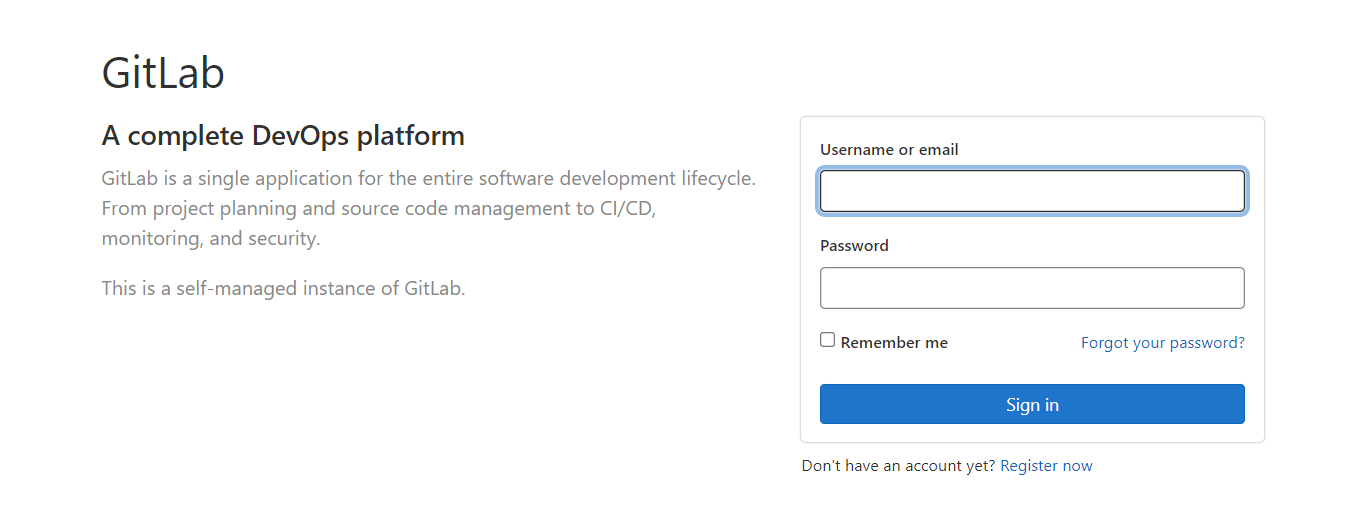
启动成功后,看到以下修改管理员root密码的页面,修改密码后,然后登录即可
注意:如果进入页面默认无修改密码,只有登录,那么需要我们在控制台中修改
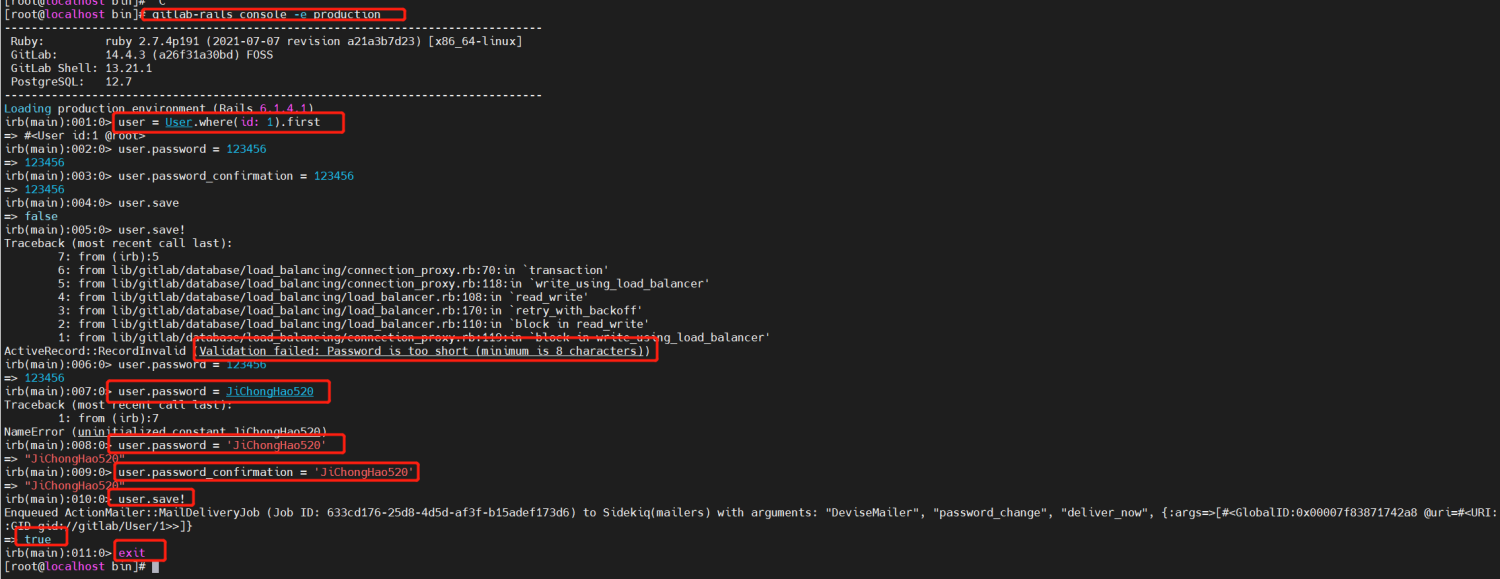
进入gitlab控制台
gitlab-rails console -e production
GitLab 版本不同,命令会有所不同(网上说的而基本都是gitlab-rails console production ),推荐大家直接上 GitLab 官网去找对应版本的命令
我测是使用gitlab-rails console production是进不去GitLab 控制台的
^[[A[git@bogon ~]$ gitlab-rails console productionTraceback (most recent call last):8: from bin/rails:4:in `<main>'7: from bin/rails:4:in `require'6: from /opt/gitlab/embedded/lib/ruby/gems/2.7.0/gems/railties-6.0.3.3/lib/rails/commands.rb:18:in `<top (required)>'5: from /opt/gitlab/embedded/lib/ruby/gems/2.7.0/gems/railties-6.0.3.3/lib/rails/command.rb:46:in `invoke'4: from /opt/gitlab/embedded/lib/ruby/gems/2.7.0/gems/railties-6.0.3.3/lib/rails/command/base.rb:69:in `perform'3: from /opt/gitlab/embedded/lib/ruby/gems/2.7.0/gems/thor-0.20.3/lib/thor.rb:387:in `dispatch'2: from /opt/gitlab/embedded/lib/ruby/gems/2.7.0/gems/thor-0.20.3/lib/thor/invocation.rb:126:in `invoke_command'1: from /opt/gitlab/embedded/lib/ruby/gems/2.7.0/gems/thor-0.20.3/lib/thor/command.rb:27:in `run'/opt/gitlab/embedded/lib/ruby/gems/2.7.0/gems/railties-6.0.3.3/lib/rails/commands/console/console_command.rb:95:in `perform': wrong number of arguments (given 1, expected 0) (ArgumentError)9: from bin/rails:4:in `<main>'8: from bin/rails:4:in `require'7: from /opt/gitlab/embedded/lib/ruby/gems/2.7.0/gems/railties-6.0.3.3/lib/rails/commands.rb:18:in `<top (required)>'6: from /opt/gitlab/embedded/lib/ruby/gems/2.7.0/gems/railties-6.0.3.3/lib/rails/command.rb:46:in `invoke'5: from /opt/gitlab/embedded/lib/ruby/gems/2.7.0/gems/railties-6.0.3.3/lib/rails/command/base.rb:69:in `perform'4: from /opt/gitlab/embedded/lib/ruby/gems/2.7.0/gems/thor-0.20.3/lib/thor.rb:387:in `dispatch'3: from /opt/gitlab/embedded/lib/ruby/gems/2.7.0/gems/thor-0.20.3/lib/thor/invocation.rb:126:in `invoke_command'2: from /opt/gitlab/embedded/lib/ruby/gems/2.7.0/gems/thor-0.20.3/lib/thor/command.rb:20:in `run'1: from /opt/gitlab/embedded/lib/ruby/gems/2.7.0/gems/thor-0.20.3/lib/thor/command.rb:34:in `rescue in run'/opt/gitlab/embedded/lib/ruby/gems/2.7.0/gems/thor-0.20.3/lib/thor/base.rb:506:in `handle_argument_error': ERROR: "rails console" was called with arguments ["production"] (Thor::InvocationError)Usage: "rails console [options]"
当出现如下信息表示我们成功登入控制台
[root@localhost ~]# gitlab-rails console -e production--------------------------------------------------------------------------------GitLab: 12.8.7 (b679f55a199) FOSSGitLab Shell: 11.0.0PostgreSQL: 10.12--------------------------------------------------------------------------------Loading production environment (Rails 6.0.2)irb(main)
执行命令: user = User.where(id: 1).first,此 user 则表示 root 用户
- 修改密码
执行命令:user.password = 'secret_pass'修改密码, user.password_confirmation = 'secret_pass' 确认密码
- 保存密码
执行命令: user.save!
- 退出控制台
2.2.官网教程
2.2.1.安装并配置必要的依赖
On CentOS 7 (and RedHat/Oracle/Scientific Linux 7), the commands below will also open HTTP, HTTPS and SSH access in the system firewall. This is an optional step, and you can skip it if you intend to access GitLab only from your local network.
sudo yum install -y curl policycoreutils-python openssh-server perl# Enable OpenSSH server daemon if not enabled: sudo systemctl status sshdsudo systemctl enable sshdsudo systemctl start sshd# Check if opening the firewall is needed with: sudo systemctl status firewalldsudo firewall-cmd --permanent --add-service=httpsudo firewall-cmd --permanent --add-service=httpssudo systemctl reload firewalld
Next, install Postfix to send notification emails. If you want to use another solution to send emails please skip this step and configure an external SMTP server after GitLab has been installed.
sudo yum install postfixsudo systemctl enable postfixsudo systemctl start postfix
During Postfix installation a configuration screen may appear. Select ‘Internet Site’ and press enter. Use your server’s external DNS for ‘mail name’ and press enter. If additional screens appear, continue to press enter to accept the defaults.
在Postfix安装期间,可能会出现配置屏幕。选择“Internet站点”,然后按enter键。使用服务器的外部DNS作为“邮件名称”,然后按enter键。如果出现其他屏幕,继续按enter键接受默认值。
2.2.2.添加gitlab包仓库并安装
Add the GitLab package repository.
curl https://packages.gitlab.com/install/repositories/gitlab/gitlab-ee/script.rpm.sh | sudo bash
Next, install the GitLab package. Make sure you have correctly set up your DNS, and change https://gitlab.example.com to the URL at which you want to access your GitLab instance. Installation will automatically configure and start GitLab at that URL.
接下来,安装GitLab包。确保已正确设置DNS,并更改https://gitlab.example.com指向要访问GitLab实例的URL。安装将在该URL自动配置并启动GitLab。
For https:// URLs, GitLab will automatically request a certificate with Let’s Encrypt, which requires inbound HTTP access and a valid hostname. You can also use your own certificate or just use http:// (without s).
对于https://url,GitLab将自动请求带有Let’s Encrypt的证书,这需要入站HTTP访问和有效主机名。您也可以使用自己的证书,或者只使用http://(不带s)。
If you would like to specify a custom password for the initial administrator user (root), check the documentation. If a password is not specified, a random password will be automatically generated.
如果要为初始管理员用户(root)指定自定义密码,请查看文档。如果未指定密码,将自动生成随机密码。
sudo EXTERNAL_URL="https://gitlab.example.com" yum install -y gitlab-ee#这里的url改成自己的地址
2.4.docker安装
2.4.1.配置路径
export GITLAB_HOME=/srv/gitlab
2.4.2.安装
docker pull gitlab/gitlab-ce #这里的Community Edition (CE)表示社区标本

docker run -d \--hostname 192.168.254.132 \--publish 7001:443 --publish 7002:80 --publish 7003:22 \--name gitlab --restart always \--volume /home/gitlab/config:/etc/gitlab \--volume /home/gitlab/logs:/var/log/gitlab \--volume /home/gitlab/data:/var/opt/gitlab gitlab/gitlab-ce
| detach | 指定容器运行于前台还是后台 |
|---|---|
| hostname | 指定主机地址,如果有域名可以指向域名 |
| publish | 指定容器暴露的端口,左边的端口代表宿主机的端口,右边的是代表容器的端口 |
2.4.3.修改配置文件
按上面的方式,gitlab容器运行没问题,但在gitlab上创建项目的时候,生成项目的URL访问地址是按容器的hostname来生成的,也就是容器的id。作为gitlab服务器,我们需要一个固定的URL访问地址,于是需要配置gitlab.rb(宿主机路径:/home/gitlab/config/gitlab.rb)配置有三个参数如:
external_url 'http://192.168.1.133'gitlab_rails['gitlab_ssh_host'] = '192.168.1.133'gitlab_rails['gitlab_shell_ssh_port'] = 7003
2.4.4.进入gitlab容器内重启配置服务
docker exec -it gitlab /bin/bash 进去gitlab容器的命令gitlab-ctl reconfigure 重置gitlab客户端的命令
三、Gitlab添加组、创建用户、创建项目
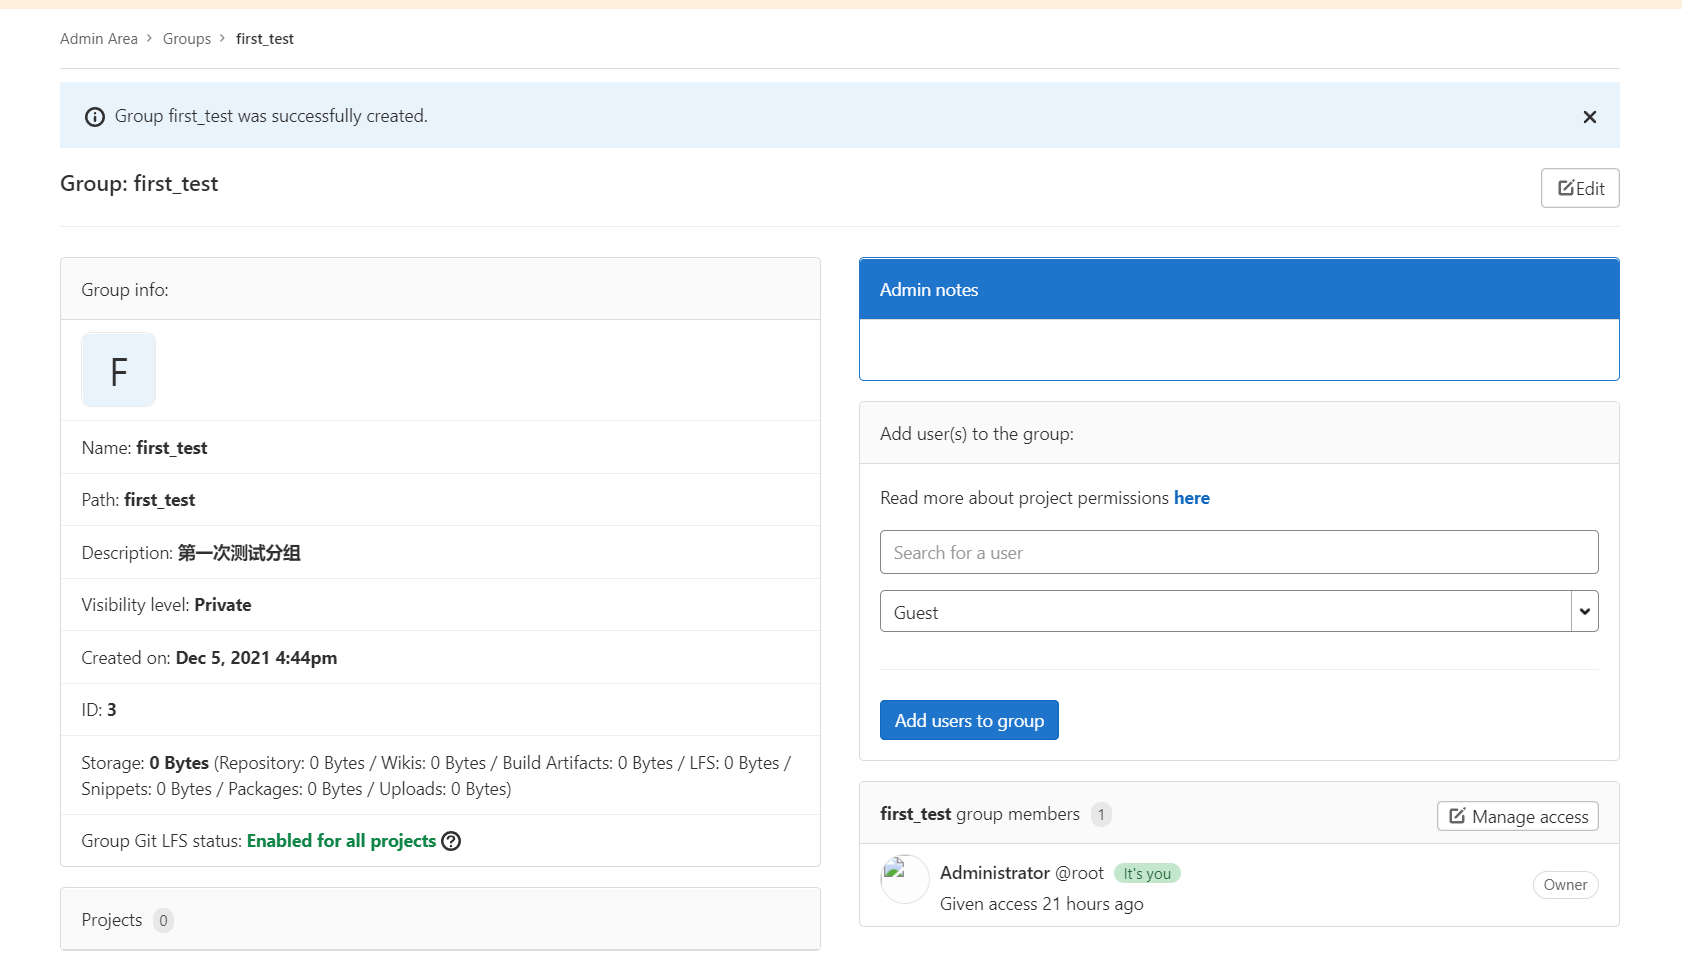
3.1.创建组
使用管理员root创建组,一个组里面可以有多个项目分支,可以将开发分支添加到组里面进行设置权限,不同的组就是公司不同的开发项目或者服务模块,不同的组添加不同的开发即可实现对开发设置权限的管理。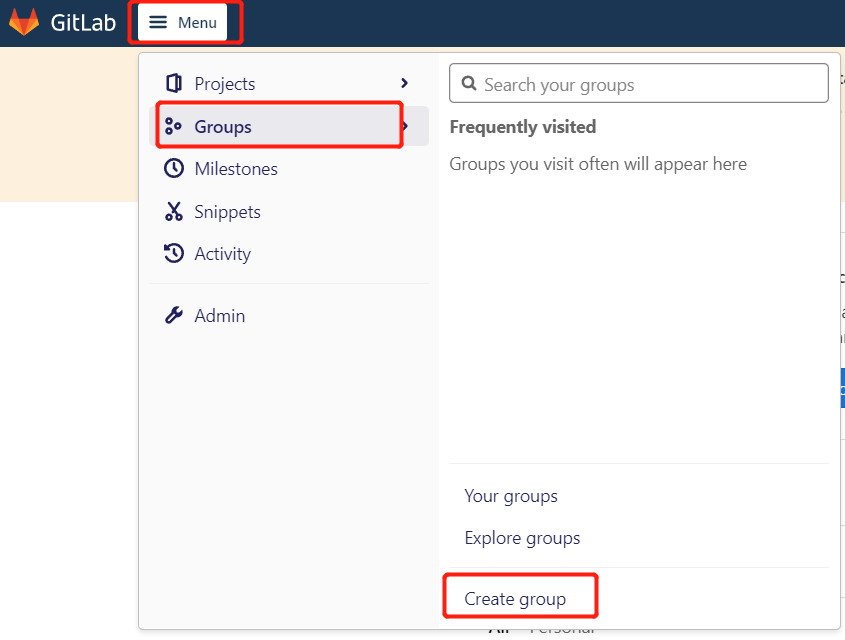
3.2.权限说明
Gitlab用户在组里有5种不同权限:
- Guest:可以创建issue、发表评论,不能读写版本库
- Reporter:可以克隆代码,不能提交,QA、PM可以赋予这个权限
- Developer:可以克隆代码、开发、提交、push,普通开发可以赋予这个权限。
- Maintainer:可以创建项目、添加tag、保护分支、添加项目成员、编辑项目,核心开发可以赋予这个权限。
- Owner:可以设置项目访问权限-Visibility Level、删除项目、迁移项目、管理组成员,开发组组长可以赋予这个权限。
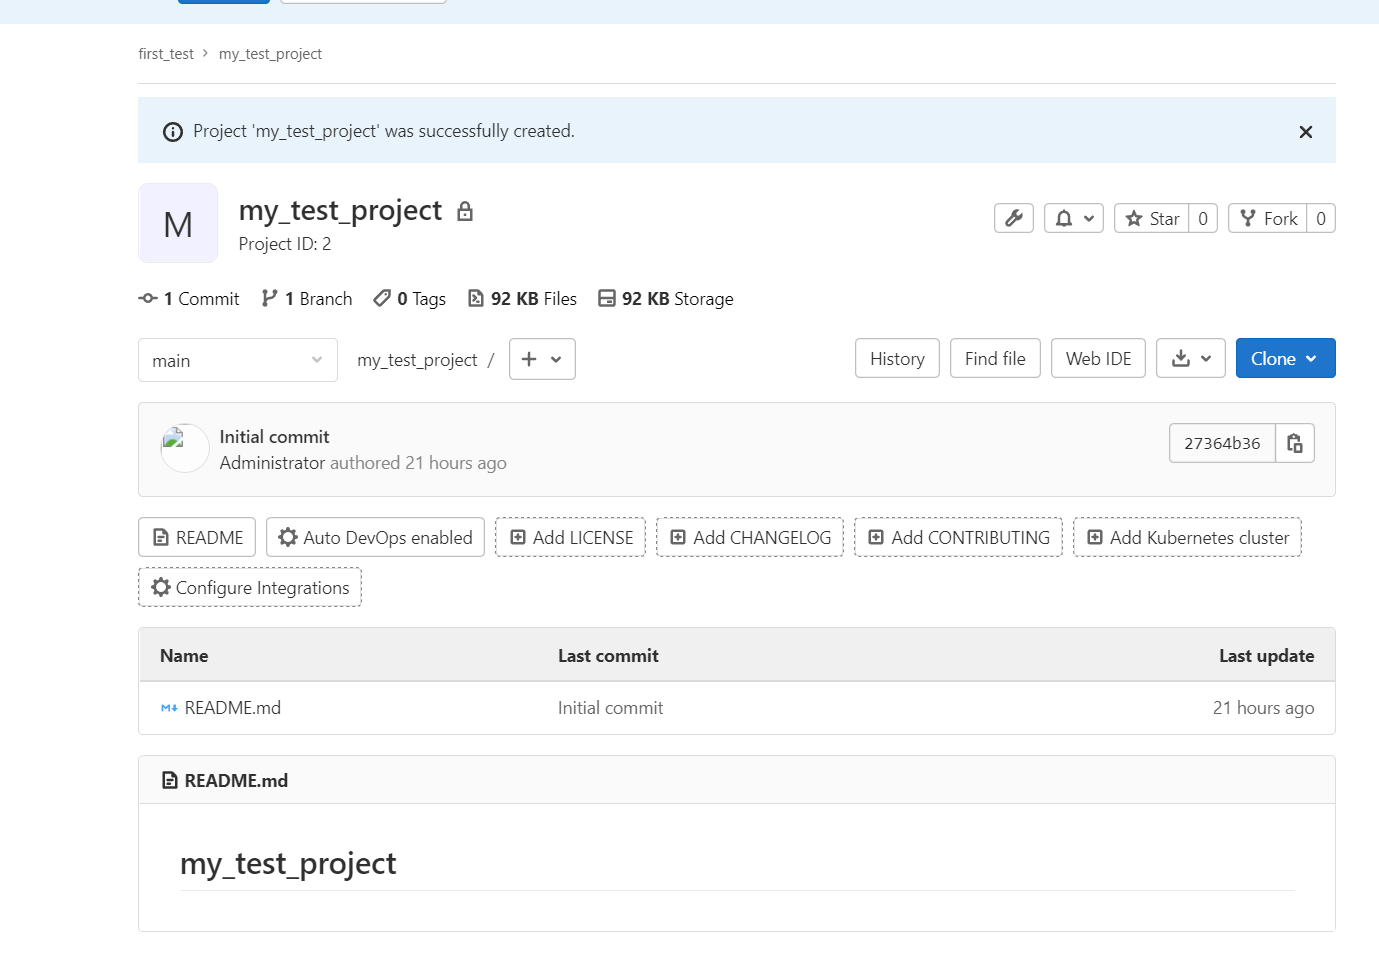
四、源码上传到Gitlab仓库
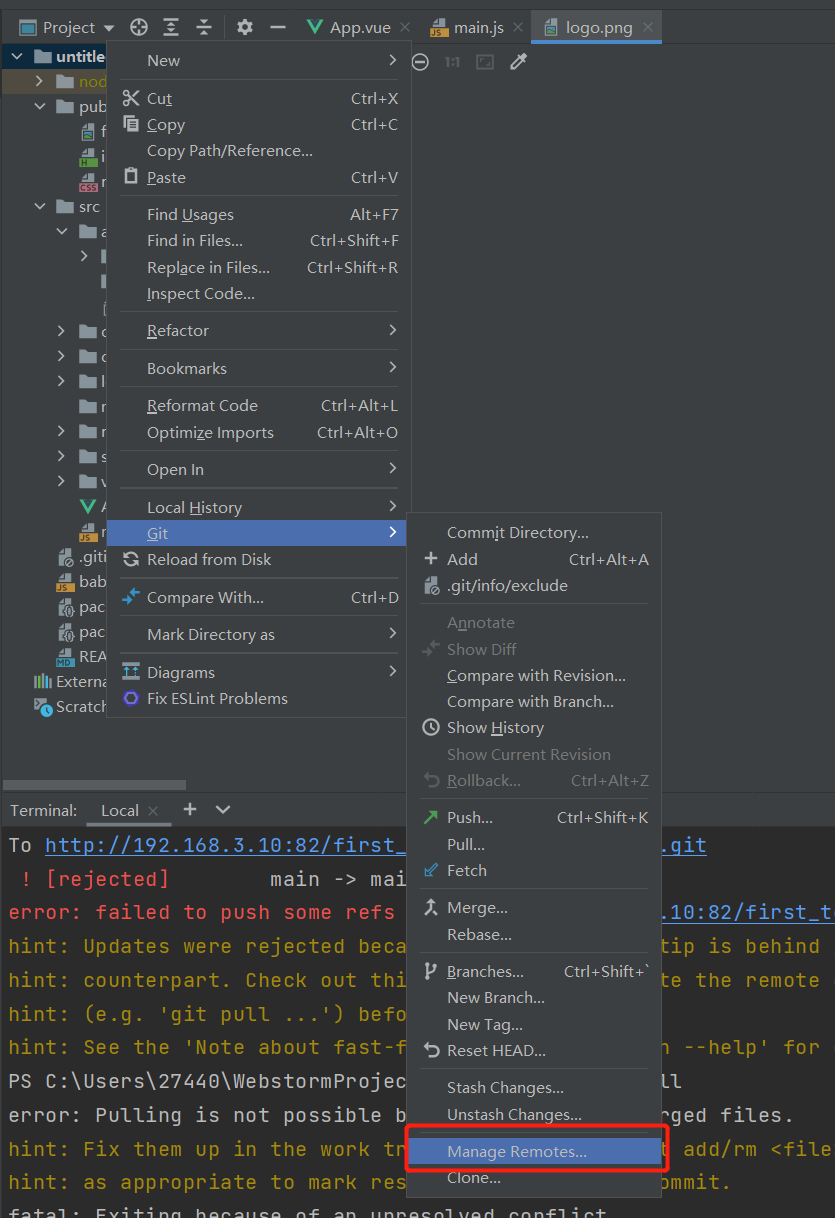
背景:idea中已存在本地项目,并且项目已经推送到GitHub,即已存在远程关联仓库
目的:实现添加gitlab远程仓库关联,并推送4.1.管理远程
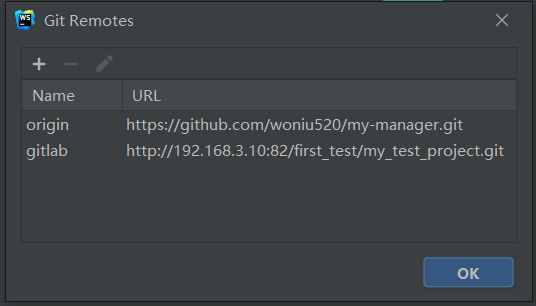
4.1.1.idea设置如下
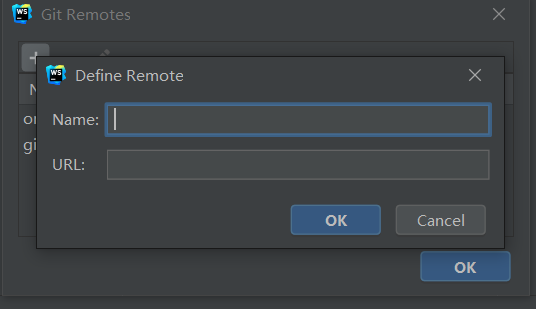
4.1.2.新建远程仓库地址
4.2.初始化远程以及本地
直接推送会报错如下: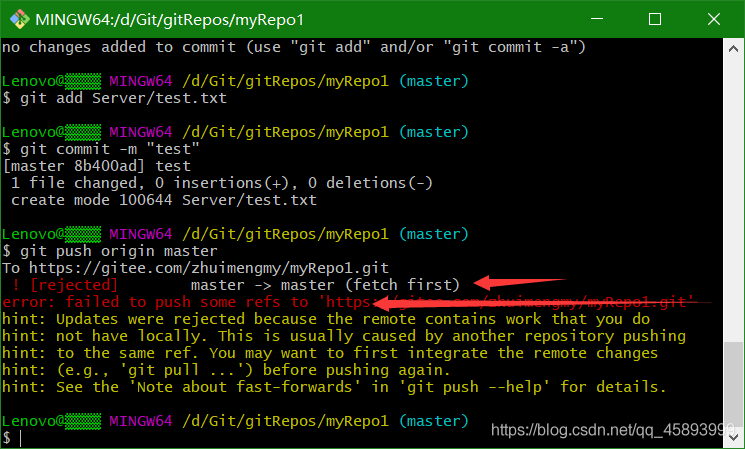
我们在创建仓库的时候,都会勾选“使用Reamdme文件初始化这个仓库”这个操作初识了一个README文件并配置添加了忽略文件。当点击创建仓库时,它会帮我们做一次初始提交。于是我们的仓库就有了README.m和.gitignore文件,然后我们把本地项目关联到这个仓库,并把项目推送到仓库时,我们在关联本地与远程时,两端都是有内容的,但是这两份内容并没有联系,当我们推送到远程或者从远程拉取内容时,都会有没有被跟踪的内容,于是你看git报的详细错误中总是会让你先拉取再推送,但是拉取总是失败。4.2.1.初始化拉取远程
或者直接通过idea先拉取,再推送git pull --rebase origin master

4.3.推送远程

若有收获,就点个赞吧
0 人点赞
