在导航栏组件中,小程序开放了自定义标题栏,只需要在Json文件中设置 "navigationStyle":"custom" ,即可自定义顶部导航栏.
然后使用 wx.getSystemInfo 获取系统的参数,具体参数参考 点我> ,该参数可以获取系统参数, .result.stausBarHeight 返回的是系统栏的高度
可以看到,系统栏到胶囊还有一定距离,通过查阅文章可以知道 安卓是8px,IOS是6px ,那么公式可得
系统栏到胶囊的距离 = 系统栏高度 + 6/8px 
因为胶囊的高度也是动态的,所以我们再动态获取胶囊高度 wx.getMenuButtonBoundingClientRect().height ,相关链接点我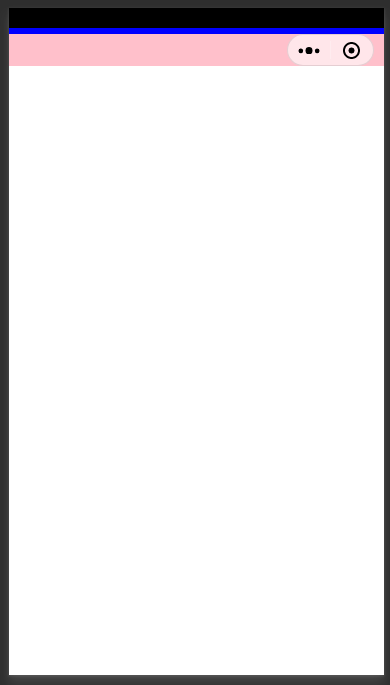
粉色是胶囊栏高度,胶囊栏下方还有一点距离,和安卓/IOS一样 也是 6/8的差距,我们可以写一个wx:if来判断系统来设置胶囊栏高度,
WXML
<!-- 获取胶囊栏高度 --><!-- IOS --><view wx:if="{{Buer === 0}}" class="view_3" style="height:{{ButtonHeight}}px;margin-top:{{statusBarHeight+6}}px;margin-bottom:6px"></view><!-- 安卓 --><view wx:else class="view_3" style="height:{{ButtonHeight}}px;margin-top:{{statusBarHeight+8}}px;margin-bottom:8px"></view>
WXSS
.view_3{width: 100%;background: pink;}
JS
const app = getApp()Page({data: {statusBarHeight: null,ButtonHeight: null,System: null,Buer: null},onLoad: function () {// starwx.getSystemInfo({success: (result) => {this.setData({ statusBarHeight: result.statusBarHeight })let height = wx.getMenuButtonBoundingClientRect().heightthis.setData({ ButtonHeight: height })this.setData({ System: result.system })this.setData({ Buer: this.data.System.indexOf('iOS') })},})// End},})

若有收获,就点个赞吧
0 人点赞
