一、Spring
1、容器——组件注册
1、 @Configuration 注解& @Bean 注解
@Configuration :一般修饰在一个类上,告诉Spring容器这是一个配置类。
其实我们最开始学习Spring的时候,是通过创建一个 xml 文件,通过 bean 标签来注册bean的,如下,我们新建了一个 Person 实体类,然后新建 beans.xml 注册一个 Person 实例到 bean 容器中:
Person.java
@Data@AllArgsConstructor@NoArgsConstructor@ToStringpublic class Person {private String name;private Integer age;}
beans.xml
<?xml version="1.0" encoding="UTF-8"?><beans xmlns="http://www.springframework.org/schema/beans"xmlns:xsi="http://www.w3.org/2001/XMLSchema-instance"xmlns:context="http://www.springframework.org/schema/context"xsi:schemaLocation="http://www.springframework.org/schema/beanshttp://www.springframework.org/schema/beans/spring-beans.xsdhttp://www.springframework.org/schema/contexthttps://www.springframework.org/schema/context/spring-context.xsd"><bean id="person" class="com.ftj.bean.Person"><property name="name" value="ftj"/><property name="age" value="18"/></bean></beans>
测试类:MainTest.java
public class MainTest {@Testpublic void test() {ApplicationContext context = new ClassPathXmlApplicationContext("classpath:beans.xml");Person person = (Person) context.getBean("person");System.out.println(person);}}
 如上,通过
如上,通过ClassPathXmlApplicationContext加载配置文件,加载到 Spring 应用上下文,获取bean实例,即可得到刚才注册的 id 为 person 的 bean 实例。
而现在我们可以通过 @Configuration 注解和 @bean 注解去给容器注册组件,如下:只需要新建一个配置类 MainConfig.java (名字随意),里面创建一个返回值类型为所需注册组件类型的方法即可。
//配置类==配置文件@Configuration //告诉spring这是一个配置类public class MainConfig {@Bean("person") //给容器中注册一个Bean;类型:返回值类型 id:默认方法名为idpublic Person getPerson() {return new Person("lisi", 20);}}
此处:可以通过给 @bean 注解,设置组件的名称(如果不设置,默认是方法名作为bean组件名称),效果类似与配置文件形式的 bean 标签内的 id 。
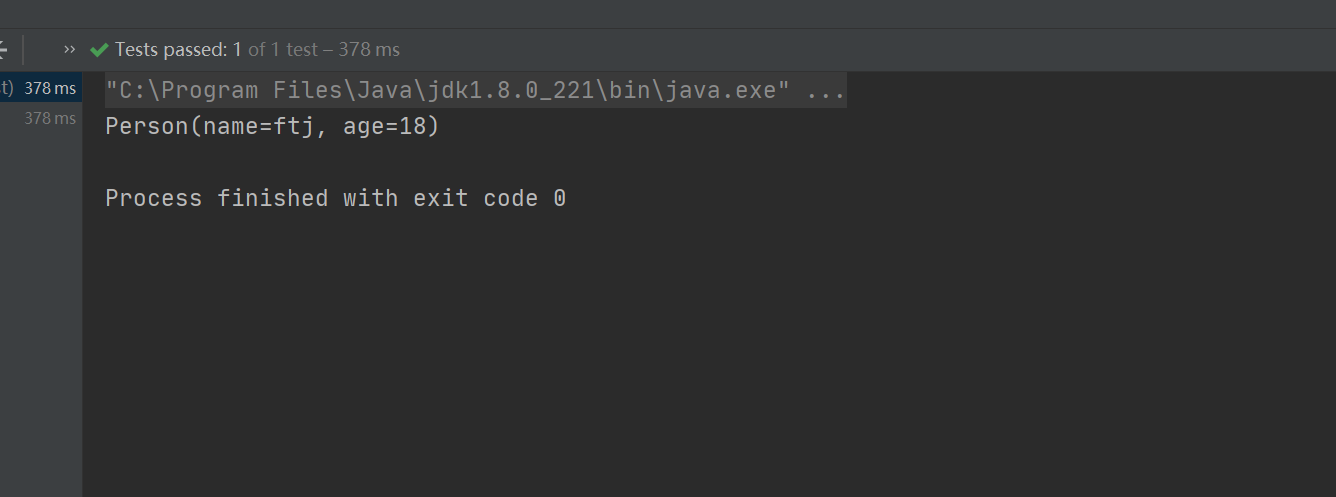
public class MainTest {@Testpublic void test2() {ApplicationContext context = new AnnotationConfigApplicationContext(MainConfig.class);Person getPerson = (Person) context.getBean("person");System.out.println(getPerson);//获取Person类型的bean的名字String[] beanNamesForType = context.getBeanNamesForType(Person.class);for (String s : beanNamesForType) {System.out.println(s);}}}
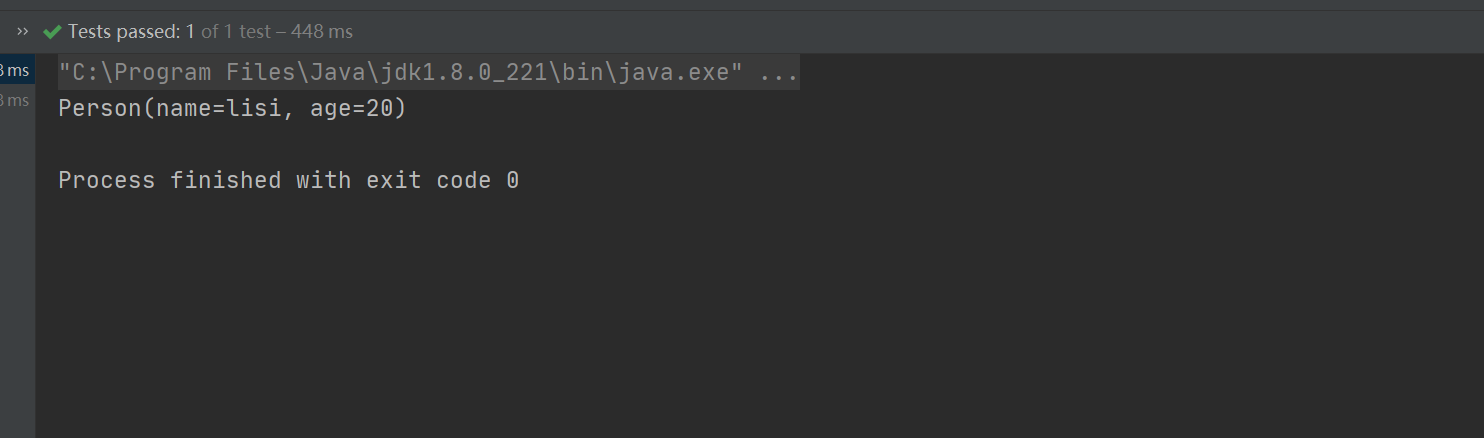
效果跟配置文件形式获取bean是一样的,这里要注意的是,注解方式是通过 AnnotationConfigApplicationContext 来加载 Spring 应用的上下文的。
注意:这里可以使用 getBeanNamesForType 方法,传递某个类型,即可以查看该类型在bean容器中,有哪些组件,如上例,我们通过 @Bean 注解注册了名为 person 的组件,那么遍历下结果,就为如下: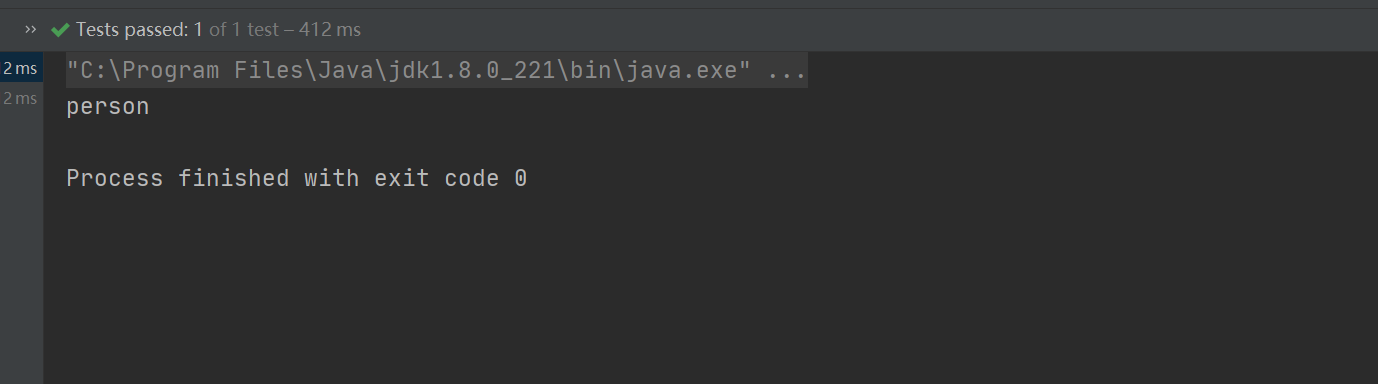
2、 @ComponentScan 自动扫描组件&指定扫描组件
@ComponentScan 注解用来扫描组件并且注册(可以指定需要扫描的组件)。
在原来我们使用 XML 方式开发的时候,我们需要通过 context:component-scan 标签的 base-package 属性来指定需要扫描的组件,如下:
<context:component-scan base-package="com.ftj" use-default-filters="true"></context:component-scan>
use-default-filters 属性默认 true ,如果是 fasle 那么则是,禁用默认的扫描规则(默认一般扫描 @Component @Service @Repository @Controller 注解),自己指定扫描规则,可以使用 context:include-filter 标签来指定:
<!-- 配置自动扫描的包 --><context:component-scan base-package="" use-default-filters="false"><context:include-filter type="annotation" expression="org.springframework.stereotype.Controller"/>//只扫描@Controller</context:component-scan>
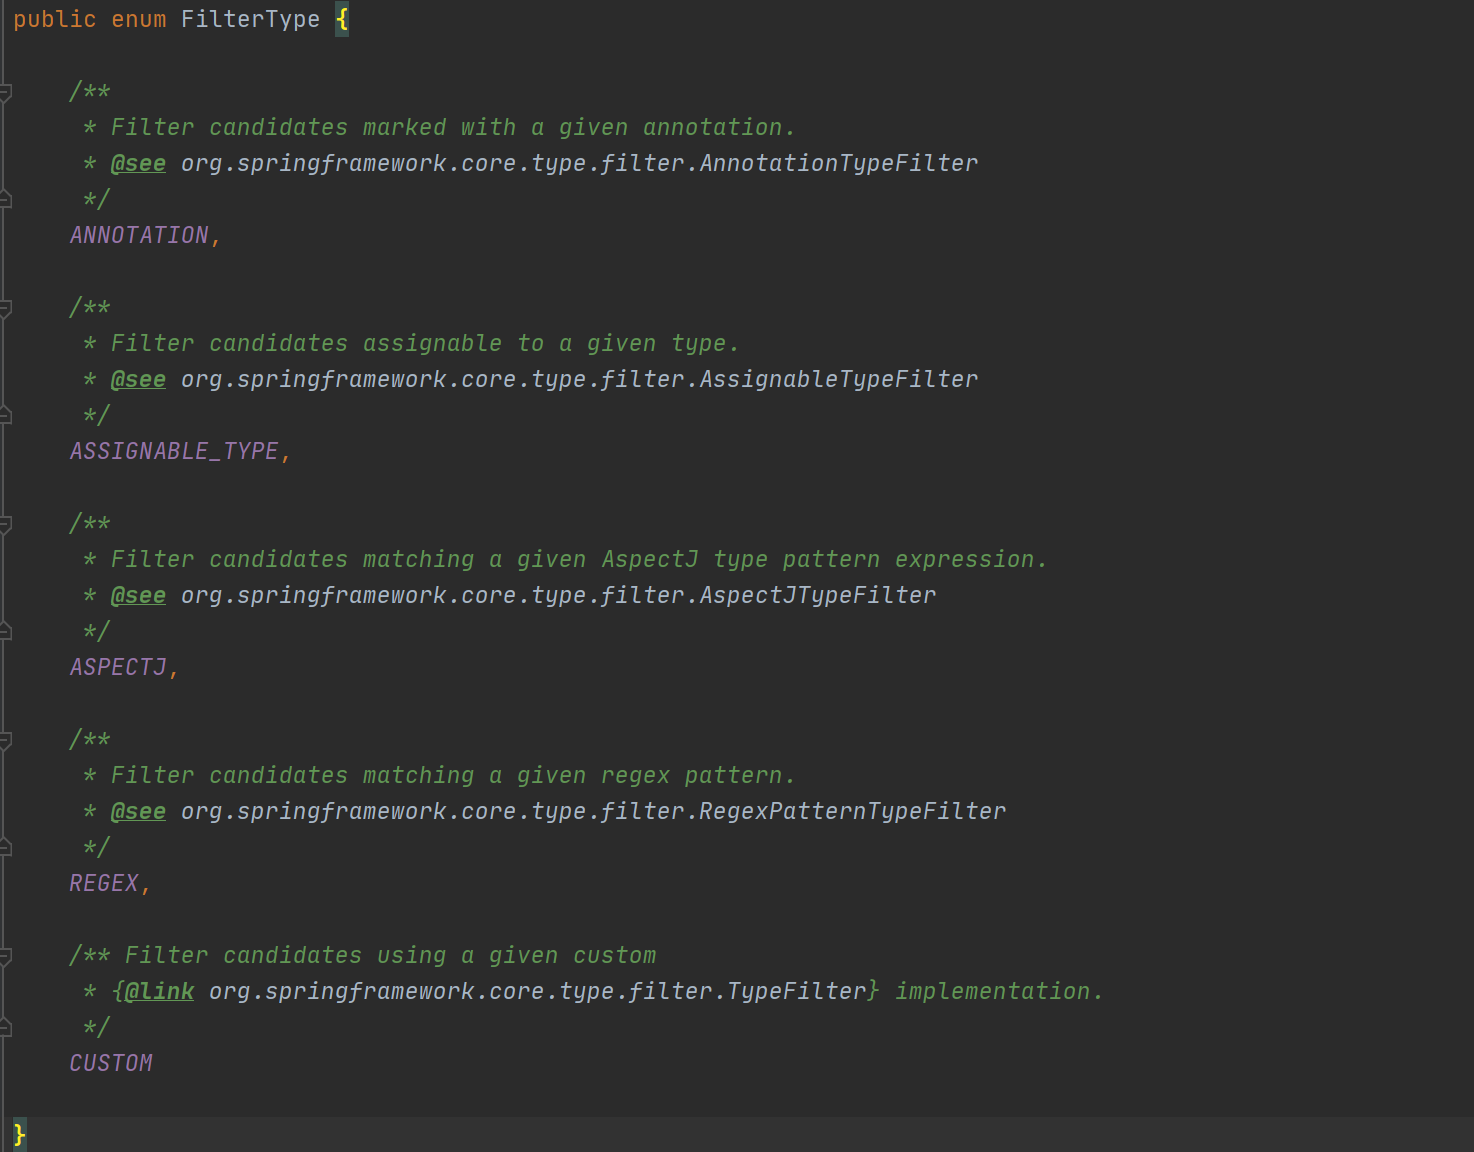
excludeFilters = Filter[] :指定扫描的时候按照什么规则排除哪些组件。 includeFilters = Filter[]:指定扫描的时候只需要包含哪些组件。
现在我们可以再主配置类上,使用@ComponentScan注解来指定要扫描的包,如下:
@ComponentScan(value = "com.ftj", includeFilters = {@ComponentScan.Filter(type = FilterType.ANNOTATION, classes = {Controller.class, Service.class})}, useDefaultFilters = false)
includeFilters 和Filter 一起使用是用来指定需要扫描的包,如上,说明只需要扫描 @Controller 和 @Service 注解下的类,而禁用默认规则则可以使用 useDefaultFilters 为 false 。
而且我们可以通过查看源码发现,还可以通过其他的规则进行排除:如根据类型 ASSIGNABLE_TYPE (如果排除的是User.class,那么其子类,实现类的都会被排除),ASPECTJ ,REGEX 正则, CUSTOM
也可以这么玩:
@ComponentScans(value = {@ComponentScan(value = "com.ftj", includeFilters = {@ComponentScan.Filter(type = FilterType.ANNOTATION, classes = {Controller.class, Service.class})}, useDefaultFilters = false)})
@ComponentScans 注解中使用 value 可以放多个 @ComponentScan 。

若有收获,就点个赞吧
0 人点赞
