- 一:环境准备
- 查看防火墙状态
systemctl status firewalld
#查看开机是否启动防火墙服务
systemctl is-enabled firewalld
#关闭防火墙
systemctl stop firewalld systemctl disable firewalld
#再次查看防火墙状态和开机防火墙是否启动
systemctl status firewalld - 二:NTP时间同步
- 0.centos.pool.ntp.org iburst
# server 1.centos.pool.ntp.org iburst
# server 2.centos.pool.ntp.org iburst
# server 3.centos.pool.ntp.org iburst
# 添加:
server 127.127.1.0 # 表示NTP主服务器是与自身的系统时钟同步
fudge 127.127.1.0 stratum 10 # 指定阶层编号为10,降低其优先度
server hadoop001 # 配置时间服务器为本地的时间服务器
restrict hadoop001 nomodify notrap noquery # 允许上层时间服务器主动修改本机时间">将下列字段注释:
# server 0.centos.pool.ntp.org iburst
# server 1.centos.pool.ntp.org iburst
# server 2.centos.pool.ntp.org iburst
# server 3.centos.pool.ntp.org iburst
# 添加:
server 127.127.1.0 # 表示NTP主服务器是与自身的系统时钟同步
fudge 127.127.1.0 stratum 10 # 指定阶层编号为10,降低其优先度
server hadoop001 # 配置时间服务器为本地的时间服务器
restrict hadoop001 nomodify notrap noquery # 允许上层时间服务器主动修改本机时间 - 三:安装mysql,jdk
- 四:制作本地yum
- 五:安装ambari
- 六:部署ambari
- 七:hdfs,mapreduce安装
- 八:hive安装
- 九:atlas安装
- 十:dolphin安装
- 十一:常用命令
- 十二:FAQ
- 十二:依赖配置
- 1:具体服务安装位置,以hive为例
- 2:hdfs默认用户名
- 3:hive默认用户
- 4:hdfs查看数据目录
- 5:各web管理登录用户
- http://node12:8080/#/login admin/admin">(1):ambari http://node12:8080/#/login admin/admin
- http://node13.data.yuzhilin.net.cn:16010/master-status">(2):hbase http://node13.data.yuzhilin.net.cn:16010/master-status
- http://node12.data.yuzhilin.net.cn:8886/solr/#/">(3):solr http://node12.data.yuzhilin.net.cn:8886/solr/#/
- http://node21.data.yuzhilin.net.cn:21000/login.jsp admin/yzl123456">(4):atlas http://node21.data.yuzhilin.net.cn:21000/login.jsp admin/yzl123456
- http://node13:12345/dolphinscheduler admin/dolphinscheduler123">(5):dolphinscheduler http://node13:12345/dolphinscheduler admin/dolphinscheduler123
- http://node13.data.yuzhilin.net.cn:6080/index.htm admin/admin">(6):ranger http://node13.data.yuzhilin.net.cn:6080/index.htm admin/admin
- http://node12:50070/explorer.html">(N):hdfs namenode http://node12:50070/explorer.html
- 6:依赖mysql库信息配置
- 十三:软件安装包及文档
一:环境准备
1:yum安装包
yum install net-tools
yum install vim
yum install wget
yum install sshd
#时间同步
yum install ntp
#apache服务
yum -y install httpd
yum install rsync
2:设置主机名
hostnamectl set-hostname node12
hostnamectl set-hostname node13
hostnamectl set-hostname node14
hostnamectl set-hostname node21
vi /etc/hosts
192.168.32.12 node12.data.yuzhilin.net.cn node12
192.168.32.13 node13.data.yuzhilin.net.cn node13
192.168.32.14 node14.data.yuzhilin.net.cn node14
192.168.32.21 node21.data.yuzhilin.net.cn node21
3:关闭防火墙
查看防火墙状态
systemctl status firewalld
#查看开机是否启动防火墙服务
systemctl is-enabled firewalld
#关闭防火墙
systemctl stop firewalld systemctl disable firewalld
#再次查看防火墙状态和开机防火墙是否启动
systemctl status firewalld
4:关闭selinux
vi /etc/selinux/config
修改为SELINUX=disabled
重启
查看selinux状态
getenforce
5:免密
ssh-keygen -t rsa
ssh-copy-id node12
ssh-copy-id node13
ssh-copy-id node14
ssh-copy-id node21
二:NTP时间同步
1:yum install ntp
2:查看是否上海时区
3:配置ntp配置文件
node12
vim /etc/ntp.conf
# 将下列字段注释:
# server 0.centos.pool.ntp.org iburst
# server 1.centos.pool.ntp.org iburst
# server 2.centos.pool.ntp.org iburst
# server 3.centos.pool.ntp.org iburst
# 添加:
server 127.127.1.0 # 表示NTP主服务器是与自身的系统时钟同步
fudge 127.127.1.0 stratum 10 # 指定阶层编号为10,降低其优先度
4:其他节点修改
将下列字段注释:
# server 0.centos.pool.ntp.org iburst
# server 1.centos.pool.ntp.org iburst
# server 2.centos.pool.ntp.org iburst
# server 3.centos.pool.ntp.org iburst
# 添加:
server 127.127.1.0 # 表示NTP主服务器是与自身的系统时钟同步
fudge 127.127.1.0 stratum 10 # 指定阶层编号为10,降低其优先度
server hadoop001 # 配置时间服务器为本地的时间服务器
restrict hadoop001 nomodify notrap noquery # 允许上层时间服务器主动修改本机时间
5:各服务器查看时间
6:各服务器启动ntp服务
7:平滑临时同步
8:各个服务器同步硬件时间
系统时间同步硬件时间
hwclock —systohc
查看硬件时间
hwclock
9:各个服务器开机自启动
vim /etc/rc.d/rc.local
#新增
service ntpd restart
#增加权限
chmod +x /etc/rc.d/rc.local
三:安装mysql,jdk
1:(node12主节点安装)检查当前系统是否安装过Mysql
2:如果存在通过如下命令卸载
sudo rpm -e —nodeps mariadb-libs
3:MySQL安装包拷贝到/opt/software目录下
tar -xf mysql-5.7.28-1.el7.x86_64.rpm-bundle.tar
4:在安装目录下执行rpm安装,按照顺序依次执行
sudo rpm -ivh mysql-community-common-5.7.28-1.el7.x86_64.rpm
sudo rpm -ivh mysql-community-libs-5.7.28-1.el7.x86_64.rpm
sudo rpm -ivh mysql-community-libs-compat-5.7.28-1.el7.x86_64.rpm
sudo rpm -ivh mysql-community-client-5.7.28-1.el7.x86_64.rpm
sudo rpm -ivh mysql-community-server-5.7.28-1.el7.x86_64.rpm
如果Linux是最小化安装的,在安装mysql-community-server-5.7.28-1.el7.x86_64.rpm时可能会出 现如下错误
sudo rpm -ivh mysql-community-server-5.7.28-1.el7.x86_64.rpm
错误:依赖检测失败:
libaio.so.1()(64bit) 被 mysql-community-server-5.7.28-1.el7.x86_64 需要
libaio.so.1(LIBAIO_0.1)(64bit) 被 mysql-community-server-5.7.28-1.el7.x86_64 需要
libaio.so.1(LIBAIO_0.4)(64bit) 被 mysql-community-server-5.7.28-1.el7.x86_64 需要
yum install -y libaio
5:删除/etc/my.cnf文件中datadir指向的目录下的所有内容,如果有内容的情况下
查看datadir的值:
[mysqld]
datadir=/var/lib/mysql
删除/var/lib/mysql目录下的所有内容:
cd /var/lib/mysql
sudo rm -rf ./* //注意执行命令的位置
6:初始化数据库
sudo mysqld —initialize —user=mysql
7:查看临时生成的root用户的密码
8:启动MySQL服务
sudo systemctl start mysqld
登录:mysql -uroot -p
修改root用户的密码
set password = password(“新密码”)
修改mysql库下的user表中的root用户允许任意ip连接
update mysql.user set host=’%’ where user=’root’;
flush privileges;
开机启动
sudo systemctl enable mysqld
9:新增ambari用户并增加权限
登陆
mysql -uroot -proot123456
创建ambari库,默认ambari配置
Create database ambari;
创建用户ambari 密码bigdata 任何ip都能访问 默认ambari配置
CREATE USER’ambari’@’%’ IDENTIFIED BY ‘bigdata’;
授ambari库所有权限给用户ambari
GRANT ALL ON ambari.*TO’ambari’@’%’;
刷新权限
FLUSH PRIVILEGES;
10:(每个节点安装)安装jdk
mkdir /usr/java;将下载的压缩包上传到java文件夹内
解压压缩包:tar zxvf jdk-8u151-linux-x64.tar.gz
配置jdk环境变量:
# 编辑/etc/profile,文末插入以下内容:
export JAVA_HOME=/usr/java/jdk1.8.0_151
export PATH=$JAVA_HOME/bin:$PATH
使环境变量生效:source /etc/profile
安装验证:java -version
四:制作本地yum
1:node12安装httpd等服务
yum install wget
#安装httpd
yum -y install httpd
#开机启动
systemctl enable httpd
#启动httpd
systemctl start httpd
#访问 hadoop001
http://hadoop001
2:制作yum
cd /var/www/html
解压
tar -zxvf ambari-2.7.3.0-centos7.tar.gz
ambari
tar -zxvf HDP-3.1.0.0-centos7-rpm.tar.gz
HDP
tar -zxvf HDP-GPL-3.1.0.0-centos7-gpl.tar.gz
HDP-GPL
tar -zxvf HDP-UTILS-1.1.0.22-centos7.tar.gz
HDP-UTILS
解压完点击http://node12/ambari/centos7/2.7.3.0-139/
3:创建源
cd /etc/yum.repos.d/
vim ambari.repo
[ambari]
name=ambari
baseurl=http://node12/ambari/centos7/2.7.3.0-139/
enabled=1
gpgcheck=0
4:分发ambari.repo到其他节点
scp -r ambari.repo root@hadoop101:/etc/yum.repos.d/
五:安装ambari
1:mkdir -p /usr/share/java
mysql驱动mysql-connector-java.jar放在/usr/share/java
2:yum install ambari-server
3:导入ambari库
Mysql -uroot -p123456
use ambari;
source /var/lib/ambari-server/resources/Ambari-DDL-MySQL-CREATE.sql;
4:安装ambari
ambari-server setup
选择是否自定义 ambari-server 的运行用户,我们保持默认 root 用户即可,所以输入 y 输入root
选择 2,代表自定义 java
指定安装的 java 的路径
提示是否下载并安装 LZO 的包,输入 y 
是否进入数据库高级设置,输入 y
选择数据库,选择3
MySQL 的相关配置均采用默认值,默认用户和 db 都是 ambari,密码是 bigdata
指定 MySQL 的驱动包所在的路径
/usr/share/java/mysql-connector-java.jar
选择可以远程连接该数据库(y)
5:启动ambari
ambari-server start ,如下图则成功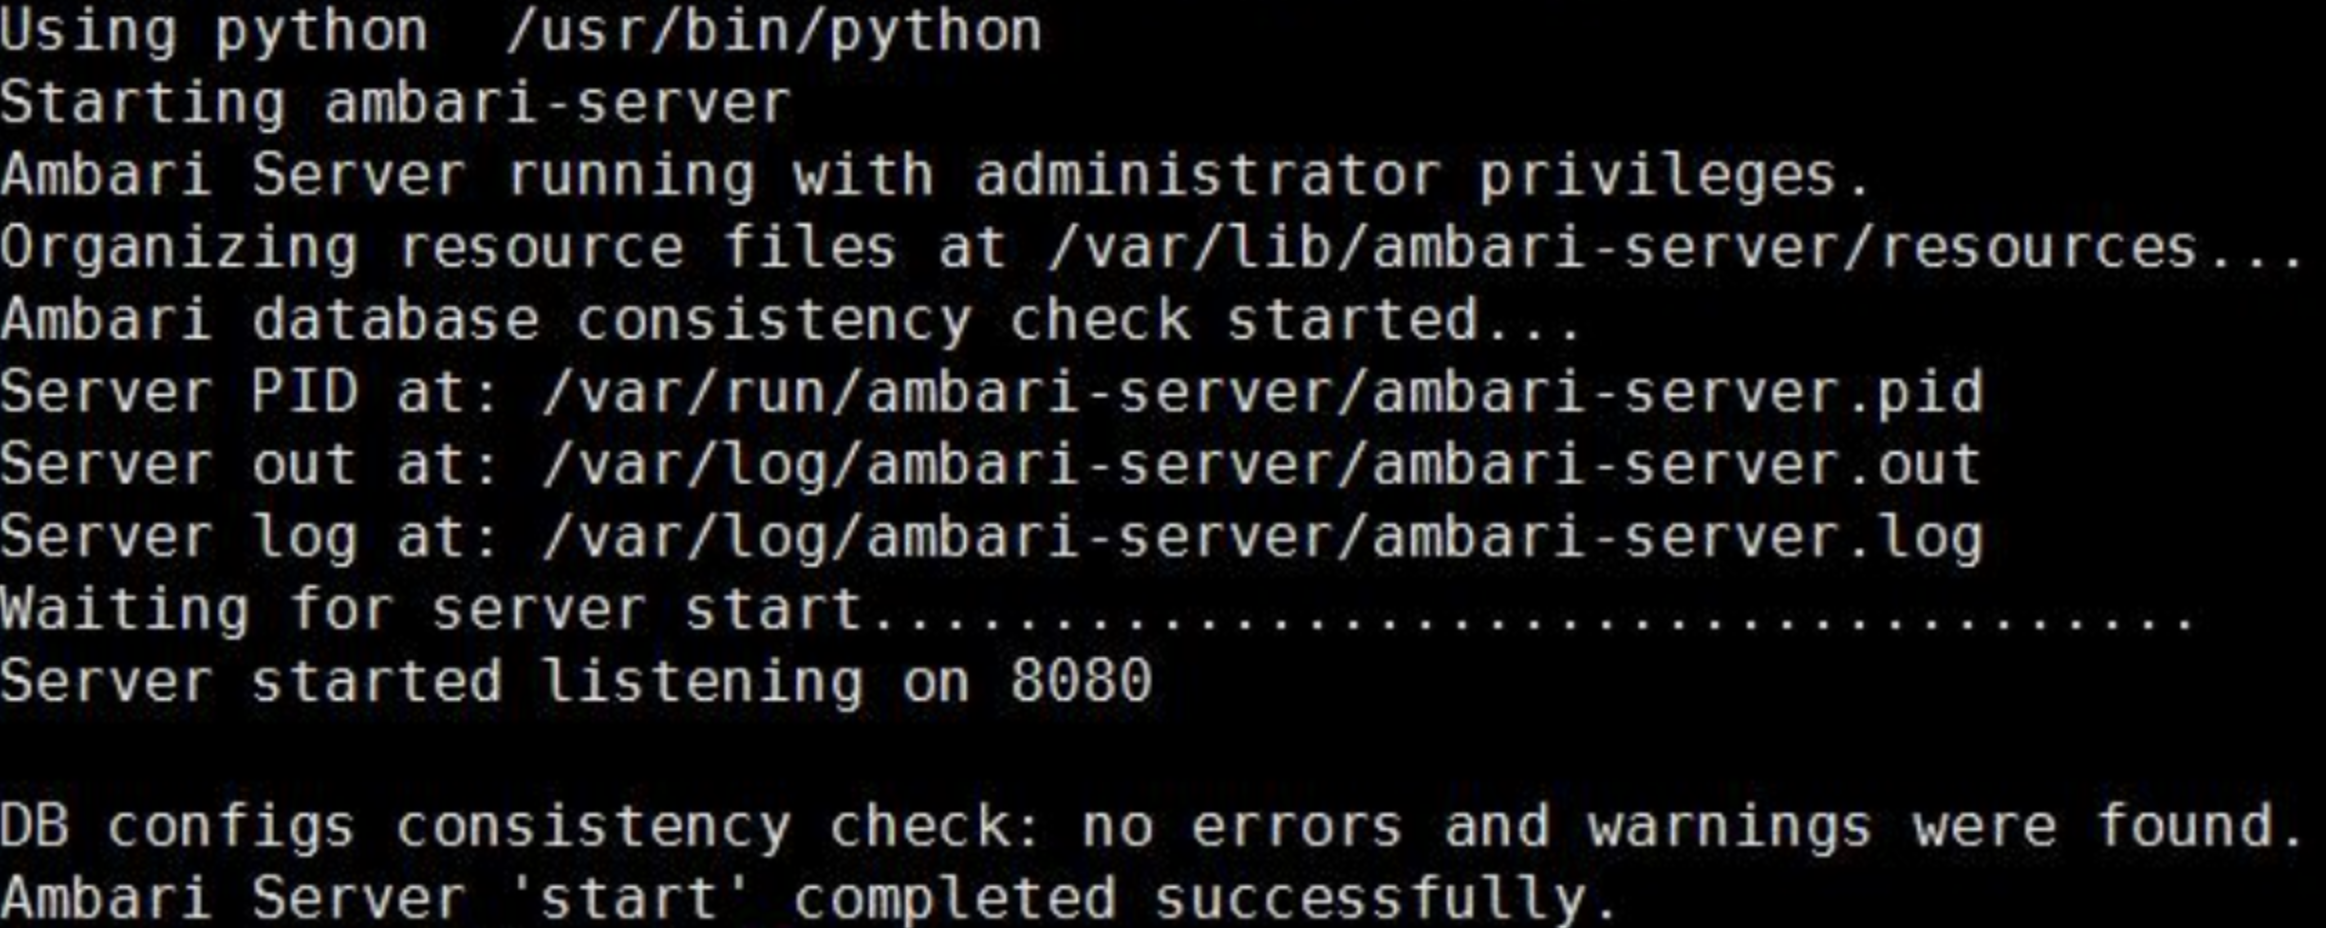
如果出现错误,一定要查看日志:cat /var/log/ambari-server/ambari-server.log
如果日志中出现找不到mysql 驱动 尝试:
cd /var/lib/ambari-server/resources/
ln -s /usr/share/java/mysql-connector-java.jar mysql-connector-java.jar
ambari-server restart重启
6:卸载SMARTSENCE
由于SMARTSENCE安装时间较长,且后期可能收费,需要卸载SMARTSENCE服务
各服务器卸载SMARTSENCE
find / -name SMARTSENSE | xargs
rm -rf /var/lib/ambari-server/resources/stacks/HDP/2.1/services/SMARTSENSE /var/lib/ambari-server/resources/stacks/HDP/3.0/services/SMARTSENSE
7:访问web
http://node12:8080 默认用户名密码 admin/admin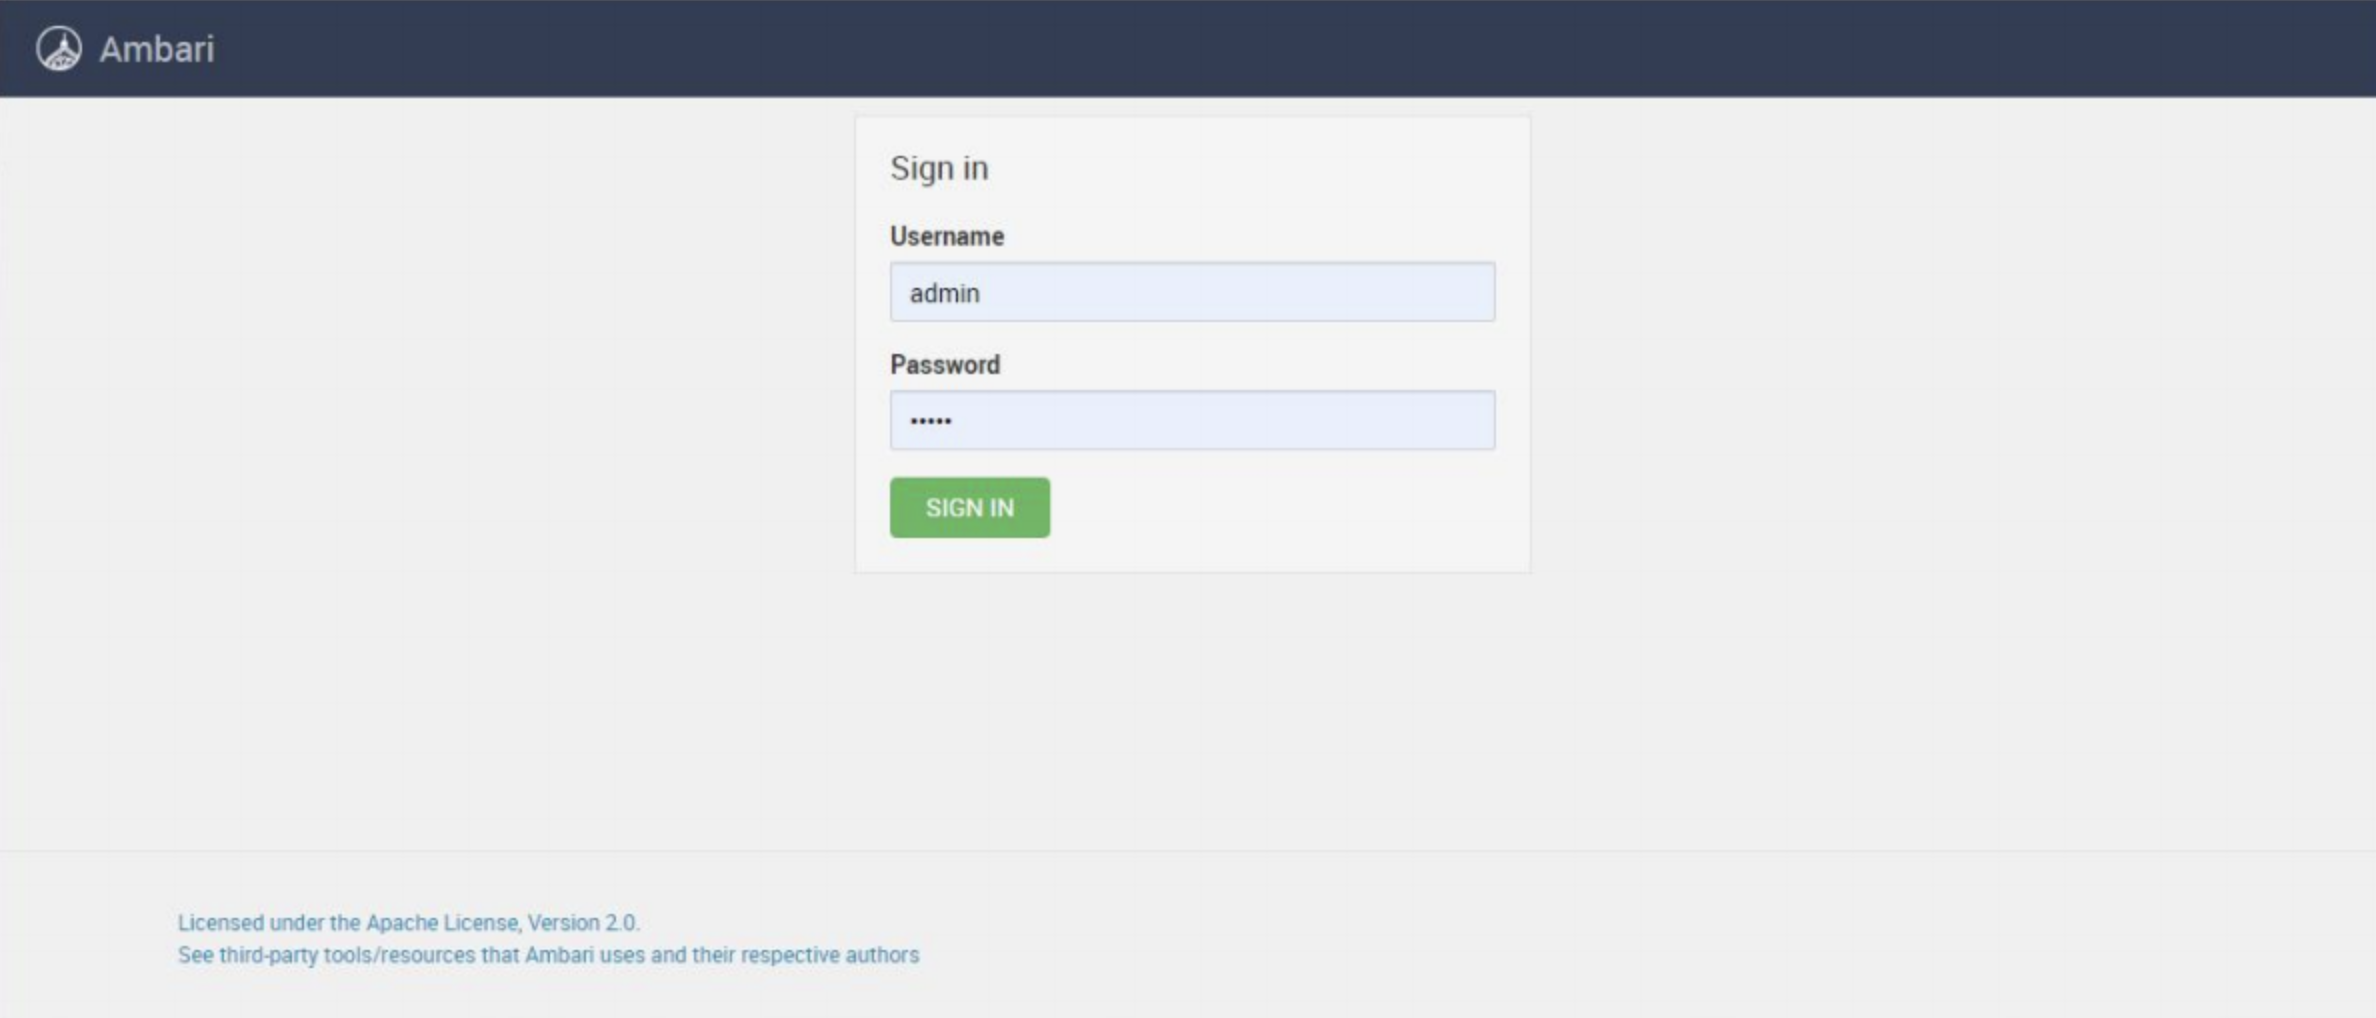
六:部署ambari
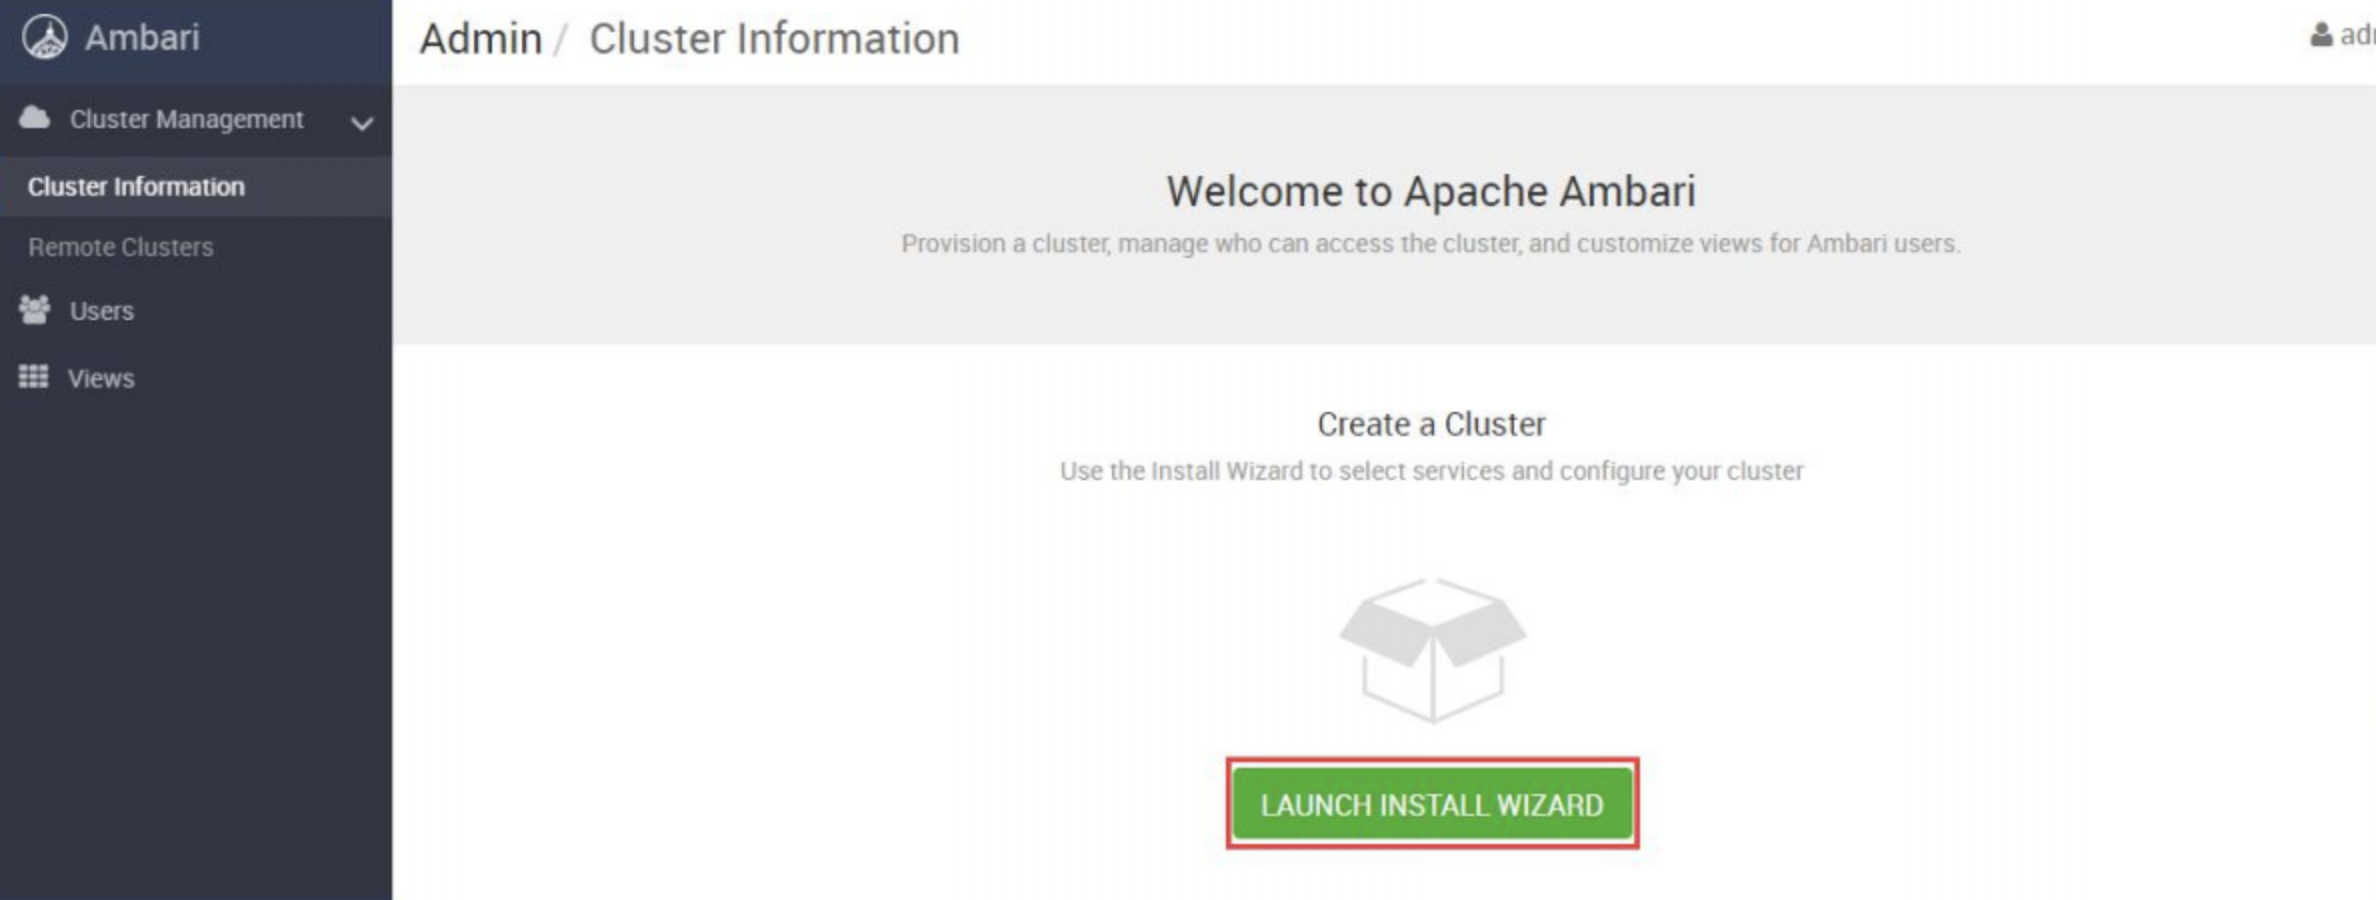
1:启动安装向导
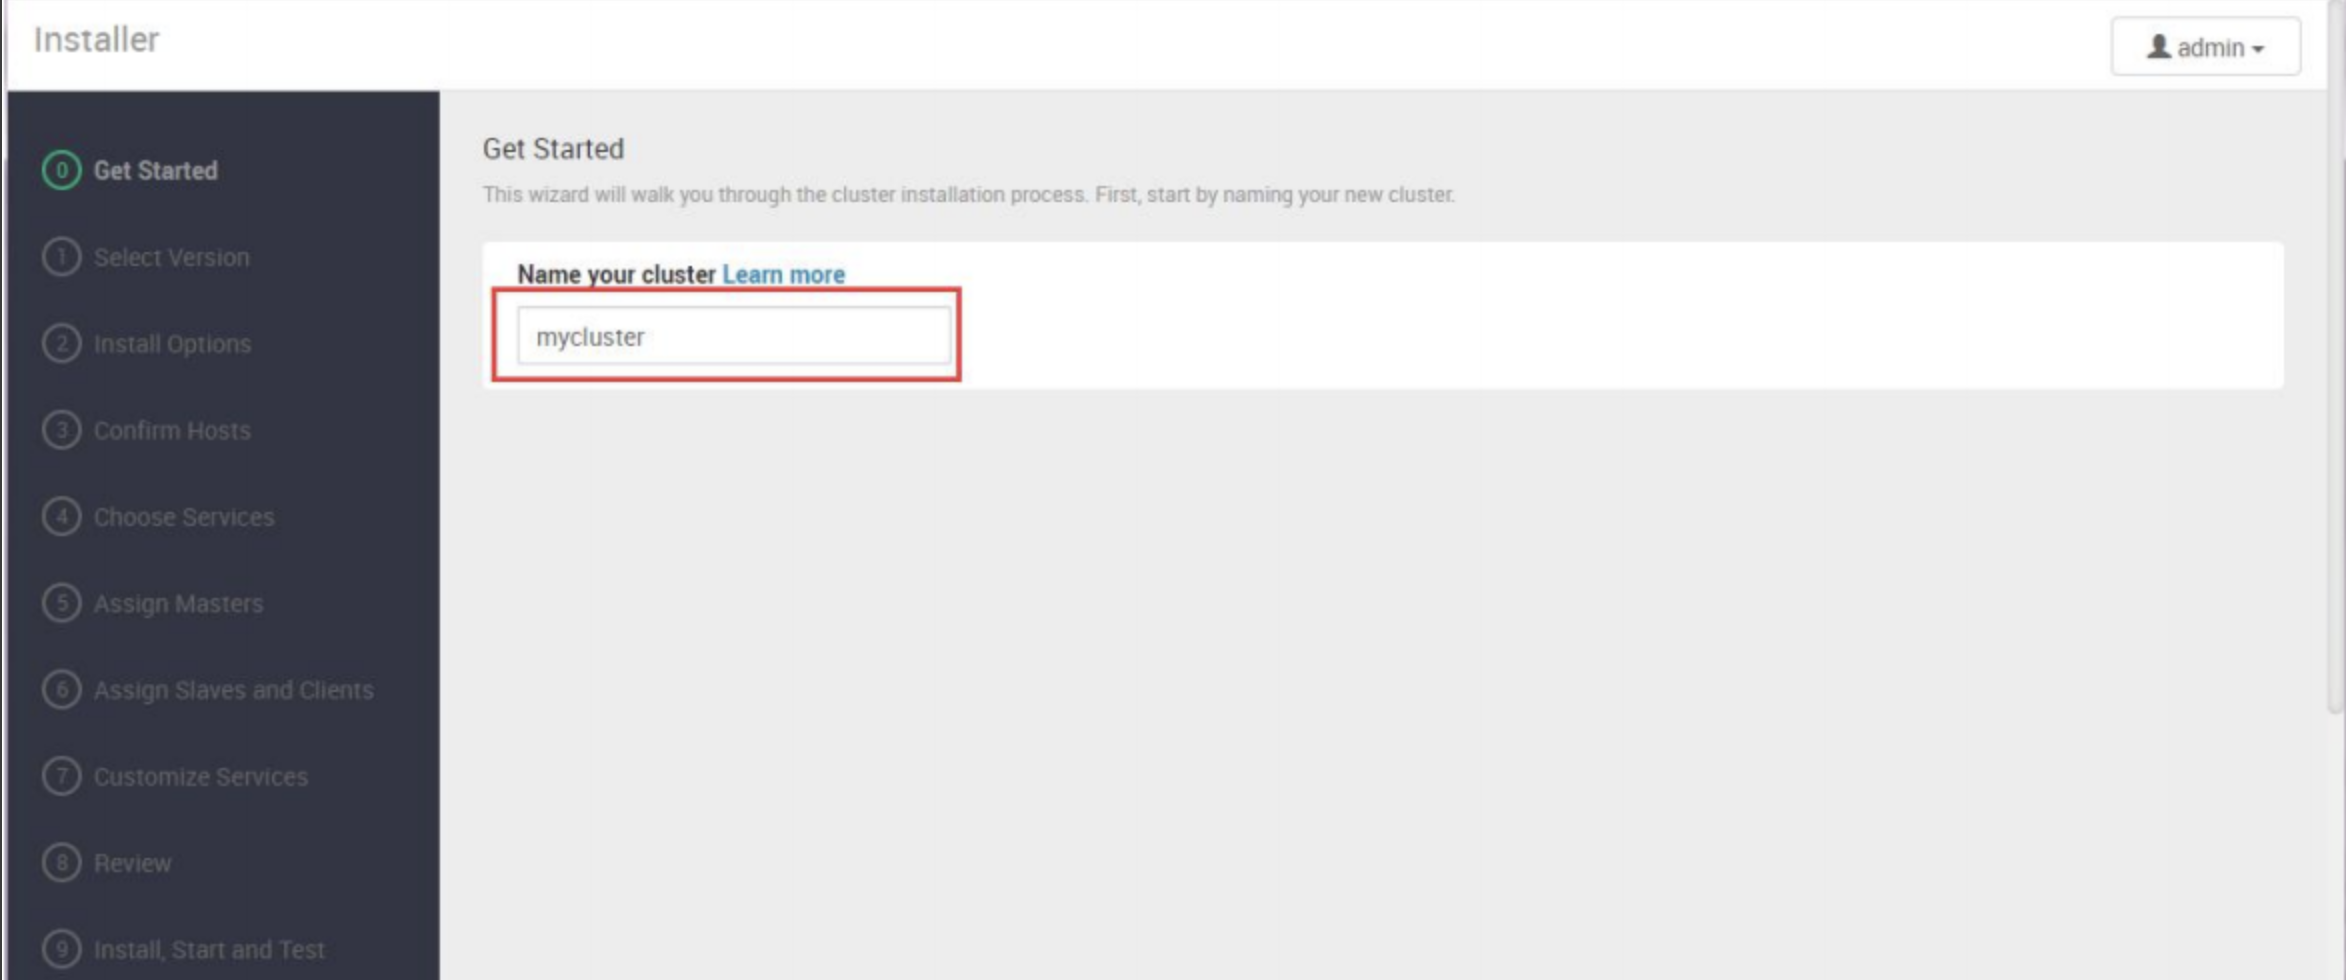
2:集群名称
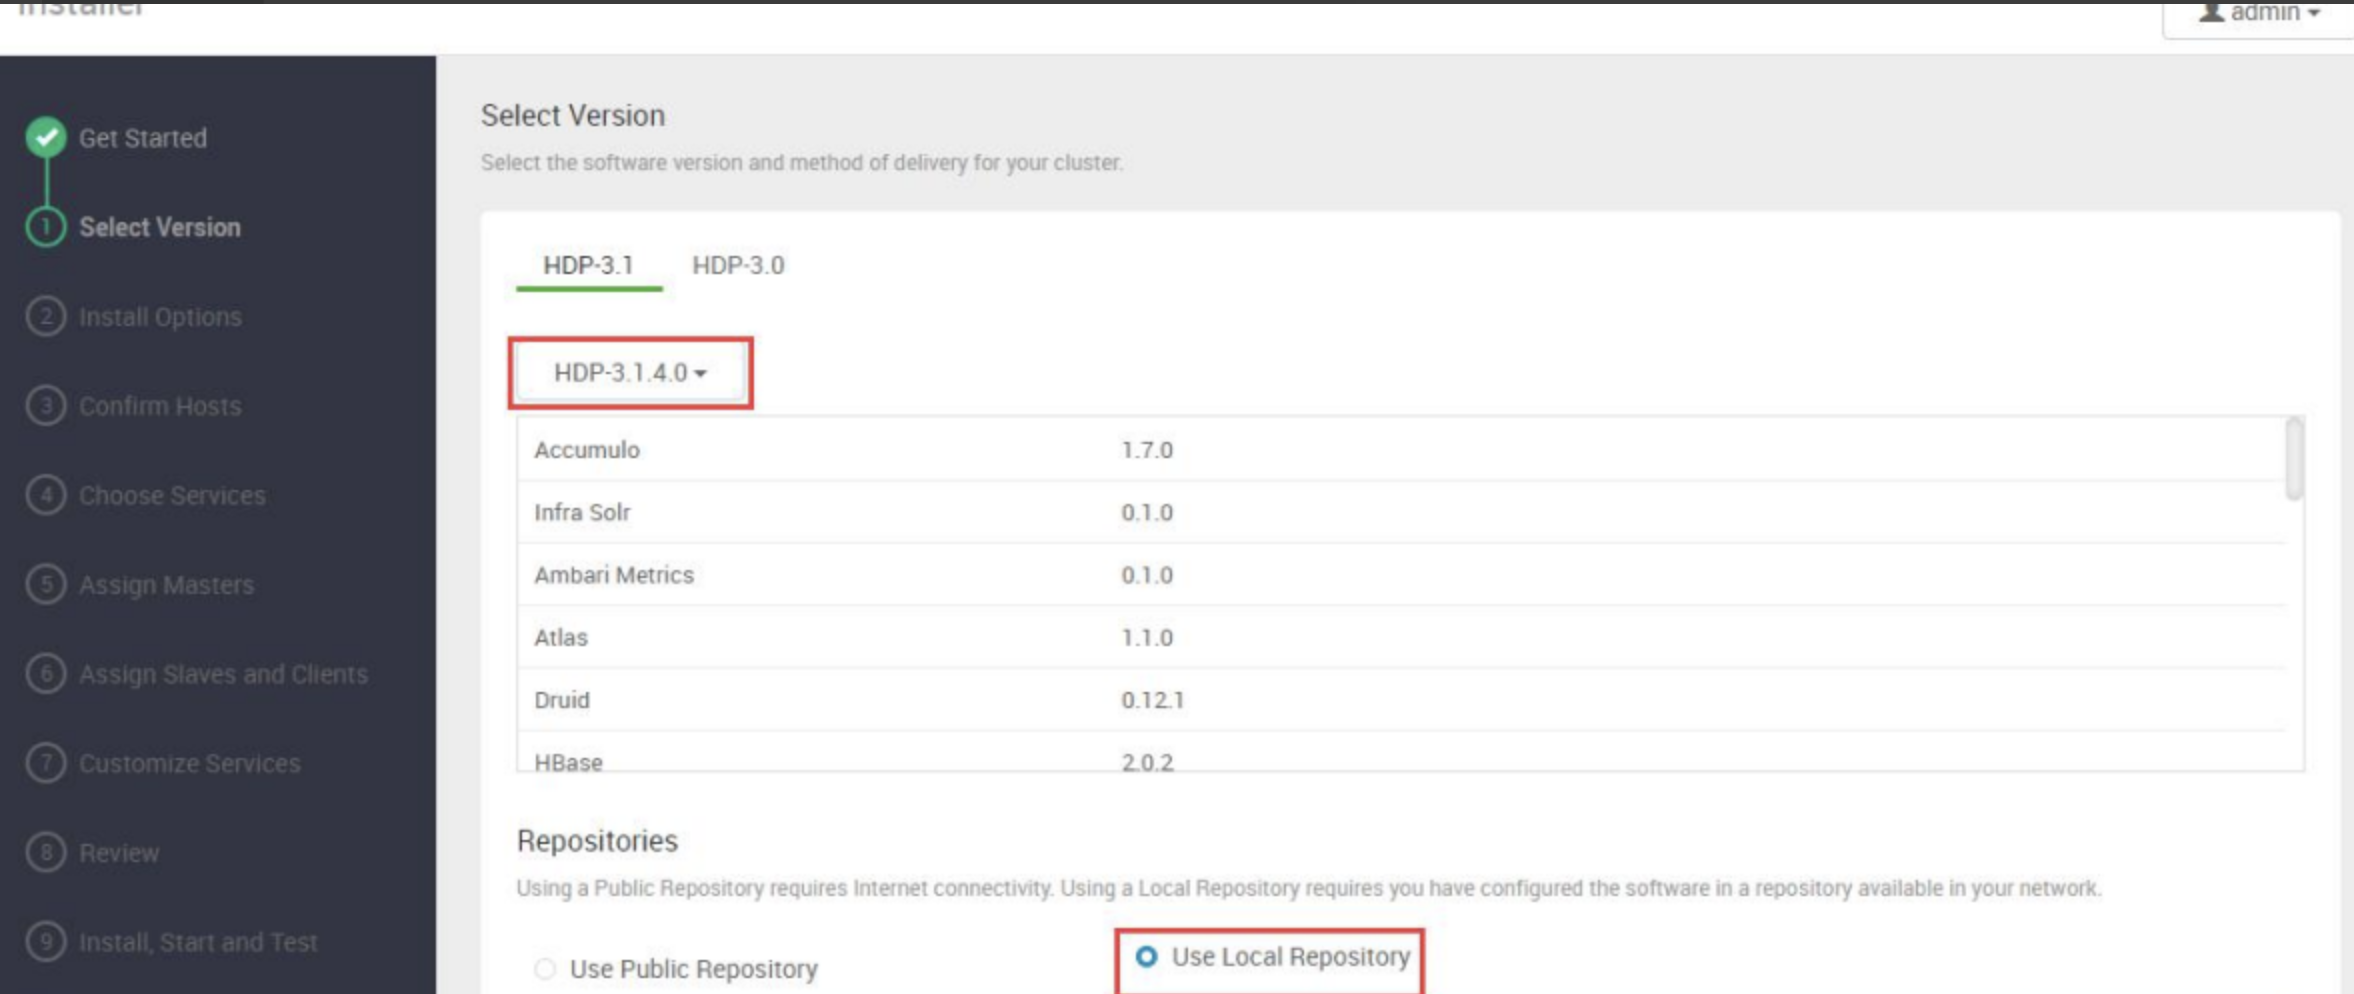
3:版本选择
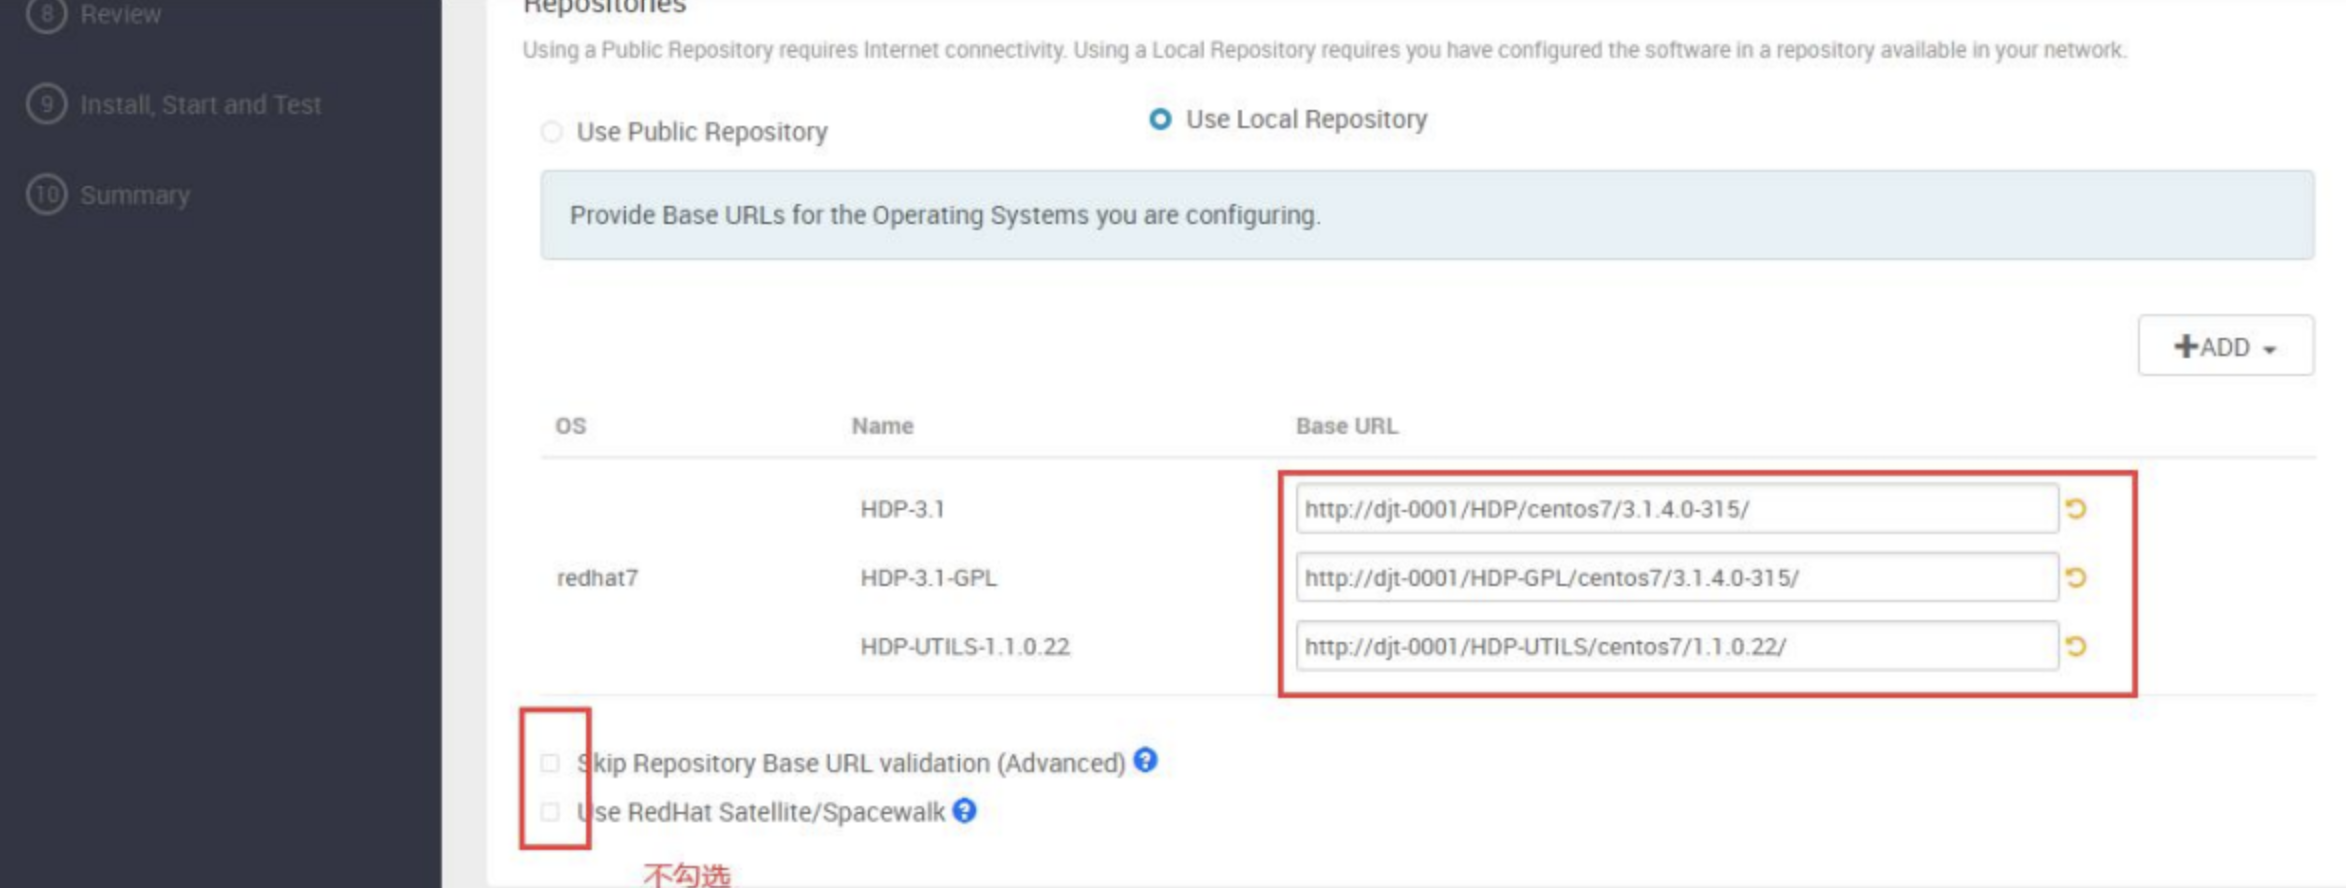
4:本地yum地址填写
http://node12/HDP/centos7/3.1.0.0-78/
http://node12/HDP-UTILS/centos7/1.1.0.22/
http://node12/HDP-GPL/centos7/3.1.0.0-78/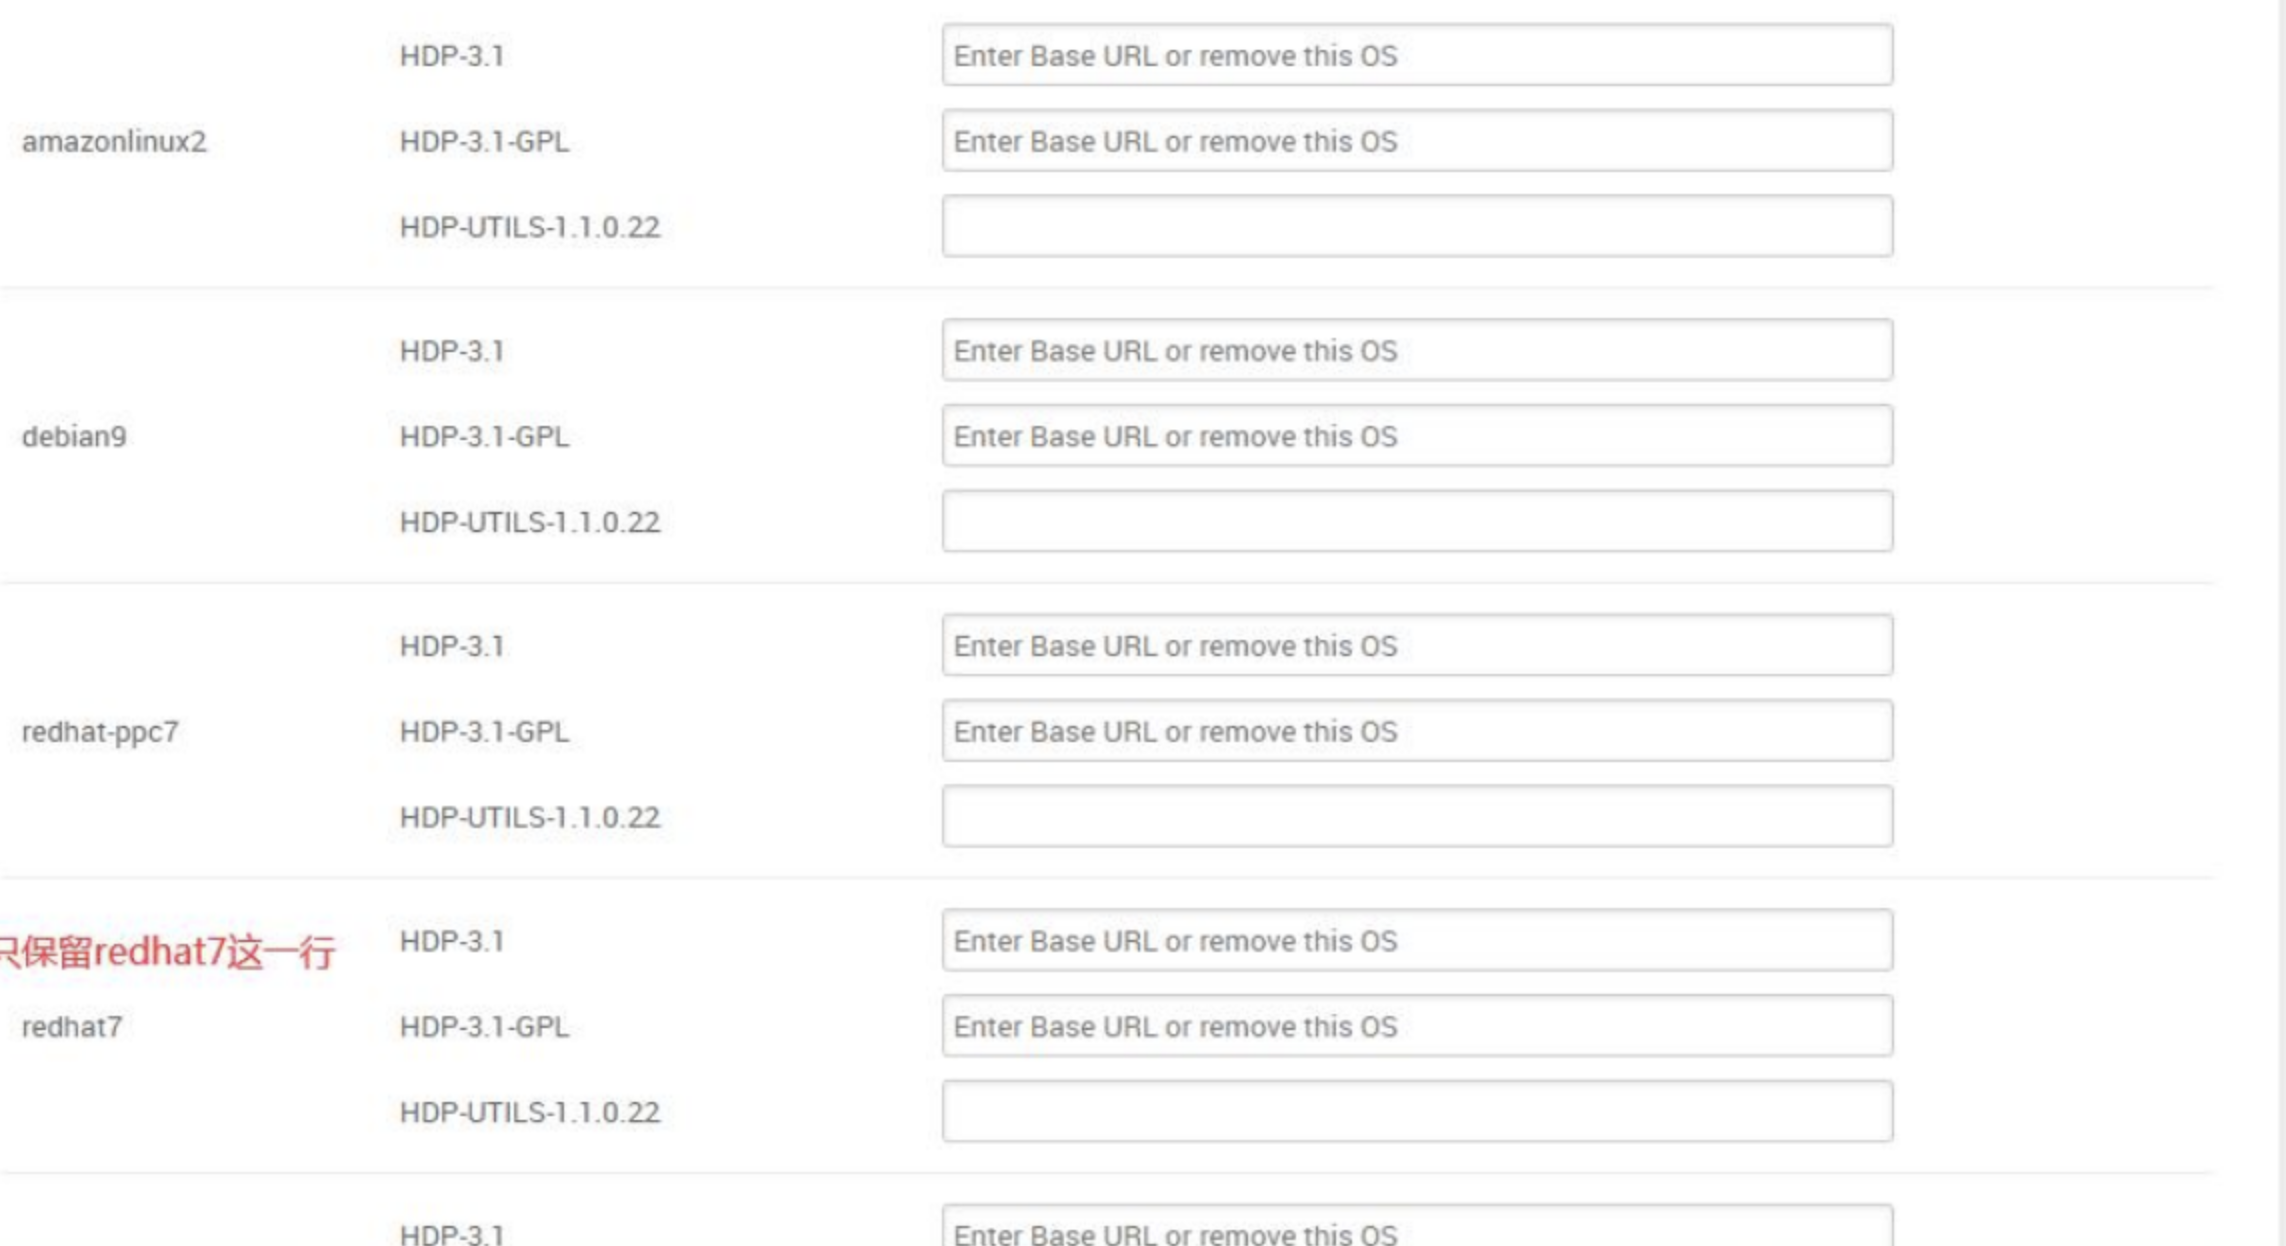
5:注册主机
主机名
node12.data.yuzhilin.net.cn
node13.data.yuzhilin.net.cn
node14.data.yuzhilin.net.cn
node21.data.yuzhilin.net.cn
node12的秘钥:cat ~/.ssh/id_rsa填入
用户名:root
端口:22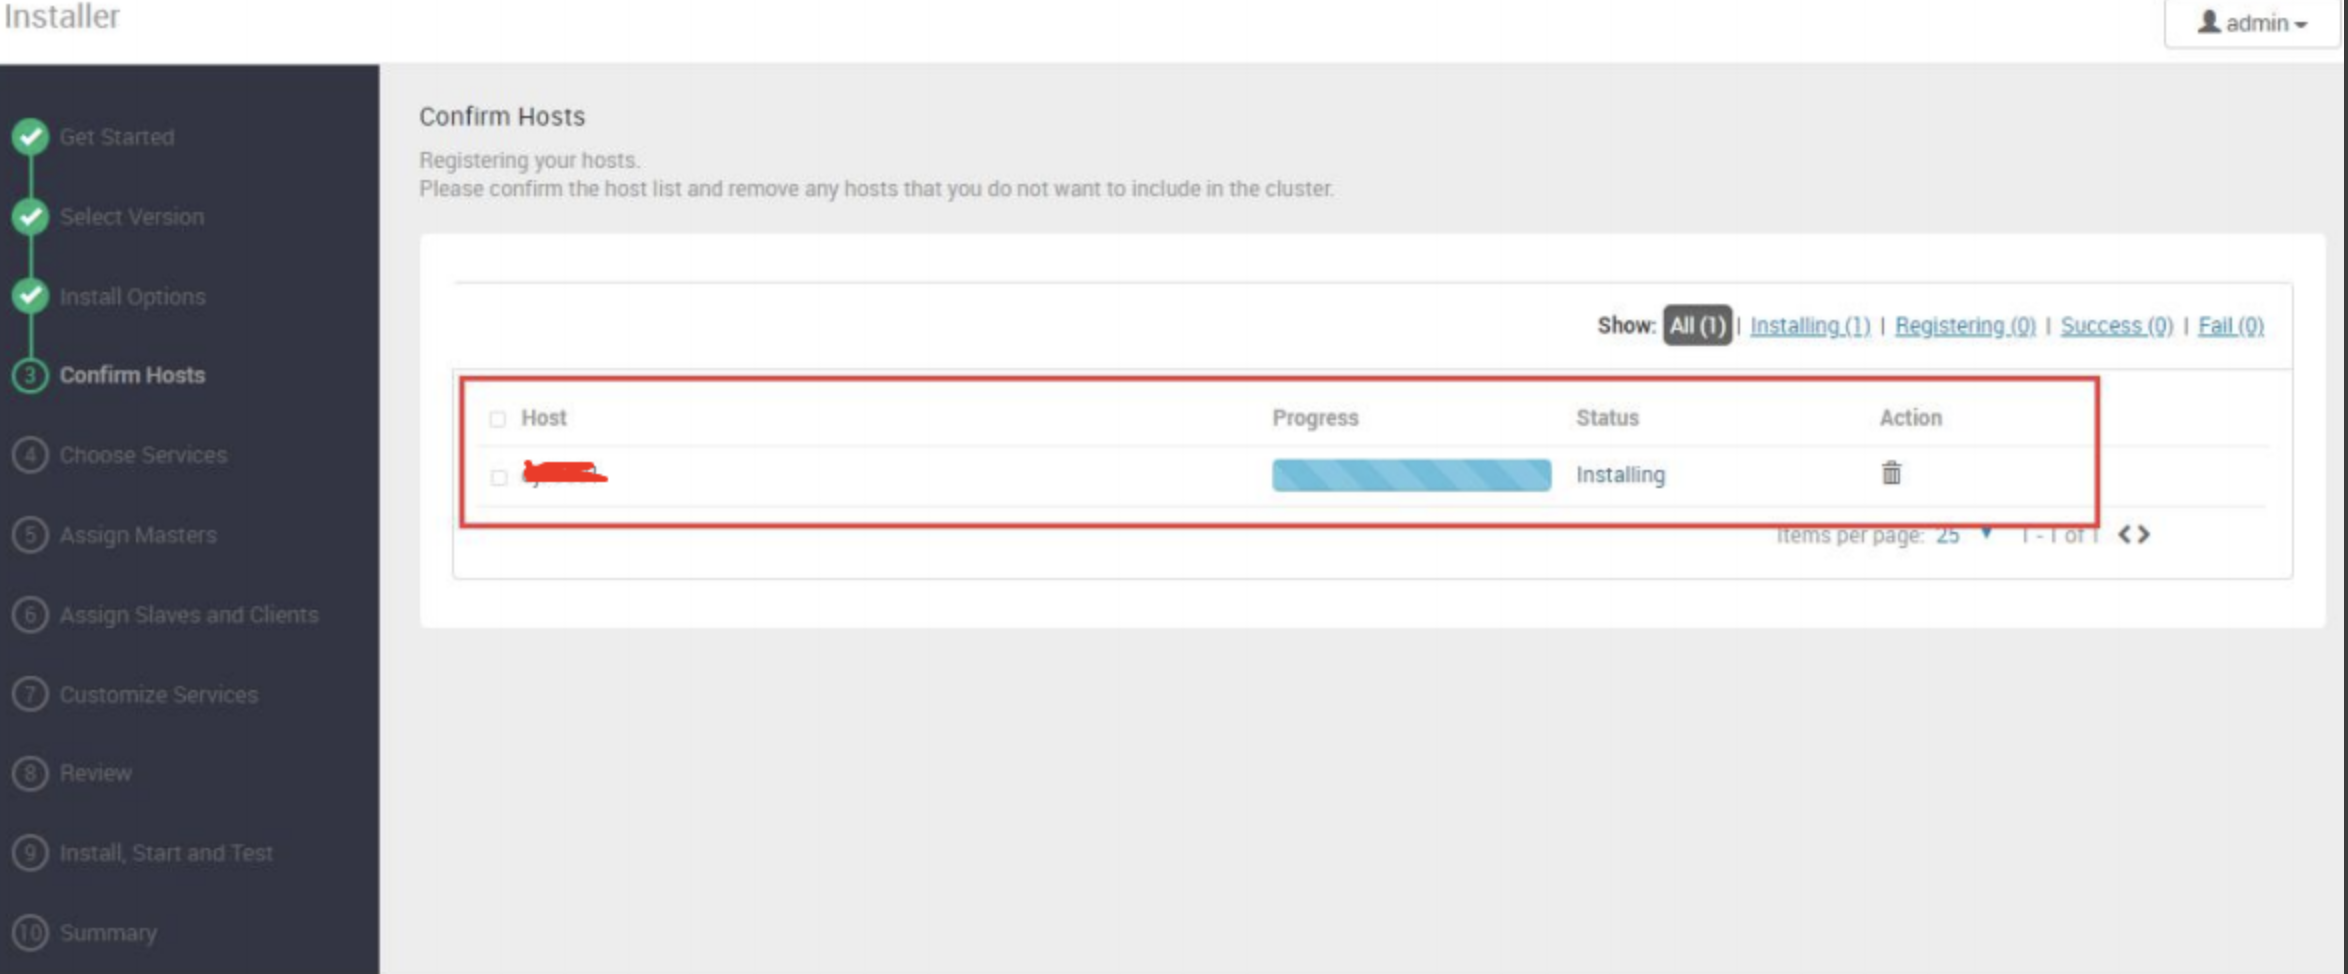
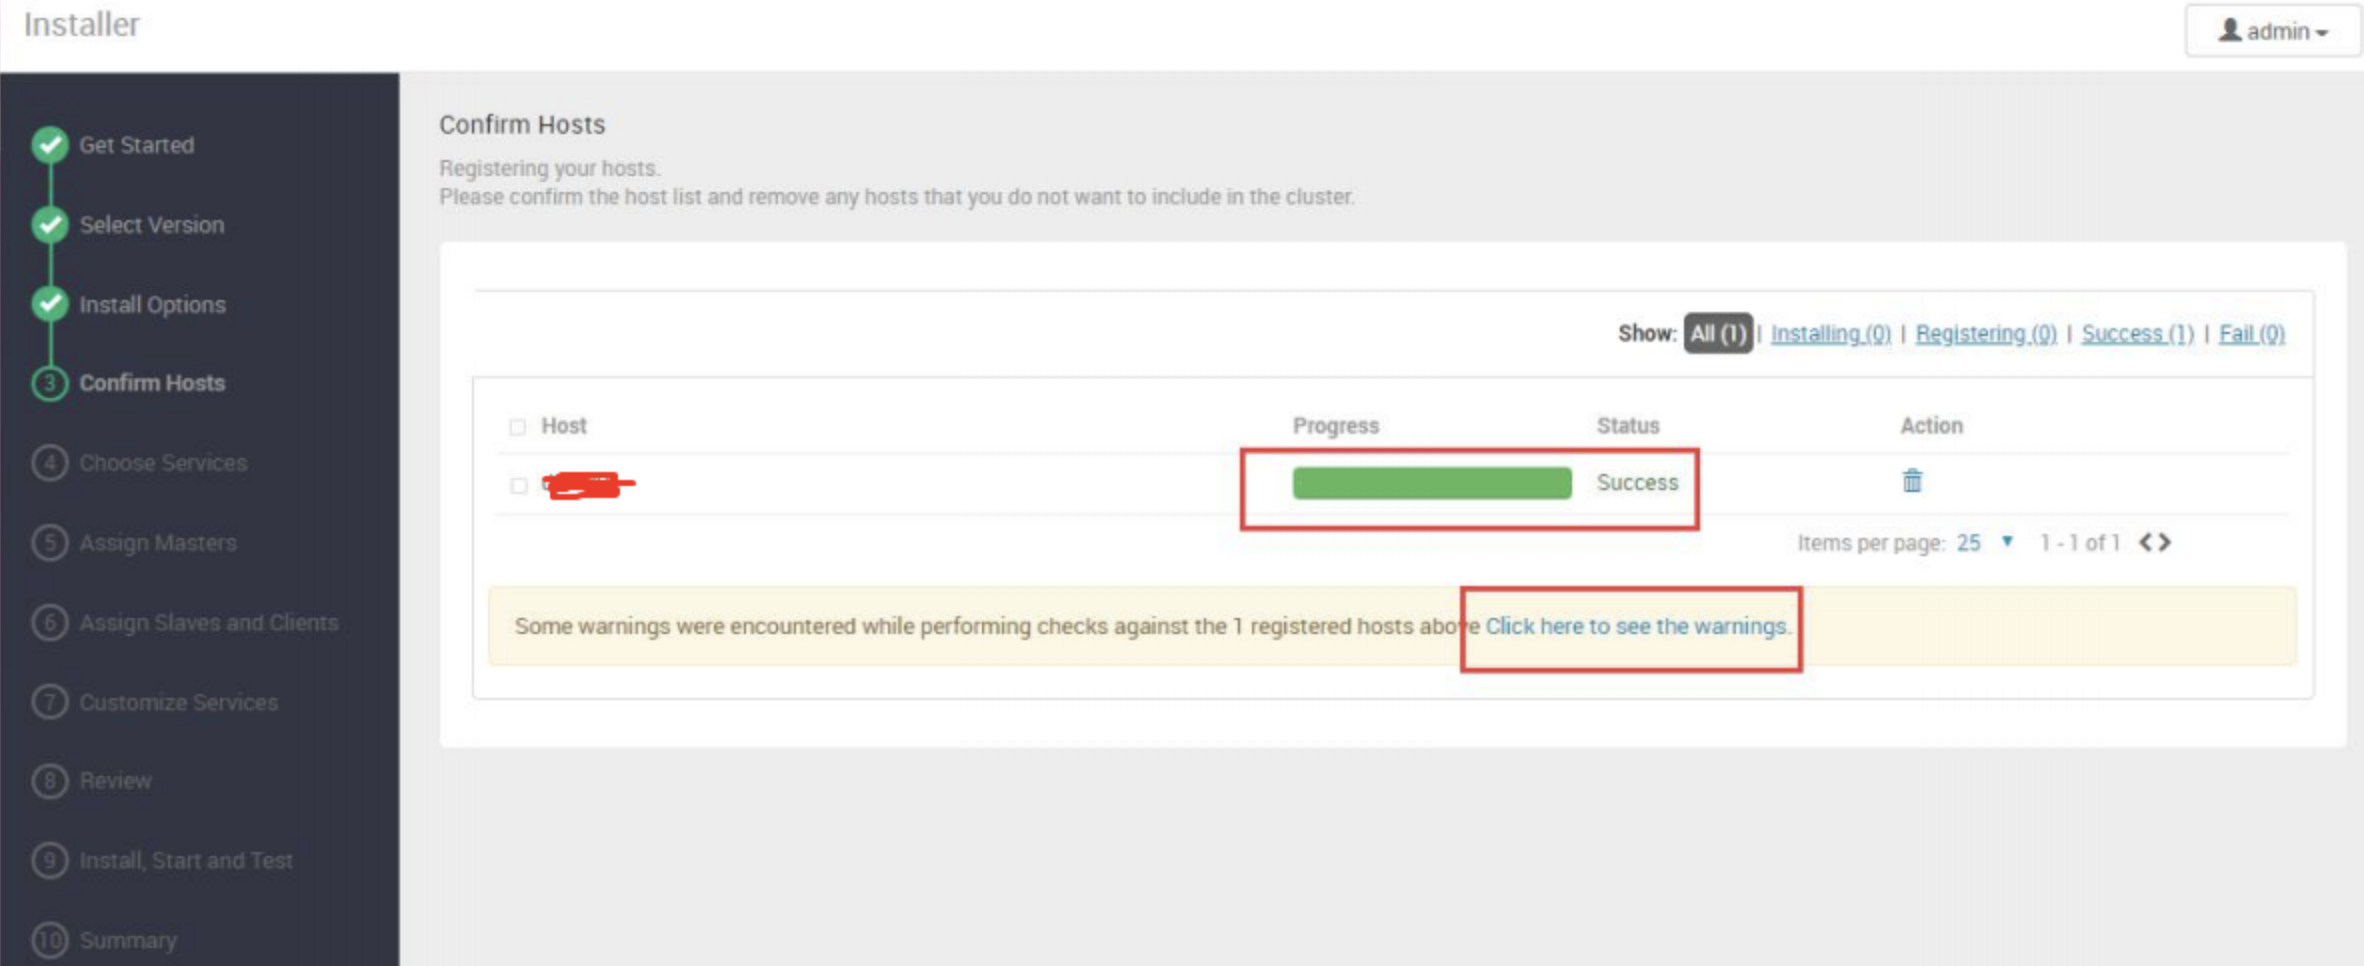
有错误:查看日志
七:hdfs,mapreduce安装
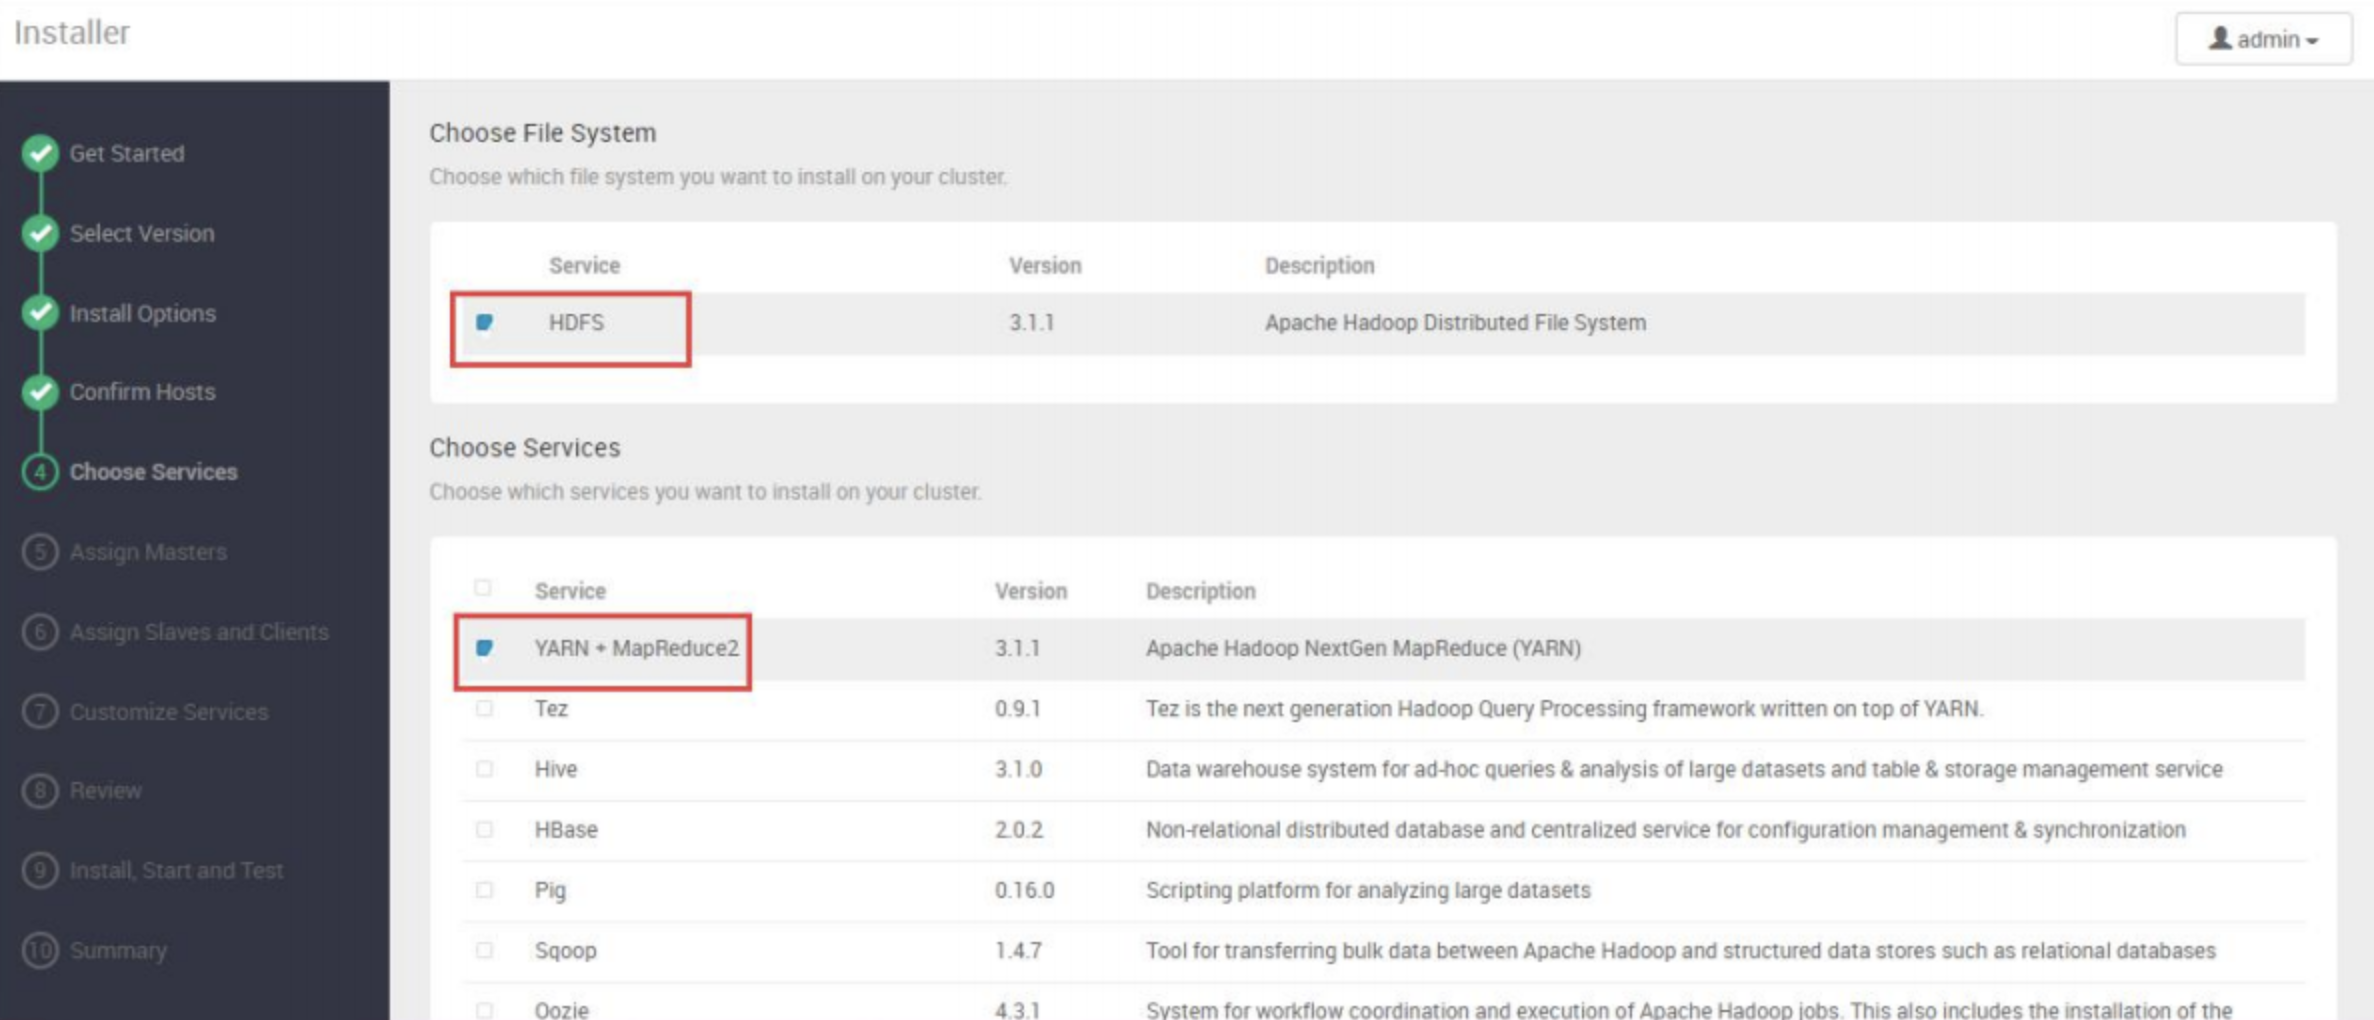
1:添加服务
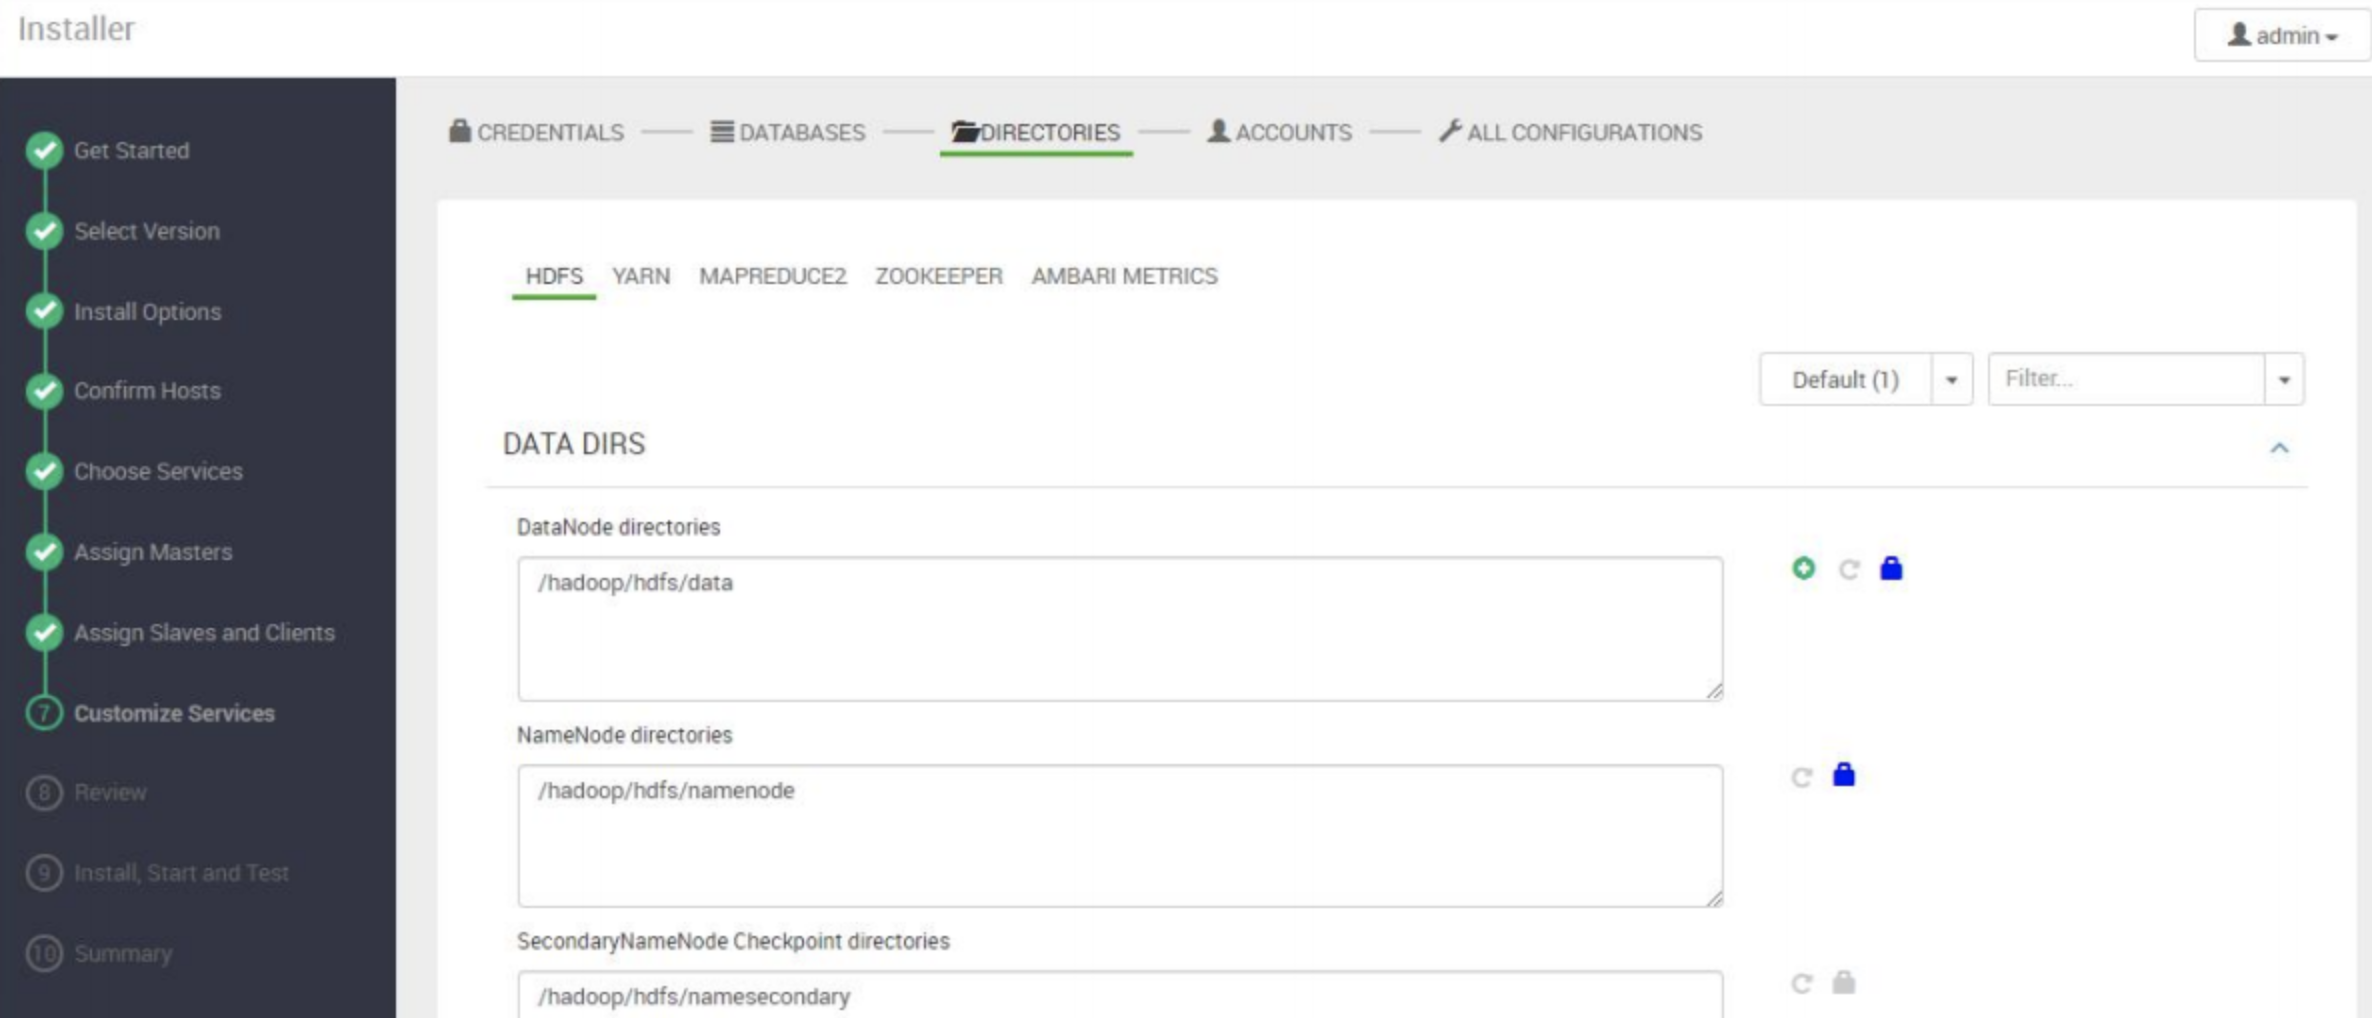
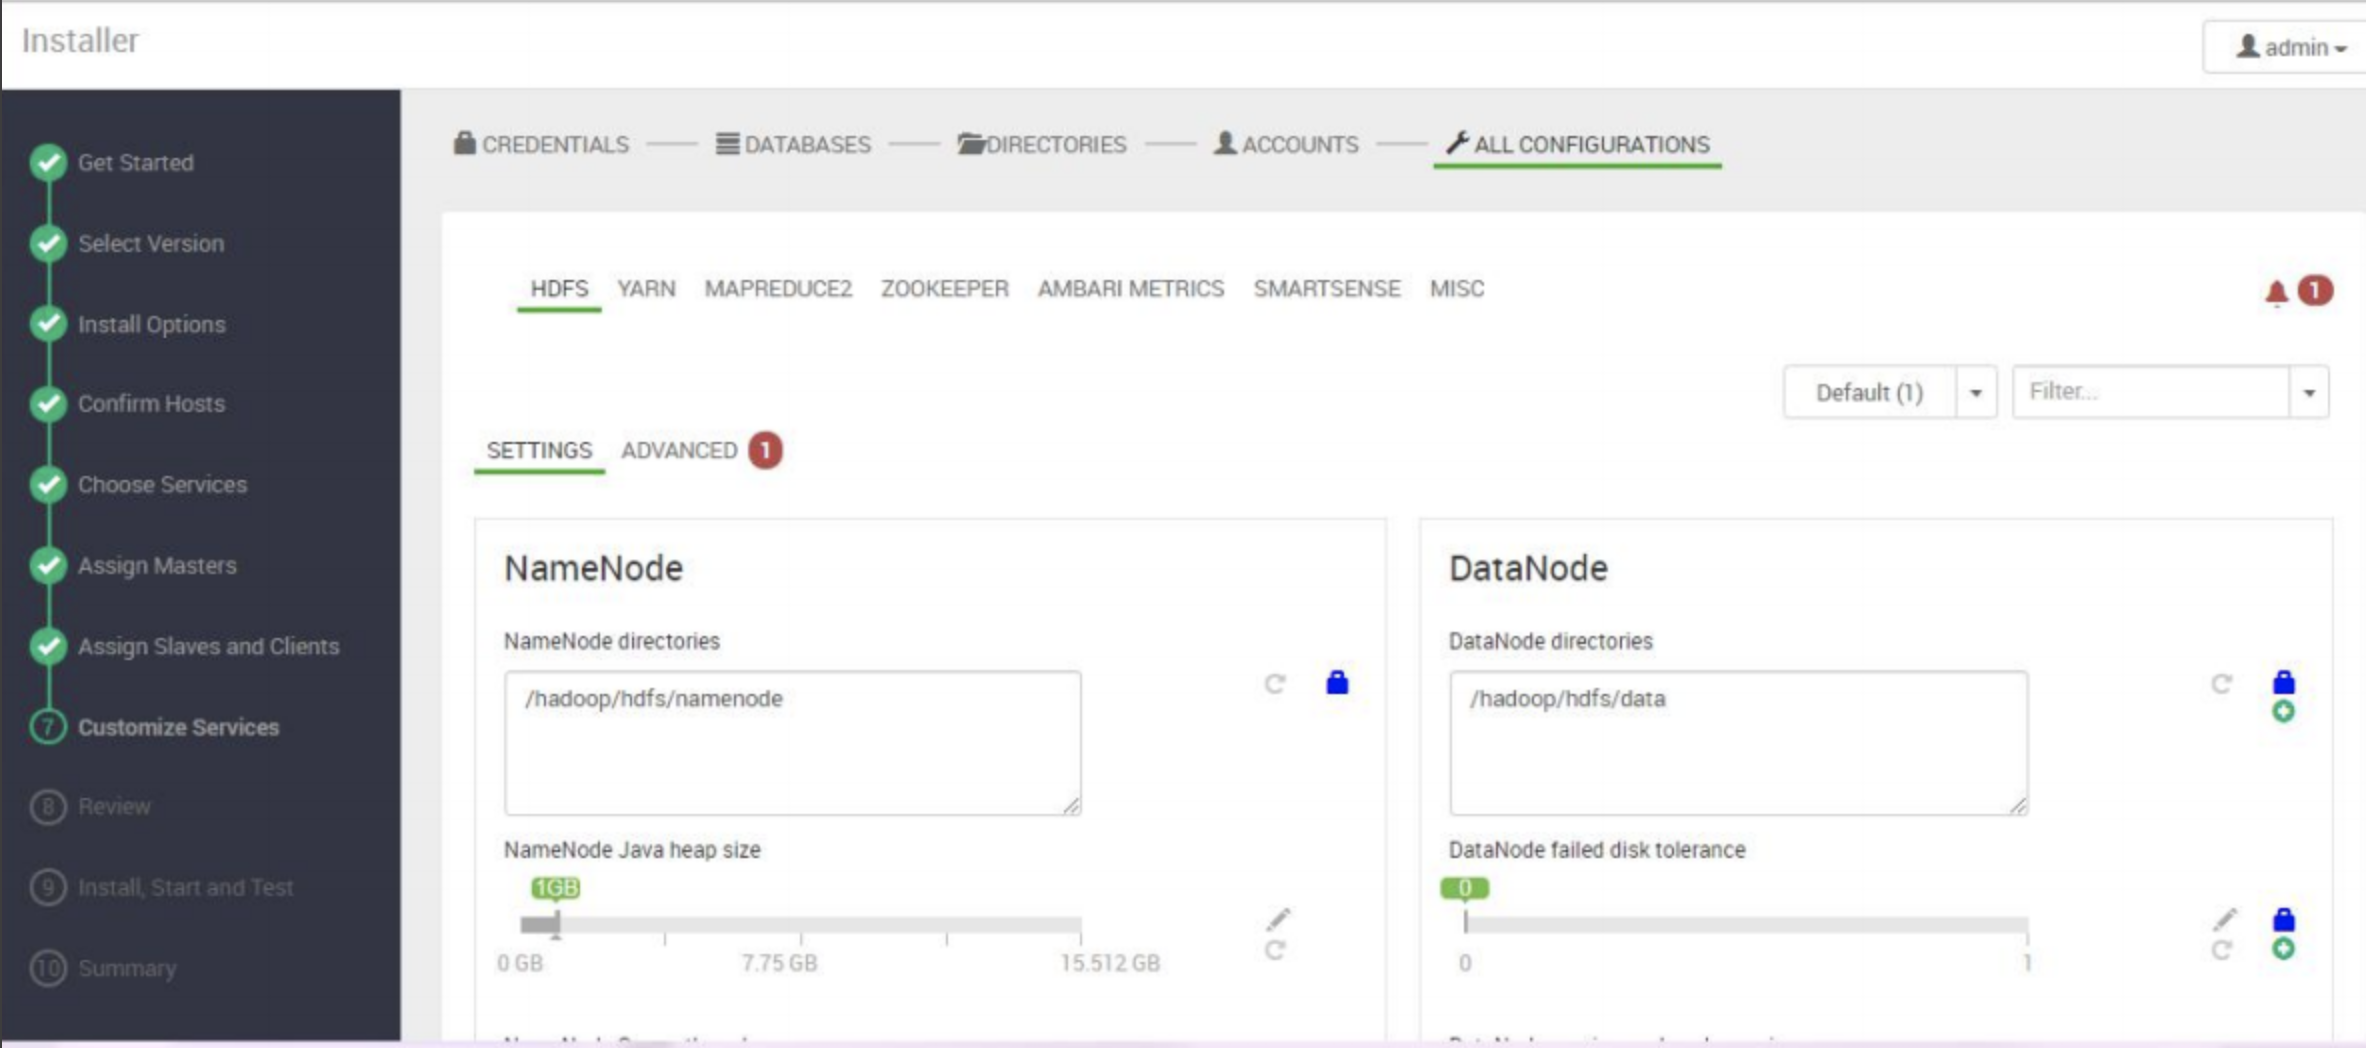
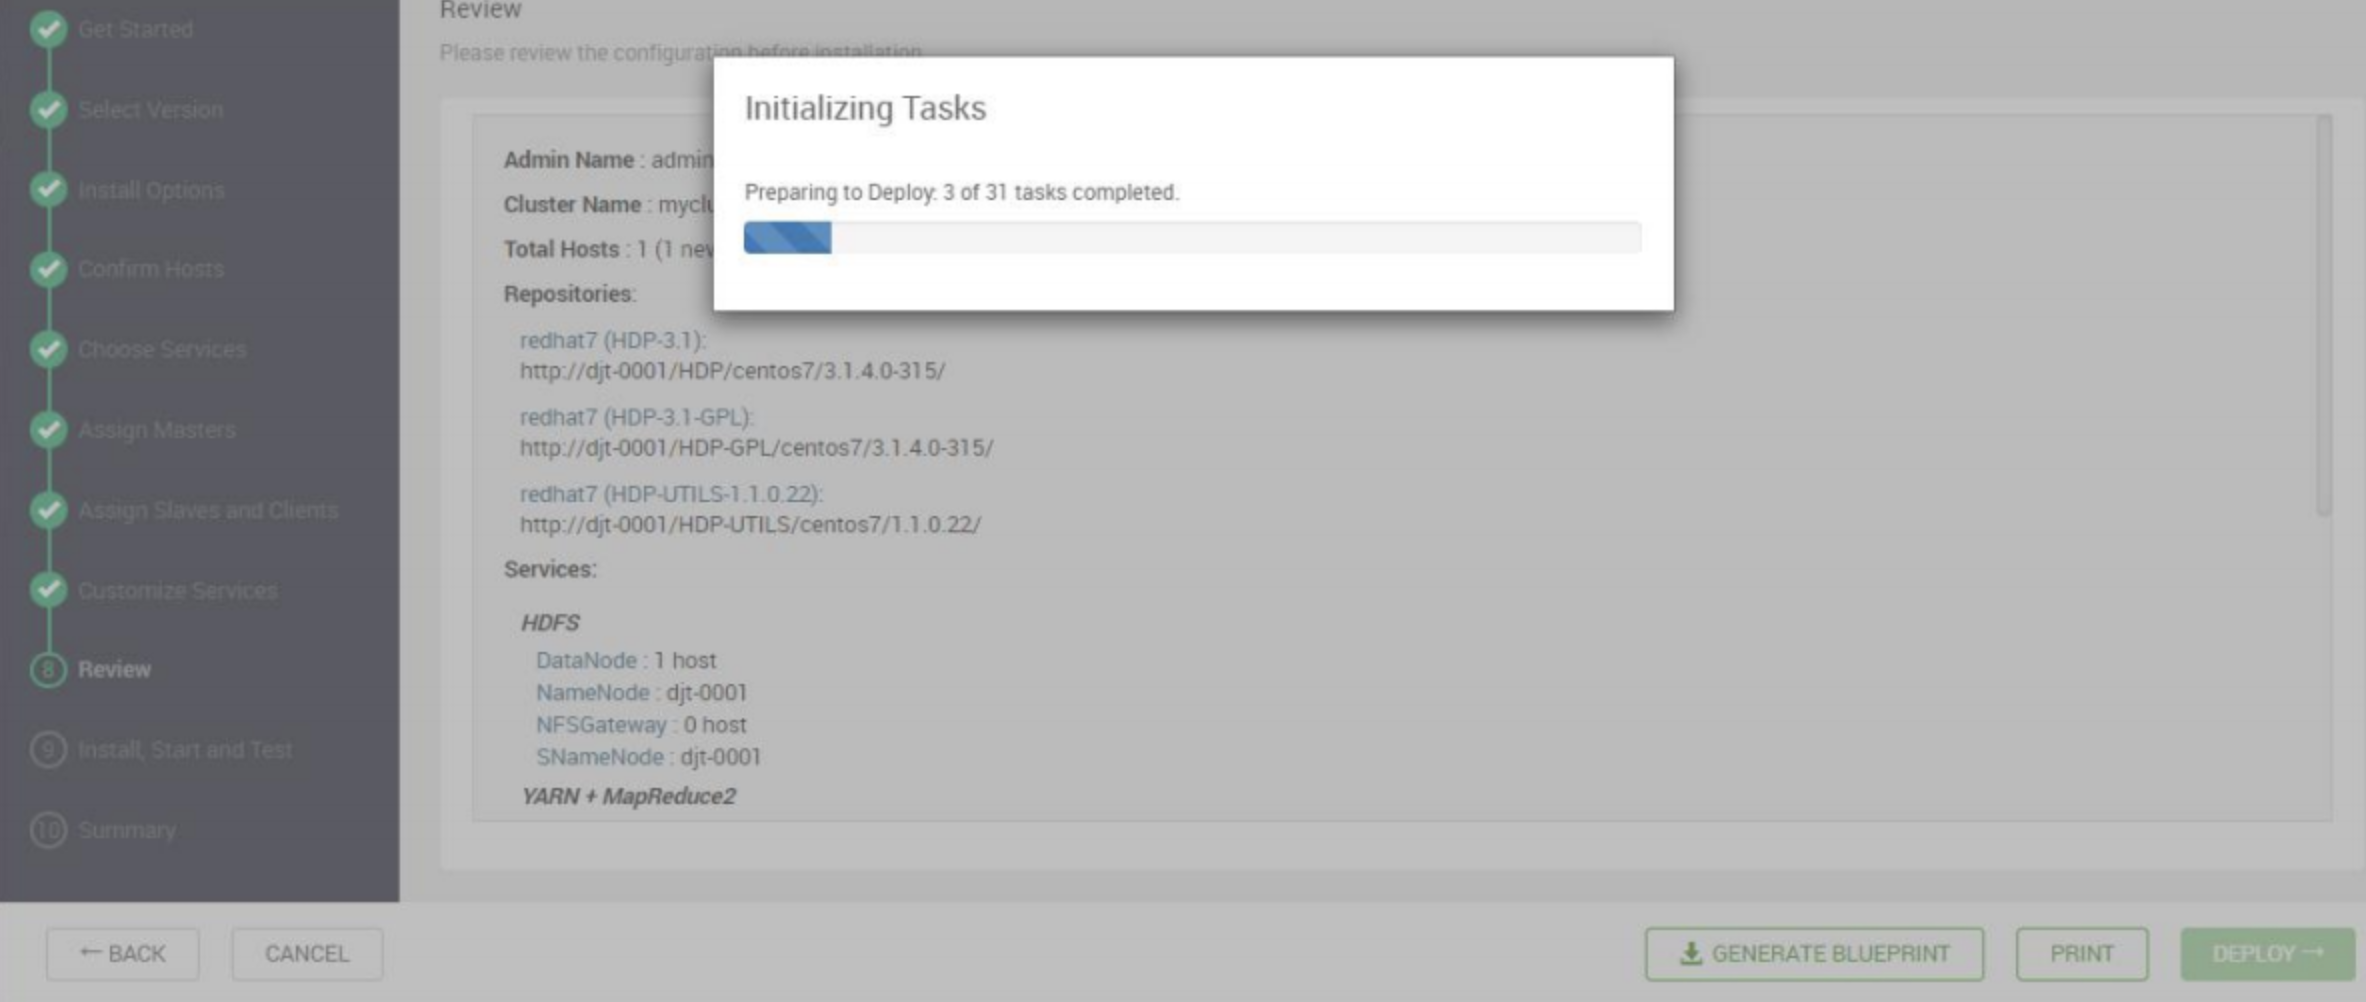
2:hdfs yarn+mr 安装.
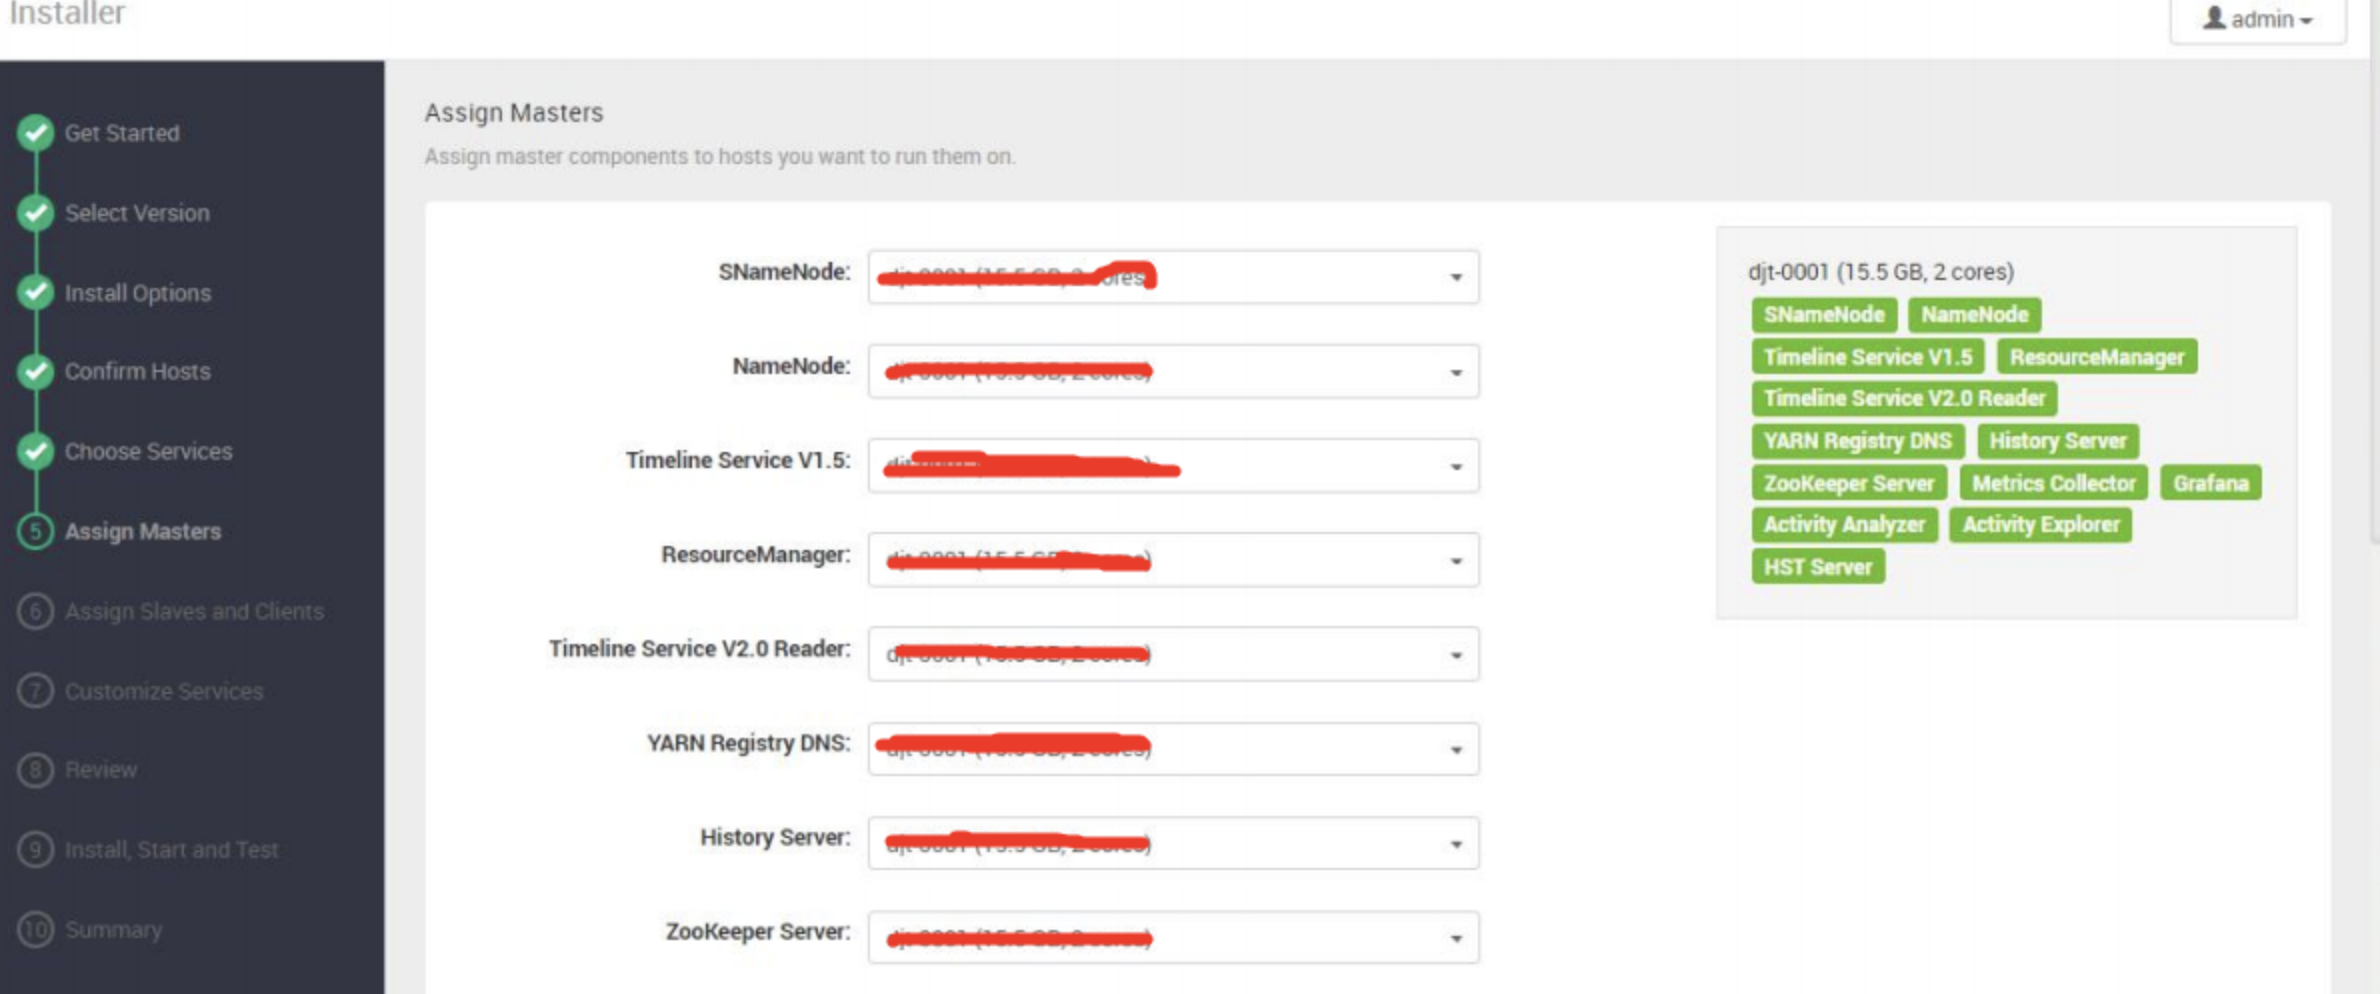
3:分配 Mater 服务安装到哪些主机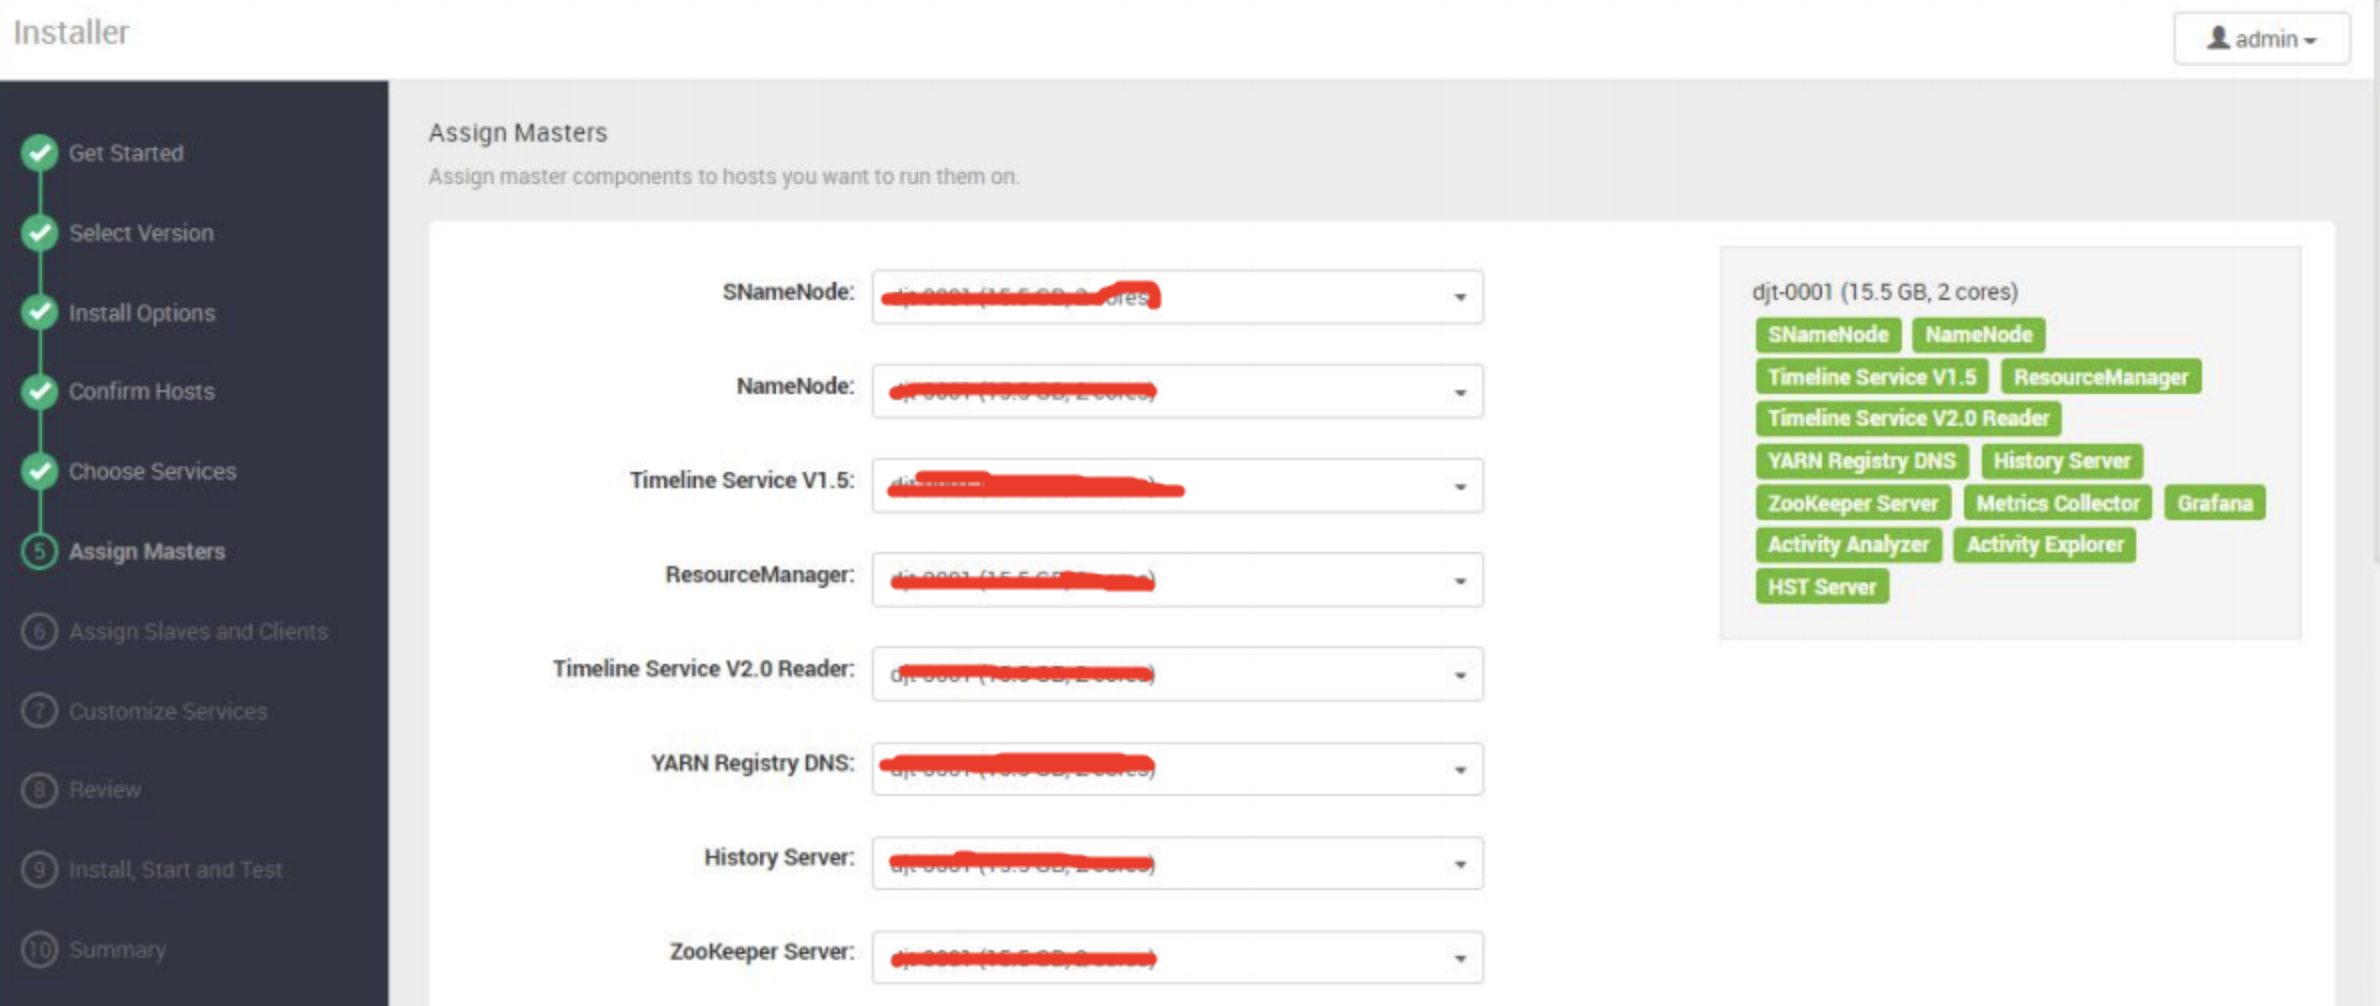
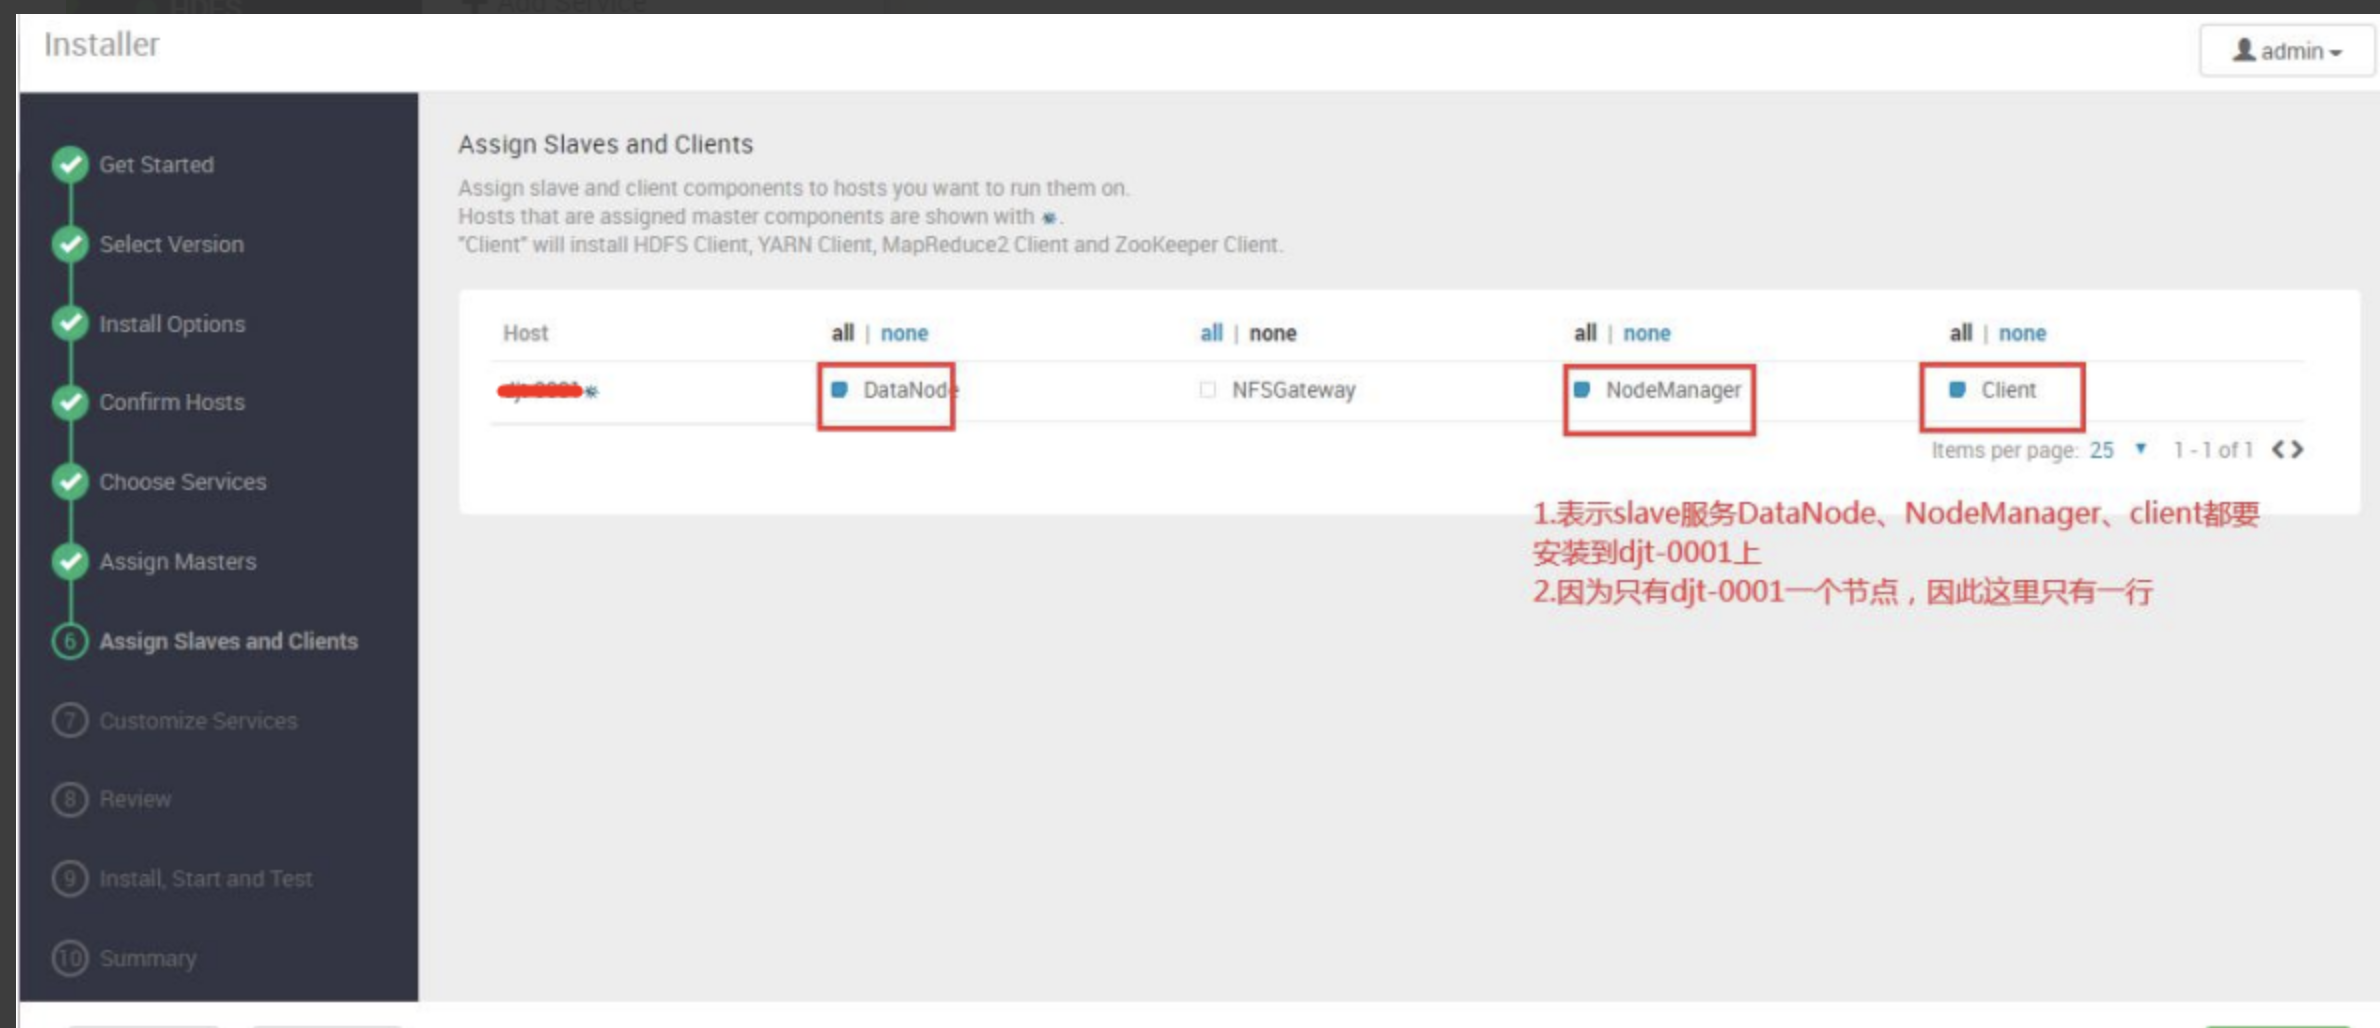
4:分配 Slave 服务和 Client 安装到哪些主机

八:hive安装
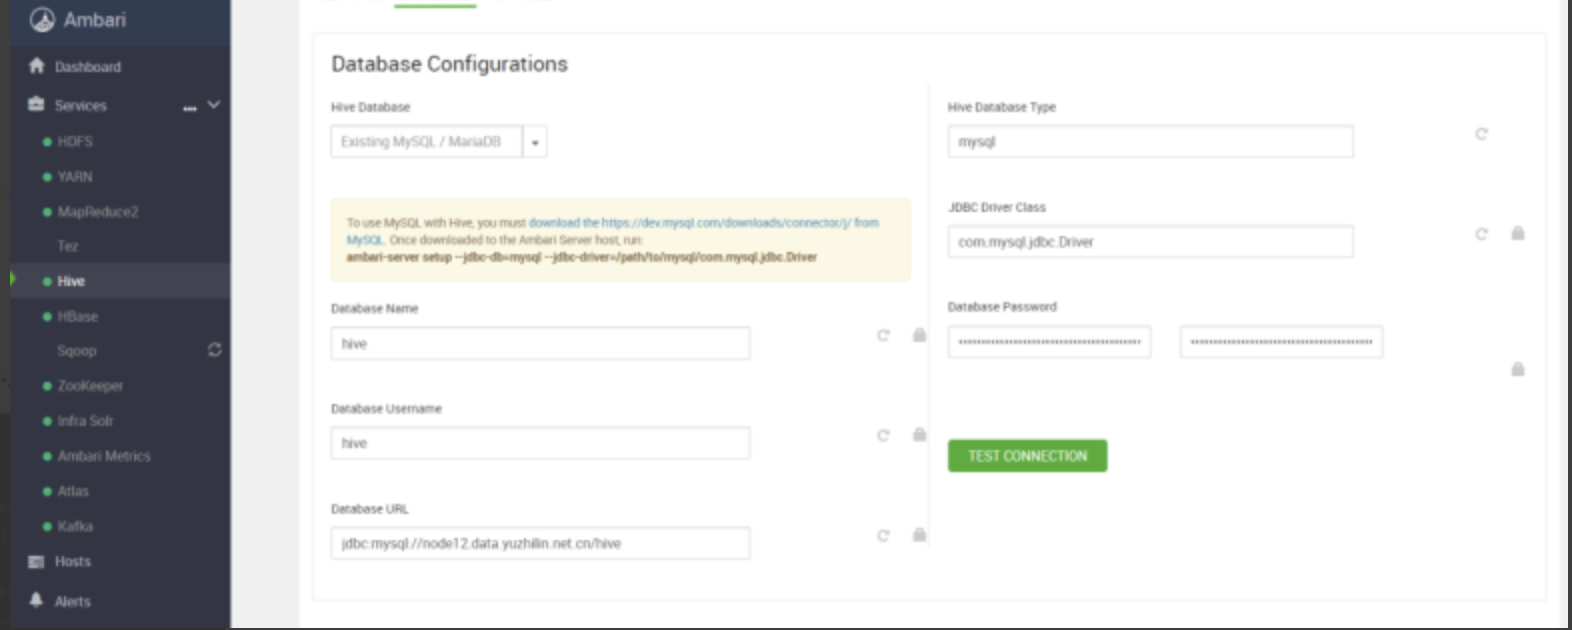
1:hive选择existing mysql,设置用户名密码
2:如果jdbc报错
需要设置mysql-connector.jar位置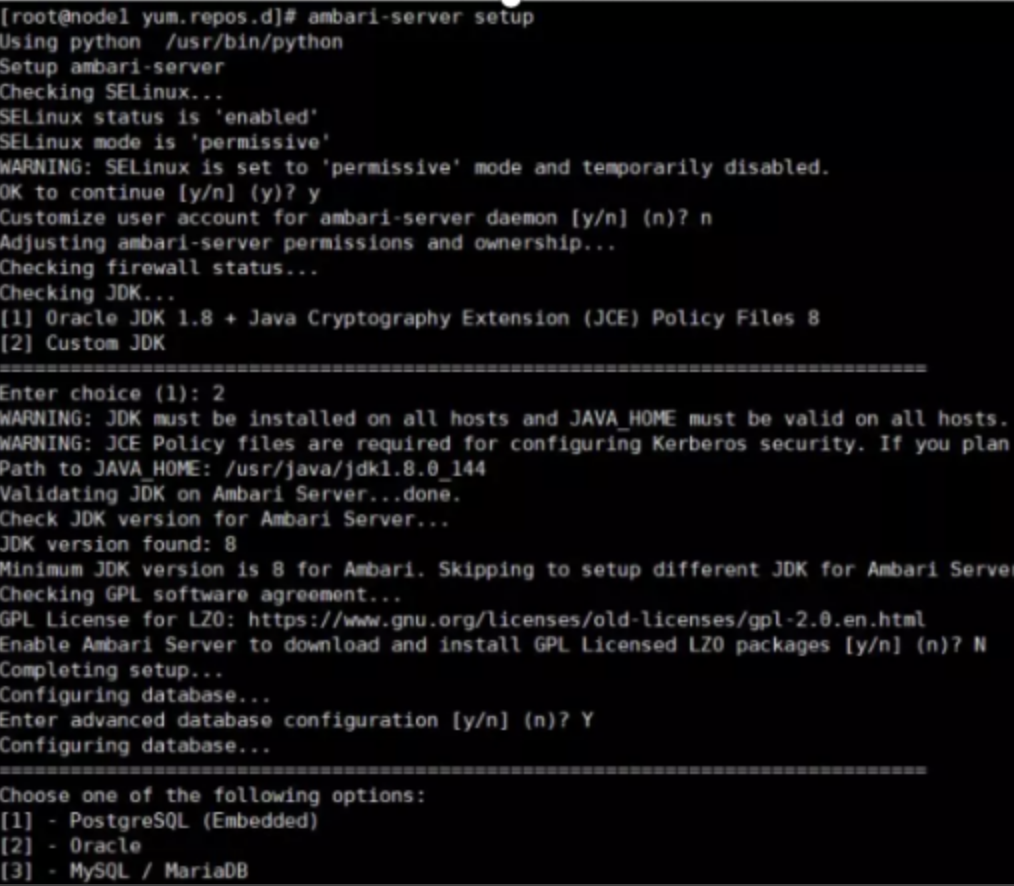
ambari-server setup —jdbc-db=mysql —jdbc-driver=/usr/share/java/mysql-connector-java.jar
ambari-server restart
再次重启
3:设置完如果可以的话重启所有服务
ambari-server restart
九:atlas安装
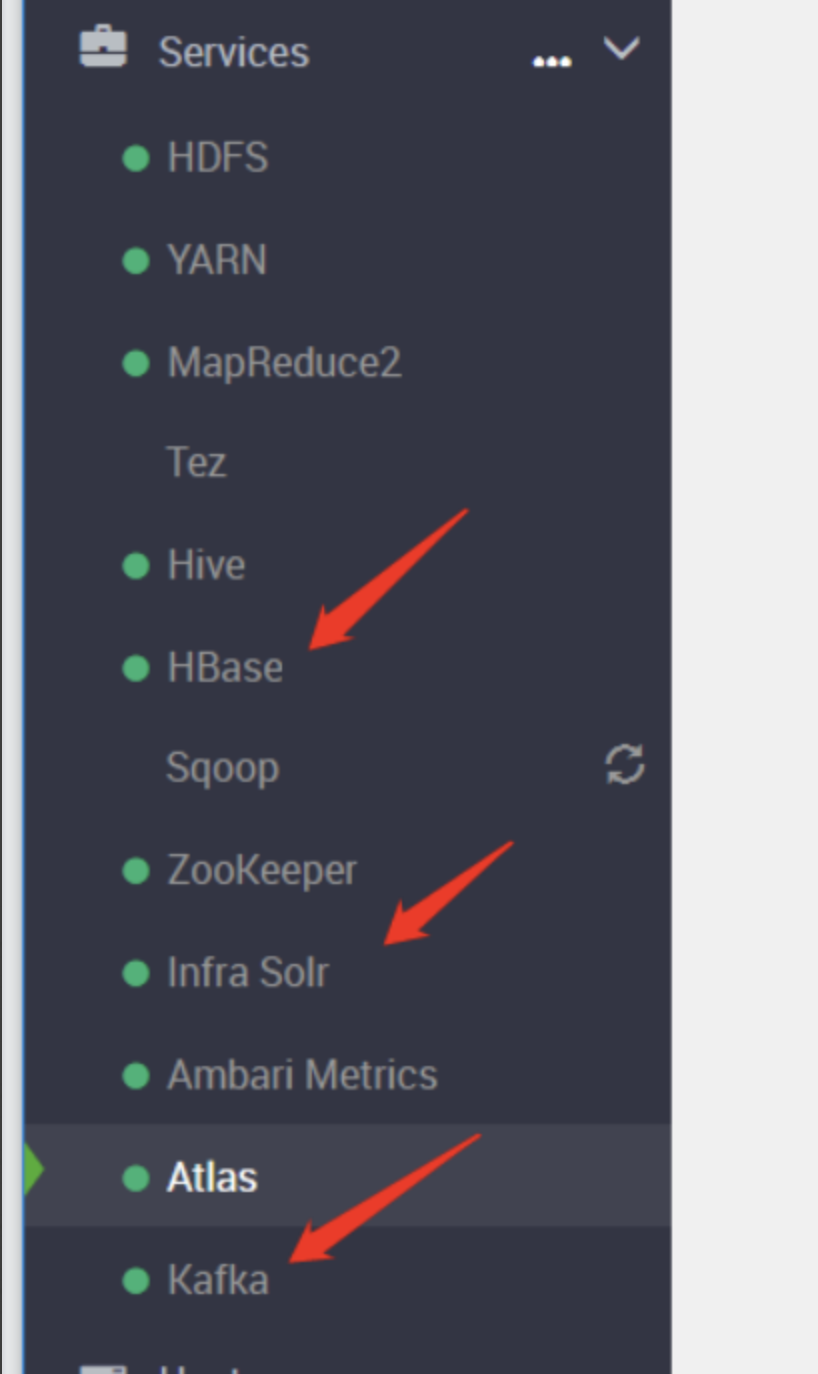
1:atlas需要安装kafka,solr,hbase组件
2:kafka
- :属性kafka.auto.commit.enable,默认是false
由于hook自动提交到kafka 自动消费
atlas.kafka.auto.commit.enable:true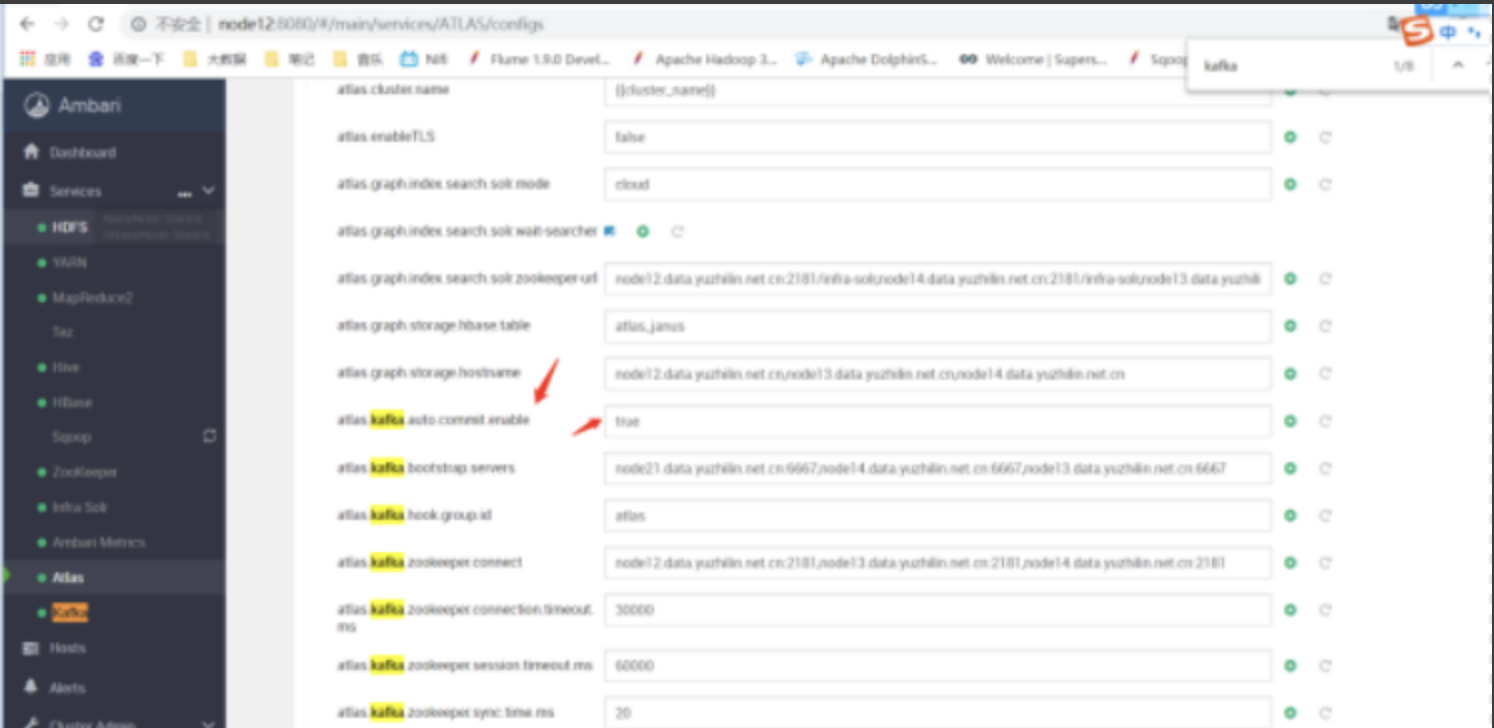
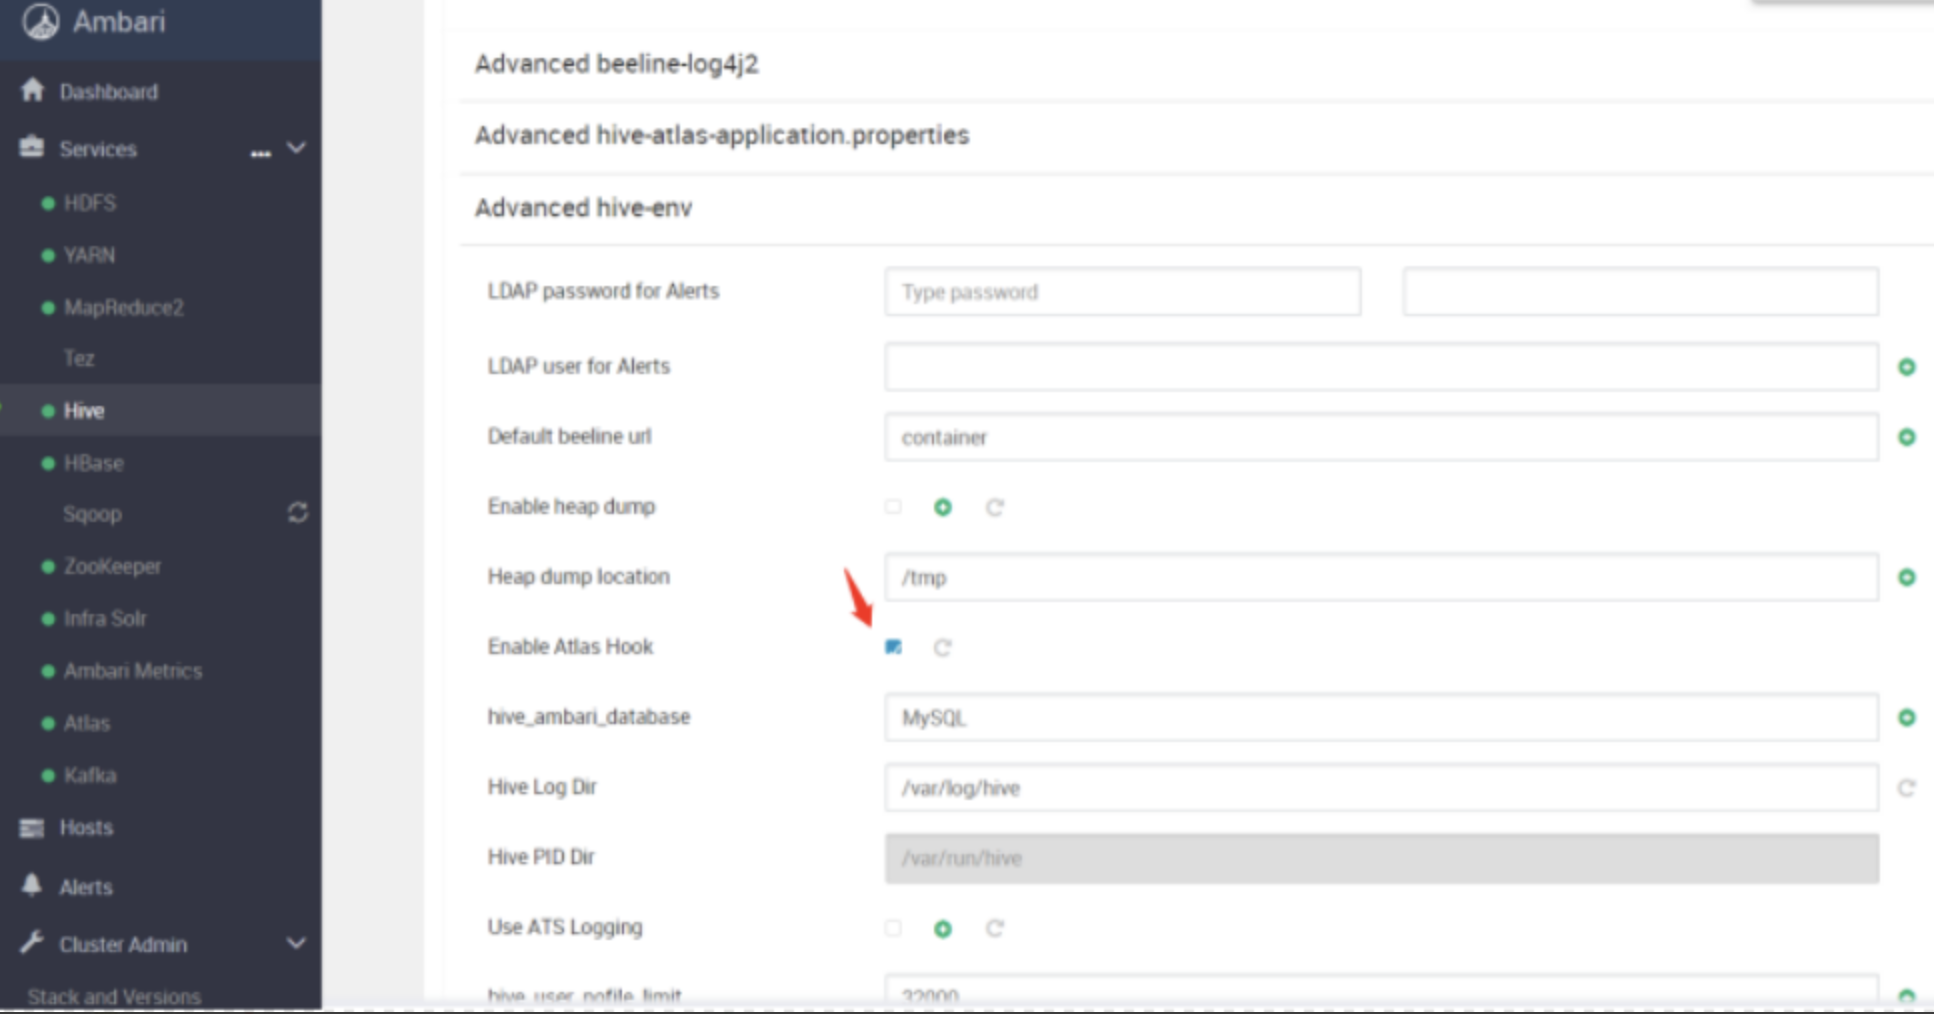
3:hive中设置Enable Atlas Hook
十:dolphin安装
1:由于组件不在ambari里,需要准备rpm源和dolphin插件
- 准备本地安装rpm文件
yum -y install createrepo
cd /var/www/html/
mkdir dolphinscheduler
文件apache-dolphinscheduler-1.3.6-1.noarch.rpm放入dolphinscheduler
cd ../
createrepo dolphinscheduler
- 准备repo
cd /etc/yum.repos.d
Vi dolphin.repo
内容为
name=dolphin_repo
baseurl=http://node12/dolphinscheduler
enable=1
gpgcheck=0
- 准备插件
cd /var/lib/ambari-server/resources/stacks/HDP/3.1/services
Mkdir DOLPHIN
将https://gitee.com/dolphinscheduler/DolphinScheduler/tree/1.3.6-release/ambari_plugin/common-services/DOLPHIN/1.3.6文件放入DOLPHIN
- :服务重启ambari-server restart
- :添加服务add service
2:注意安装时需要增加mysql-connector.jar
每个服务器都需要配置
Cd /opt/soft/apache-dolphinscheduler-1.3.6/lib
将mysql-connector.jar放入
重启服务
3:注意配置configs
(1)Custom dolphin-zookeeper
zookeeper.quorum:node12.data.yuzhilin.net.cn:2181,node13.data.yuzhilin.net.cn:2181,node14.data.yuzhilin.net.cn:2181
(2)Advanced dolphin-common
dolphinscheduler.env.path:/opt/soft/apache-dolphinscheduler-1.3.6/conf/env
4:FAQ
(1):首先在各服务器创建dolphin需要的租户
例如:useradd test passwd test usermod -aG hadoop test
(2):赋予写入hdfs的权限
hdfs dfs -chown dwa /warehouse/tablespace/managed/hive/test.db
hdfs dfs -chmod 777 /warehouse/tablespace/managed/hive/test.db
(3):赋予写入/user的权限,不然sqoop导入hive数据一直报错
十一:常用命令
1:ambari常用命令
ambari-server start
ambari-server stop
ambari-server restart
2:ambari卸载服务
find / -name SMARTSENSE | xargs
rm -rf /var/lib/ambari-server/resources/stacks/HDP/2.1/services/SMARTSENSE /var/lib/ambari-server/resources/stacks/HDP/3.0/services/SMARTSENSE
ambari restart
3:ambari查看报错日志
cat /var/log/ambari-server/ambari-server.log
4:ambari检测可用节点时失败
ambari-agent reset node11
十二:FAQ
1. ambari自动生成yum repo文件的baseurl是空的
https://www.jianshu.com/p/8e4ca48c156a登录数据库修改表
sudo mysql -u root -p
use ambari;
update repo_definition set base_url=”http://x.x.x.x/hdp/centos7/3.1.0.0-78/“ where repo_name=”HDP”;
update repo_definition set base_url=”http://x.x.x.x/hdp-utils/centos7/1.1.0.22/“ where repo_name=”HDP-UTILS”;
update repo_definition set base_url=”http://x.x.x.x/hdp-gpl/centos7/3.1.0.0-78/“ where repo_name= “HDP-GPL”;
删除生成的空的repo文件,并且刷新源
yum clean all && yum makecache
然后重启服务,不需要重新注册,页面会自动跳转到step9.
有些情况HDP-GPL为官网地址,还需要再此更新为实际地址,再此重启ambari-server。
2. 缺少libtirpc-devel依赖
rpm -ivh libtirpc-devel-0.2.4-0.16.el7.x86_64.rpm
3. ambari检测可用节点时失败
ambari-agent reset node11
4.安装易错步骤
ambari setup后
mysql驱动找不到,文件数据权限访问问题
cat /var/log/ambari-server/ambari-server.log
查看日志解决对应问题
5.ssh 问题 查看ssh免密是否正常登录
ERROR: Bootstrap of host xty108 fails because previous action finished with non-zero exit code (1)
十二:依赖配置
1:具体服务安装位置,以hive为例
cd /etc/hive/3.1.0.0-78
cd /usr/hdp/3.1.0.0-78/hive
2:hdfs默认用户名
3:hive默认用户
4:hdfs查看数据目录
http://node12:50070/explorer.html#/
5:各web管理登录用户
(1):ambari http://node12:8080/#/login admin/admin
(2):hbase http://node13.data.yuzhilin.net.cn:16010/master-status
(3):solr http://node12.data.yuzhilin.net.cn:8886/solr/#/
(4):atlas http://node21.data.yuzhilin.net.cn:21000/login.jsp admin/yzl123456
(5):dolphinscheduler http://node13:12345/dolphinscheduler admin/dolphinscheduler123
(6):ranger http://node13.data.yuzhilin.net.cn:6080/index.htm admin/admin
(N):hdfs namenode http://node12:50070/explorer.html
6:依赖mysql库信息配置
(1):192.168.32.12 3306 root/123456
(2):ambari ambari/bigdata
(3):hive hive/123456
(4):dolphinscheduler dolphinscheduler/123456
十三:软件安装包及文档
链接: https://pan.baidu.com/s/1W4f-kKxzPvwzS53ZoGMXdA 密码: csnp—来自百度网盘超级会员V7的分享
 yzl
yzl
