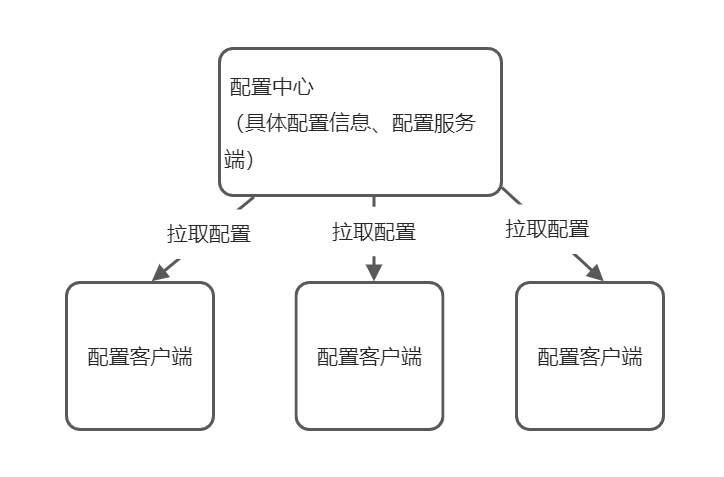
1.配置获取流程图
2.单机版客户端搭建
引入依赖
<!--Spring Cloud Alibaba Config 依赖--><dependency><groupId>com.alibaba.cloud</groupId><artifactId>spring-cloud-starter-alibaba-nacos-config</artifactId></dependency><!--SpringCloud ailibaba nacos 服务注册与发现模块 --><dependency><groupId>com.alibaba.cloud</groupId><artifactId>spring-cloud-starter-alibaba-nacos-discovery</artifactId></dependency>
编写bootstrap.yml配置文件
bootstrap.yml 是系统级别的,加载优先级高于 application.yml ,负责从外部加载配置并解析
management:endpoints:web:exposure:include: '*' #springboot监控开启所有端点server:port: 8083spring:application:name: config-clientcloud:nacos:discovery:server-addr: 127.0.0.1:8848 #服务注册到nacos注册中心的地址config:server-addr: 127.0.0.1:8848 #Nacos作为配置中心地址file-extension: yaml #指定yaml格式的配置
编写application.yml配置文件
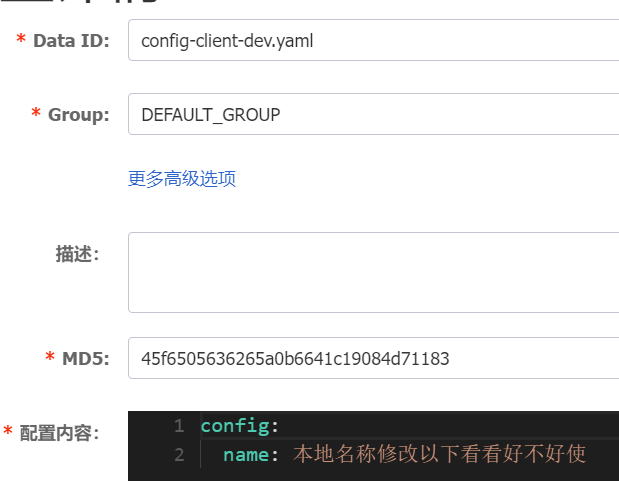
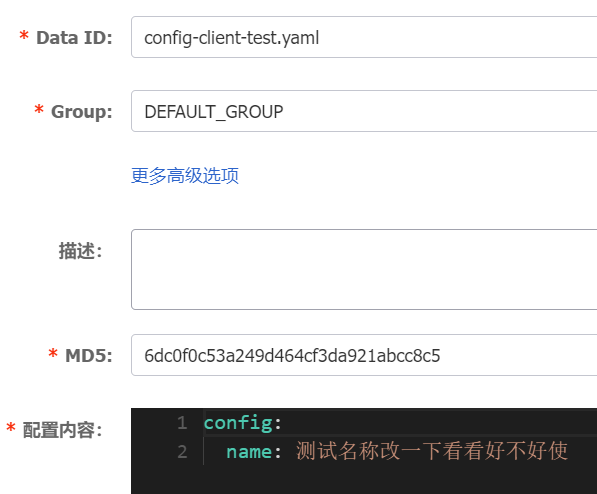
可以通过指定不同的激活文件配合Data Id从nacos获取不同环境下的配置
spring:profiles:active: dev #激活 dev 的配置
nacos控制台添加配置
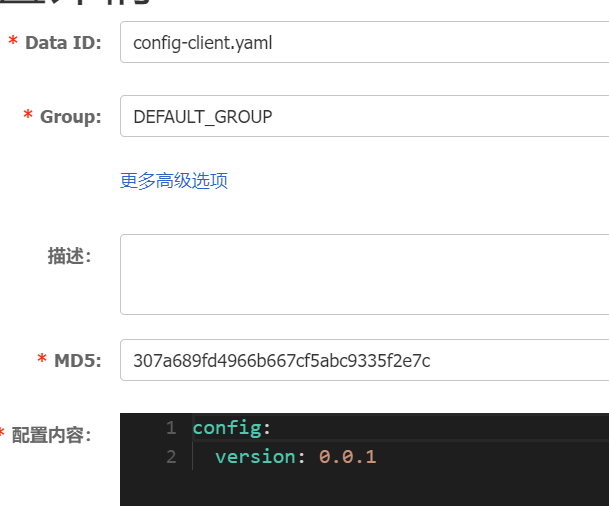
Nacos Server 配置的Data ID的完整格式如下:${prefix}-${spring.profiles.active}.${file-extension}
dataId 格式中各参数说明如下:
- ${prefix}:默认取值为微服务的服务名,即配置文件中 spring.application.name 的值,我们可以在配置文件中通过配置 spring.cloud.nacos.config.prefix 来指定。
- ${spring.profiles.active}:表示当前环境对应的 Profile,例如 dev、test、prod 等。当没有指定环境的 Profile 时,其对应的连接符也将不存在, dataId 的格式变成 ${prefix}.${file-extension}。
- ${file-extension}:表示配置内容的数据格式,我们可以在配置文件中通过配置项 spring.cloud.nacos.config.file-extension 来配置,例如 properties 和 yaml。
启动类添加注解
```java import org.springframework.boot.SpringApplication; import org.springframework.boot.autoconfigure.SpringBootApplication; import org.springframework.cloud.client.discovery.EnableDiscoveryClient;
@SpringBootApplication @EnableDiscoveryClient public class ConfigClientApplication { public static void main(String[] args) { SpringApplication.run(ConfigClientApplication.class, args); } }
<a name="F2tWZ"></a>### 编写配置类获取配置**注意注解@RefreshScope**```javaimport org.springframework.boot.context.properties.ConfigurationProperties;import org.springframework.cloud.context.config.annotation.RefreshScope;import org.springframework.stereotype.Component;/*** @author 冯铁城 [17615007230@163.com]* @date 2022-05-31 16:20:25* @describe:*/@Component@ConfigurationProperties(prefix = "config")@RefreshScopepublic class Config {private String version;private String name;public String getVersion() {return version;}public void setVersion(String version) {this.version = version;}public String getName() {return name;}public void setName(String name) {this.name = name;}}
配置使用
注意注解@RefreshScope
import org.springframework.beans.factory.annotation.Autowired;import org.springframework.cloud.context.config.annotation.RefreshScope;import org.springframework.web.bind.annotation.GetMapping;import org.springframework.web.bind.annotation.RequestMapping;import org.springframework.web.bind.annotation.RestController;/*** @author 冯铁城 [17615007230@163.com]* @date 2022-05-31 16:20:19* @describe:*/@RefreshScope@RestController@RequestMapping("api/vi/config-client")public class Controller {@Autowiredprivate Config config;@GetMappingpublic String get() {return "name:" + config.getName() + " | version:" + config.getVersion();}}

若有收获,就点个赞吧
0 人点赞
