第一阶段
一、认识SpringBoot
1.1 HelloWorld
- 版本要求:
java8和maven3.3以上版本 - 导入相关依赖
<!-- 导入父工程 --><parent><artifactId>spring-boot-starter-parent</artifactId><groupId>org.springframework.boot</groupId><version>2.6.0</version></parent><!--web场景的场景启动器 会自动导入web项目所有的依赖jar包--><dependencies><dependency><groupId>org.springframework.boot</groupId><artifactId>spring-boot-starter-web</artifactId><version>2.6.0</version></dependency></dependencies>
- 编写一个主程序,在类上使用注解 @SpringBootlication 这个注解的作用就是表示这是一个
SpringBoot应用,这个类就称为主程序类
@SpringBootApplicationpublic class MainApplication {public static void main(String[] args) {SpringApplication.run(MainApplication.class,args);}}
- 编写控制层Controller 知识点
@ResponseBody放在控制层类上表示此类所有的方法全都视为向浏览器输出内容,而@RestController相当于**_@Controller_**+**_@ResponseBody_**表示此类的所有控制器方法都是输出内容
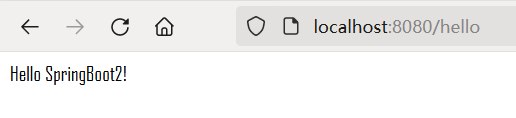
//@ResponseBody//@Controller@RestControllerpublic class ControllerJson {@RequestMapping("/hello")public String handler(){return "Hello SpringBoot2!";}}
- 创建一个名字为
application.properties的配置文件【注意:必须要叫这个名,不然无效】 - 其中可以编写一些配置
#编写Tomcat的端口号server.port=8888
3、创建Jar包
第一步、导入相关依赖
<!--加上打包方式不是web的war--><packaging>jar</packaging><!--扩展包--><build><plugins><plugin><groupId>org.springframework.boot</groupId><artifactId>spring-boot-maven-plugin</artifactId><version>2.6.0</version></plugin></plugins></build>
然后选中maven工程的打包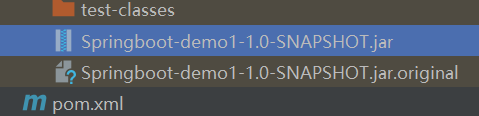
进入到此文件的目录打开cmd命令行输入java -jar [jar包名].jar 注意关闭cmd窗口的快速编辑模式
4、重写依赖jar包
如果此时SpringBoot自动仲裁的包不是我们想要的,此时就需要重写
<properties><!-- 以MySQL为例子 --><mysql.version>5.1.43</mysql.version><properties/>
5、SpringMVC的常用组件 SpringBoot已经配置好
主程序所在的包及其子包都会默认扫描进IOC容器
6、@Configuration 以及 @Bean
@Configuration 当一个类上放置了这个注解之后 就会变为配置类,被SpringBoot主方法扫描进IOC容器之后作为组件的一部分
这个类中@Bean 所标注的方法中返回的对象都会作为组件的一部分
@Configuration(proxyBeanMethods = true)public class UserController {@Beanpublic User getUser(){return new User("张三",getPet());}@Beanpublic Pet getPet(){return new Pet("tom");}}
当 @Configuration(proxyBeanMethods = true)默认为TRUE时就是单例模式 Full模式
为FALSE 时就是 Lite模式 ,这个模式启动比较快
当组件依赖时最好为TRUE
注意这个是SpringBoot的内容
引用的解释
官方文档描述: 用@Configuration注释类表明其主要目的是作为bean定义的源 @Configuration类允许通过调用同一类中的其他@Bean方法来定义bean之间的依赖关系
ta人总结: 1.表明当前类是一个配置类,是方法bean的源
2.将@Configuration配置的AppConfig的beanDefinitioin属性赋值为full类型的,保证AppConfig类型 可以转变为cglib类型 3.将@Configuration配置的AppConfig由普通类型转变为cglib代理类型,后会生成cglib代理对象,通 过代理对象的方法拦截器,
可以解决AppConfig内部方法bean之间发生依赖调用的时候从容器中去获取,避免了多例的出现
二、正式学习SpringBoot2
1、相关注解
@Import 注解
作用:可以调用给容器中创建导入的组件(无参构造)
@Import({User.class,Pet.class})@Configuration(proxyBeanMethods=true)public class ConfigurationBean {
结果: 是默认组件的全类名
String[] names = run.getBeanNamesForType(User.class);for(String name:names) {System.out.println("========");System.out.println(name);//demo.bean.User}
@Conditional 以及派生注解
- @ConditionalOnBean 在容器中有某个组件
- 当放在方法上时,当条件成立 方法中的组件才会在容器中注册
- 放在类上时,当条件成立时 类中的组件才会生效
@ConditionalOnBean(name = "tom")//判断容器中是否有tom这个组件
- @ConditionalOnMissingBean 当容器中没有才进行注册
@ImportResource
当有配置文件或者其他配置类时可以使用此注解导入到当前要使用的IOC容器@ImportResource("classpath:bean1.xml")//放在类上
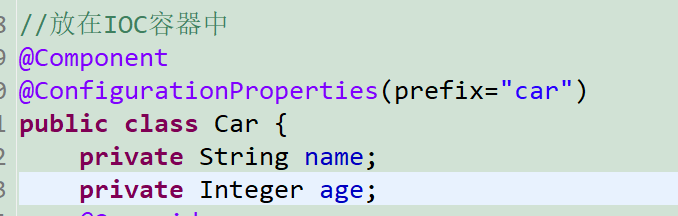
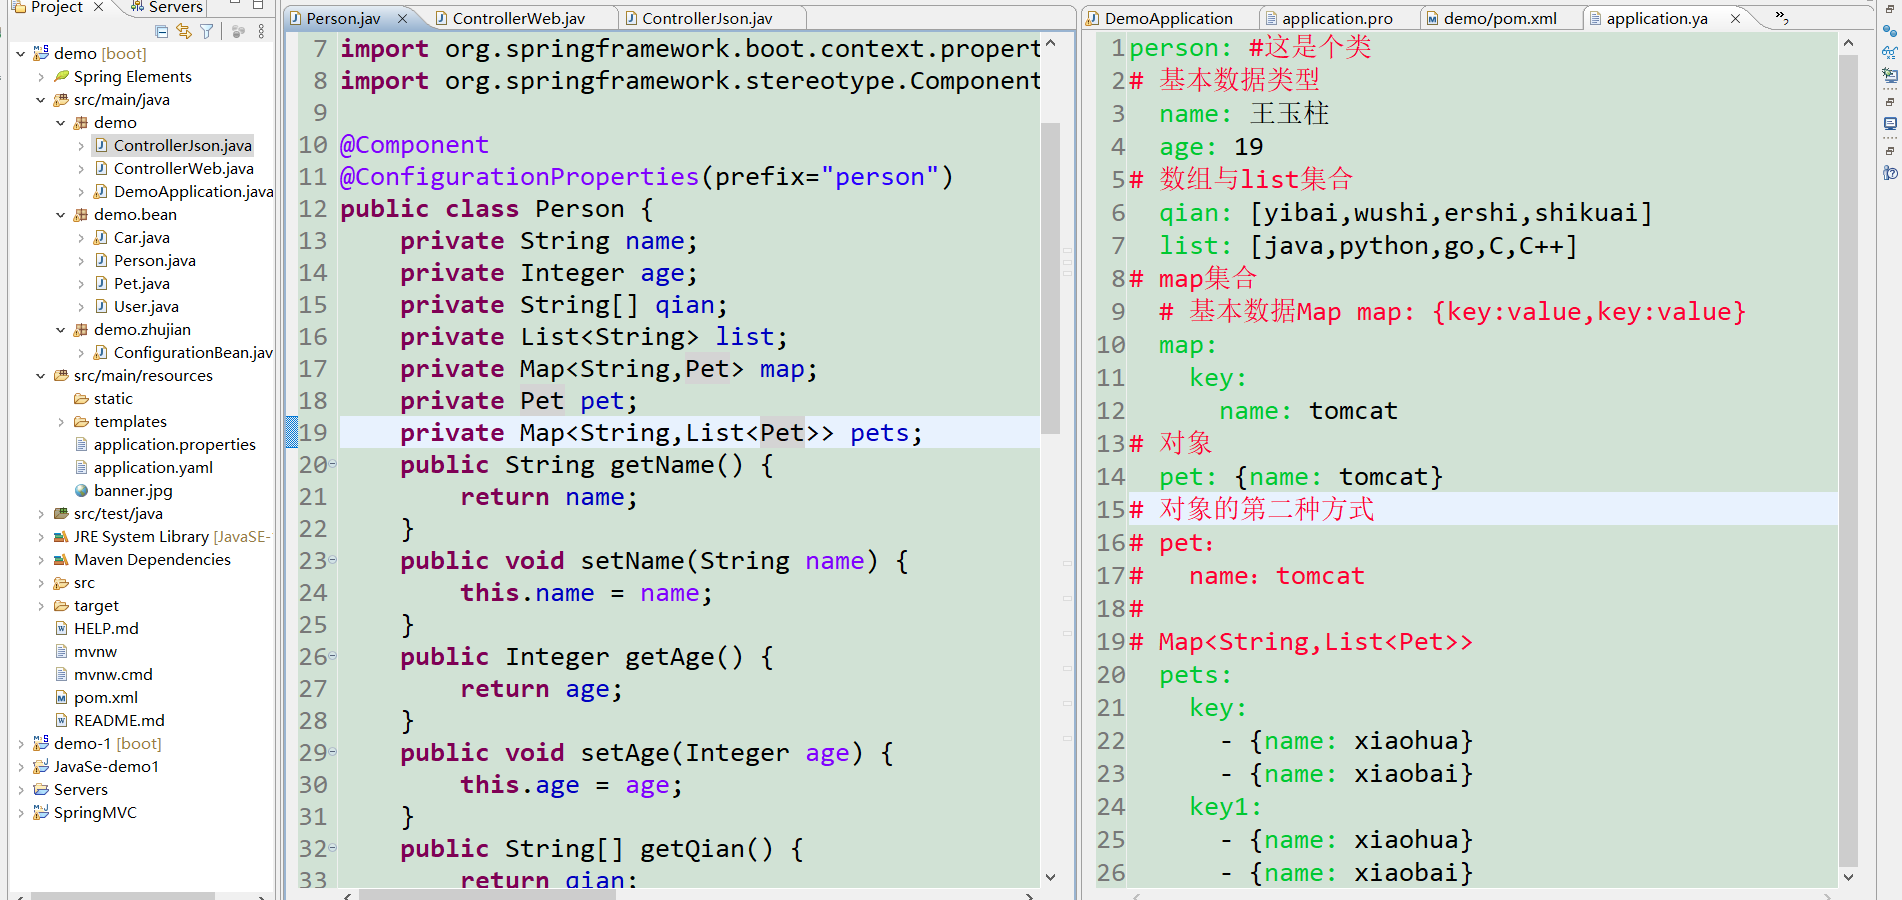
2、配置绑定
@ConfigurationProperties

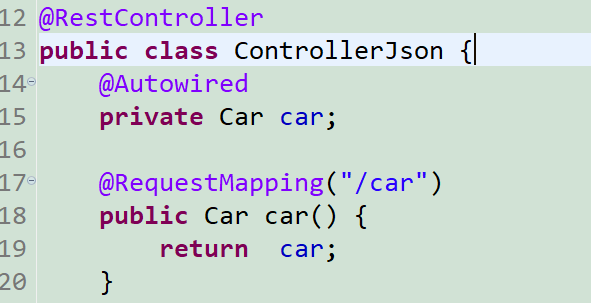
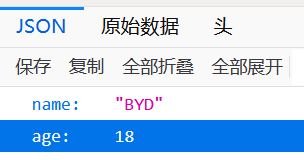
注意:被装配的类一定要开启set方法@EnableConfigurationProperties(Car.class)
```java @EnableConfigurationProperties(Car.class) //这种方式依然需要@ConfigurationProperties在需要配置的类上 //不过不需要把该类放在IOC容器当中 //这个注解是放在类上 括号里面加装配过的类 //这个注解会把类自动注入到容器当中
<a name="Jd23g"></a>### 3、@SpringBootApplication 源码分析```java@Target(ElementType.TYPE)@Retention(RetentionPolicy.RUNTIME)@Documented@Inherited@SpringBootConfiguration@EnableAutoConfiguration@ComponentScan(excludeFilters = { @Filter(type = FilterType.CUSTOM, classes = TypeExcludeFilter.class),@Filter(type = FilterType.CUSTOM, classes = AutoConfigurationExcludeFilter.class) })public @interface SpringBootApplication {
@SpringBootConfiguration
//该注解的底层@Target(ElementType.TYPE)@Retention(RetentionPolicy.RUNTIME)@Documented//代表着是一个配置类而已@Configurationpublic @interface SpringBootConfiguration {
@ComponentScan
(excludeFilte@ComponentScan(excludeFilters ={ @Filter(type = FilterType.CUSTOM, classes = TypeExcludeFilter.class),@Filter(type = FilterType.CUSTOM, classes = AutoConfigurationExcludeFilter.class) })
@EnableAutoConfiguration
@AutoConfigurationPackage@Import(AutoConfigurationImportSelector.class)public @interface EnableAutoConfiguration {
1、@AutoConfigurationPackage
自动配置包(规则)
就是将@SpringBootApplication 所标注的类的所在包下的所有组件都加载进来
@Import(AutoConfigurationPackages.Registrar.class)//给容器中导入一个(系列)组件public @interface AutoConfigurationPackage {
static class Registrar implements ImportBeanDefinitionRegistrar, DeterminableImports {@Overridepublic void registerBeanDefinitions(AnnotationMetadata metadata, BeanDefinitionRegistry registry) {register(registry, new PackageImports(metadata).getPackageNames().toArray(new String[0]));}@Overridepublic Set<Object> determineImports(AnnotationMetadata metadata) {return Collections.singleton(new PackageImports(metadata));}}
@Import(AutoConfigurationImportSelector.class)
//1、利用该方法给容器中导入一批组件protected AutoConfigurationEntry getAutoConfigurationEntry(AnnotationMetadata annotationMetadata) {if (!isEnabled(annotationMetadata)) {return EMPTY_ENTRY;}AnnotationAttributes attributes = getAttributes(annotationMetadata);//2、利用List<String> configurations 获取到所有需要导入的包List<String> configurations = getCandidateConfigurations(annotationMetadata, attributes);configurations = removeDuplicates(configurations);Set<String> exclusions = getExclusions(annotationMetadata, attributes);checkExcludedClasses(configurations, exclusions);configurations.removeAll(exclusions);configurations = getConfigurationClassFilter().filter(configurations);fireAutoConfigurationImportEvents(configurations, exclusions);return new AutoConfigurationEntry(configurations, exclusions);}
protected List<String> getCandidateConfigurations(AnnotationMetadata metadata, AnnotationAttributes attributes) {//利用工厂加载一些东西List<String> configurations = SpringFactoriesLoader.loadFactoryNames(getSpringFactoriesLoaderFactoryClass(),getBeanClassLoader());Assert.notEmpty(configurations, "No auto configuration classes found in META-INF/spring.factories. If you "+ "are using a custom packaging, make sure that file is correct.");return configurations;}
4、总结
加载127个配置类
SpringBoot 会按照条件自动装配规则(@Conditionnal)最终会按需配置
流程:XXXXAutoConfiguration—->组件—->XXXXProperties——->application.properties
也就是说更改配置文件就可以更改编码等等
5、 查看引入的场景配置
在application.properties 文件中debug=true
控制台打印 Positive 生效
控制台打印 Negative 不生效
6、热更新
<!-- 热部署 资源占大 --><!-- <dependency><groupId>org.springframework.boot</groupId><artifactId>spring-boot-devtools</artifactId><version>2.5.6</version></dependency>-->
第一阶段总结
import org.springframework.boot.autoconfigure.condition.ConditionalOnMissingBean;import org.springframework.boot.context.properties.EnableConfigurationProperties;import org.springframework.context.annotation.Bean;import org.springframework.context.annotation.Configuration;import org.springframework.context.annotation.Import;import org.springframework.context.annotation.ImportResource;import demo.bean.Car;import demo.bean.Pet;import demo.bean.User;@Import({User.class,Pet.class})@Configuration(proxyBeanMethods=true)@ConditionalOnMissingBean(name = "!demo.bean.User")//@ImportResource("classpath:bean1.xml")@EnableConfigurationProperties(Car.class)public class ConfigurationBean {//@ConditionalOnBean(name = "tom")@Bean("user")public User getUser() {return new User("张三",getPet());}@Bean("tom")public Pet getPet() {return new Pet("tom");}}
第二阶段
一、配置、Web
1、yaml
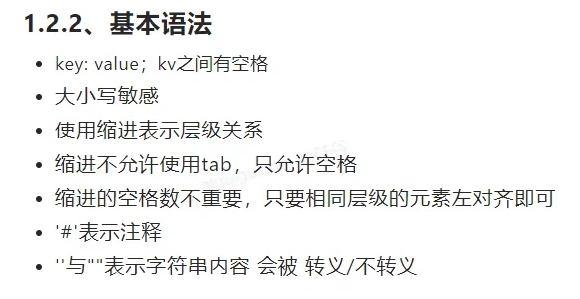
基本使用方式
编写提示依赖
<dependency><groupId>org.springframework.boot</groupId><artifactId>spring-boot-configuration</artifactId><optional>true</optional></dependency>
2、Web开发
WebMvcConfigurer
功能等同于原来的springMVC.xml。可以注册视图解析器,多部件解析器
静态资源目录
静态资源访问
- public
- 可以直接访问
- META-INF/resources
- 可以直接访问
- resources
- 可以直接访问
- static
- 可以直接访问
配置静态资源访问目录
# 不配置的话默认访问静态资源目录为/**spring:mvc:static-path-pattern: /wjl/**# 此时要想找到静态资源 静态资源的目录必须是所设置的文件夹# 注意:已经被弃用resources:static-locations: classpath: /wjl1/
欢迎界面
- 默认为index名字的HTML文件
- 设置了静态资源的目录可以访问
- 加了前缀不行
static-path-pattern: /wjl/**
favicon.ico 文件会默认为网站图标 和代码无太多关联、浏览器处理
网站缓存原因 Shift+f5/刷新
配置文件和相关属性进行了绑定

一些相关配置以及源码
1、禁用所有静态资源
spring:resources:# add-mappings 类的实例属性add-mappings: false
对应的WebMvcAutoconfiguration.java(也就是webMVC的配置类)中的源码部分
@Overridepublic void addResourceHandlers(ResourceHandlerRegistry registry) {if (!this.resourceProperties.isAddMappings()) {logger.debug("Default resource handling disabled");return;}Duration cachePeriod = this.resourceProperties.getCache().getPeriod();CacheControl cacheControl = this.resourceProperties.getCache().getCachecontrol().toHttpCacheControl();if (!registry.hasMappingForPattern("/webjars/**")) {customizeResourceHandlerRegistration(registry.addResourceHandler("/webjars/**").addResourceLocations("classpath:/META-INF/resources/webjars/").setCachePeriod(getSeconds(cachePeriod)).setCacheControl(cacheControl));}String staticPathPattern = this.mvcProperties.getStaticPathPattern();if (!registry.hasMappingForPattern(staticPathPattern)) {customizeResourceHandlerRegistration(registry.addResourceHandler(staticPathPattern).addResourceLocations(getResourceLocations(this.resourceProperties.getStaticLocations())).setCachePeriod(getSeconds(cachePeriod)).setCacheControl(cacheControl));}}
WelcomePageHandlerMapping.java中的处理欢迎页代码
final class WelcomePageHandlerMapping extends AbstractUrlHandlerMapping {private static final Log logger = LogFactory.getLog(WelcomePageHandlerMapping.class);private static final List<MediaType> MEDIA_TYPES_ALL = Collections.singletonList(MediaType.ALL);WelcomePageHandlerMapping(TemplateAvailabilityProviders templateAvailabilityProviders,ApplicationContext applicationContext, Optional<Resource> welcomePage, String staticPathPattern) {if (welcomePage.isPresent() && "/**".equals(staticPathPattern)) {logger.info("Adding welcome page: " + welcomePage.get());setRootViewName("forward:index.html");}else if (welcomeTemplateExists(templateAvailabilityProviders, applicationContext)) {logger.info("Adding welcome page template: index");setRootViewName("index");}}private boolean welcomeTemplateExists(TemplateAvailabilityProviders templateAvailabilityProviders,ApplicationContext applicationContext) {return templateAvailabilityProviders.getProvider("index", applicationContext) != null;}private void setRootViewName(String viewName) {ParameterizableViewController controller = new ParameterizableViewController();controller.setViewName(viewName);setRootHandler(controller);setOrder(2);}@Overridepublic Object getHandlerInternal(HttpServletRequest request) throws Exception {for (MediaType mediaType : getAcceptedMediaTypes(request)) {if (mediaType.includes(MediaType.TEXT_HTML)) {return super.getHandlerInternal(request);}}return null;}private List<MediaType> getAcceptedMediaTypes(HttpServletRequest request) {String acceptHeader = request.getHeader(HttpHeaders.ACCEPT);if (StringUtils.hasText(acceptHeader)) {return MediaType.parseMediaTypes(acceptHeader);}return MEDIA_TYPES_ALL;}}
开启REST 请求风格的请求
此时不得不夸赞 Rest风格真的协调 同一段请求连接 不同的请求方式
不同的效果
- get 查
- post 增
- put 改
- delete 删
- patch
控制器部分
//@RestColltroller@ResponseBody@Controllerpublic class ControllerWeb {// @ResponseBody// @RequestMapping("/")// public String hello() {// return "Hello SpringBoot2!";// }@RequestMapping(value="/user",method=RequestMethod.GET)public String getUser() {return "get-张三";}@RequestMapping(value = "/user",method = RequestMethod.POST)public String saveUser() {return "post-张三";}@RequestMapping(value = "/user",method = RequestMethod.PUT)public String updateUser() {return "put-张三";}@RequestMapping(value = "/user",method = RequestMethod.DELETE)public String deletsUser() {return "delete-张三";}}
表单部分
<form action="/user" method="post"><!--这里大小写都行--><input type="hidden" name="_method" value="put"/><input type="submit" value="put"></form><br>
该配置源码
//SpringMVC的HiddenHttpMethodFilter@Overrideprotected void doFilterInternal(HttpServletRequest request, HttpServletResponse response, FilterChain filterChain)throws ServletException, IOException {HttpServletRequest requestToUse = request;if ("POST".equals(request.getMethod()) && request.getAttribute(WebUtils.ERROR_EXCEPTION_ATTRIBUTE) == null) {String paramValue = request.getParameter(this.methodParam);if (StringUtils.hasLength(paramValue)) {String method = paramValue.toUpperCase(Locale.ENGLISH);if (ALLOWED_METHODS.contains(method)) {requestToUse = new HttpMethodRequestWrapper(request, method);}}}//WebMVC类@Bean@ConditionalOnMissingBean(FormContentFilter.class)@ConditionalOnProperty(prefix = "spring.mvc.formcontent.filter", name = "enabled", matchIfMissing = true)public OrderedFormContentFilter formContentFilter() {return new OrderedFormContentFilter();}
所以实际开启:
# 真的比MVC方便许多# 选择性开启 如果用能直接发送delete和put等的方式可以不开启spring:mvc:hiddenmethod:filter:enabled: true
MVC 注解
@PathVariable @RequestHeader
@RestControllerpublic class ControllerRest {@GetMapping("/user/{id}/{username}")public Map<String,Object> rest1(@PathVariable("id") Integer id,@PathVariable("username") String username,@PathVariable Map<String,Object> map,@RequestHeader("User-Agent") String Ua,//map不带User-Agent 就是所有@RequestHeader("User-Agent") Map<String,Object> uamap){System.out.println(id);System.out.println(username);System.out.println(map);System.out.println(Ua);System.out.println(uamap);/*1王玉柱{id=1, username=王玉柱}Mozilla/5.0 (Windows NT 6.1; Win64; x64; rv:90.0) Gecko/20100101 Firefox/90.0{host=localhost:8080, user-agent=Mozilla/5.0 (Windows NT 6.1; Win64; x64; rv:90.0) Gecko/20100101 Firefox/90.0, accept=text/html,application/xhtml+xml,application/xml;q=0.9,image/avif,image/webp,;q=0.8, accept-language=zh,en;q=0.5, accept-encoding=gzip, deflate, connection=keep-alive, upgrade-insecure-requests=1, sec-fetch-dest=document, sec-fetch-mode=navigate, sec-fetch-site=none, sec-fetch-user=?1}*/return map;}}
@RequestParam
注意数组或者集合 多选模式下不要用map
@GetMapping("/par")//http://localhost:8080/par?id=1&username=王玉柱&username=王public Map<String,Object> par(@RequestParam("id") Integer id,@RequestParam Map<String,Object> map,@RequestParam("username") List<Object> list,@RequestParam("username") String[] str){System.out.println(id);System.out.println(map);System.out.println(list);for(int i=0;i<str.length;i++) {System.out.print(str[i]+" ");}return map;/*1{id=1, username=玉柱}[玉柱, 王]玉柱 王*/}
@CookieValue @RequestBody
- @CookieValue(“key”) cookie是以键值对形式存储的
- @CookieValue Cookie cookie 获取所有cookie
-
URL重写@MatrixVariable(“k”)
页面开发禁用了Cookie
此时需要这样矩阵变量/path;jssionssid=xxxx把Cookie的值通过矩阵变量的方式进行传递路径/路径; k=v;k=v;k=v注意分号
此时想要获得参数的值需要这个注解@MatrixVariable("k")修饰方法形参变量以获得v的值 不过很少用
不过SpringBoot默认禁用了矩阵变量
第一种方式 实现WebMvcConfigurer接口,重写默认方法
功能等同于原来的springMVC.xml。可以注册视图解析器,多部件解析器
configurePathMatch(PathMatchConfigurer configurer),更改对其的禁用
@Configuration//组件public class ConfiguartionZDY /*implements WebMvcConfigurer*/{/*@Override //路径帮助器public void configurePathMatch(PathMatchConfigurer configurer) {// TODO Auto-generated method stubUrlPathHelper urlpath = new UrlPathHelper();//这个方法默认为true 意思就是默认移除掉分号在请求路径urlpath.setRemoveSemicolonContent(false);//set进去configurer.setUrlPathHelper(urlpath);}*/@Bean//匿名内部类的形式public WebMvcConfigurer webMvcConfigurer() {return new WebMvcConfigurer(){public void configurePathMatch(PathMatchConfigurer configurer) {UrlPathHelper urlpath = new UrlPathHelper();//这个方法默认为true 意思就是默认移除掉分号在请求路径urlpath.setRemoveSemicolonContent(false);//set进去configurer.setUrlPathHelper(urlpath);}};}@Beanpublic HiddenHttpMethodFilter hiddenHttpMethodFilter() {HiddenHttpMethodFilter filter = new HiddenHttpMethodFilter();//自定义rest请求的隐藏域name的值 过这里filter.setMethodParam("_method");return filter;}}
控制层
//http://localhost:8080/jz/wjl;user=123;pass=123445@GetMapping("/jz/{path}")public String path(@PathVariable("path") String path,@MatrixVariable("user") String user,@MatrixVariable("pass") String pass){System.out.println(path+"====>");//wjlreturn "path===>"+path+"\nuser==>"+user+"\npassword==>"+pass;}
二/路径/path; user=xxxx/path2;user=xxxx
这种形式的需要注解的 pathVar属性
//http://localhost:8080/jz/jz1;user=123/jz2;user=456@GetMapping("/jz/{path}/{path2}")public String path(@PathVariable("path") String path,@PathVariable("path2") String path2,@MatrixVariable(value="user",pathVar="path") String user,@MatrixVariable(value ="user",pathVar="path2") String user2){System.out.println("path===>"+path+"path2====>"+path2+"\nuser==>"+user+"\npassword==>"+user2);//path===>jz1path2====>jz2 user==>123 password==>456return "path===>"+path+"path2====>"+path2+"\nuser==>"+user+"\npassword==>"+user2;}
内部类
动态:
- 外部类的属性和方法内部类可以访问,但是外访问内的属性与方法必须new
- 如果成员内部类的属性或者方法与外部类的同名,将导致外部类的这些属性与方法在内部类被隐藏,也可按照该格式调用,外部类.this.属性/方法。
- 通过外部类创建内部类的两种方式
//方式1C c = new C();C.D d = c.new D();/*方式2创建成员内部类对象*/C.D d1 = c.getClassD();
静态
- 完善了Java多继承机制,由于每一个内部类都可以独立的继承接口或类,所以无论外部类是否继承或实现了某个类或接口,对于内部类没有影响。
- 方便写事件驱动程序。
- 静态内部类对象的创建一般是外部类.内部类 类名 = new 外部类.内部类();
成员内部类对象的创建一般是外部类.内部类 类名 = 外部类对象名.new 内部类();相应的链接
内部类的详解)
域中的参数传递
@RequestMapping("/mm")public String mm(Map<String,Object> map,Model model,HttpServletRequest requst,HttpServletResponse response){map.put("map","map");model.addAttribute("model","model");requst.setAttribute("res","res");Cookie cookie = new Cookie("user","user");//放在域中response.addCookie(cookie);//转发的意思不要写错return "forward:/cook";}@ResponseBody@RequestMapping("/cook")public String cookie(@CookieValue(value ="user") String mapcookie,@RequestAttribute("map") String map,@RequestAttribute("model") String model,HttpServletRequest res) {System.out.println("map====>"+map);System.out.println("model===>"+model);System.out.println("res====>"+res.getAttribute("res"));//System.out.println(cookie.getValue());System.out.println(mapcookie+"[cookie]");/*map====>mapmodel===>modelres====>resuser[cookie]*/
自定义对象的传递
当前页面表单的的name属性如果和实体类的属性名一致 可以直接用对象来接
@ResponseBody@PostMapping("/save1")public BeanOne bean1(BeanOne one) {return one;}@ResponseBody@PostMapping("/save2")public BeanOne bean2(String username,String password,String sex) {BeanOne one = new BeanOne();one.setPassword(password);one.setUsername(username);one.setSex(sex);return one;}
级联赋值
宠物名:<input type="text" name="pet.name"><br>
更改级联赋值规则
@Bean//匿名内部类的形式public WebMvcConfigurer webMvcConfigurer() {return new WebMvcConfigurer(){public void configurePathMatch(PathMatchConfigurer configurer) {UrlPathHelper urlpath = new UrlPathHelper();//这个方法默认为true 意思就是默认移除掉分号在请求路径urlpath.setRemoveSemicolonContent(false);//set进去configurer.setUrlPathHelper(urlpath);}//重写WebMvcConfigurer类中的类型转换器不在用传统的级联Per.per 而是这种逗号分割的@Overridepublic void addFormatters(FormatterRegistry registry) {//将字符串转化为Pet对象registry.addConverter(new Converter<String,Pet>() {@Overridepublic Pet convert(String str) {if(!StringUtils.isEmpty(str)) {Pet pet = new Pet();String[] strs = str.split(",");pet.setName(strs[0]);return pet;}return null;}});}};}
SpringMVC 所支持的返回值
- View
- Model
- ModelAndView
- ResponseEntity
- ReactiveHandler(响应式)
- 自定义对象
- StreamResponseBody(函数式)
- HttpEntity
- HttpHeaders
- Callable(异步)
- DeferredResult
- ListenablFuture
- CompletionStage
- WebAsyncTask
- @ModelAttribute
- @ResponseBody
3、内容协商
1、首先引入依赖
<dependency><groupId>org.springframework.boot</groupId><artifactId>spring-boot-starter-data-jdbc</artifactId></dependency>
源码讲解链接
2、自定义MessageConverter
#spring:# resources:# add-mappings: falsespring:mvc:hiddenmethod:filter:enabled: true# 开启参数的内容协商contentnegotiation:favor-parameter: true
开启器内容协商之后可以在访问连接后面加一段可以指定请求要的是什么内容、请求连接+?format=json 或者其他类型的
自定义内容协商解析
扩展接口留出来的扩展方法
return new WebMvcConfigurer(){public void configurePathMatch(PathMatchConfigurer configurer) {UrlPathHelper urlpath = new UrlPathHelper();//这个方法默认为true 意思就是默认移除掉分号在请求路径urlpath.setRemoveSemicolonContent(false);//set进去configurer.setUrlPathHelper(urlpath);}//自定义内容协商把控制器所返回的对象写为自定义格式就是写出JSON就是JSON写出Xml就是Xml@Overridepublic void extendMessageConverters(List<HttpMessageConverter<?>> converters) {//添加上自定义的MessageConverterconverters.add(new WjlMessageConverters());}
加入自己的解析器
//实现HttpMessageConverter总接口与其方法public class WjlMessageConverters implements HttpMessageConverter<BeanOne>{@Override//支持读取某种格式的功能public boolean canRead(Class<?> clazz, MediaType mediaType) {// TODO Auto-generated method stubreturn false;}@Override//支持写出某种数据的功能public boolean canWrite(Class<?> clazz, MediaType mediaType) {// TODO Auto-generated method stub//返回值是否支持这种类型return clazz.isAssignableFrom(BeanOne.class);}/*** 获取所有能支持的媒体类型* 服务器要统计所有MessageConverter都能写出哪些内容类型*/@Override//在这个方法的 返回值里写出自己所需要的返回值类型public List<MediaType> getSupportedMediaTypes() {// TODO Auto-generated method stubreturn MediaType.parseMediaTypes("application/x-wjl");}@Overridepublic BeanOne read(Class<? extends BeanOne> clazz, HttpInputMessage inputMessage)throws IOException, HttpMessageNotReadableException {// TODO Auto-generated method stubreturn null;}@Overridepublic void write(BeanOne t, MediaType contentType, HttpOutputMessage outputMessage)throws IOException, HttpMessageNotWritableException {// TODO Auto-generated method stub//自定义协议数据的内容的写出 自定义写出到浏览器的数据String data = t.getUsername()+";"+t.getPassword()+";"+t.getSex()+";"+t.getPet();//获取输出流OutputStream body = outputMessage.getBody();//写出去body.write(data.getBytes());}}
4、视图解析与模板引擎‘
项目访问路径请求连接设置
server:servlet:context-path: /wjl
依赖
<dependency><groupId>org.springframework.boot</groupId><artifactId>spring-boot-starter-thymeleaf</artifactId></dependency>
eclipse需要的配置
spring.thymeleaf.cache=truespring.thymeleaf.check-template=truespring.thymeleaf.check-template-location=truespring.thymeleaf.content-type=text/htmlspring.thymeleaf.enabled=truespring.thymeleaf.encoding=UTF-8spring.thymeleaf.excluded-view-names=spring.thymeleaf.mode=HTML5spring.thymeleaf.prefix=classpath:/templates/spring.thymeleaf.suffix=.html
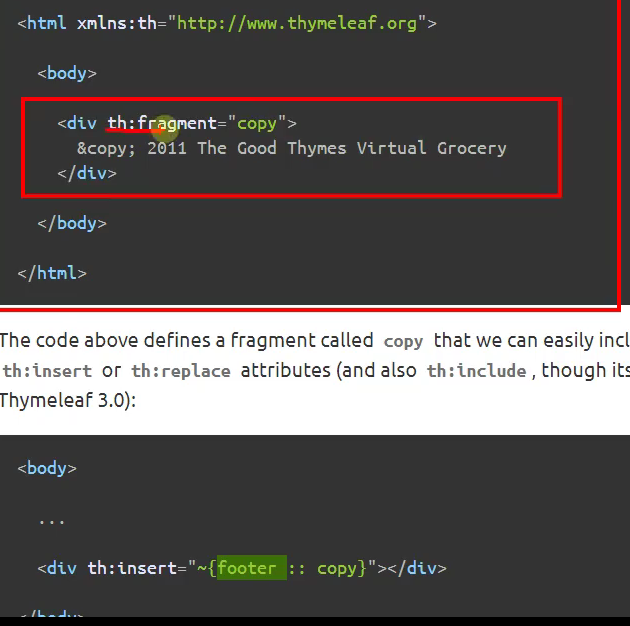
The 抽取公共内容的两种方式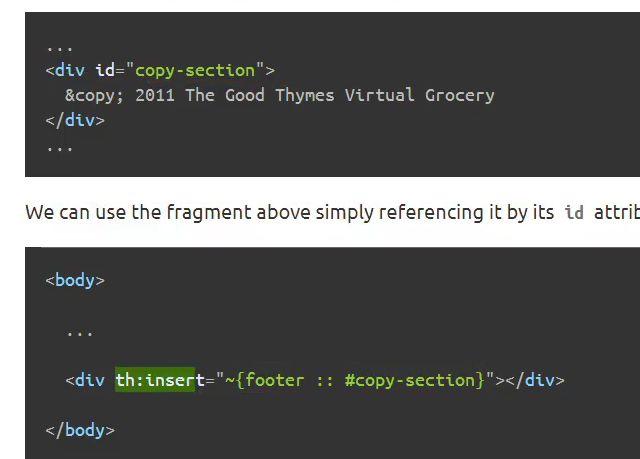
import javax.servlet.http.HttpServletRequest; import javax.servlet.http.HttpServletResponse; import javax.servlet.http.HttpSession;
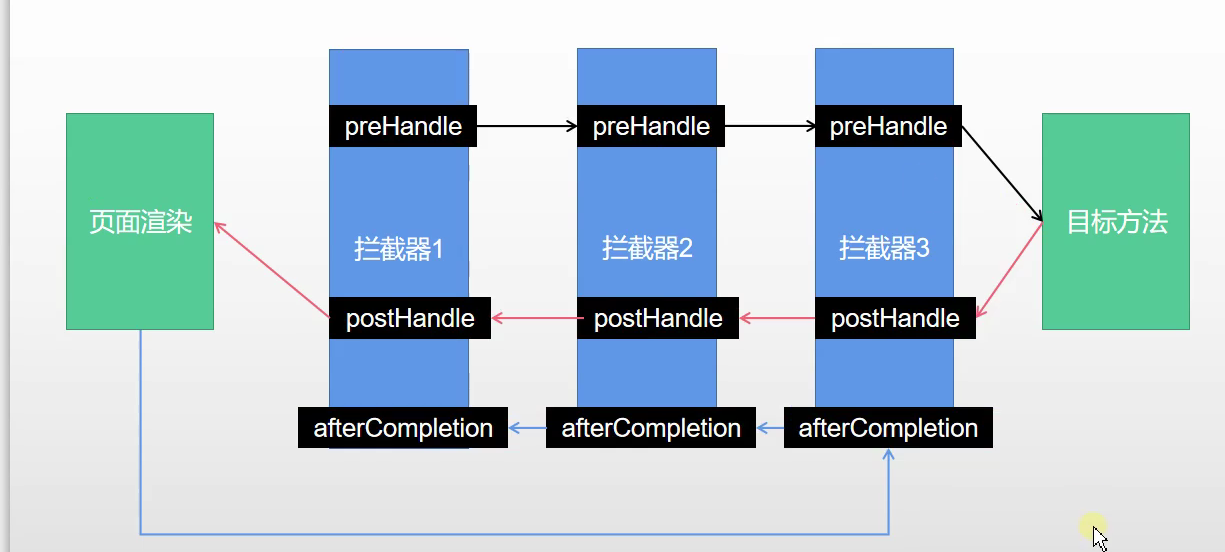
import org.springframework.web.servlet.HandlerInterceptor; import org.springframework.web.servlet.ModelAndView; //自定义拦截器 //第一步 继承HandlerInterceptor接口 重写其方法 //把这个配置放在容器中 public class LoginHandleInterceptor implements HandlerInterceptor{
@Override//目标方法执行之前public boolean preHandle(HttpServletRequest request, HttpServletResponse response, Object handler)throws Exception {HttpSession session = request.getSession();if(session.getAttribute("login") != null) {//跳转到登录后的界面return true;}//跳转到登录界面session.setAttribute("mgs","请登录");//跳转到最开初的界面response.sendRedirect("/login");return false;}@Override//执行之后呢public void postHandle(HttpServletRequest request, HttpServletResponse response, Object handler,ModelAndView modelAndView) throws Exception {HandlerInterceptor.super.postHandle(request, response, handler, modelAndView);}@Override//渲染之后public void afterCompletion(HttpServletRequest request, HttpServletResponse response, Object handler, Exception ex)throws Exception {HandlerInterceptor.super.afterCompletion(request, response, handler, ex);}
}
@Bean//匿名内部类的形式 public WebMvcConfigurer webMvcConfigurer() { return new WebMvcConfigurer(){ //放入容器中就是通过WebMvcConfigurer接口,要么实现接口,要么以匿名内部类的方式以@Bean //标注的方法WebMvcConfigurer抛出到容器中 @Override public void addInterceptors(InterceptorRegistry registry) { //添加进自定义的拦截器 registry.addInterceptor(new LoginHandleInterceptor()) //拦截所有 .addPathPatterns(“/**”) //放行不需要拦截的路径以及静态页面 .excludePathPatterns(“/“,”/login”); }
<a name="Uq82s"></a>### 6、文件上传与下载<a name="jKQ0f"></a>#### 上传html页面```html上传文件必须要的属性<form th:action="@{/file}" method="post" enctype="multipart/form-data">用户名:<input type="text" name="username"><br>密码: <input type="password" name="password"><br>单文件上传:<input type="file" name="photo" ><br>多文件上传:<input type="file" name="photos" multiple><br><input type="submit" value="提交"></form>
# 配置单个文件上传大小spring.servlet.multipart.max-file-size=10MB# 配置整个文件上传域的大小spring.servlet.multipart.max-request-size=100MB
控制器层面
@ResponseBody//MultipartFile 封装的一个文件接口// 用来接受文件处理对象 多文件上传使用数组形式//@RequestPart("photo") 对应上传的文件的名字(name)@PostMapping("/file")public String file2(@RequestPart("photo") MultipartFile file,@RequestPart("photos") MultipartFile[] files,@RequestParam("username") String username,@RequestParam("password") String password) throws IOException {log.info("上传的文件信息:username={},password={},file={},files={}",username,password,file.getSize(),files.length);if (!file.isEmpty()){//判断文件是否为空String name = file.getOriginalFilename();//获取文件名然后存放文件file.transferTo(new File("D:\\.temp\\ceshiwenjianjia\\"+name));}if(files.length>0){for (MultipartFile f:files){if (!f.isEmpty()){//判断文件是否为空String fname = f.getOriginalFilename();//获取文件名f.transferTo(new File("D:\\.temp\\ceshiwenjianjia\\pi\\"+fname));}}}return "谢谢";}
下载
1、文件下载
使用ResponseEntity实现下载文件的功能
@RequestMapping("/testDown")public ResponseEntity<byte[]> testResponseEntity(HttpSession session) throws IOException {//获取ServletContext对象ServletContext servletContext = session.getServletContext();//获取服务器中文件的真实路径String realPath = servletContext.getRealPath("/static/img/1.jpg");//创建输入流InputStream is = new FileInputStream(realPath);//创建字节数组byte[] bytes = new byte[is.available()];//将流读到字节数组中is.read(bytes);//创建HttpHeaders对象设置响应头信息MultiValueMap<String, String> headers = new HttpHeaders();//设置要下载方式以及下载文件的名字headers.add("Content-Disposition", "attachment;filename=1.jpg");//设置响应状态码HttpStatus statusCode = HttpStatus.OK;//创建ResponseEntity对象ResponseEntity<byte[]> responseEntity = new ResponseEntity<>(bytes, headers, statusCode);//关闭输入流is.close();return responseEntity;}
2、文件上传
文件上传要求form表单的请求方式必须为post,并且添加属性enctype=”multipart/form-data”
SpringMVC中将上传的文件封装到MultipartFile对象中,通过此对象可以获取文件相关信息
上传步骤:
a>添加依赖:
<!-- https://mvnrepository.com/artifact/commons-fileupload/commons-fileupload --><dependency><groupId>commons-fileupload</groupId><artifactId>commons-fileupload</artifactId><version>1.3.1</version></dependency>
b>在SpringMVC的配置文件中添加配置:
<!--必须通过文件解析器的解析才能将文件转换为MultipartFile对象--><bean id="multipartResolver" class="org.springframework.web.multipart.commons.CommonsMultipartResolver"></bean>
c>控制器方法:
@RequestMapping("/testUp")public String testUp(MultipartFile photo, HttpSession session) throws IOException {//获取上传的文件的文件名String fileName = photo.getOriginalFilename();//处理文件重名问题String hzName = fileName.substring(fileName.lastIndexOf("."));fileName = UUID.randomUUID().toString() + hzName;//获取服务器中photo目录的路径ServletContext servletContext = session.getServletContext();String photoPath = servletContext.getRealPath("photo");File file = new File(photoPath);if(!file.exists()){file.mkdir();}String finalPath = photoPath + File.separator + fileName;//实现上传功能photo.transferTo(new File(finalPath));return "success";}
7、错误处理机制
自定义异常显示页面
创建一个静态文件夹 error这里面专门存放一处理错误的页面
如果是自带的视图解析就是静态文件夹 如果是模板引擎就是模板引擎所规定的的文件夹下
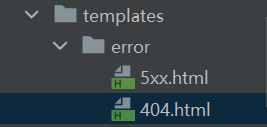
此时网站出现异常会自动解析并跳转该文件夹下面的4xx,5xx页面
并且会把错误信息以JSON的形式显示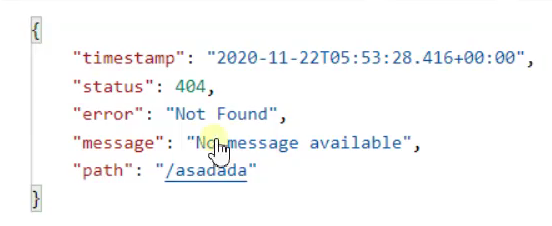
可以通过视图的功能取出来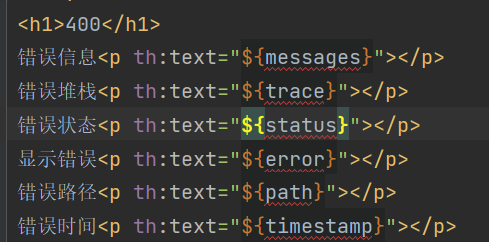
自定义异常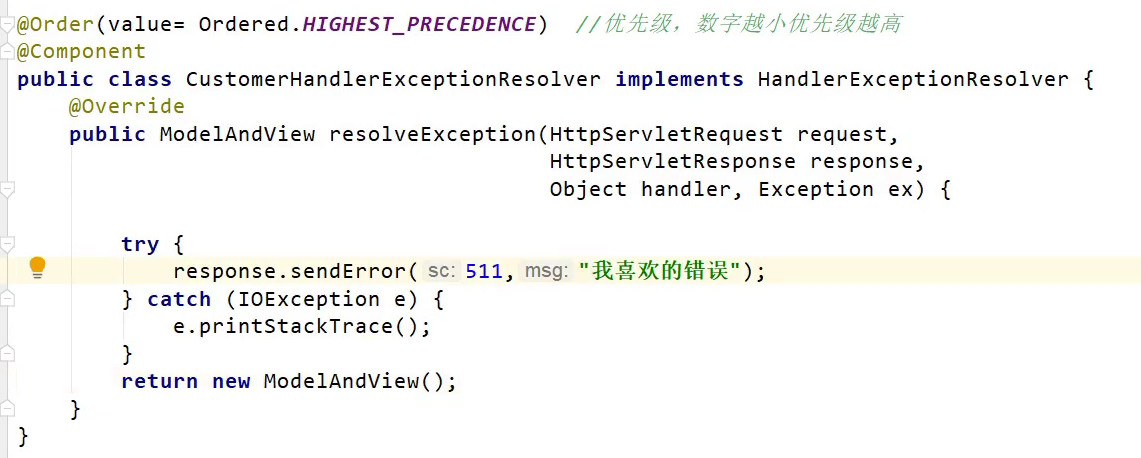
8、Web原生组件注入

- 在主配置类中上添加该注解
@ServletComponentScan("servlet类的包") - 在Servlet类上面添加
@WebServlet(访问路径) - Servlet类继承HttpServlet 并且重写doGet、doPost方法
- 直接响应 会
忽视SpringBoot的拦截器 @WebFilter(拦截路径)和WebListener也是同样如此 ```java //拦截器备忘 @WebFilter(“/serv”) public class MyFilter implements Filter { @Override public void doFilter(ServletRequest request, ServletResponse response, FilterChain chain) throws IOException, ServletException {
}//放行chain.doFilter(request,response);
```java@WebListener//监听器 继承ServletContextListener接口public class MyListener implements ServletContextListener {@Overridepublic void contextInitialized(ServletContextEvent sce) {System.out.println("监听开始");}@Overridepublic void contextDestroyed(ServletContextEvent sce) {System.out.println("监听结束");}}
第二种方式
RegistrationBean

- 注册一个配置类
要保证单例模式,不要造成代码冗余 ```java @Configuration(proxyBeanMethods = true)//配置类 public class MyRegistration { //把要映射的Servlet类注册到ServletRegistrationBean中 @Bean//并且配置访问路径 public ServletRegistrationBean myServlet(){
MyServlet myServlet = new MyServlet();//要映射的Servlet类//此时/se 或者 /s 就是请求路径return new ServletRegistrationBean(myServlet,"/se","/s");
}
@Bean//注册拦截器 public FilterRegistrationBean myFilter(){
MyFilter myFilter = new MyFilter();//第一种写法 拦截上面方法中注册Servlet类的路径//return new FilterRegistrationBean(myFilter,myServlet());//第二种 自己写路径MyFilter filter = new MyFilter();FilterRegistrationBean filterR = new FilterRegistrationBean<>(filter);ArrayList<String> list = new ArrayList<>(); list.add("/**"); list.add("/serv");filterR.setUrlPatterns(list);return filterR;
}
@Bean//注册监听器‘ public ServletListenerRegistrationBean myListener(){
return new ServletListenerRegistrationBean(new MyListener());
}
}
<a name="CCs2s"></a>#### 更换Tomcat服务器```xml<dependency><groupId>org.springframework.boot</groupId><artifactId>spring-boot-starter-web</artifactId><exclusions><exclusion><groupId>org.springframework.boot</groupId><artifactId>spring-boot-starter-tomcat</artifactId></exclusion></exclusions></dependency><dependency><groupId>org.springframework.boot</groupId><artifactId>spring-boot-starter-undertow</artifactId></dependency>
9、定制化SpringBootWeb的三种方式
一、创建配置类实现WebMvcConfigurer接口(推荐)
@Configuration//组件public class ConfiguartionZDY /*implements WebMvcConfigurer*/{/*@Override //路径帮助器public void configurePathMatch(PathMatchConfigurer configurer) {// TODO Auto-generated method stubUrlPathHelper urlpath = new UrlPathHelper();//这个方法默认为true 意思就是默认移除掉分号在请求路径urlpath.setRemoveSemicolonContent(false);//set进去configurer.setUrlPathHelper(urlpath);}*/@Bean//匿名内部类的形式public WebMvcConfigurer webMvcConfigurer() {return new WebMvcConfigurer(){//放入容器中就是通过WebMvcConfigurer接口,要么实现接口,要么以匿名内部类的方式以@Bean//标注的方法WebMvcConfigurer抛出到容器中//@Override// public void addInterceptors(InterceptorRegistry registry) {// //添加进自定义的拦截器// registry.addInterceptor(new LoginHandleInterceptor())// //拦截所有// .addPathPatterns("/**")// //放行不需要拦截的路径以及静态页面// .excludePathPatterns("/","/login");// }//自己设置内容协商策略@Overridepublic void configureContentNegotiation(ContentNegotiationConfigurer configurer) {Map<String,MediaType> mediaTypes = new HashMap<>();ParameterContentNegotiationStrategy strategy =new ParameterContentNegotiationStrategy(mediaTypes);configurer.strategies(Arrays.asList(strategy));}public void configurePathMatch(PathMatchConfigurer configurer) {UrlPathHelper urlpath = new UrlPathHelper();//这个方法默认为true 意思就是默认移除掉分号在请求路径urlpath.setRemoveSemicolonContent(false);//set进去configurer.setUrlPathHelper(urlpath);}//自定义内容协商把控制器所返回的对象写为自定义格式就是写出JSON就是JSON写出Xml就是Xml@Overridepublic void extendMessageConverters(List<HttpMessageConverter<?>> converters) {//添加上自定义的MessageConverterconverters.add(new WjlMessageConverters());}//重写WebMvcConfigurer类中的类型转换器不在用传统的级联Per.per 而是这种逗号分割的/*@Overridepublic void addFormatters(FormatterRegistry registry) {//将字符串转化为Pet对象registry.addConverter(new Converter<String,Pet>() {@Overridepublic Pet convert(String str) {if(!StringUtils.isEmpty(str)) {Pet pet = new Pet();String[] strs = str.split(",");pet.setName(strs[0]);return pet;}return null;}});}*/};}@Beanpublic HiddenHttpMethodFilter hiddenHttpMethodFilter() {HiddenHttpMethodFilter filter = new HiddenHttpMethodFilter();//自定义rest请求的隐藏域name的值 过这里filter.setMethodParam("_method");return filter;}}
二、通过返回WebMvcRegistrations组件的形式
//这里很底层 没做修改 只是知道有这么一种方式@Beanpublic WebMvcRegistrations webMvcRegistrations(){return new WebMvcRegistrations() {@Overridepublic RequestMappingHandlerMapping getRequestMappingHandlerMapping() {return WebMvcRegistrations.super.getRequestMappingHandlerMapping();}@Overridepublic RequestMappingHandlerAdapter getRequestMappingHandlerAdapter() {return WebMvcRegistrations.super.getRequestMappingHandlerAdapter();}@Overridepublic ExceptionHandlerExceptionResolver getExceptionHandlerExceptionResolver() {return WebMvcRegistrations.super.getExceptionHandlerExceptionResolver();}};}
三 、失效的注解
/***WebMvcConfigurer 重写其方法*@EnableWebMvc: 全面接管SpringMVC* 意思就是都由自己定制 视图解析器 欢迎页* 静态资源等等SpringMVC全部失效* 由自己重写方法处理*/@EnableWebMvc@Configurationpublic class ZiDingYiSpringMVC implements WebMvcConfigurer {
二、数据访问
1、SQL数据源
数据准备
SpringBoot不会自动导入驱动,因为ta不知道 需要什么数据库
所以需要自己导入 [做了版本仲裁]
//默认版本<dependency><groupId>mysql</groupId><artifactId>mysql-connector-java</artifactId></dependency>//自定义版本(就近原则)<properties><java.version>1.8</java.version><mysql.version>版本号</mysql.version></properties>
数据源的自动配置
导入JDBC场景
<dependency><groupId>org.springframework.boot</groupId><artifactId>spring-boot-starter-data-jdbc</artifactId></dependency>
SpringBoot的jdbc
DataSourceAutoConfiguration : 数据源的自动配置
- 修改数据源相关的配置:spring.datasource
- 数据库连接池的配置,是自己容器中没有DataSource才自动配置的
- 底层配置好的连接池是:HikariDataSource
@Configuration(proxyBeanMethods = false)@Conditional(PooledDataSourceCondition.class)@ConditionalOnMissingBean({ DataSource.class, XADataSource.class })@Import({ DataSourceConfiguration.Hikari.class, DataSourceConfiguration.Tomcat.class,DataSourceConfiguration.Dbcp2.class, DataSourceConfiguration.OracleUcp.class,DataSourceConfiguration.Generic.class, DataSourceJmxConfiguration.class })protected static class PooledDataSourceConfiguration
DataSourceTransactionManagerAutoConfiguration: 事务管理器的自动配置
- JdbcTemplateAutoConfiguration: JdbcTemplate的自动配置,可以来对数据库进行crud
- 可以修改这个配置项@ConfigurationProperties(prefix = “spring.jdbc”) 来修改JdbcTemplate
- @Bean@Primary JdbcTemplate;容器中有这个组件
- JndiDataSourceAutoConfiguration: jndi的自动配置
- XADataSourceAutoConfiguration: 分布式事务相关的
配置数据库链接
//默认的配置HikariDataSourcespring:datasource:# /// 和 localhost:3306/url: jdbc:mysql:///wjlusername: rootpassword: 123456driver-class-name: com.mysql.cj.jdbc.Driver
测试代码
@Slf4j@SpringBootTestclass SpringBootDemo2ApplicationTests {@AutowiredJdbcTemplate jdbcTemplate;@Testvoid contextLoads() {String sql = "select * from user where id = ?";User2 user = jdbcTemplate.queryForObject(sql, new BeanPropertyRowMapper<User2>(User2.class), 1);log.info("此用户信息:{}",user);}}
获取德鲁伊连接
@Configurationpublic class MyDataSources {/*** 当向容器中添加自己配置的数据源组件时* SpringBoot所自带的HikariDataSource就会失效* @return DruidDataSource实现了DataSource接口*///这个注解可以把配置文件中的数据源装配到所返回的组件中//绑定对应的配置文件中的数据库所需内容@Bean@ConfigurationProperties("spring.datasource")public DataSource getDataSource(){DruidDataSource dataSource = new DruidDataSource();//开启数据监控 可以不开启 有异常dataSource.setFilters("stat");//下面是再加上开启防火墙//dataSource.setFilters("stat,wall");return dataSource;}}
注意返回组件的bean(方法)与配置类不要有一样的默认空间名称,否则就会报错
配置德鲁伊的监控页
@Configurationpublic class MyDataSources {/*** 当向容器中添加自己配置的数据源组件时* SpringBoot所自带的HikariDataSource就会失效* @return DruidDataSource实现了DataSource接口*///这个注解可以把配置文件中的数据源装配到所返回的组件中@Bean@ConfigurationProperties("spring.datasource")public DataSource getDataSource() throws SQLException {DruidDataSource dataSource = new DruidDataSource();//开启数据监控 可以不开启 有异常//这两个配置可以直接在配置文件中写出dataSource.setFilters("stat,wall");return dataSource;}/*** 配置德鲁伊的监控页* 地址栏输入http://localhost:8080/druid* 就可以看到监控页* @return*/@Beanpublic ServletRegistrationBean statViewServlet(){StatViewServlet servlet = new StatViewServlet();//构造器需要一个StatViewServletServletRegistrationBean<StatViewServlet> registrationBean =new ServletRegistrationBean<>(servlet, "/druid/*");//初始化参数loginUsername用户名 admin 是自定义的registrationBean.addInitParameter("loginUsername","admin");registrationBean.addInitParameter("loginPassword","123456");return registrationBean;}/*** 用于采集web-jdbc关联监控的数据* @return*/@Beanpublic FilterRegistrationBean filterRegistrationBean(){WebStatFilter filter = new WebStatFilter();FilterRegistrationBean<WebStatFilter> registrationBean =new FilterRegistrationBean<>(filter);List<String> list = new ArrayList<>(); list.add("/*");//要监控的内容registrationBean.setUrlPatterns(list);//排除监控的内容registrationBean.addInitParameter("exclusions","*.js,*.gif");return registrationBean;}}
总结:当我们看到某某个Bean的文档或者教程时,就可以把它加入到容器中
德鲁伊简略办法
以上是原理,导入这个依赖之后,以上不需要配置德鲁伊的版本等等
<dependency><groupId>com.alibaba</groupId><artifactId>druid-spring-boot-starter</artifactId><version>1.2.8</version></dependency>
@Slf4j@SpringBootTestclass SpringDriudApplicationTests {@AutowiredJdbcTemplate jdbcTemplate;@AutowiredDataSource dataSource;@Testvoid contextLoads() {String sql = "select count(*) from user";Integer integer = jdbcTemplate.queryForObject(sql, Integer.class);log.info("一共有{}条数据",integer);//手动配置的德鲁伊//com.alibaba.druid.pool.DruidDataSource//引入德鲁伊stat//com.alibaba.druid.spring.boot.autoconfigure.DruidDataSourceWrapperSystem.out.println("DataSource"+dataSource.getClass());}}
扩展配置项
之后的配置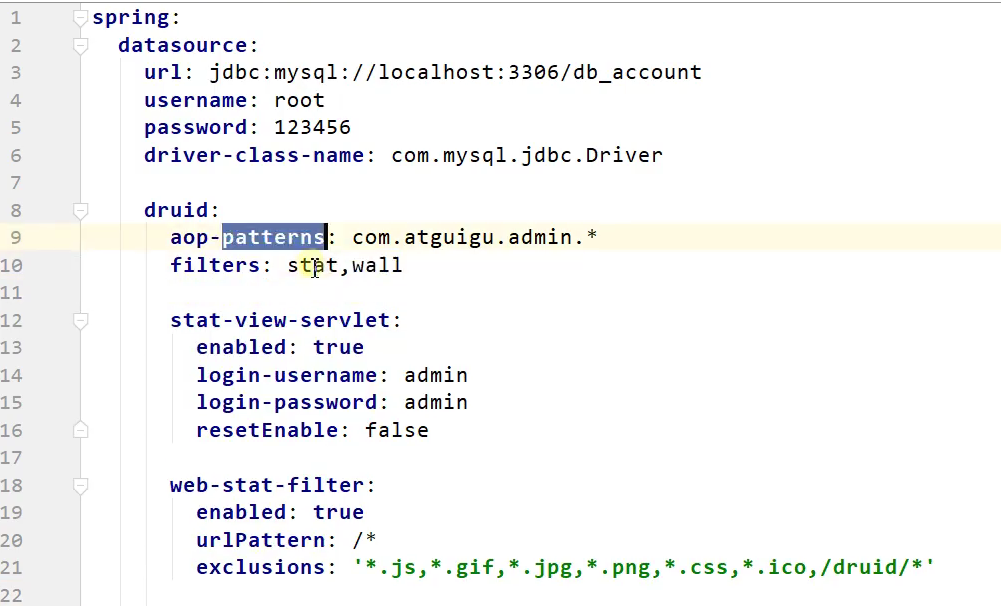
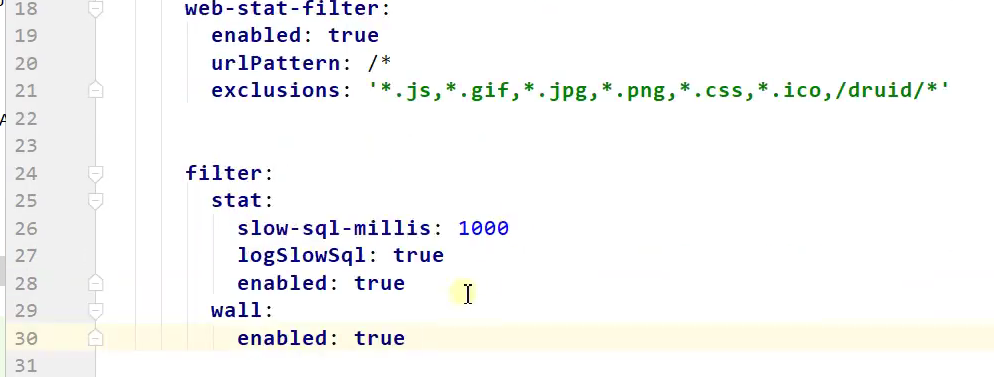
spring:datasource:url: jdbc:mysql://localhost:3306/db_accountusername: rootpassword: 123456driver-class-name: com.mysql.jdbc.Driverdruid:aop-patterns: com.atguigu.admin.* #监控SpringBeanfilters: stat,wall # 底层开启功能,stat(sql监控),wall(防火墙)stat-view-servlet: # 配置监控页功能enabled: truelogin-username: adminlogin-password: adminresetEnable: falseweb-stat-filter: # 监控webenabled: trueurlPattern: /*exclusions: '*.js,*.gif,*.jpg,*.png,*.css,*.ico,/druid/*'filter:stat: # 对上面filters里面的stat的详细配置slow-sql-millis: 1000logSlowSql: trueenabled: truewall:enabled: trueconfig:drop-table-allow: false
这些都是写死的
2、整合Mybatis
入门
<dependency><groupId>org.mybatis.spring.boot</groupId><artifactId>mybatis-spring-boot-starter</artifactId><version>2.2.0</version></dependency>
同理,可以在配置文件中修改相应的配置
- SqlSessionFactory自动配置好了
- SqlSession:自动配置了SqlSession组合了SqlSession
- Mapper
映射文件# 整合mybatis# 指定配置文件路径mybatis:config-location: classpath:mybatis-config.xmlmapper-locations: classpath:springdriud/mapper/*.xml
映射接口 ```java @Mapper//Springboot映射接口需要此注解 public interface UserMapper { User selectById(Long id); }<mapper namespace="springdriud.mapper.UserMapper"><select id="selectById" resultType="springdriud.bean.User">select * from user where id = #{id}</select></mapper>
//service层 @Service public class UserService { @Autowired UserMapper userMapper; public User selectById(Long id){ return userMapper.selectById(id); } }
//Controller层 @Controller public class SqlController { // @Autowired // JdbcTemplate jdbcTemplate; @Autowired UserService userService;
@ResponseBody@GetMapping("/user")public User selectById(@RequestParam("id") Long id){User user = userService.selectById(id);System.out.println(user);return user;}
}
默认开启驼峰命名规则<br />主配置文件中```xml<settings><setting name="mapUnderscoreToCamelCase" value="true"/></settings>
SpringBoot配置文件中、
mybatis:# 使用了yaml配置文件中的的对应配置之后# 对应的主配置文件就会冲突 不需要了#config-location: classpath:mybatis-config.xmlmapper-locations: classpath:springdriud/mapper/*.xmlconfiguration: # 指定mybatis主配置文件中的相关配置项map-underscore-to-camel-case: true
@Mapper 和 @MapperScan
@Mapper 标注Mapper接口
@MapperScan 标注与SpringBoot主程序上 ,扫描Mapper接口所在的包
两个注解只需要用一个注解形式就行
3、整合mybatis-plus(知识点比较多)
导入依赖
<dependency><groupId>org.mybatis.spring.boot</groupId><artifactId>mybatis-spring-boot-starter</artifactId><version>2.2.0</version></dependency>
配置
mybatis:#config-location: classpath:mybatis-config.xmlmapper-locations: classpath:springdriud/mapper/*.xmlconfiguration: # 指定mybatis主配置文件中的相关配置项# 开启了相关的配置之后可能不需要执行主配置文件只需要Mapper映射文件map-underscore-to-camel-case: true

Service层
//这个IService<User> 是MP的最高Service类public interface UserService extends IService<User> {}@Service //第一个泛型值得是要操作哪个Mapper类 第二个泛型是指要返回的数据类型 有许多方法 自己看着重写public class UserServiceimpl extends ServiceImpl<UserMapper, User> implements UserService {}
此时Service的实现类就有众多方法可用
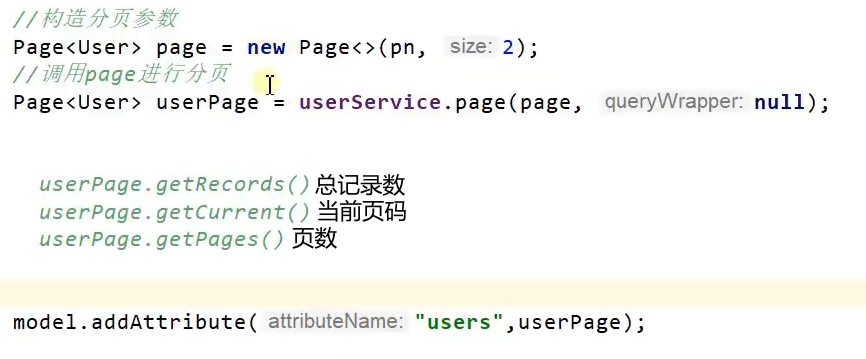


//获取页Page<User> objectPage = new Page<>(3,3);Page<User> userPage = userMapper.selectPage(objectPage, null);//总记录数long total = userPage.getTotal();//当前页号long current = userPage.getCurrent();//当前页的记录条数long pages = userPage.getPages();//获取Page对象的里面包含的实体类对象List<User> records = userPage.getRecords();
地址与参数
rest风格的携带参数

重定向参数类 RedirectAttributes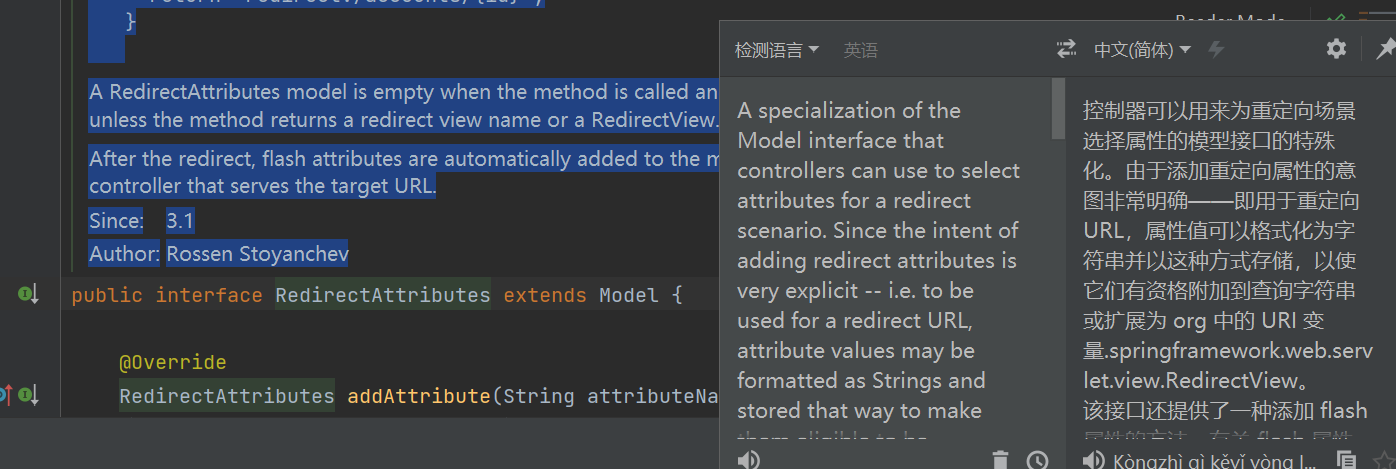
4、NOSQL
1、整合Redis
<dependency><groupId>org.springframework.boot</groupId><artifactId>spring-boot-starter-data-redis</artifactId></dependency>
自动配置:
●RedisAutoConfiguration 自动配置类。RedisProperties 属性类 —> spring.redis.xxx是对redis的配置
●连接工厂是准备好的。LettuceConnectionConfiguration、JedisConnectionConfiguration
●自动注入了RedisTemplate<Object, Object> : xxxTemplate;
●自动注入了StringRedisTemplate;k:v都是String
●key:value
●底层只要我们使用 StringRedisTemplate、RedisTemplate就可以操作redis
安装配置Redis https://www.cnblogs.com/guo126/p/12446304.html
一般使用 阿里云
配置本地无密码连接
redis:url: redis://localhost:6379
redis://default:XXXX@X.X.X.X:6379,前提是学过redis,配置过
阿里云的
RedisTemplate与Lettuce
@AutowiredRedisTemplate redisTemplate;@Testvoid reids(){ValueOperations valueOperations = redisTemplate.opsForValue();valueOperations.set("hello","work");System.out.println(valueOperations.get("hello"));}
切换Jedis
<dependency><groupId>redis.clients</groupId><artifactId>jedis</artifactId></dependency>
redis:url: redis://localhost:6379client-type: jedis# Lettuce也可以配置jedis:pool:max-active: 10
@AutowiredRedisConnectionFactory factory;@Testvoid cll(){//查看工厂System.out.println(factory.getClass());//class org.springframework.data.redis.connection.jedis.JedisConnectionFactory}
5、 单元测试
@Transactional 标注的测试注解方法会自动回滚@DisplayName("方法名/类名")标注的测试方法起名@BeforeEach @AfterEach被这两个注解修饰的测试(@Test可用可不用)方法在其他测试方法执行前/后必定执行一下 两个测试方法就执行两下@BeforeAll@AfterAll测试单个方法时前后执行一下 测试整个测试类里面的所有测试方法时执行一次 注意修饰 **静态方法**@Disabled全部方法运行时,被标注的此方法不运行@Tag("2")加标签@Timeout(value = 1,unit = TimeUnit._NANOSECONDS_)此方法运行时间超过便算作超时@RepeatedTest(5)重复测试
简单断言
用来对单个值进行简单的验证。如:
| 方法
| 说明
| | —- | —- | | assertEquals
| 判断两个对象或两个原始类型是否相等
| | assertNotEquals
| 判断两个对象或两个原始类型是否不相等
| | assertSame
| 判断两个对象引用是否指向同一个对象
| | assertNotSame
| 判断两个对象引用是否指向不同的对象
| | assertTrue
| 判断给定的布尔值是否为 true
| | assertFalse | 判断给定的布尔值是否为 false
| | assertNull
| 判断给定的对象引用是否为 null
| | assertNotNull
| 判断给定的对象引用是否不为 null |
参数型测试
//参数式测试@ParameterizedTest//赋值@ValueSource(ints={1,2,3})void test(int i){System.out.println(i);}@ParameterizedTest@DisplayName("把方法作为参数")@MethodSource("str")void mehtod(String str){System.out.println(str);// I// Love// You!!!}static Stream<String> str(){return Stream.of("I ","Love"," You!!!");}
6、指标监控
<dependency><groupId>org.springframework.boot</groupId><artifactId>spring-boot-starter-actuator</artifactId></dependency>
http://localhost:8080/actuator/

后期自己再钻研先放在这里
7、原理解析
Profile功能
简单来说就是多环境切换,生产环境、测试环境
例子:
创建两个配置文件application-test.yaml代表测试环境application-prop.yaml代表生产环境
在application.properties中指定当前所使用的配置
application-test.yaml
per.name: 测试环境张三
application-prop.yaml
per.name: 生产环境张三
controller
@Controllerpublic class IndexController {@Value("${per.name:张三}")private String name;@ResponseBody@GetMapping("/")public String index(){return "Hello "+name;}}
application.properties
spring.profiles.active=test
输出:测试环境张三
后者覆盖前者
同名配置以指定精确的环境配置优先
在打包之后指定
命令行的方式可以修改配置文件的任意值
Profile条件装配功能
@Profile注解@Profile("test/prop") 标注与类或者方法上 如果这是test环境 标注了@Profile("test")的方法/类就生效
Profile分组
#prod组spring.profiles.group.myprod[0]=prod1spring.profiles.group.myprod[1]=prod2# test组spring.profiles.group.mytest[0]=test1spring.profiles.group.mytest[1]=test2# 值定加载哪个配置文件组spring.profiles.active=mytest
外部化配置
@Controllerpublic class IndexController {//@Value("${per.name:张三}")@Value("${JAVA_HOME}")private String name;@ResponseBody@GetMapping("/")public String index(){//返回你好 D:\develop\jdk-13return "Hello "+name;}}
@SpringBootApplicationpublic class ProfileApplication {public static void main(String[] args) {ConfigurableApplicationContext run = SpringApplication.run(ProfileApplication.class, args);ConfigurableEnvironment environment = run.getEnvironment();//获取环境变量Map<String, Object> systemEnvironment = environment.getSystemEnvironment();System.out.println(systemEnvironment);System.out.println("======================");//获取系统当前属性MutablePropertySources sources = environment.getPropertySources();System.out.println(sources);}
/*seconds (JVM running for 1.887){USERDOMAIN_ROAMINGPROFILE=LAPTOP-4H9RKFJI,LOCALAPPDATA=C:\Users\还是人物经历\AppData\Local,PROCESSOR_LEVEL=25, USERDOMAIN=LAPTOP-4H9RKFJI,LOGONSERVER=\\LAPTOP-4H9RKFJI,JAVA_HOME=D:\develop\jdk-13,SESSIONNAME=Console,ALLUSERSPROFILE=C:\ProgramData,PROCESSOR_ARCHITECTURE=AMD64,PSModulePath=C:\Program Files\WindowsPowerShell\Modules;C:\Windows\system32\WindowsPowerShell\v1.0\Modules,SystemDrive=C:,OneDrive=C:\Users\还是人物经历\OneDrive,APPDATA=C:\Users\还是人物经历\AppData\Roaming,USERNAME=还是人物经历,ProgramFiles(x86)=C:\Program Files (x86),CommonProgramFiles=C:\Program Files\Common Files,Path=D:\Python\Scripts\;D:\Python\;C:\Program Files\Common Files\Oracle\Java\javapath;D:\develop\jdk-13\bin;C:\Windows\system32;C:\Windows;C:\Windows\System32\Wbem;C:\Windows\System32\WindowsPowerShell\v1.0\;C:\Windows\System32\OpenSSH\;D:\1 下载默认位置\platform-tools;D:\Gohuanjing\bin;C:\Program Files\MySQL\MySQL Server 8.0\bin;".;D:\mysqlcc\mysql-connector-java-8.0.26\mysql-connector-java-8.0.26.jar";D:\JavaWeb\Maven\apache-maven-3.8.3\bin;D:\pandoc\;D:\JavaWeb\Redis-x64-5.0.14;C:\Users\还是人物经历\AppData\Local\Microsoft\WindowsApps;D:\band\;D:\html\Microsoft VS Code\bin;C:\Users\还是人物经历\go\bin, PATHEXT=.COM;.EXE;.BAT;.CMD;.VBS;.VBE;.JS;.JSE;.WSF;.WSH;.MSC;.PY;.PYW, DriverData=C:\Windows\System32\Drivers\DriverData, OS=Windows_NT, classpath=.;D:\mysqlcc\mysql-connector-java-8.0.26\mysql-connector-java-8.0.26.jar, OneDriveConsumer=C:\Users\还是人物经历\OneDrive, COMPUTERNAME=LAPTOP-4H9RKFJI, GOPATH=C:\Users\还是人物经历\go, PROCESSOR_REVISION=5000, CommonProgramW6432=C:\Program Files\Common Files, GOROOT=D:\Gohuanjing, ComSpec=C:\Windows\system32\cmd.exe, ProgramData=C:\ProgramData, ProgramW6432=C:\Program Files, HOMEPATH=\Users\还是人物经历, SystemRoot=C:\Windows, TEMP=C:\Users\还是人~1\AppData\Local\Temp, HOMEDRIVE=C:, PROCESSOR_IDENTIFIER=AMD64 Family 25 Model 80 Stepping 0, AuthenticAMD, USERPROFILE=C:\Users\还是人物经历, TMP=C:\Users\还是人~1\AppData\Local\Temp, M2_HOME=D:\JavaWeb\Maven\apache-maven-3.8.3, CommonProgramFiles(x86)=C:\Program Files (x86)\Common Files, ProgramFiles=C:\Program Files, PUBLIC=C:\Users\Public, NUMBER_OF_PROCESSORS=12, windir=C:\Windows, =::=::\, IDEA_INITIAL_DIRECTORY=D:\ijideaje\IntelliJ IDEA 2021.2.3\bin}======================[MapPropertySource {name='server.ports'}, ConfigurationPropertySourcesPropertySource {name='configurationProperties'}, StubPropertySource {name='servletConfigInitParams'}, ServletContextPropertySource {name='servletContextInitParams'}, PropertiesPropertySource {name='systemProperties'}, OriginAwareSystemEnvironmentPropertySource {name='systemEnvironment'}, RandomValuePropertySource {name='random'}, OriginTrackedMapPropertySource {name='Config resource 'class path resource [application-test.yaml]' via location 'optional:classpath:/''}, OriginTrackedMapPropertySource {name='Config resource 'class path resource [application.properties]' via location 'optional:classpath:/''}]*/
配置文件的路径
- 配置文件的根路径(resources)
- 配置文件的根路径下config目录下
- jar包当前目录
- jar包目录下的config目录
优先级低的会覆盖优先级高的
自定义starter
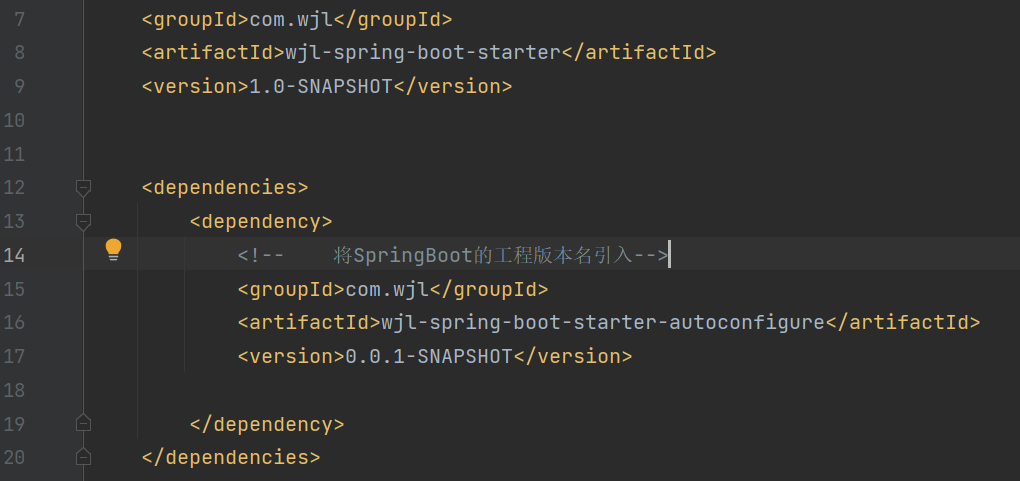
第一步 创建一个空工程创建一个模块选择MAVEN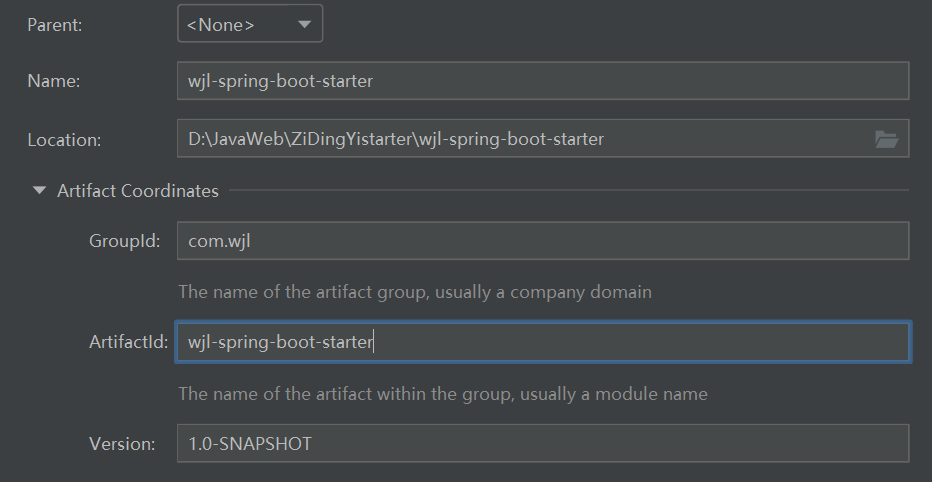
第二步 创建一个新模块,以SpringBoot初始化向导配置,不选择任何场景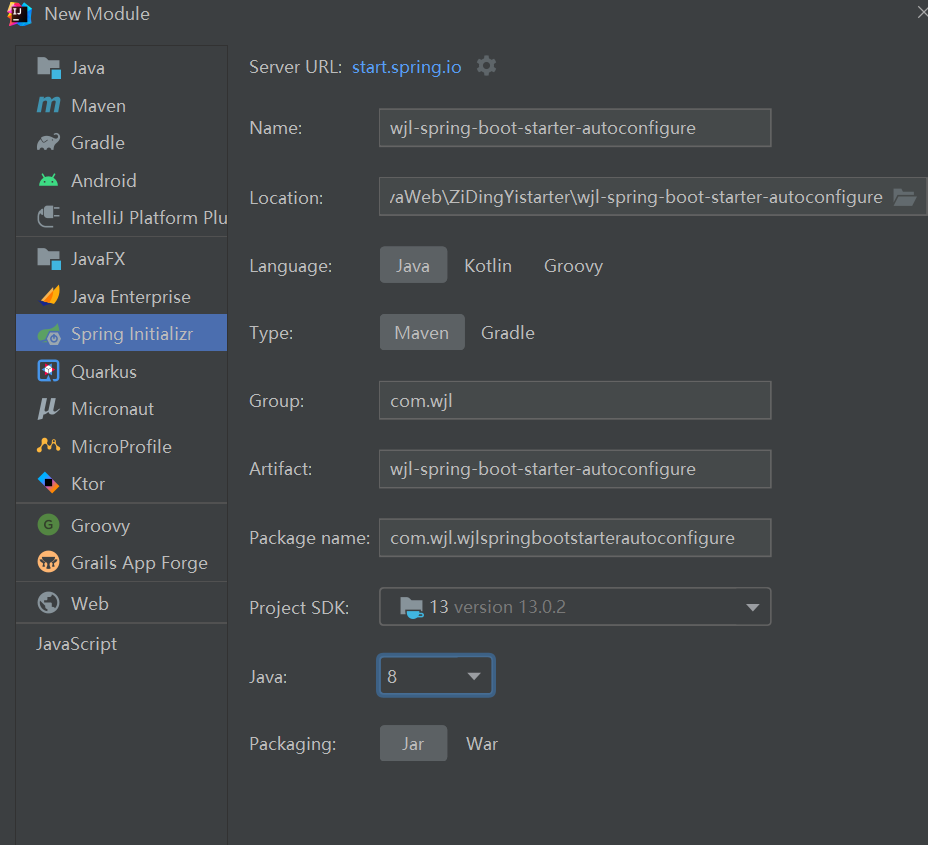
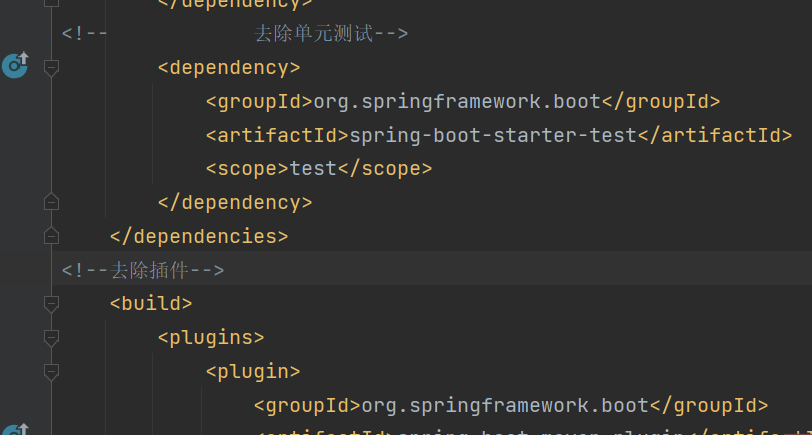
第三步将没用的东西删除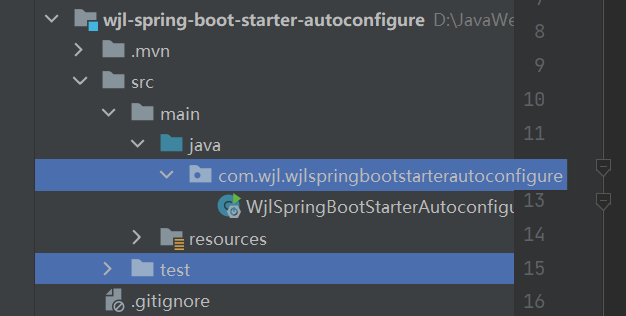
主类
/*** 默认不要放在容器中*/public class HelloSrvice {//也可以有一个构造@AutowiredHelloServiceProperties properties;public String hello(String name){return properties.getPrefix()+name+properties.getSuffix();}public void setProperties(HelloServiceProperties properties) {this.properties = properties;}}
主类的属性配置类
//该配置类进行绑定@ConfigurationProperties("wjl.hello")public class HelloServiceProperties {private String prefix;private String suffix;//生成GET SETpublic String getPrefix() {return prefix;}public void setPrefix(String prefix) {this.prefix = prefix;}public String getSuffix() {return suffix;}public void setSuffix(String suffix) {this.suffix = suffix;}}
主类的自动配置类
@Configuration//IOC容器中没有该类时配置这个配置类才起效@ConditionalOnMissingBean(HelloSrvice.class)//HelloSrvice的配置类进行属性绑定放在容器中@EnableConfigurationProperties(HelloServiceProperties.class)public class HelloServiceAutoConfiguration {//放组件@Beanpublic HelloSrvice helloSrvice(){HelloSrvice helloSrvice = new HelloSrvice();return helloSrvice;}}
第四步创建一个META-INF文件夹及下面的spring.factories文件
#项目一旦启动要加载哪个自动配置类?org.springframework.boot.autoconfigure.EnableAutoConfiguration=\com.wjl.HelloServiceAutoConfiguration
第五步 先打包安装有主程序的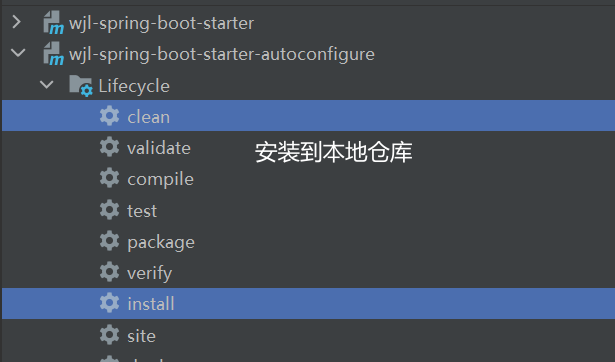
第六步 创建一个测试项目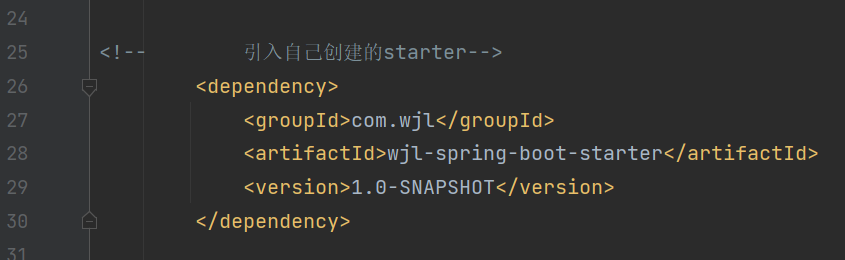

若有收获,就点个赞吧
0 人点赞
