一 搭建环境说明及准备
RedHat6 下安装,需要的安装包有:
1.mysql-server-5.1.66-2.el6_3.x86_64 (yum)
2.jdk-7u51-linux-x64.tar.gz (redhat6.4 环境直接可用,可不用安装jdk,)
3.mysql-connector-java-5.1.32.tar.gz (下载)
4.atlassian-jira-6.0.1-x64.bin (下载)
下载地址:
百度云盘下载地址:
atlassian-jira-6.0.1-x64.bin
http://pan.baidu.com/s/1sj2nHql
jira_crack.zip:
http://pan.baidu.com/s/1bn6KbWN
mysql-connector-java-5.1.34.tar.gz
http://pan.baidu.com/s/1eQ2AgDG
language_zh_CN-6.0.jar
http://pan.baidu.com/s/1dDxS2oL
2.2 安装Mysql
yum install -y mysql-server
# mysql
mysql> create database jiradb character set utf8;
mysql> grant all on jiradb. to jira@’%’ identified by ‘jira123’;
mysql> grant all on jiradb. to jira@’localhost’ identified by ‘jira123’;
mysql> flush privileges;
2.3 安装JIRA
chmod 755 atlassian-jira-6.0.1-x64.bin
./atlassian-jira-6.0.1-x64.bin
需要输入几个选项看下就懂(可用默认,可自定义,可以看本文最下面,有我的安装选择) 下面是安装信息时候 我的选择
================================================================
[root@hdserver5 jira]# ./atlassian-jira-6.0.1-x64.bin
Unpacking JRE …
Starting Installer …
Aug 29, 2014 3:29:28 PM java.util.prefs.FileSystemPreferences$2 run
INFO: Created system preferences directory in java.home.
This will install JIRA 6.0.1 on your computer.
OK [o, Enter], Cancel [c]
o
Choose the appropriate installation or upgrade option.
Please choose one of the following:
Express Install (use default settings) [1], Custom Install (recommended for advanced users) [2, Enter], Upgrade an existing JIRA installation [3]
2
Where should JIRA 6.0.1 be installed?
[/opt/atlassian/jira]
/usr/local/jira
Default location for JIRA data
[/var/atlassian/application-data/jira]
/usr/local/jira_data
Configure which ports JIRA will use.
JIRA requires two TCP ports that are not being used by any other
applications on this machine. The HTTP port is where you will access JIRA
through your browser. The Control port is used to Startup and Shutdown JIRA.
Use default ports (HTTP: 8080, Control: 8005) - Recommended [1, Enter], Set custom value for HTTP and Control ports [2]
1
JIRA can be run in the background.
You may choose to run JIRA as a service, which means it will start
automatically whenever the computer restarts.
Install JIRA as Service?
Yes [y, Enter], No [n]
y
Extracting files …
Please wait a few moments while JIRA starts up.
Launching JIRA …
Installation of JIRA 6.0.1 is complete
Your installation of JIRA 6.0.1 is now ready and can be accessed via your
browser.
JIRA 6.0.1 can be accessed at http://localhost:8080
2.4 修改配置文件(端口可以不用修改)
vi /usr/local/jira/server.xml,修改端口号为8090,并找到如下内容并修改:
6、安装JIRA
在浏览器里输入IP地址端口是8080访问JIRA
7、选择connection,设置mysql连接
8、测试连接
9、填写设置个人信息
10、商业版本,输入授权key
11、创建管理JIRA的超级用户
12、设置邮箱通知
13、设置成功,登录JIRA界面
汉化:
14、添加插件—>添加中文插件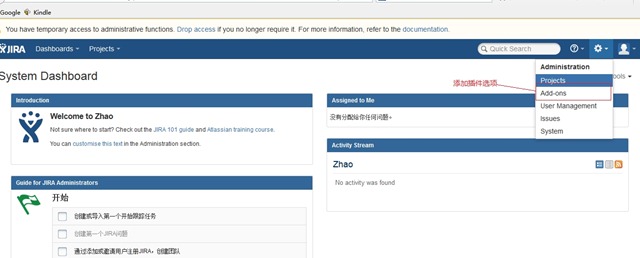


15、添加完成,刷新页面或者清缓存刷新页面
破解:
下载破解补丁 jira_crack.zip(包含atlassian-extras-2.2.2.jar atlassian-universal-plugin-manager-plugin-2.10.1.jar keytpl.txt )
unzip jira_crack.zip
cp atlassian-extras-2.2.2.jar /usr/local/jira/atlassian-jira/WEB-INF/lib/atlassian-extras-2.2.2.jar
cp atlassian-universal-plugin-manager-plugin-2.10.1.jar /usr/local/jira_data/plugins/.bundled-plugins/atlassian-universal-plugin-manager-plugin-2.10.1.jar
根据自己的情况,按照keytpl.txt的格式填写自己好自己license
| 1 2 3 4 5 6 7 8 9 10 11 12 13 14 15 |
Description=JIRA: Commercial,CreationDate=2014-08-10,jira.LicenseEdition=ENTERPRISE,Evaluation=``false``,jira.LicenseTypeName=COMMERCIAL,jira.active=``true``,licenseVersion=2,MaintenanceExpiryDate=2099-12-31,Organisation=foreverlove,SEN=SEN-L2651368,ServerID=BN9H-UF7W-1FI9-606I, --``##ServiceID要正确jira.NumberOfUsers=-1,LicenseID=LIDSEN-L2651368, --``##LicenseID要正确LicenseExpiryDate=2099-12-31,PurchaseDate=2014-08-10, |
|---|---|
5、重启JIRA,进如授权管理,将修改好的keytpl.txt文件中的内容黏贴到Licenes输入框中,更新
授权完成之后,Jira破解完成。

若有收获,就点个赞吧
0 人点赞
