Part A: Non-Programming Projects
Project 1 Line Following Car
i Implementation
The car will drive along a black line.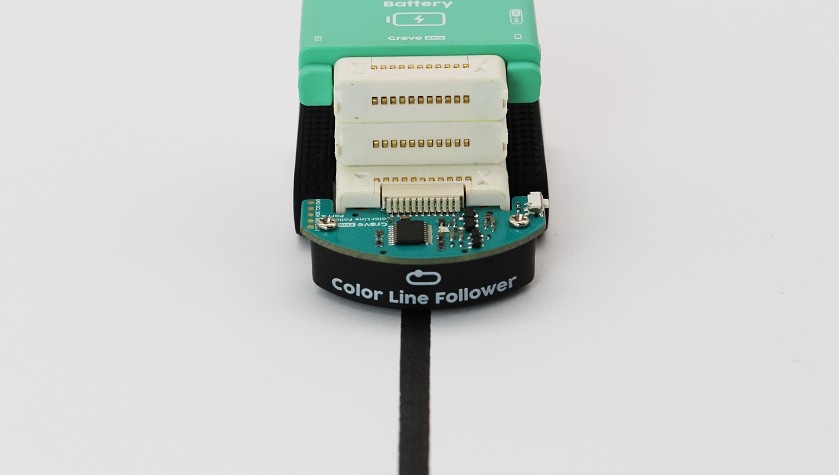
ii Specific Steps
Open the Car Kit and assemble the car. Turn on the switch on the battery and ensure that the LED indicator flashes green. Then, bring out the map #1. Use a black marker to color the unfinished part of the track. Once you complete, put your car on the map and see how it works.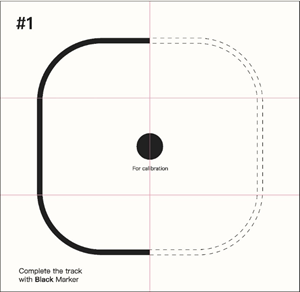
Project 2 Color Recognizer
i Implementation
The default program in the car allows it to follow a black line and recognize various colors that it sees, which, to be specific, is defined as: when seeing black, the car drives along it; when seeing green, it turns left; when seeing blue, it turns right; when seeing red, it stops.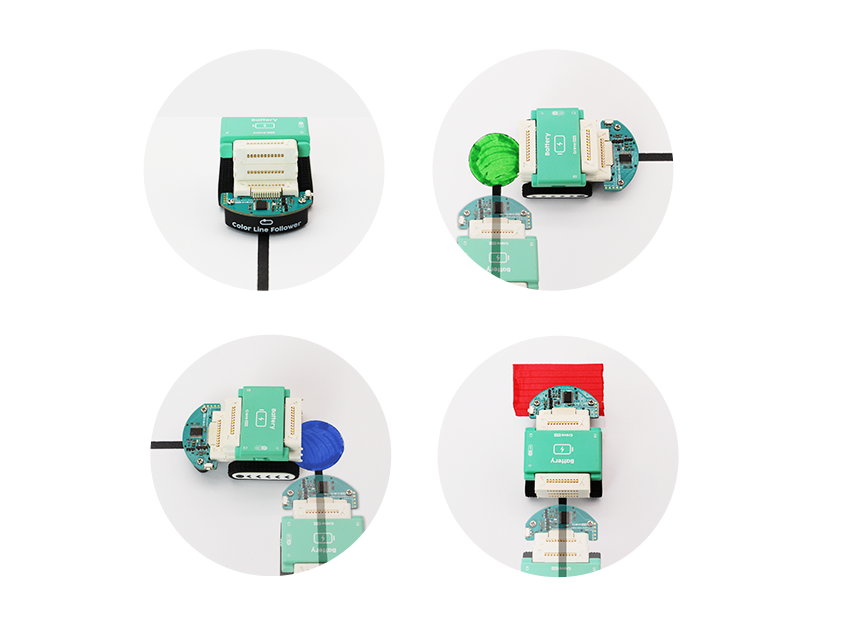
ii Specific Steps
Open the Car Kit and assemble the car. Turn on the switch on the battery and ensure that the LED indicator flashes green. Then, bring out the map #2. Follow the instruction on the map, color those boxes and circles correspondingly. Once you complete, put the car on the map and see how it works.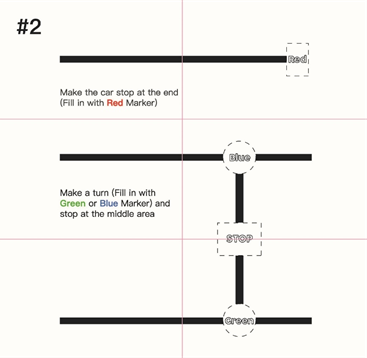
Project 3 Sound-Activated Car
Besides the G0 modules in the kit, the car is also compatible with other modules from this series to bring interesting projects that have not been made before. For example, we can add a sound sensor to make a sound-activated car.
i Implementation
We use a sound sensor to measure the sound intensity from the world around us. In this project, our car is expected to start driving forward when it detects a sound and adjust its speed as the sound intensity varies. The greater the sound, the faster the car.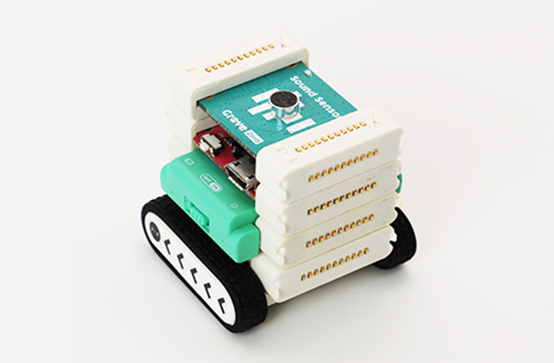
ii Specific Steps
Open the Car Kit and assemble the car. Turn on the switch on the battery and ensure that the LED indicator flashes green. Snap the sound sensor to the car. Note that we don’t need a color line follower this time. Then, let’s put the car on the white ground (not map) and see how it works.
Project 4 Line Following in Different Conditions
i Implementation
The car requires a calibration to ensuring consistent behavior in different line following conditions.
ii Specific Steps
When operating or running, the car may not follow a line precisely. In this case, it needs calibration. Follow the instruction below and learn how to do it:
Bring out the car and turn it on. Press and hold the button on the color line follower for 2 seconds until the LED indicator lights up and the car enters the calibration mode. Then release the button.
Put the line follower onto the black spot in Map #1. Short press the button, then the indicator blinks rapidly and the sensor starts calibrating. Once calibration completes, the indicator goes back to normal.
Place the sensor on a white surface. Double press the button, then the LED indicator blinks slowly and the sensor starts calibrating. Once calibration completes, the indicator goes back to normal.
Now the car is ready. Reconnect the modules and have fun with it.
Part B: Programming Projects
Project 1 Calculator Car
i Implementation
The car will first drive along a black line. But when it sees different colors, it will react to them differently.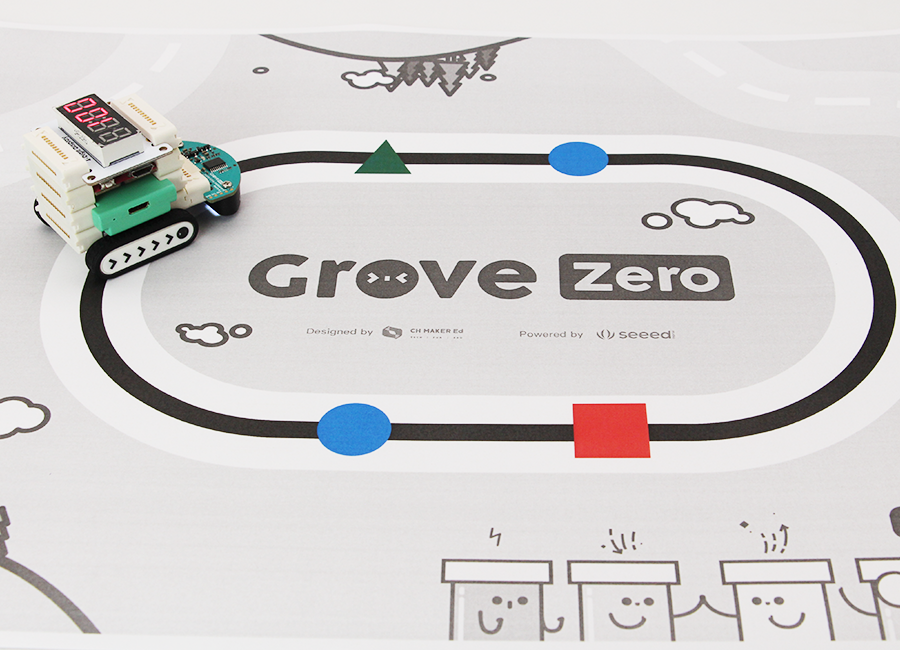
ii Start Programming
Go to Codecraft and start coding under a Device mode.
First, add a When start block. Make a new variable and name it as points. The points are initially set as 0. Then we add a 4 Digit Display show block to show the points in real time.
Next, the program is going to perform decision making 3 times which follows a program logic below:
If the color line follower sees green, then the points will increase 50 and pause for 1 second;
If the color line follower sees blue, then the points will increase 100 and pause for 1 second;
If the color line follower sees red, then the points will decrease 50 and pause for 1 second.
Then, for the second part of our program, we will give the car an instruction which follows a same program logic in the Tutorial 1 of Bit Kit Help Documentation – make the car follow a black line. So, let’s go ahead and learn how to do this step exactly.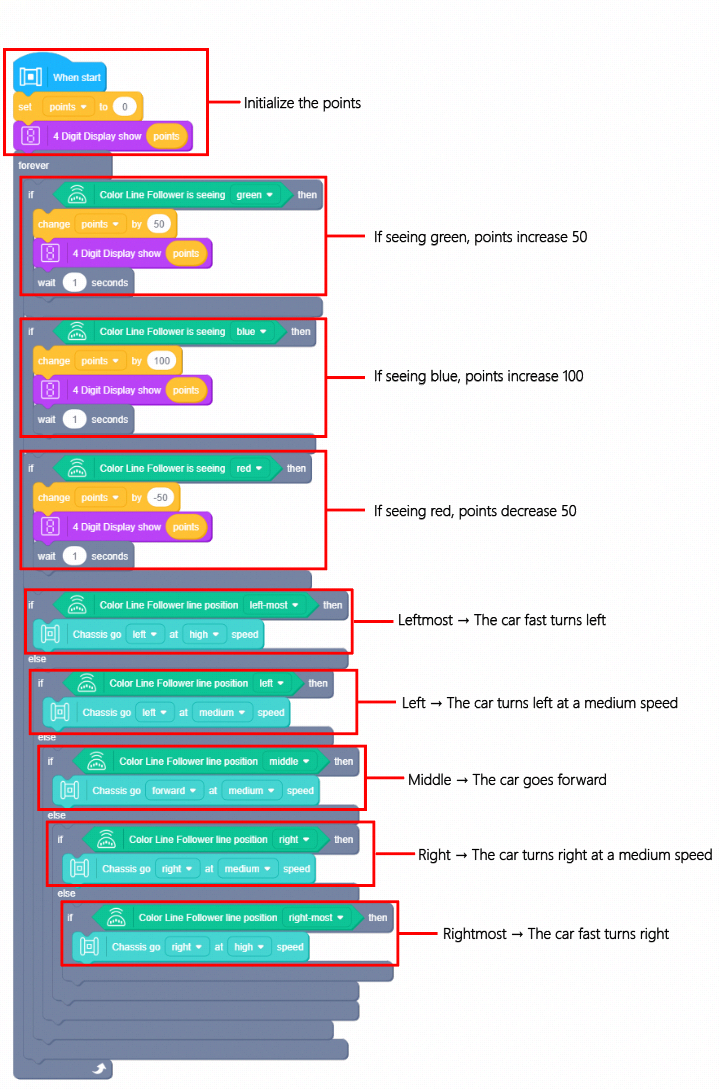
iii Connect a Device
Snap the mainboard, battery, chassis, color line follower and 4 digit display* together. Connect the mainboard to your PC with a USB cable. Ensure that the LED indicator on the mainboard lights up continuously.
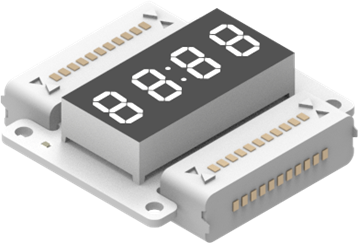
- The 4 digit display is also known as seven-segment display, which is commonly used for displaying decimal numerals and basic character. We can use it to make a digital clock, time counter or calculator that display numerical information.
iv Upload a Program
You have installed the Codecraft Assistant from the previous tutorials. Just make sure it is enabled. Connect the device and click the Upload button on Codecraft, then the program will be uploaded successfully.
Before uploading the program to a device, you can also save it to the desktop or any locations you like in your computer. The steps are quite easy: Click Project → Select Save as → Name your project.
v Run a Program
Bring out the Map #3 and color the blank boxes and circles correspondingly. Then, power on the car and see how it works.
Project 2 Obstacle Avoidance
i Implementation
The car will first drive forward slowly. When it detects an obstacle ahead of it, it will make a left turn and then drive forward again.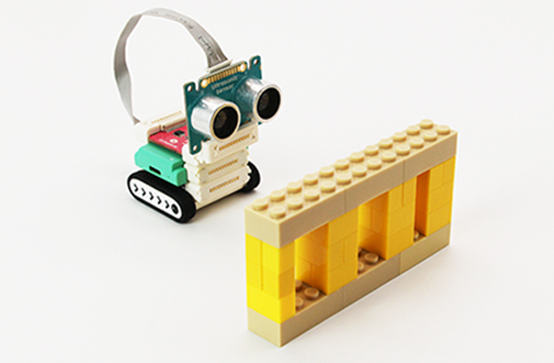
ii Start Programming
Go to Codecraft and start coding under a Device mode.
First, add a When start block. Connect a Chassis go forward at low speed block underneath.
Next, add a forever block and connect an IF-THEN-ELSE statement into it. Follow this program logic, if the ultrasonic sensor detects an obstacle within a range of 15 cm, then the car will make a left turn slowly. If not, the car will go forward slowly.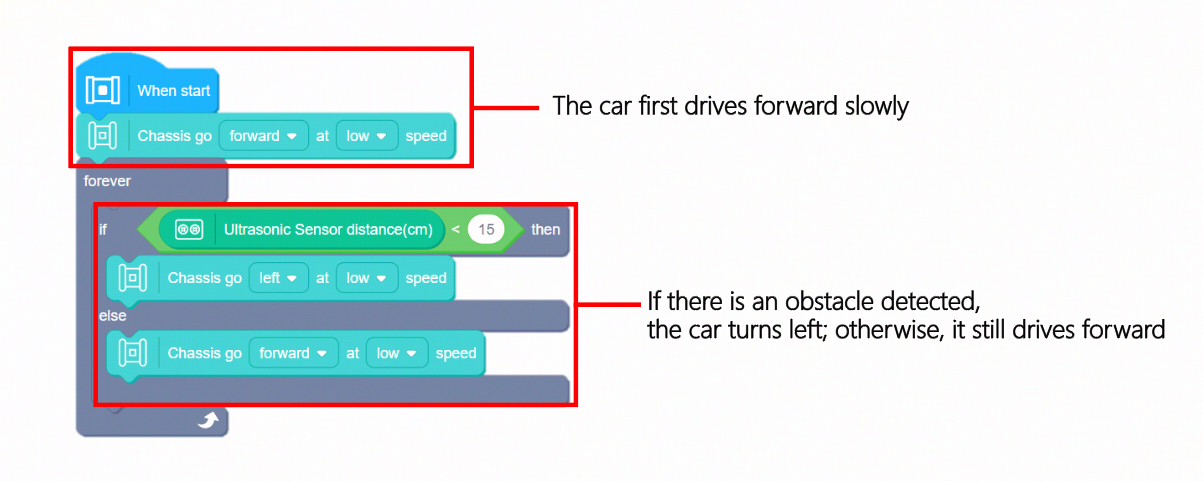
iii Connect a Device
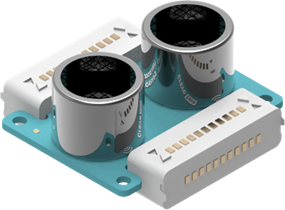
Snap the mainboard, battery and chassis together. Next, use a connection module to connect an ultrasonic sensor to the top of the car. Make sure the ultrasonic sensor stands straight against the ground. Then, connect the mainboard to your PC with a USB cable. Ensure that the LED indicator on the mainboard lights up continuously.
- The connection module can lengthen the circuit through a snap-together connection.

- The ultrasonic sensor is used for measuring the distance to an object, in centimeter by default.
iv Upload a Program
You have installed the Codecraft Assistant from the previous tutorials. Just make sure it is enabled. Connect the device and click the Upload button on Codecraft, then the program will be uploaded successfully.
Before uploading the program to a device, you can also save it to the desktop or any locations you like in your computer. The steps are quite easy: Click Project → Select Save as → Name your project.
v Run a Program
Put the car on a flat floor and show it an object in the front. Observe whether it can avoid the obstacle automatically.
Project 3 Remote Control Car
i Implementation
Use a twin-button module to control the car. When the button A is pressed, the car can drive fast forward. When the button B is pressed, it can drive slowly backward.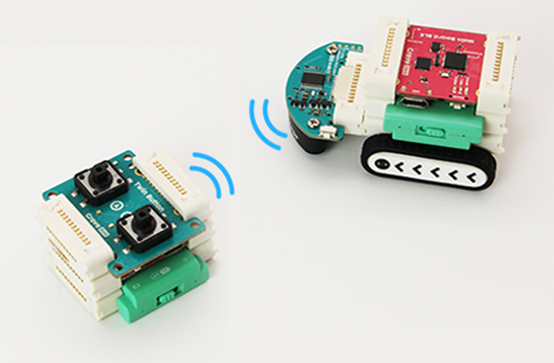
ii Start Programming
Go to Codecraft and start coding under a Device mode.
First, add a When start block.
The radio broadcasts message 1. Ensure that the controller and the car will receive a same message.
The car first drives forward slowly.
Next, add an IF-THEN-ELSE statement. Follow this program logic: if the button A is pressed, the radio broadcasts message 11; if button B is pressed, the radio broadcasts message 22.
Then, let’s program the mainboard that works as the car controller. If the car receives message 11, it drives fast forward; if it receives message 22, it drives slowly backward.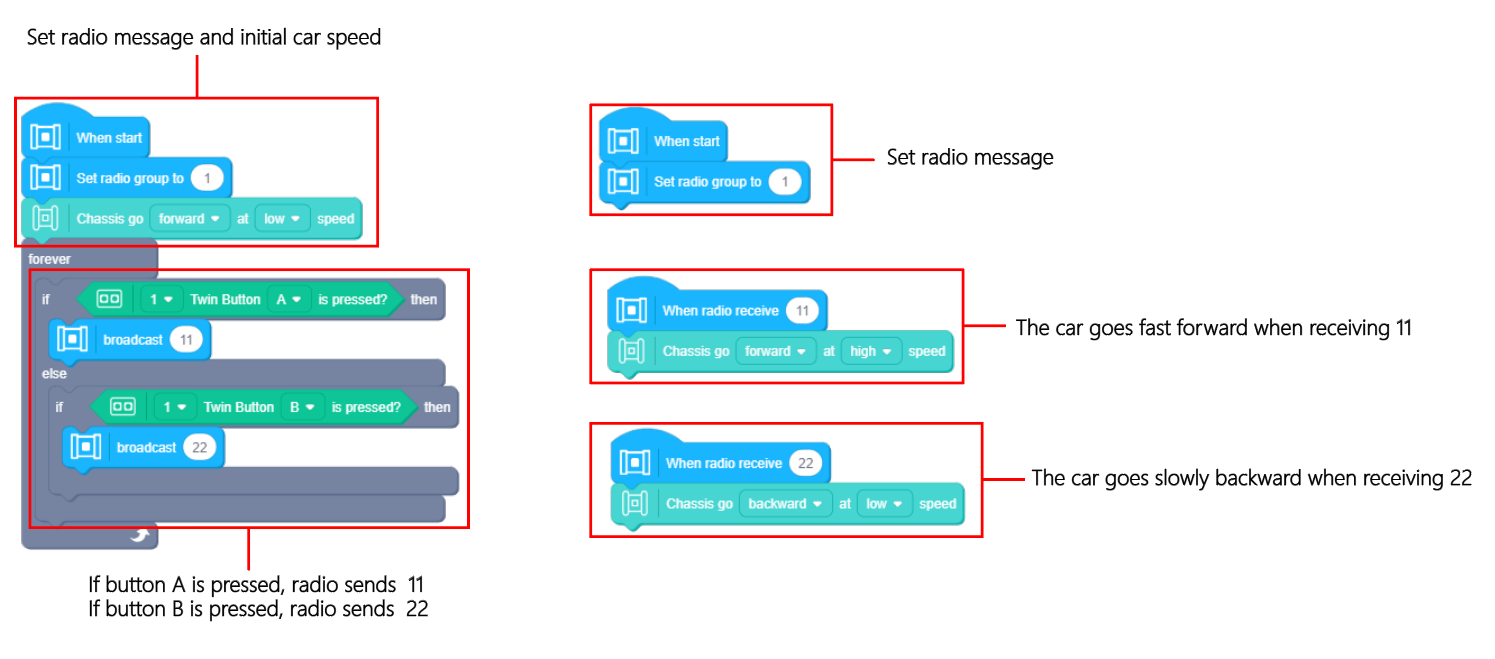
iii Connect a Device
You need two different mainboards to assemble a car and a controller. First, connect one of the mainboards, the battery and the chassis together to make a car. Next, connect the other mainboard, the battery and the twin-button* together to make the controller.
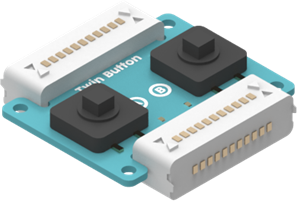
- The twin-button module is composed of two buttons labeled as A and B. It can detect a short press, a long press and an ongoing press-down action.
iv Upload a Program
You have installed the Codecraft Assistant from the previous tutorials. Just make sure it is enabled. Connect the device and click the Upload button on Codecraft, then the program will be uploaded successfully.
Before uploading the program to a device, you can also save it to the desktop or any locations you like in your computer. The steps are quite easy: Click Project → Select Save as → Name your project.
【Note: You need to upload this program to both the mainboards.】
v Run a Program
Put the car on a flat floor. Control the car with the buttons and see how it works.
Attachments
Attachment1_Car_Kit_TutorialCode.zip
Attachment 2 Car Kit Maps.pdf

若有收获,就点个赞吧
0 人点赞
