python发邮件需要掌握两个模块的用法,smtplib和email,这俩模块是python自带的,只需import即可使用。smtplib模块主要负责发送邮件,email模块主要负责构造邮件。
smtplib模块主要负责发送邮件:是一个发送邮件的动作,连接邮箱服务器,登录邮箱,发送邮件(有发件人,收信人,邮件内容)。
email模块主要负责构造邮件:指的是邮箱页面显示的一些构造,如发件人,收件人,主题,正文,附件等。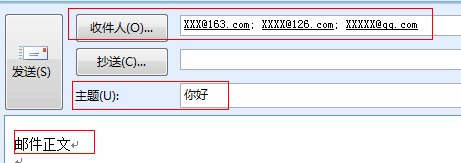
1.smtplib模块
smtplib使用较为简单。以下是最基本的语法。
导入及使用方法如下:
import smtplibsmtp = smtplib.SMTP()smtp.connect('smtp.163.com',25)smtp.login(username, password)smtp.sendmail(sender, receiver, msg.as_string())smtp.quit()
说明:
smtplib.SMTP():实例化SMTP()
connect(host,port):
host:指定连接的邮箱服务器。常用邮箱的smtp服务器地址如下:
新浪邮箱:smtp.sina.com,新浪VIP:smtp.vip.sina.com,搜狐邮箱:smtp.sohu.com,126邮箱:smtp.126.com,139邮箱:smtp.139.com,163网易邮箱:smtp.163.com。
port:指定连接服务器的端口号,默认为25.
login(user,password):
user:登录邮箱的用户名。
password:登录邮箱的密码,像笔者用的是网易邮箱,网易邮箱一般是网页版,需要用到客户端密码,需要在网页版的网易邮箱中设置授权码,该授权码即为客户端密码。
sendmail(from_addr,to_addrs,msg,…):
from_addr:邮件发送者地址
to_addrs:邮件接收者地址。字符串列表[‘接收地址1’,’接收地址2’,’接收地址3’,…]或’接收地址’
msg:发送消息:邮件内容。一般是msg.as_string():as_string()是将msg(MIMEText对象或者MIMEMultipart对象)变为str。
quit():用于结束SMTP会话。
2.email模块
email模块下有mime包,mime英文全称为“Multipurpose Internet Mail Extensions”,即多用途互联网邮件扩展,是目前互联网电子邮件普遍遵循的邮件技术规范。
该mime包下常用的有三个模块:text,image,multpart。
导入方法如下:
from email.mime.multipart import MIMEMultipartfrom email.mime.text import MIMETextfrom email.mime.image import MIMEImage
构造一个邮件对象就是一个Message对象,如果构造一个MIMEText对象,就表示一个文本邮件对象,如果构造一个MIMEImage对象,就表示一个作为附件的图片,要把多个对象组合起来,就用MIMEMultipart对象,而MIMEBase可以表示任何对象。它们的继承关系如下:
Message+- MIMEBase+- MIMEMultipart+- MIMENonMultipart+- MIMEMessage+- MIMEText+- MIMEImage
2.1 text说明
邮件发送程序为了防止有些邮件阅读软件不能显示处理HTML格式的数据,通常都会用两类型分别为”text/plain”和”text/html”
构造MIMEText对象时,第一个参数是邮件正文,第二个参数是MIME的subtype,最后一定要用utf-8编码保证多语言兼容性。
2.1.1添加普通文本
text = "Hi!\nHow are you?\nHere is the link you wanted:\nhttp://www.baidu.com"text_plain = MIMEText(text,'plain', 'utf-8')
查看MIMEText属性:可以观察到MIMEText,MIMEImage和MIMEMultipart的属性都一样。
print dir(text_plain)
[‘contains‘, ‘delitem‘, ‘doc‘, ‘getitem‘, ‘init‘, ‘len‘, ‘module‘, ‘setitem‘, ‘str‘, ‘_charset’, ‘_default_type’, ‘_get_params_preserve’, ‘_headers’, ‘_payload’, ‘_unixfrom’, ‘add_header’, ‘as_string’, ‘attach’, ‘defects’, ‘del_param’, ‘epilogue’, ‘get’, ‘get_all’, ‘get_boundary’, ‘get_charset’, ‘get_charsets’, ‘get_content_charset’, ‘get_content_maintype’, ‘get_content_subtype’, ‘get_content_type’, ‘get_default_type’, ‘get_filename’, ‘get_param’, ‘get_params’, ‘get_payload’, ‘get_unixfrom’, ‘has_key’, ‘is_multipart’, ‘items’, ‘keys’, ‘preamble’, ‘replace_header’, ‘set_boundary’, ‘set_charset’, ‘set_default_type’, ‘set_param’, ‘set_payload’, ‘set_type’, ‘set_unixfrom’, ‘values’, ‘walk’]
2.1.2添加超文本
html = """<html><body><p>Here is the <a href="http://www.baidu.com">link</a> you wanted.</p></body></html>"""text_html = MIMEText(html,'html', 'utf-8')
2.1.3添加附件
sendfile=open(r'D:\pythontest\1111.txt','rb').read()text_att = MIMEText(sendfile, 'base64', 'utf-8')text_att["Content-Type"] = 'application/octet-stream'text_att["Content-Disposition"] = 'attachment; filename="显示的名字.txt"'
2.2 image说明
添加图片:
sendimagefile=open(r'D:\pythontest\testimage.png','rb').read()image = MIMEImage(sendimagefile)image.add_header('Content-ID','<image1>')
查看MIMEImage属性:
print dir(image)
[‘contains‘, ‘delitem‘, ‘doc‘, ‘getitem‘, ‘init‘, ‘len‘, ‘module‘, ‘setitem‘, ‘str‘, ‘_charset’, ‘_default_type’, ‘_get_params_preserve’, ‘_headers’, ‘_payload’, ‘_unixfrom’, ‘add_header’, ‘as_string’, ‘attach’, ‘defects’, ‘del_param’, ‘epilogue’, ‘get’, ‘get_all’, ‘get_boundary’, ‘get_charset’, ‘get_charsets’, ‘get_content_charset’, ‘get_content_maintype’, ‘get_content_subtype’, ‘get_content_type’, ‘get_default_type’, ‘get_filename’, ‘get_param’, ‘get_params’, ‘get_payload’, ‘get_unixfrom’, ‘has_key’, ‘is_multipart’, ‘items’, ‘keys’, ‘preamble’, ‘replace_header’, ‘set_boundary’, ‘set_charset’, ‘set_default_type’, ‘set_param’, ‘set_payload’, ‘set_type’, ‘set_unixfrom’, ‘values’, ‘walk’]
2.3 multpart说明
常见的multipart类型有三种:multipart/alternative, multipart/related和multipart/mixed。
邮件类型为”multipart/alternative”的邮件包括纯文本正文(text/plain)和超文本正文(text/html)。
邮件类型为”multipart/related”的邮件正文中包括图片,声音等内嵌资源。
邮件类型为”multipart/mixed”的邮件包含附件。向上兼容,如果一个邮件有纯文本正文,超文本正文,内嵌资源,附件,则选择mixed类型。
msg = MIMEMultipart('mixed')
我们必须把Subject,From,To,Date添加到MIMEText对象或者MIMEMultipart对象中,邮件中才会显示主题,发件人,收件人,时间(若无时间,就默认一般为当前时间,该值一般不设置)。
msg = MIMEMultipart('mixed')msg['Subject'] = 'Python email test'msg['From'] = 'XXX@163.com <XXX@163.com>'msg['To'] = 'XXX@126.com'msg['Date']='2012-3-16'
查看MIMEMultipart属性:
msg = MIMEMultipart('mixed')print dir(msg)
结果:
[‘contains‘, ‘delitem‘, ‘doc‘, ‘getitem‘, ‘init‘, ‘len‘, ‘module‘, ‘setitem‘, ‘str‘, ‘_charset’, ‘_default_type’, ‘_get_params_preserve’, ‘_headers’, ‘_payload’, ‘_unixfrom’, ‘add_header’, ‘as_string’, ‘attach’, ‘defects’, ‘del_param’, ‘epilogue’, ‘get’, ‘get_all’, ‘get_boundary’, ‘get_charset’, ‘get_charsets’, ‘get_content_charset’, ‘get_content_maintype’, ‘get_content_subtype’, ‘get_content_type’, ‘get_default_type’, ‘get_filename’, ‘get_param’, ‘get_params’, ‘get_payload’, ‘get_unixfrom’, ‘has_key’, ‘is_multipart’, ‘items’, ‘keys’, ‘preamble’, ‘replace_header’, ‘set_boundary’, ‘set_charset’, ‘set_default_type’, ‘set_param’, ‘set_payload’, ‘set_type’, ‘set_unixfrom’, ‘values’, ‘walk’]
说明:
msg.add_header(_name,_value,_params):添加邮件头字段。
msg.as_string():是将msg(MIMEText对象或者MIMEMultipart对象)变为str,如果只有一个html超文本正文或者plain普通文本正文的话,一般msg的类型可以是MIMEText;如果是多个的话,就都添加到MIMEMultipart,msg类型就变为MIMEMultipart。**
msg.attach(MIMEText对象或MIMEImage对象):将MIMEText对象或MIMEImage对象添加到MIMEMultipart对象中。MIMEMultipart对象代表邮件本身,MIMEText对象或MIMEImage对象代表邮件正文。
以上的构造的文本,超文本,附件,图片都何以添加到MIMEMultipart(‘mixed’)中:
msg.attach(text_plain)msg.attach(text_html)msg.attach(text_att)msg.attach(image)
3.文字,html,图片,附件实现实例
#coding: utf-8import smtplibfrom email.mime.multipart import MIMEMultipartfrom email.mime.text import MIMETextfrom email.mime.image import MIMEImagefrom email.header import Header#设置smtplib所需的参数#下面的发件人,收件人是用于邮件传输的。smtpserver = 'smtp.163.com'username = 'XXX@163.com'password='XXX'sender='XXX@163.com'#receiver='XXX@126.com'#收件人为多个收件人receiver=['XXX@126.com','XXX@126.com']subject = 'Python email test'#通过Header对象编码的文本,包含utf-8编码信息和Base64编码信息。以下中文名测试ok#subject = '中文标题'#subject=Header(subject, 'utf-8').encode()#构造邮件对象MIMEMultipart对象#下面的主题,发件人,收件人,日期是显示在邮件页面上的。msg = MIMEMultipart('mixed')msg['Subject'] = subjectmsg['From'] = 'XXX@163.com <XXX@163.com>'#msg['To'] = 'XXX@126.com'#收件人为多个收件人,通过join将列表转换为以;为间隔的字符串msg['To'] = ";".join(receiver)#msg['Date']='2012-3-16'#构造文字内容text = "Hi!\nHow are you?\nHere is the link you wanted:\nhttp://www.baidu.com"text_plain = MIMEText(text,'plain', 'utf-8')msg.attach(text_plain)#构造图片链接sendimagefile=open(r'D:\pythontest\testimage.png','rb').read()image = MIMEImage(sendimagefile)image.add_header('Content-ID','<image1>')image["Content-Disposition"] = 'attachment; filename="testimage.png"'msg.attach(image)#构造html#发送正文中的图片:由于包含未被许可的信息,网易邮箱定义为垃圾邮件,报554 DT:SPM :<p><img src="cid:image1"></p>html = """<html><head></head><body><p>Hi!<br>How are you?<br>Here is the <a href="http://www.baidu.com">link</a> you wanted.<br></p></body></html>"""text_html = MIMEText(html,'html', 'utf-8')text_html["Content-Disposition"] = 'attachment; filename="texthtml.html"'msg.attach(text_html)#构造附件sendfile=open(r'D:\pythontest\1111.txt','rb').read()text_att = MIMEText(sendfile, 'base64', 'utf-8')text_att["Content-Type"] = 'application/octet-stream'#以下附件可以重命名成aaa.txt#text_att["Content-Disposition"] = 'attachment; filename="aaa.txt"'#另一种实现方式text_att.add_header('Content-Disposition', 'attachment', filename='aaa.txt')#以下中文测试不ok#text_att["Content-Disposition"] = u'attachment; filename="中文附件.txt"'.decode('utf-8')msg.attach(text_att)#发送邮件smtp = smtplib.SMTP()smtp.connect('smtp.163.com')#我们用set_debuglevel(1)就可以打印出和SMTP服务器交互的所有信息。#smtp.set_debuglevel(1)smtp.login(username, password)smtp.sendmail(sender, receiver, msg.as_string())smtp.quit()
转载来自:https://www.cnblogs.com/yufeihlf/p/5726619.html

若有收获,就点个赞吧
0 人点赞
