1.webpack的概念
我们的浏览器上是不能直接运行JS文件的,如果想要运行JS文件,就必须通过html内的script标签引入,但这样非常考验程序员对应内部JS代码的引用顺序问题,内部必须按顺序的引用才不会出错,因此,我们需要使用webpack来将JS代码打包,并且处理好其内部的依赖关系,并且还引入了模块化的处理方式,把每一个部分的代码分开打包,引入时也只需按模块引入。
(webpack的运行环境是由 node.js 提供的,其很好的解决了代码直接的依赖性问题,并且把墉余的代码进行模块化处理)
其官网的描述是:
本质上,webpack 是一个现代 JavaScript 应用程序的静态模块打包器(module bundler)。当 webpack 处理应用程序时,它会递归地构建一个依赖关系图(dependency graph),其中包含应用程序需要的每个模块,然后将所有这些模块打包成一个或多个 bundle。
2.webpack的安装
需要先安装node环境,官网地址:http://nodejs.cn/
(1)全局安装(不推荐)
打开我们的cdm,或者在 vscode 中的一个文件下,打开终端
npm i -g webpack webpack-cli
(2)局部安装(推荐)
在 我们的项目内,打开终端
npm i —save webpack webpack-cli
3.webpack的基本操作
(1)指令操作
输入下面指令,我们可以看到 webpack的终端命令行指令,但是不推荐使用指令进行webpack 的操作,因为这非常的繁琐,并且不能保留我们的一些配置项。
npx webpack —help
Usage: webpack [entries...] [options]Alternative usage to run commands: webpack [command] [options]The build tool for modern web applications.Options:-c, --config <value...> Provide path to a webpack configuration file e.g. ./webpack.config.js.--config-name <value...> Name of the configuration to use.-m, --merge Merge two or more configurations using 'webpack-merge'.--env <value...> Environment passed to the configuration when it is a function.--node-env <value> Sets process.env.NODE_ENV to the specified value.--progress [value] Print compilation progress during build.-j, --json [value] Prints result as JSON or store it in a file.-d, --devtool <value> Determine source maps to use.--no-devtool Do not generate source maps.--entry <value...> The entry point(s) of your application e.g. ./src/main.js.--mode <value> Defines the mode to pass to webpack.--name <value> Name of the configuration. Used when loading multiple configurations.-o, --output-path <value> Output location of the file generated by webpack e.g. ./dist/.--stats [value] It instructs webpack on how to treat the stats e.g. verbose.--no-stats Disable stats output.-t, --target <value...> Sets the build target e.g. node.--no-target Negative 'target' option.-w, --watch Watch for files changes.--no-watch Do not watch for file changes.--watch-options-stdin Stop watching when stdin stream has ended.--no-watch-options-stdin Do not stop watching when stdin stream has ended.Global options:--color Enable colors on console.--no-color Disable colors on console.-v, --version Output the version number of 'webpack', 'webpack-cli' and 'webpack-dev-server' and commands.-h, --help [verbose] Display help for commands and options.Commands:build|bundle|b [entries...] [options] Run webpack (default command, can be omitted).configtest|t [config-path] Validate a webpack configuration.help|h [command] [option] Display help for commands and options.info|i [options] Outputs information about your system.serve|server|s [entries...] Run the webpack dev server. To see all available options you need to install 'webpack', 'webpack-dev-server'.version|v [commands...] Output the version number of 'webpack', 'webpack-cli' and 'webpack-dev-server' and commands.watch|w [entries...] [options] Run webpack and watch for files changes.To see list of all supported commands and options run 'webpack --help=verbose'.Webpack documentation: https://webpack.js.org/.CLI documentation: https://webpack.js.org/api/cli/.Made with ♥ by the webpack team.
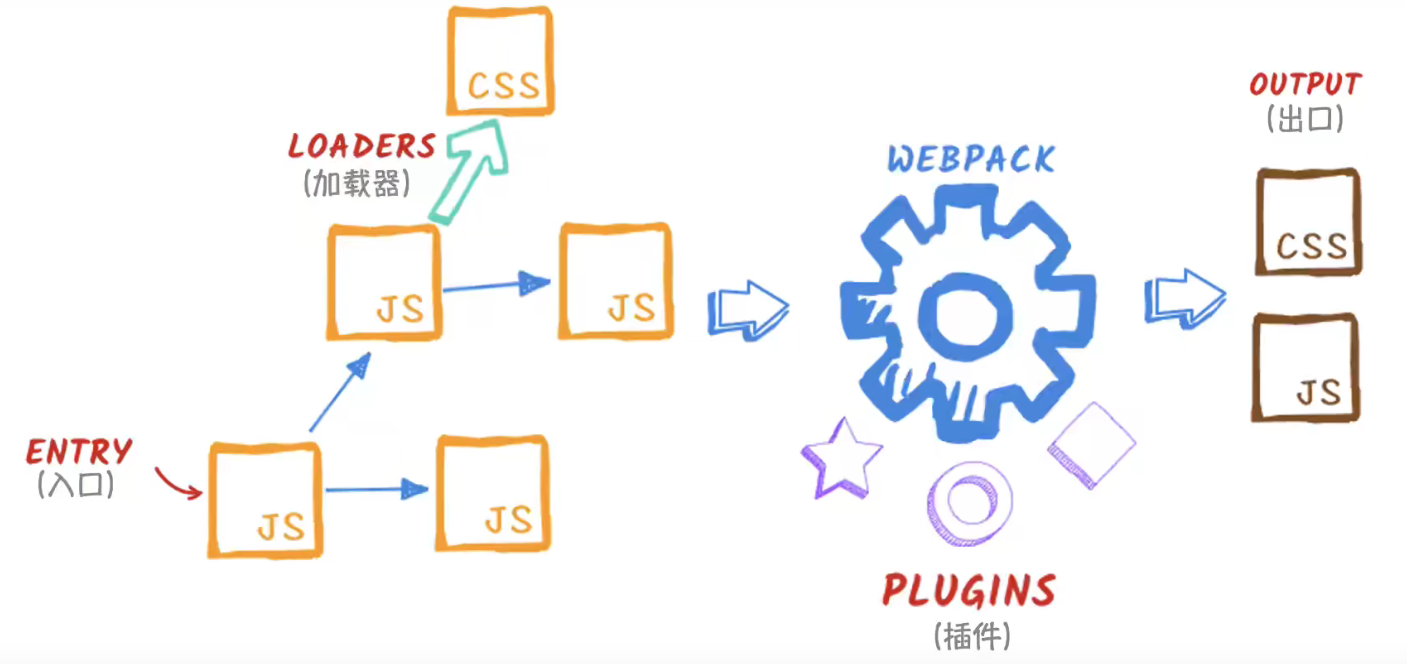
(2)webpack的核心部分
主要由7个部分组成:
- 入口(entry)
- 输出(output)
- loader
- 插件(plugin)
- 模式(mode)
- 浏览器兼容性(browser compatibility)
- 环境(environment)
我们必须要配置的首先是: (1)入口:入口起点(entry point) 指示 webpack 应该使用哪个模块,来作为构建其内部 依赖图(dependency graph) 的开始。进入入口起点后,webpack 会找出有哪些模块和库是入口起点(直接和间接)依赖的。 (2)出口:output 属性告诉 webpack 在哪里输出它所创建的 bundle,以及如何命名这些文件。主要输出文件的默认值是 ./dist/main.js,其他生成文件默认放置在 ./dist 文件夹中。 你可以通过在配置中指定一个 output 字段,来配置这些处理过程: (3)模式:通过选择 development, production 或 none 之中的一个,来设置 mode 参数,你可以启用 webpack 内置在相应环境下的优化。其默认值为 production。
(3)配置webpack.config.js文件
在我们的项目文件目录01-setup-app下,创建一个 webpack.config.js 文件,然后我们就可以通过设置一些配置来完成我们的webpack操作。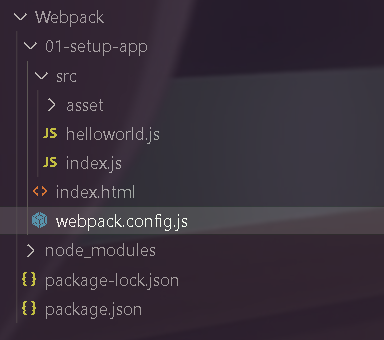
(1)我们找到在同一级目录下的src文件夹,找到index.js,其内部调用了helloworld的模块,我们把它设置为入口文件
(2)出口的配置:
我们先指定好文件打包后的名字bundle.js
出口文件的路径,我们使用__dirname找到同级目录下,并创建一个dist文件夹,放在其里面
如果打包时,不想要上一次打包留下的东西,我们就可以通过clean属性来清除上一次打包留下的文件
(3)配置mode模式,由于我们暂时处于开发阶段,所以选择development
const path = require("path")module.exports = {// mode:打包的模式mode: 'development',// entry: 我们的入口文件,要打包的文件entry: './src/index.js',// output:出口文件,打包好之后的文件// -filename:文件名// -path:文件所在的绝对路径// --path.resolve(__dirname)获取到 webpack.config.js的物理路径output: {filename: 'bundle.js',path: path.resolve(__dirname, './dist'),// 在生成文件之前清空 output 目录clean: true,}}
当我们配置好后,我们就可以通过 npx webpack 来运行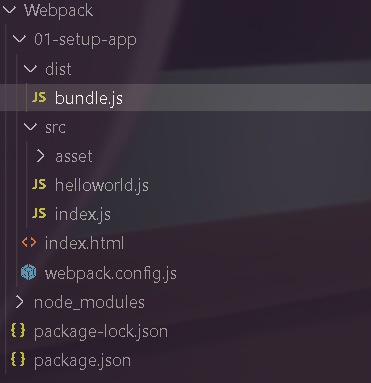
可以看到,在src的同级目录下,生成了一个dist文件夹,里面由bundle.js
我们再通过index.html引入bundle.js,运行
成功运行
4.附录文件
// helloworld.jsexport function helloworld(){console.log("helloworld");console.log("666");}
// index.jsimport { helloworld } from "./helloworld";helloworld()
// index.html<!DOCTYPE html><html lang="en"><head><meta charset="UTF-8"><meta http-equiv="X-UA-Compatible" content="IE=edge"><meta name="viewport" content="width=device-width, initial-scale=1.0"><title>GodVoid Test</title></head><body><script src="bundle.js"></script></body></html>
5.devtool 配置
详情请看官网:https://webpack.docschina.org/configuration/devtool/
devtool 可以让我们选择一种 source map 风格来增强调试过程。不同的值会明显影响到构建(build)和重新构建(rebuild)的速度。
也就是通过devtool 我们在调试代码时可以更好的发现我们代码错误的所在位置。
如果不设置devtool ,我们的源代码有错误时,在浏览器内部显示错误的位置会在我们打包的bundle.js内,我们很难发现错误,而通过设置devtool ,我们可以在浏览器内点击错误,直接跳到我们源码错误的位置,以方便我们修改。
const path = require("path")

module.exports = {
  // mode:打包的模式
  mode: 'development',

  // entry: 我们的入口文件,要打包的文件
  entry: './src/index.js',

  // output:出口文件,打包好之后的文件
  // -filename:文件名
  // -path:文件所在的绝对路径
  // --path.resolve(__dirname)获取到 webpack.config.js的物理路径
  output: {
    filename: 'bundle.js',
    path: path.resolve(__dirname, './dist'),

    // 在生成文件之前清空 output 目录
    clean: true,
  }

  // 此选项控制是否生成,以及如何生成 source map。
  // inline-source-map: source map 转换为 DataUrl 后添加到 bundle 中。
  devtool:'inline-source-map',
}

若有收获,就点个赞吧
0 人点赞
