在指定文件或目录设置审计策略的Powershell脚本
$computer = gc env:computername$path = "C:\New Folder"$user = "everyone"$path = $path.replace("\", "\\")$SD = ([WMIClass] "Win32_SecurityDescriptor").CreateInstance()$ace = ([WMIClass] "Win32_ace").CreateInstance()$Trustee = ([WMIClass] "Win32_Trustee").CreateInstance()$SID = (new-object security.principal.ntaccount $user).translate([security.principal.securityidentifier])[byte[]] $SIDArray = ,0 * $SID.BinaryLength$SID.GetBinaryForm($SIDArray,0)$Trustee.Name = $user$Trustee.SID = $SIDArray$ace.AccessMask = [System.Security.AccessControl.FileSystemRights]"Modify"$ace.AceFlags = "0x67"$ace.AceType = 2$ace.Trustee = $trustee$SD.SACL = $ace$SD.ControlFlags="0x10"$wPrivilege = gwmi Win32_LogicalFileSecuritySetting -computername $computer -filter "path='$path'"$wPrivilege.psbase.Scope.Options.EnablePrivileges = $true$wPrivilege.setsecuritydescriptor($SD)
$path 参数指定需要设置审核策略的文件或文件夹
参考:
https://blogs.technet.microsoft.com/bulentozkir/2009/12/26/sample-powershell-code-to-enable-auditing-on-a-folder/
https://docs.microsoft.com/es-es/dotnet/api/system.security.accesscontrol.aceflags?view=netframework-4.7.2
https://docs.microsoft.com/en-us/dotnet/api/system.security.accesscontrol.acetype?view=netframework-4.7.2
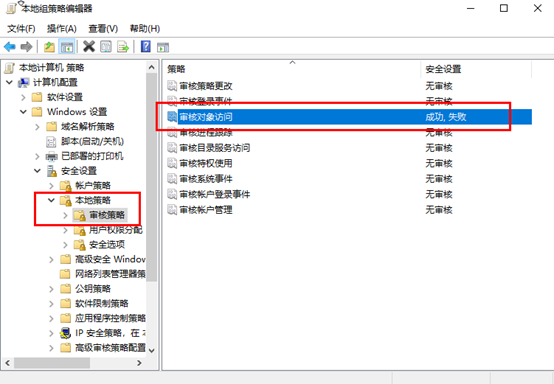
打开组策略中的文件访问审计
使用secedit 或 auditpol 命令
1. secedit
导出策略
secedit /export /cfg gp.inf /log 1.log
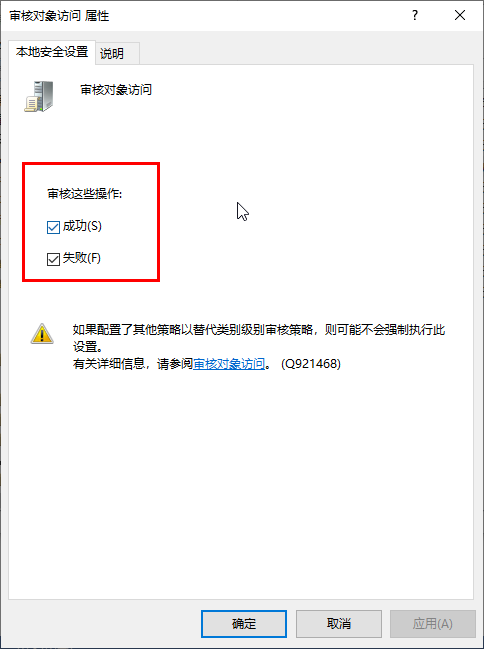
修改审核对象访问为成功和失败:
echo [version] > 1.infecho signature="$CHICAGO$" >> 1.infecho [Event Audit] >> 1.infecho AuditObjectAccess=3 >> 1.infsecedit /configure /db 1.sdb /cfg 1.inf /log 1.log /quietdel 1.*gpupdate /force
审核对象访问
AuditObjectAccess=3
键值含义:
0:无审核,1:成功,2:失败,3:成功失败
Signature
必须为$Windows NT$ or $Chicago$,表示所有Windows系统
gpupdate /force
强制更新组策略
2. auditpol
中文系统上,获取或设置参数是需使用中文,“chcp 437”转换成英文后仍有部分内容是中文,使用该命令建议测试下兼容性。
图形化界面操作
打开审计访问策略
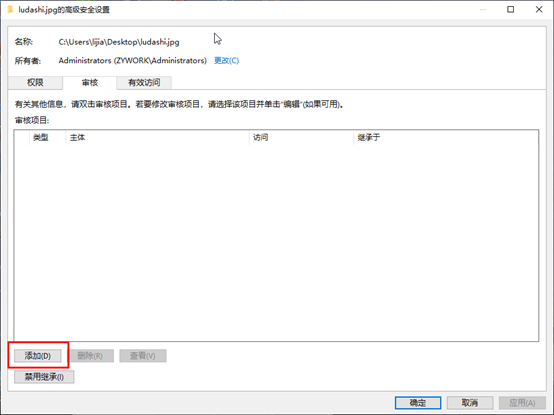
选择审计的具体文件
1、 文件属性->高级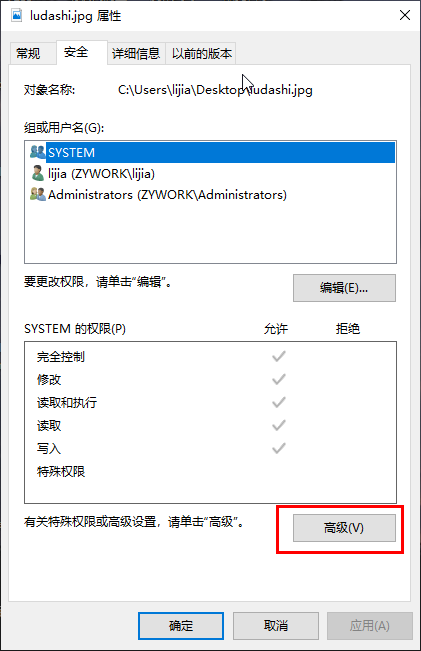
2、 审核标签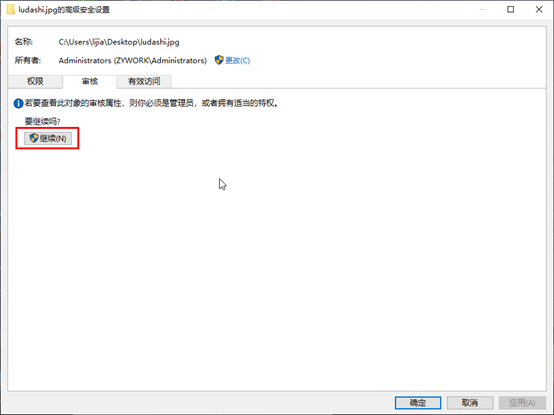
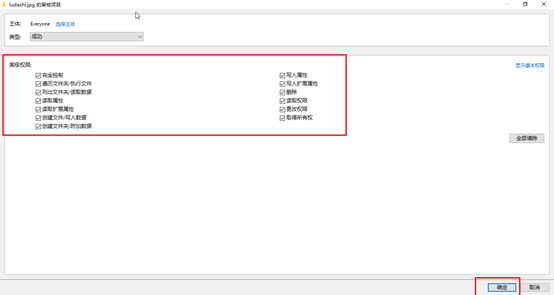
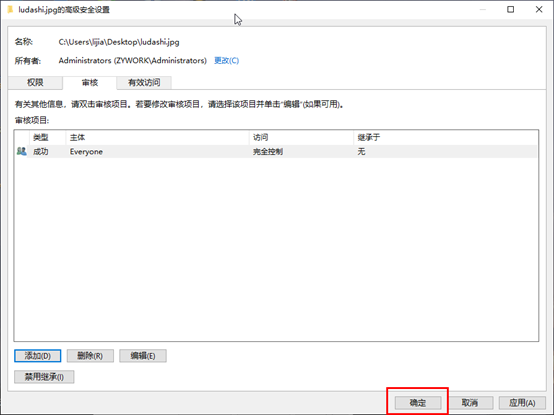
3、 添加审计人员EveryOne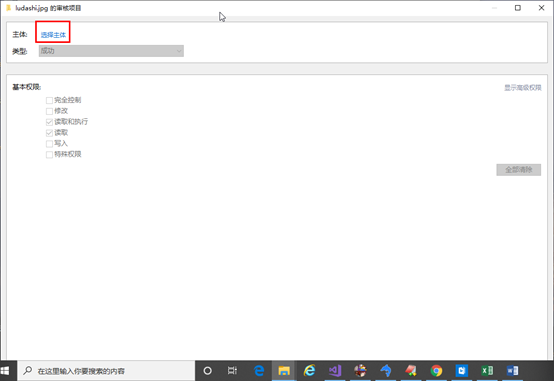


若有收获,就点个赞吧
0 人点赞
