0. get 文档链接地址
1. 安装
dependencies:get: ^3.23.1
2. update() 数据动态化更新视图-方法1

import 'package:flutter/material.dart';import 'package:get/get.dart';// 使用 GetMaterialApp()void main() => runApp(GetMaterialApp(home: Home()));// 定义自己的控制器, 想 更新视图,都需要 调用 update() 方法class Controller extends GetxController {var count = 0;increment() {count++;update();}}// 在页面中使用定义的数据源class Home extends StatelessWidget {// 定义控制器的实例final Controller controller = Get.put(Controller());@overrideWidget build(context) {return Scaffold(appBar: AppBar(title: Text("getx基础使用")),body: Center(child: Column(children: [GetBuilder<Controller>(builder: (_) => Text("${controller.count}",style: TextStyle(color: Colors.black, fontSize: 25.0),),),RaisedButton(onPressed: () => controller.increment(),child: Text("+1"),),],),),);}}
2.1 简单计数器案例
- 更新全部的视图 ```dart import ‘package:flutter/material.dart’; import ‘package:get/get.dart’;
// 创建初始数据源 class Controller extends GetxController { int _counter = 0; int get counter => _counter; void increment() { _counter++; update(); } }
class HomePage extends StatelessWidget {
@override
Widget build(BuildContext context) {
print(‘SimplePage—build’);
// 使用 GetBuilder
<a name="vkSAz"></a>#### 2.2 计数器案例,只更新局部UI- GetBuilder 只包裹需要更新的视图部分- 使用 `Get.find<SimpleController>()` 找到方法```dartimport 'package:flutter/material.dart';import 'package:get/get.dart';class SimpleController extends GetxController {int _counter = 0;int get counter => _counter;void increment() {_counter++;update();}}class HomePage extends StatelessWidget {@overrideWidget build(BuildContext context) {print('SimplePage--build');return Scaffold(appBar: AppBar(title: Text('Simple')),body: Center(// GetBuilder 只包裹需要更新的部分child: GetBuilder<SimpleController>(init: SimpleController(),builder: (c) {return Text("${c.counter}");},),),floatingActionButton: FloatingActionButton(onPressed: () {//使用 Get.find<T>() 找到定义的方法Get.find<SimpleController>().increment();},child: Icon(Icons.add),),);}}
2.3 GetxController有生命周期的
class SimpleController extends GetxController {int _counter = 0;int get counter => _counter;void increment() {_counter++;update();}@overridevoid onInit() {super.onInit();print('SimpleController--onInit');}@overridevoid onReady() {super.onReady();print('SimpleController--onReady');}@overridevoid onClose() {super.onClose();print('SimpleController--onClose');}}
3. GetX() || Obx() 数据动态化更新视图-方法2
和第一种方法差不多, 但是需要使用
.obs后缀,和调用 Obx() 方法
- 如果想让你的数据 具备动态化, 就需要在数据的后缀加上 .obs
- 在需要改变视图的地方,调用Obx 方法,返回一个 widget
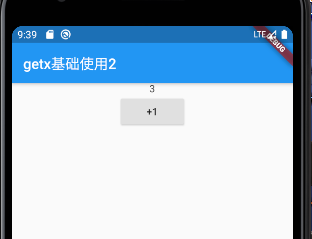
import 'package:flutter/material.dart';import 'package:get/get.dart';// 使用 GetMaterialApp()void main() => runApp(GetMaterialApp(home: Home()));// 定义自己的控制器 , 需要在引起视图变化的数据后加上 .obsclass Controller extends GetxController {var count = 0.obs;// var count = RxInt(0);void increment() => count++;}// 在页面中使用定义的数据源class Home extends StatelessWidget {// 定义控制器的实例final Controller controller = Get.put(Controller());@overrideWidget build(context) {return Scaffold(appBar: AppBar(title: Text("getx基础使用2")),body: Center(child: Column(children: [/// 通过使用 Obx()方法Obx(() => Text("${controller.count}",),),RaisedButton(onPressed: () => controller.increment(),child: Text("+1"),),],),),);}}
4. 使用 Bindings接口 和 GetView类
1. 定义自己的控制器
// 定义自己的控制器class HomeController extends GetxController {var count = 0.obs;void increment() => count++;}
2. 实现 Bindings 接口, 重写 dependencies 方法
// 实现 Bindings 接口class HomeBinding implements Bindings {@overridevoid dependencies() {// 使用Get.lazyPut() 方法推入控制器Get.lazyPut(() => HomeController());}}
3.继承 GetView类, 泛型T: 你要使用的控制器
class Home extends GetView<HomeController> {@overrideWidget build(context) => Scaffold(appBar: AppBar(title: Text("使用Binding 和 GetView")),body: Center(child: Obx(() => Text("数据源:${controller.count}")),),floatingActionButton: FloatingActionButton(child: Icon(Icons.add),onPressed: controller.increment,),);}
4. 在 main函数中配置
通过使用 GetPage(name, page,binding) 方法给每个页面注入不同的依赖,
void main() {runApp(GetMaterialApp(initialRoute: '/',getPages: [GetPage(name: '/', page: () => Home(), binding: HomeBinding()),],));}
5.路由
0. 定义路由
void main() {runApp(GetMaterialApp(initialRoute: '/',getPages: [GetPage(name: '/', page: () => MyHomePage()),GetPage(name: '/second', page: () => Second()),GetPage(name: '/third',page: () => Third(),transition: Transition.zoom),],));}
1. 使用Get.to(page,{其它可选参数}) 进行跳转
import 'package:flutter/material.dart';import 'package:get/get.dart';main(List<String> args) {runApp(GetMaterialApp(home: Home()));}class Home extends StatelessWidget {@overrideWidget build(BuildContext context) {return Scaffold(appBar: AppBar(title: Text("Home- Page 路由跳转"),),body: FlatButton(onPressed: () {Get.to(Mine());},child: Text("go to mine"),),);}}class Mine extends StatelessWidget {@overrideWidget build(BuildContext context) {return Scaffold(appBar: AppBar(title: Text("Mine- page"),),body: Text("Mine- page"),);}}
2. Get.toNamed() 进行命名路由跳转
import 'package:flutter/material.dart';import 'package:get/get.dart';main(List<String> args) {runApp(GetMaterialApp(home: Home(),// 配置命名路由getPages: [GetPage(name: "/mine", page: () => Mine()),],));}// Get.toNamed("/mine");class Home extends StatelessWidget {@overrideWidget build(BuildContext context) {return Scaffold(appBar: AppBar(title: Text("Home- Page 路由跳转"),),body: FlatButton(onPressed: () {Get.toNamed("/mine");},child: Text("go to mine"),),);}}class Mine extends StatelessWidget {@overrideWidget build(BuildContext context) {return Scaffold(appBar: AppBar(title: Text("Mine- page"),),body: Text("Mine- page"),);}}
3. 使用 Get.back() 返回上个页面
class Mine extends StatelessWidget {@overrideWidget build(BuildContext context) {return Scaffold(appBar: AppBar(title: Text("Mine- page"),),body: FlatButton(//也可以这样写 onPressed: Get.back,onPressed: () {Get.back();},child: Text("返回上个页面"),),);}}
4. 使用Get.off() || Get.offAll() 跳转页面
- Get.off() 导航到下一个页面并删除前一个页面
- Get.offAll() 导航到下一个页面并删除以前所有的页面
该方法和 Get.to() 实现的效果一样, 但是使用此方法跳转后,在下一个页面,不能再返回前一个页面, 可以用在 登录页,获取退出页面,这样登录后,或者退出页面后,就不能再返回到前一个页面
class Home extends StatelessWidget {@overrideWidget build(BuildContext context) {return Scaffold(appBar: AppBar(title: Text("Home- Page 路由跳转"),),body: FlatButton(onPressed: () {Get.off(Mine());},child: Text("go to mine"),),);}}
5. arguments传参数和arguments参数接收
// Get.to(Mine(), arguments: '我是参数'); 进行传参class Home extends StatelessWidget {@overrideWidget build(BuildContext context) {return Scaffold(appBar: AppBar(title: Text("Home- Page 路由跳转"),),body: FlatButton(onPressed: () {Get.to(Mine(), arguments: '我是参数');},child: Text("go to mine"),),);}}// 使用 Get.arguments 接收参数class Mine extends StatelessWidget {@overrideWidget build(BuildContext context) {String name = Get.arguments;print(name);return Scaffold(appBar: AppBar(title: Text("Mine- page"),),body: FlatButton(onPressed: () {Get.back();},child: Text("返回上个页面"),),);}}
6. 像web一样携带参数(url?name=李四&age=12) 模式传参 和 参数的接收
class Home extends StatelessWidget {@overrideWidget build(BuildContext context) {return Scaffold(appBar: AppBar(title: Text("Home- Page 路由跳转"),),body: FlatButton(onPressed: () {Get.toNamed("/mine?name=李四&age=12");},child: Text("go to mine"),),);}}class Mine extends StatelessWidget {@overrideWidget build(BuildContext context) {// 参数接收String age = Get.parameters['age'];print(age);String name = Get.parameters['name'];print(name);return Scaffold(appBar: AppBar(title: Text("Mine- page"),),);}}
7. 动态命名路由传参(/profile/:user)
- 同上边那种接收参数方法一样
```dart
main(List
args) { runApp(GetMaterialApp( home: Home(), // 配置命名路由 getPages: [
], )); } class Home extends StatelessWidget { @override Widget build(BuildContext context) { return Scaffold(GetPage(name: "/mine/:name/:age", page: () => Mine()),
); } }appBar: AppBar(title: Text("Home- Page 路由跳转"),),body: FlatButton(onPressed: () {// 传参Get.toNamed("/mine/李四/12");},child: Text("go to mine"),),
class Mine extends StatelessWidget { @override Widget build(BuildContext context) { // 接收参数 String age = Get.parameters[‘age’]; print(age); String name = Get.parameters[‘name’]; print(name);
return Scaffold(appBar: AppBar(title: Text("Mine- page"),),);
} }
<a name="wtkBk"></a>#### 8. await Get.to()导航到下一条路由,并在返回后立即接收或更新数据。<a name="Xz8Ph"></a>#<a name="Ppjbg"></a># 5. GetMaterialApp 类> 该类和 MaterialApp 类用法基本类似,具体参考源码- 官方例子,参考下```dartvoid main() {runApp(GetMaterialApp(initialRoute: '/home',defaultTransition: Transition.native,translations: MyTranslations(),locale: Locale('pt', 'BR'),getPages: [GetPage(name: '/home', page: () => First()),],));}

若有收获,就点个赞吧
0 人点赞
