前言
直播行业是当前火热的行业,谁都想从中分得一杯羹,直播养活了一大批人,一个平台主播粗略估计就有几千号人,但是实时在线观看量有的居然到了惊人的百万级别,特别是游戏主播,可想而知,直播间是一个磁铁式的广告传播媒介,也难怪这么多巨头公司都抢着做直播。我不太清楚直播行业技术有多深,毕竟自己没做过,但是咱们可以自己实现一个满足几百号人同时观看的直播间。
最终成果
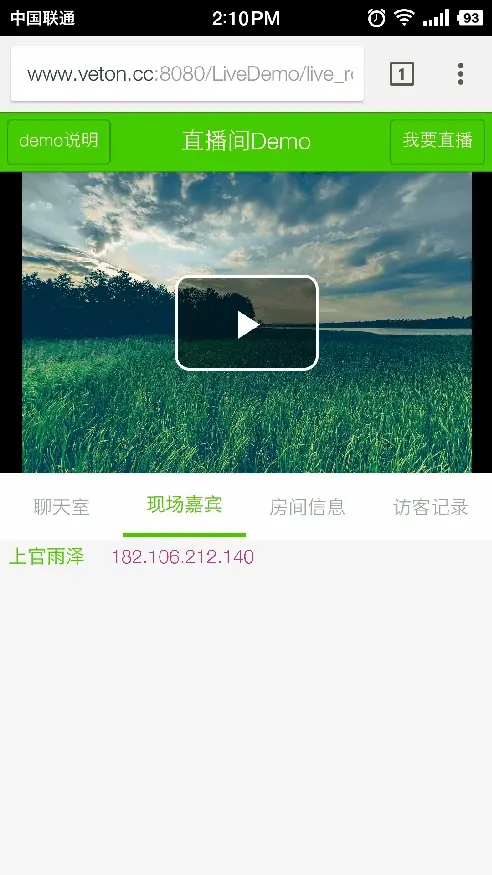
手机端效果
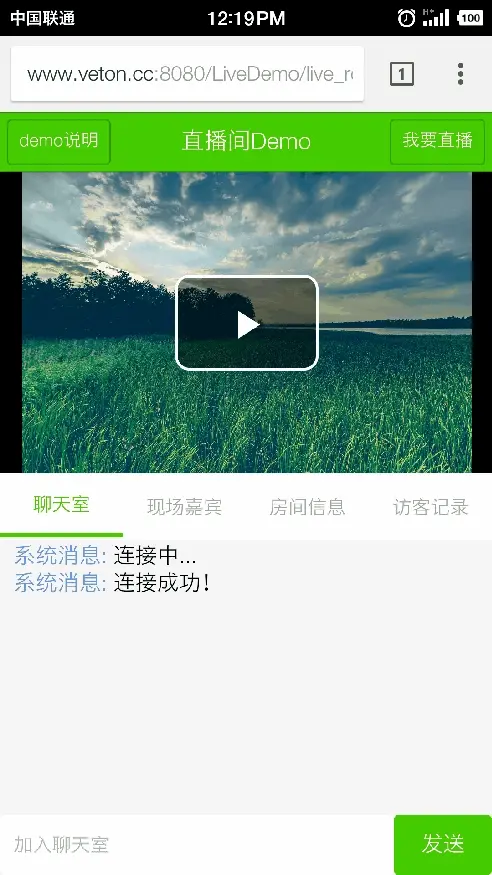
这个场景很熟悉吧~~ 通过 obs 推流软件来推流。
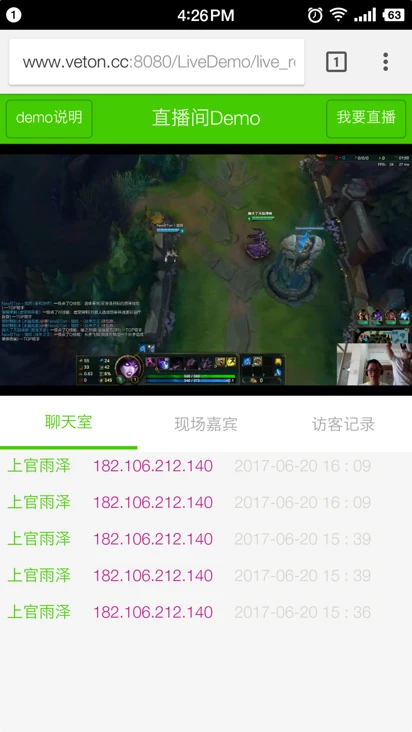
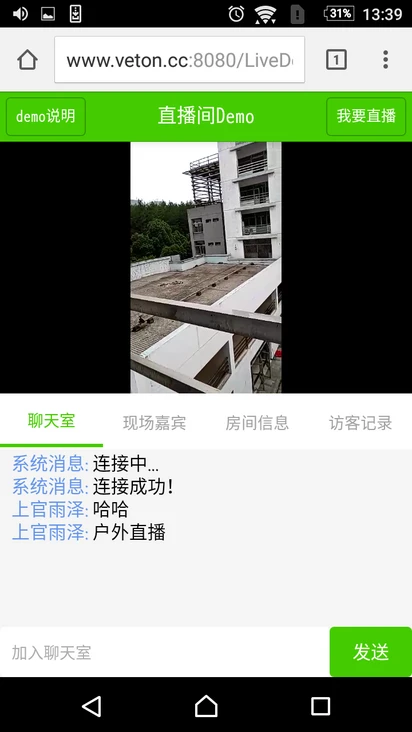
户外直播,通过 yasea 手机端推流软件,使用手机摄像头推流。
电脑端效果
播放香港卫视
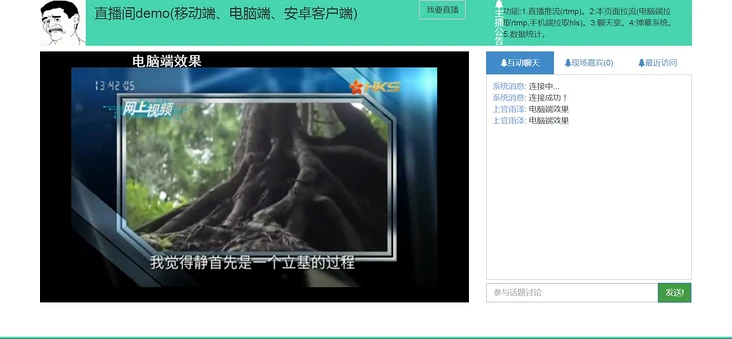
直播画面

项目总览
项目分为三个部分:
- 客户端
直播间视频拉流、播放和聊天室,炫酷的弹幕以及直播间信息
- 服务端
处理直播间、用户的数据业务, 聊天室消息的处理
- 服务器部署
视频服务器和 web 服务器
技术栈
移动客户端
- VUE 全家桶
- UI 层 vonic
- axios
- 视频播放器: vue-video-player + videojs-contrib-hls
- websocket 客户端: vue-stomp
- 弹幕插件: vue-barrage
- 打包工具: webpack
电脑端客户端
- 项目架构: Jquery + BootStrap
- 视频播放器: video.js
- websocket 客户端: stomp.js + sockjs.js
- 弹幕插件: Jquery.danmu.js
- 模版引擎: thymeleaf
服务端
- IDE: IntelliJ IDEA
- 项目架构: SpringBoot1.5.4 +Maven3.0
- 主数据库: Mysql5.7
- 辅数据库: redis3.2
- 数据库访问层: spring-boot-starter-data-jpa + spring-boot-starter-data-redis
- websocket: spring-boot-starter-websocket
- 消息中间件: RabbitMQ/3.6.10
服务器部署
- 视频直播模块: nginx-rtmp-module
- web 应用服务器: tomcat8.0
- 服务器: 腾讯云 centos6.5
技术点讲解
直播间主要涉及到两个主要功能:第一是视频直播、第二是聊天室。这两个都是非常讲究实时性。
- 视频直播
说到直播我们先了解下几个常用的直播流协议, 看了挺多的流媒体协议文章博客,但都是非常粗略,这里有个比较详细的 流媒体协议介绍,如果想详细了解协议内容估计去要看看专业书籍了。这里我们用到的只是 rtmp 和 hls,实践后发现:rtmp 只能够在电脑端播放,hls 只能够在手机端播放。而且 rtmp 是相当快的尽管没有 rtsp 那么快,延迟只有几秒,我测试的就差不多 2-5 秒,但是 hls 大概有 10 几秒。所以如果你体验过 demo, 就会发现手机延迟比较多。
直播的流程:
直播分为推流和拉流两个过程,那么流推向哪里,拉流又从哪里拉取呢?那当然需要视频服务器啦,千万不要以为视频直播服务器很复杂,其实在 nginx 服务器中一切都变得简单。后面我会讲解如何部署 Nginx 服务器并配置视频模块 (nginx-rtmp-module).
首先主播通过推流软件,比如 OBS Studio 推流软件,这个是比较专业级别的,很多直播平台的推荐主播使用这个软件来推送视频流,这里我也推荐一个开源的安卓端推流工具 Yasea,下载地址,文件很小,但是很强大。
直播内容推送到服务器后,就可以在服务器端使用视频编码工具进行转码了,可以转换成各种高清,标清,超清的分辨率视频,也就是为什么我们在各个视频网站都可以选择视频清晰度。这里我们没有转码,只是通过前端视频播放器 (video.js) 来拉取视频. 这样整个视频推流拉流过程就完成了。
- 聊天室
直播间里面的聊天室跟我们的群聊天差不多,只不过它变成了 web 端,web 端的即时通信方案有很多,这里我们选择 websocket 协议来与服务端通信,websocket 是基于 http 之上的传输协议,客户端向服务端发送 http 请求,并携带 Upgrade:websocket 升级头信息表示转换 websocket 协议,通过与服务端握手成功后就可以建立 tcp 通道,由此来传递消息,它与 http 最大的差别就是,服务端可以主动向客户端发送消息。
既然建立了消息通道,那我们就需要往通道里发消息,但是总得需要一个东西来管控消息该发给谁吧,要不然全乱套了,所以我们选择了消息中间件 RabbitMQ. 使用它来负责消息的路由去向。
理论知识都讲完啦,实操时间到!
移动客户端实操
工程结构
|—— build 构建服务和webpack配置|—— congfig 项目不同环境的配置|—— dist build生成生产目录|—— static 静态资源|—— package.json 项目配置文件|—— src 开发源代码目录|—— api 通过axios导出的api目录|—— components 页面和组件|—— public 公有组件|—— vuex 全局状态|—— main.js 应用启动配置点
功能模块
- 拉取服务器的直播视频流 (hls) 并播放直播画面
- 与服务端创建 websocket 连接,收发聊天室消息
- 通过 websocket 获取消息并发送到弹幕
- 通过 websocket 实时更新在线用户
- 结合服务端获取访问历史记录
- 问题反馈模块
效果图
项目说明
服务端实操
由于个人比较喜欢接触新的东西,所以后端选择了 springboot,前端选择了 Vue.js 年轻人嘛总得跟上潮流。SpringBoot 实践过后发现真的太省心了,不用再理会各种配置文件,全自动化装配。
这里贴一下 pom.xml
<?xml version="1.0" encoding="UTF-8"?><project xmlns="http://maven.apache.org/POM/4.0.0" xmlns:xsi="http://www.w3.org/2001/XMLSchema-instance"xsi:schemaLocation="http://maven.apache.org/POM/4.0.0 http://maven.apache.org/xsd/maven-4.0.0.xsd"><modelVersion>4.0.0</modelVersion><groupId>com.hushangjie</groupId><artifactId>rtmp-demo</artifactId><version>0.0.1-SNAPSHOT</version><packaging>jar</packaging><name>rtmp-demo</name><description>Demo project for Spring Boot</description><parent><groupId>org.springframework.boot</groupId><artifactId>spring-boot-starter-parent</artifactId><version>1.5.4.RELEASE</version><relativePath/></parent><properties><project.build.sourceEncoding>UTF-8</project.build.sourceEncoding><project.reporting.outputEncoding>UTF-8</project.reporting.outputEncoding><java.version>1.8</java.version></properties><dependencies><dependency><groupId>org.springframework.boot</groupId><artifactId>spring-boot-devtools</artifactId><optional>true</optional></dependency><dependency><groupId>org.springframework.boot</groupId><artifactId>spring-boot-starter-actuator</artifactId></dependency><dependency><groupId>org.springframework.boot</groupId><artifactId>spring-boot-actuator-docs</artifactId></dependency><dependency><groupId>org.springframework.boot</groupId><artifactId>spring-boot-starter-data-jpa</artifactId></dependency><dependency><groupId>org.springframework.boot</groupId><artifactId>spring-boot-starter-data-redis</artifactId></dependency><dependency><groupId>org.springframework.boot</groupId><artifactId>spring-boot-starter-thymeleaf</artifactId></dependency><dependency><groupId>net.sourceforge.nekohtml</groupId><artifactId>nekohtml</artifactId><version>1.9.22</version></dependency><dependency><groupId>org.springframework.boot</groupId><artifactId>spring-boot-starter-web</artifactId></dependency><dependency><groupId>org.springframework.boot</groupId><artifactId>spring-boot-starter-websocket</artifactId></dependency><dependency><groupId>org.springframework.boot</groupId><artifactId>spring-boot-starter-test</artifactId><scope>test</scope></dependency><dependency><groupId>org.webjars</groupId><artifactId>vue</artifactId><version>2.1.3</version></dependency><dependency><groupId>mysql</groupId><artifactId>mysql-connector-java</artifactId></dependency><dependency><groupId>joda-time</groupId><artifactId>joda-time</artifactId><version>2.9.2</version></dependency><dependency><groupId>io.projectreactor</groupId><artifactId>reactor-core</artifactId><version>2.0.8.RELEASE</version></dependency><dependency><groupId>io.projectreactor</groupId><artifactId>reactor-net</artifactId><version>2.0.8.RELEASE</version></dependency><dependency><groupId>io.netty</groupId><artifactId>netty-all</artifactId><version>4.1.6.Final</version></dependency></dependencies><build><plugins><plugin><groupId>org.springframework.boot</groupId><artifactId>spring-boot-maven-plugin</artifactId><configuration><fork>true</fork></configuration></plugin></plugins></build></project>
application.properties 文件
spring.datasource.url=jdbc:mysql://host:3306/database?characterEncoding=utf8&spring.datasource.username=usernamespring.datasource.password=passwordspring.datasource.driver-class-name=com.mysql.jdbc.Driverspring.thymeleaf.mode=LEGACYHTML5server.port=8085spring.redis.database=0spring.redis.host=127.0.0.1spring.redis.port=6379spring.redis.password=spring.redis.pool.max-active=8spring.redis.pool.max-wait=-1spring.redis.pool.max-idle=8spring.redis.pool.min-idle=0spring.redis.timeout=0
websocket 配置
@Configuration@EnableWebSocketMessageBrokerpublic class WebSocketConfig extends AbstractWebSocketMessageBrokerConfigurer {@Beanpublic MyChannelInterceptor myChannelInterceptor(){return new MyChannelInterceptor();}@Overridepublic void registerStompEndpoints(StompEndpointRegistry registry) {registry.addEndpoint("/live").setAllowedOrigins("*").addInterceptors(new HandShkeInceptor()).withSockJS();}@Overridepublic void configureMessageBroker(MessageBrokerRegistry registry) {registry.setApplicationDestinationPrefixes("/demo").enableStompBrokerRelay("/topic","/queue").setRelayHost("127.0.0.1").setRelayPort(61613).setClientLogin("guest").setClientPasscode("guest").setSystemLogin("guest").setSystemPasscode("guest").setSystemHeartbeatSendInterval(5000).setSystemHeartbeatReceiveInterval(4000);}@Overridepublic void configureClientInboundChannel(ChannelRegistration registration) {ChannelRegistration channelRegistration = registration.setInterceptors(myChannelInterceptor());super.configureClientInboundChannel(registration);}@Overridepublic void configureClientOutboundChannel(ChannelRegistration registration) {super.configureClientOutboundChannel(registration);}}
配置类继承了消息代理配置类,意味着我们将使用消息代理 rabbitmq. 使用 registerStompEndpoints 方法注册一个 websocket 终端连接。这里我们需要了解两个东西,第一个是 stomp 和 sockjs,sockjs 是啥呢,其实它是对于 websocket 的封装,因为如果单纯使用 websocket 的话效率会非常低,我们需要的编码量也会增多,而且如果浏览器不支持 websocket,sockjs 会自动降级为轮询策略,并模拟 websocket, 保证客户端和服务端可以通信。
stomp 有是什么看这里
stomp 是一种简单 (流) 文本定向消息协议,它提供了一个可互操作的连接格式,允许 STOMP 客户端与任意 STOMP 消息代理(Broker)进行交互,也就是我们上面的 RabbbitMQ, 它就是一个消息代理。
我们可以通过 configureMessageBroker 来配置消息代理,需要注意的是我们将要部署的服务器也应该要有 RabbitMQ,因为它是一个中间件,安装非常容易,这里就不说明了。这里我们配置了 “/topic,/queue” 两个代理转播策略,就是说客户端订阅了前缀为 “/topic,/queue” 频道都会通过消息代理 (RabbitMQ) 来转发。跟 spring 没啥关系啦,完全解耦。
websocke 如何保证安全
一开始接触 stomp 的时候一直有个问题困扰我,客户端只要与服务端通过 websocket 建立了连接,那么他就可以订阅任何内容,意味着可以接受任何消息,这样岂不是乱了套啦,于是我翻阅了大量博客文章,很多都是官方的例子并没有解决实际问题。经过琢磨,其实 websocket 是要考虑安全性的。具体在以下几个方面
- 跨域 websocket 连接
- 协议升级前握手拦截器
- 消息信道拦截器
对于跨域问题,我们可以通过 setAllowedOrigins 方法来设置可连接的域名,防止跨站连接。
对于站内用户是否允许连接我们可以如下配置
public class HandShkeInceptor extends HttpSessionHandshakeInterceptor {private static final Set<UserEntity> ONLINE_USERS = new HashSet<>();@Overridepublic boolean beforeHandshake(ServerHttpRequest request, ServerHttpResponse response, WebSocketHandler wsHandler, Map<String, Object> attributes) throws Exception {System.out.println("握手前"+request.getURI());if (request instanceof ServletServerHttpRequest) {ServletServerHttpRequest servletRequest = (ServletServerHttpRequest) request;HttpSession session = servletRequest.getServletRequest().getSession();UserEntity user = (UserEntity) session.getAttribute("user");if (user != null) {return super.beforeHandshake(request, response, wsHandler, attributes);}else {System.out.println("用户未登录,握手失败!");return false;}}return false;}@Overridepublic void afterHandshake(ServerHttpRequest request, ServerHttpResponse response, WebSocketHandler wsHandler, Exception ex) {System.out.println("握手后");super.afterHandshake(request, response, wsHandler, ex);}}
HttpSessionHandshakeInterceptor 这个拦截器用来管理握手和握手后的事情,我们可以通过请求信息,比如 token、或者 session 判用户是否可以连接,这样就能够防范非法用户。
那如何限制用户只能订阅指定内容呢?我们接着往下看
public class MyChannelInterceptor extends ChannelInterceptorAdapter {@Autowiredprivate StatDao statDao;@Autowiredprivate SimpMessagingTemplate simpMessagingTemplate;@Overridepublic boolean preReceive(MessageChannel channel) {System.out.println("preReceive");return super.preReceive(channel);}@Overridepublic Message<?> preSend(Message<?> message, MessageChannel channel) {StompHeaderAccessor accessor = StompHeaderAccessor.wrap(message);StompCommand command = accessor.getCommand();if (StompCommand.SUBSCRIBE.equals(command)) {Set<String> subedChannelInDB = new HashSet<>();subedChannelInDB.add("/topic/group");subedChannelInDB.add("/topic/online_user");if (subedChannelInDB.contains(accessor.getDestination())) {return super.preSend(message, channel);} else {return null;}} else {return super.preSend(message, channel);}}@Overridepublic void afterSendCompletion(Message<?> message, MessageChannel channel, boolean sent, Exception ex) {StompHeaderAccessor accessor = StompHeaderAccessor.wrap(message);StompCommand command = accessor.getCommand();if (StompCommand.SUBSCRIBE.equals(command)){Map<String,UserEntity> map = (Map<String, UserEntity>) accessor.getHeader("simpSessionAttributes");UserEntity user = map.get("user");if(user != null){statDao.pushOnlineUser(user);Guest guest = new Guest();guest.setUserEntity(user);guest.setAccessTime(Calendar.getInstance().getTimeInMillis());statDao.pushGuestHistory(guest);this.simpMessagingTemplate.convertAndSend("/topic/online_user",statDao.getAllUserOnline());}}if (StompCommand.DISCONNECT.equals(command)){Map<String,UserEntity> map = (Map<String, UserEntity>) accessor.getHeader("simpSessionAttributes");UserEntity user = map.get("user");if (user != null){statDao.popOnlineUser(user);simpMessagingTemplate.convertAndSend("/topic/online_user",statDao.getAllUserOnline());}}super.afterSendCompletion(message, channel, sent, ex);}}
在 stomp 里面,Channel 信道就是消息传送的通道,客户端与服务端建立了连接就相当于建立了通道,以后的信息就是通过这个通道来传输。所有的消息都有消息头,被封装在了 spring 的 messag 接口中,比如建立连接时候消息头就含有 CONNECT, 当然还有一些其他的信息。客户端订阅的时候也有订阅头信息 SUBSCRIBE,那么我是不是可以在这个拦截器 ChannelInterceptorAdapter 中拦截每个人的订阅信息,然后与数据库的信息作比对,最后决定这个用户是否可以订阅这个频道的信息呢,对的,这是我的想法,按照这样的思路,做单聊不是迎刃而解了吗。
那客户端通过 websocket 发送的消息如何到达订阅者手中呢,按照 rabbitmq 的规则,订阅者属于消费者,发送消息的一方属于生产者,生产者通过 websocket 把消息发送到服务端,服务端通过转发给消息代理(rabbitmq), 消息代理负责存储消息,管理发送规则,推送消息给订阅者,看下面的代码
@MessageMapping(value = "/chat")@SendTo("/topic/group")public MsgEntity testWst(String message , @Header(value = "simpSessionAttributes") Map<String,Object> session){UserEntity user = (UserEntity) session.get("user");String username = user.getRandomName();MsgEntity msg = new MsgEntity();msg.setCreator(username);msg.setsTime(Calendar.getInstance());msg.setMsgBody(message);return msg;}
@MessageMapping 看起来跟 springmvc 方法特别像,它即可以用在类级别上也可以用在方法级别上
当发送者往‘/chat’发送消息后,服务端接受到消息,再发送给 “/topic/group” 的订阅者,@SendTo 就是发送给谁,这里需要注意的有,如果我们没有配置消息代理,只使用了 enableSimpleBroker(“/topic”,”/queue”)简单消息代理,那么就是直接发送到消息订阅者,如果配置了消息代理,那还要通过消息代理,由它来转发。
如果我们想在服务端随时发送消息,而不是在客户端发送(这样的场景很常见,比如发送全局通知),可以使用 SimpMessagingTemplate 类,通过注入该 bean, 在合适的业务场景中发送消息。
Redis 统计数据
直播间经常需要统计数据,比如实时在线人数,访问量,贡献排行榜,订阅量。我选择的方案是使用 redis 来计数,尽管这个 demo 可能不会太多人访问,但是我的目的是学习如何使用 redis
先看 springboot 中 redis 的配置
@Configurationpublic class RedisConfig extends CachingConfigurerSupport{@Beanpublic KeyGenerator keyGenerator() {return new KeyGenerator() {@Overridepublic Object generate(Object target, Method method, Object... params) {StringBuilder sb = new StringBuilder();sb.append(target.getClass().getName());sb.append(method.getName());for (Object obj : params) {sb.append(obj.toString());}return sb.toString();}};}@SuppressWarnings("rawtypes")@Beanpublic CacheManager cacheManager(RedisTemplate redisTemplate) {RedisCacheManager rcm = new RedisCacheManager(redisTemplate);Map<String,Long> map=new HashMap();map.put("test",60L);rcm.setExpires(map);return rcm;}@Beanpublic RedisTemplate<String, String> redisTemplate(RedisConnectionFactory factory) {StringRedisTemplate template = new StringRedisTemplate(factory);Jackson2JsonRedisSerializer jackson2JsonRedisSerializer = new Jackson2JsonRedisSerializer(Object.class);ObjectMapper om = new ObjectMapper();om.setVisibility(PropertyAccessor.ALL, JsonAutoDetect.Visibility.ANY);om.enableDefaultTyping(ObjectMapper.DefaultTyping.NON_FINAL);jackson2JsonRedisSerializer.setObjectMapper(om);template.setValueSerializer(jackson2JsonRedisSerializer);//如果key是String 需要配置一下StringSerializer,不然key会乱码 /XX/XXtemplate.afterPropertiesSet();//template.setStringSerializer();return template;}}
redis 数据统计 Dao 的实现
@Repositorypublic class StatDao {@AutowiredRedisTemplate redisTemplate;public void pushOnlineUser(UserEntity userEntity){redisTemplate.opsForSet().add("OnlineUser",userEntity);}public void popOnlineUser(UserEntity userEntity){redisTemplate.opsForSet().remove("OnlineUser" ,userEntity);}public Set getAllUserOnline(){return redisTemplate.opsForSet().members("OnlineUser");}public void pushGuestHistory(Guest guest){if (redisTemplate.opsForList().size("Guest") == 200l){redisTemplate.opsForList().rightPop("Guest");}redisTemplate.opsForList().leftPush("Guest",guest);}public List getGuestHistory(){return redisTemplate.opsForList().range("Guest",0,-1);}}
Dao 层非常简单,因为我们只需要统计在线人数和访客。但是在线人数是实时更新的,既然我们使用了 websocket 实时数据更新就非常容易了,前面我们讲过,通过信道拦截器可以拦截连接,订阅,断开连接等等事件信息,所以我们就可以当用户连接时存储在线用户,通过 websocket 返回在线用户信息。
public class MyChannelInterceptor extends ChannelInterceptorAdapter {@Autowiredprivate StatDao statDao;@Autowiredprivate SimpMessagingTemplate simpMessagingTemplate;@Overridepublic boolean preReceive(MessageChannel channel) {System.out.println("preReceive");return super.preReceive(channel);}@Overridepublic Message<?> preSend(Message<?> message, MessageChannel channel) {StompHeaderAccessor accessor = StompHeaderAccessor.wrap(message);StompCommand command = accessor.getCommand();if (StompCommand.SUBSCRIBE.equals(command)) {Set<String> subedChannelInDB = new HashSet<>();subedChannelInDB.add("/topic/group");subedChannelInDB.add("/topic/online_user");if (subedChannelInDB.contains(accessor.getDestination())) {return super.preSend(message, channel);} else {return null;}} else {return super.preSend(message, channel);}}@Overridepublic void afterSendCompletion(Message<?> message, MessageChannel channel, boolean sent, Exception ex) {StompHeaderAccessor accessor = StompHeaderAccessor.wrap(message);StompCommand command = accessor.getCommand();if (StompCommand.SUBSCRIBE.equals(command)){Map<String,UserEntity> map = (Map<String, UserEntity>) accessor.getHeader("simpSessionAttributes");UserEntity user = map.get("user");if(user != null){statDao.pushOnlineUser(user);Guest guest = new Guest();guest.setUserEntity(user);guest.setAccessTime(Calendar.getInstance().getTimeInMillis());statDao.pushGuestHistory(guest);this.simpMessagingTemplate.convertAndSend("/topic/online_user",statDao.getAllUserOnline());}}if (StompCommand.DISCONNECT.equals(command)){Map<String,UserEntity> map = (Map<String, UserEntity>) accessor.getHeader("simpSessionAttributes");UserEntity user = map.get("user");if (user != null){statDao.popOnlineUser(user);simpMessagingTemplate.convertAndSend("/topic/online_user",statDao.getAllUserOnline());}}super.afterSendCompletion(message, channel, sent, ex);}}
由于这个项目有移动端和电脑端,所以需要根据请求代理 UserAgent 来判断客户端属于哪一种类型。这个工具类在源码上有。我就不贴了。
服务器部署
说了这么多即时通信,却没发现视频直播。不要着急我们马上进入视频环节。文章开头就说明了几种媒体流协议,这里不讲解详细的协议流程,只需要知道,我们是通过推流软件采集视频信息,如何采集也不是我们关注的。采集到信息后通过软件来推送到指定的服务器,如下图
obs 推流设置
yasea 手机端推流设置
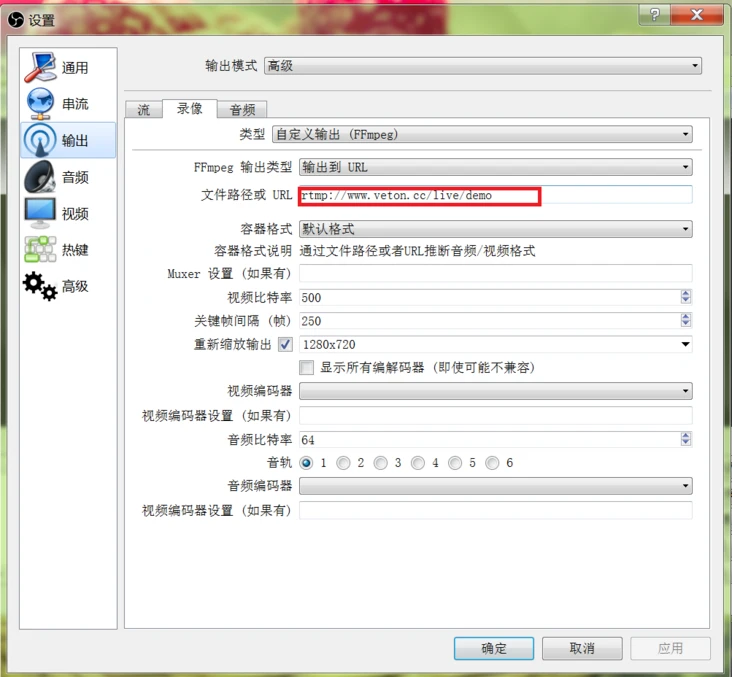

红色部分是服务器开放的获取流接口。
Nginx-rtmp-module 配置
视频服务器有很多,也支持很多媒体流协议。这里我们选择 nginx-rtmp-module 来做视频服务,接下来我们需要在 linux 下安装 nginx, 并安装 rtmp 模块。本人也是 linux 初学者,一步步摸索着把服务器搭建好,听说 tomcat 和 nginx 很配哦,所以作为免费开源的当然首选这两个。
接下来需要在 linux 安装一下软件和服务。
- Nginx 以及 Nginx-rtmp-module
- Tomcat
- Mysql
- Redis
- RabbitMQ
安装步骤我就不说了,大家搜索一下啦,这里贴一下 nginx.conf 文件配置
rtmp {server {listen 1935;chunk_size 4096;application video {play /yjdata/www/www/video;}application live {live on;hls on;hls_path /yjdata/www/www/live/hls/;hls_fragment 5s;}}}
上面代码是配置 rtmp 模块, play /yjdata/www/www/video 指的是配置点播模块,可以直接播放 / yjdata/www/www/video 路径下的视频。hls_path 制定 hls 分块存放路径,因为 hls 是通过获取到推送的视频流信息,分块存储在服务器。所以它的延时比 rtmp 要更高。
server {listen 80;server_name localhost;index index.jsp index.html;root /yjdata/www/www;location / {proxy_pass http://127.0.0.1:8080;}location ~ .*\.(gif|jpg|jpeg|png|bmp|swf|js|css|docx|pdf|doc|ppt|html|properties)$ {expires 30d;root /yjdata/www/www/static/;}location /hls {types {application/vnd.apple.mpegurl m3u8;video/mp2t ts;}alias /yjdata/www/www/live/hls/;expires -1;add_header Cache-Control no-cache;}location /stat {rtmp_stat all;rtmp_stat_stylesheet stat.xsl;}location /stat.xsl {root /soft/nginx/nginx-rtmp-module/;}
上面配置了 location 指向 / hls, 别名是 / yjdata/www/www/live/hls/,所以可以在前端直接通过域名 +/hls/+ 文件名. m3u8 获取直播视频。
关于 nginx 的配置还有很多,我也在学习当中。总而言之 nginx 非常强大。
总结
通过从前端 => 后台 => 服务器,整个流程走下来还是需要花很多心思。但是收获也是很多。
https://segmentfault.com/a/1190000009892006

若有收获,就点个赞吧
0 人点赞
