一、安装ifconfig
命令:yum search ifconfig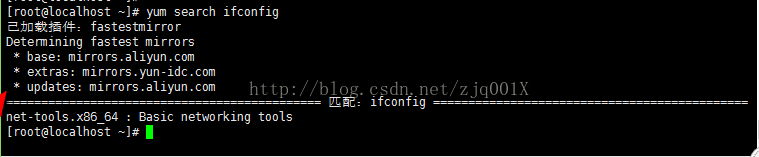
通过yum search 这个命令我们发现ifconfig这个命令是在net-tools.x86_64这个包里
命令:yum install net-tools.x86_64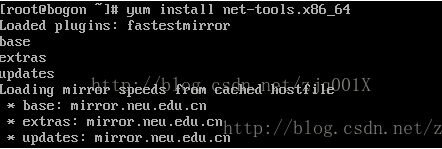
安装完成后,再次使用ifconfig -a命令就可以查看到所有的网卡了。
二、更改ssh连接时长
编辑ssh配置文件:vim etc/ssh/sshd_config
ClientAliveInterval 60 #连接时长 60sClientAliveCountMax 3 #断开连接后重试次数
重启ssh服务
systemctl restart sshd
三、更换yum源
 使用之前请确保已经安装wget,如未安装请执行下面一条命令来安装
yum install -y wget

# 1.备份当前yum源(可选)
cd /etc/yum.repos.d/
cp ./CentOS-Base.repo ./CentOS-Base-repo.bak

# 2.使用wget下载阿里yum源repo文件
vim /etc/yum.repos.d/CentOS-Base.repo

# 3.清理默认缓存包
yum clean all

# 4.把下载下来的阿里云repo文件设置成为默认源
mv Centos-7.repo CentOS-Base.repo

# 5.生成阿里云yum源缓存并更新yum源
yum makecache
yum update
# CentOS-Base.repo
#
# The mirror system uses the connecting IP address of the client and the
# update status of each mirror to pick mirrors that are updated to and
# geographically close to the client. You should use this for CentOS updates
# unless you are manually picking other mirrors.
#
# If the mirrorlist= does not work for you, as a fall back you can try the
# remarked out baseurl= line instead.
#
#
 [base]
name=CentOS-$releasever - Base
baseurl=https://mirrors.tuna.tsinghua.edu.cn/centos/$releasever/os/$basearch/
#mirrorlist=http://mirrorlist.centos.org/?release=$releasever&arch=$basearch&repo=os
gpgcheck=1
gpgkey=file:///etc/pki/rpm-gpg/RPM-GPG-KEY-CentOS-7

#released updates
[updates]
name=CentOS-$releasever - Updates
baseurl=https://mirrors.tuna.tsinghua.edu.cn/centos/$releasever/updates/$basearch/
#mirrorlist=http://mirrorlist.centos.org/?release=$releasever&arch=$basearch&repo=updates
gpgcheck=1
gpgkey=file:///etc/pki/rpm-gpg/RPM-GPG-KEY-CentOS-7

#additional packages that may be useful
[extras]
name=CentOS-$releasever - Extras
baseurl=https://mirrors.tuna.tsinghua.edu.cn/centos/$releasever/extras/$basearch/
#mirrorlist=http://mirrorlist.centos.org/?release=$releasever&arch=$basearch&repo=extras
gpgcheck=1
gpgkey=file:///etc/pki/rpm-gpg/RPM-GPG-KEY-CentOS-7

#additional packages that extend functionality of existing packages
[centosplus]
name=CentOS-$releasever - Plus
baseurl=https://mirrors.tuna.tsinghua.edu.cn/centos/$releasever/centosplus/$basearch/
#mirrorlist=http://mirrorlist.centos.org/?release=$releasever&arch=$basearch&repo=centosplus
gpgcheck=1
enabled=0
gpgkey=file:///etc/pki/rpm-gpg/RPM-GPG-KEY-CentOS-7
国内yum源推荐
网易163 yum源,安装方法查看:http://mirrors.163.com/.help/
中科大的 yum源,安装方法查看:https://lug.ustc.edu.cn/wiki/mirrors/help
sohu的 yum源,安装方法查看: http://mirrors.sohu.com/help/
阿里云的 yum源,安装方法查看: https://opsx.alibaba.com/mirror
清华大学的 yum源,安装方法查看: https://mirrors.tuna.tsinghua.edu.cn/
浙江大学的 yum源,安装方法查看: http://mirrors.zju.edu.cn/
中国科技大学yum源,安装方法查看: http://centos.ustc.edu.cn/
四、安装依赖
安装依赖包
yum install -y yum-utils device-mapper-persistent-data lvm2

设置docker的yum源
yum-config-manager --add-repo https://download.docker.com/linux/centos/docker-ce.repo
#清华源
yum-config-manager --add-repo http://mirrors.aliyun.com/docker-ce/linux/centos/docker-ce.repo

查询及安装docker
docker CE(社区版) 和docker EE(企业版)
yum list docker-ce --showduplicates | sort -r
yum install docker-ce-18.03.1.ce-1.el7.centos.x86_64

检查是否安装成功
docker version

启动docker并加入开机启动
systemctl start docker    # 启动
systemctl enable docker      # 加入开机启动
ps -ef | grep docker
netstat -autnlp

若有收获,就点个赞吧
0 人点赞
