- 检查vue的版本
- 如果使用的是vue-cli3,需要先行安装@vue/cli-init以便使用vue-cli 2.x版本语法:
- 开始创建vue的开发模板
- 创建完成后进入项目目录,安装相关依赖 (cnpm install),并运行(npm run dev)测试项目是否成功运行。
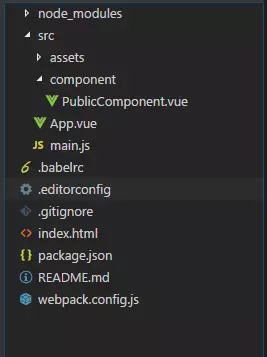
- 在src目录下新建文件夹(名字随意),并新建一个.vue文件,图示如下:
- 文件代码:
- 在组件平级目录下新增index.js文件
- 修改package.json等配置文件
- webpack.config.js文件配置,主要修改入口(entry)及出口信息(output):
- 以上步骤完成后,我们可以进行打包测试了:
- 注册npm账号
- 注册成功后:
- 发布成功后,你的注册邮箱会受到来自npm的邮件,提示你的npm包已经成功发布。这时候我们可以去npm与cnpm搜索上传的包:
- 使用该组件
检查vue的版本
如果使用的是vue-cli3,需要先行安装@vue/cli-init以便使用vue-cli 2.x版本语法:
npm install -g @vue/cli-init //全局安装@vue/cli-init
开始创建vue的开发模板
vue init webpack-simple public-element-prompt-component //创建webpack-simple模板项目

创建完成后进入项目目录,安装相关依赖 (cnpm install),并运行(npm run dev)测试项目是否成功运行。

在src目录下新建文件夹(名字随意),并新建一个.vue文件,图示如下:
文件代码:
<template><div class="PublicComponent"></div></template><script>export default {name: 'PublicComponent',data() {return {}},props:{msgConfig:Object,confirmConfig:Object,promptConfig:Object},watch: {msgConfig: function (val, oldVal) {if (val != oldVal) {this.showMassage(val);}},confirmConfig: function (val, oldVal) {if (val != oldVal) {this.showConfirmModal(val);}},promptConfig: function (val, oldVal) {if (val != oldVal) {this.showPromptModal(val);}}},methods: {showMassage(config) {this.$message(config);},showConfirmModal(config) {this.$confirm(config.message, config.title, config.options ? config.options : {}).then(config.yesCallback).catch(config.cancelCallback ? config.cancelCallback : () => { });},showPromptModal(config) {this.$prompt(config.message, config.title, config.options ? config.options : {}).then(config.yesCallback).catch(config.cancelCallback ? config.cancelCallback : () => { });}}}</script>
在组件平级目录下新增index.js文件
import PublicComponent from './PublicComponent.vue'// Declare install function executed by Vue.use()export function install(Vue) {if (install.installed) return;install.installed = true;Vue.component('PublicComponent', PublicComponent);}// Create module definition for Vue.use()const plugin = {install,};// Auto-install when vue is found (eg. in browser via <script> tag)let GlobalVue = null;if (typeof window !== 'undefined') {GlobalVue = window.Vue;} else if (typeof global !== 'undefined') {GlobalVue = global.Vue;}if (GlobalVue) {GlobalVue.use(plugin);}export default PublicComponent;
修改package.json等配置文件

webpack.config.js文件配置,主要修改入口(entry)及出口信息(output):
···module.exports = {// entry: './src/main.js',entry: './src/component/index.js',output: {path: path.resolve(__dirname, './dist'),publicPath: '/dist/',// filename: 'build.js'filename: 'public-component.js',//与package.json中main相对应library: 'Public-component',libraryTarget: 'umd',umdNamedDefine: true}...}
以上步骤完成后,我们可以进行打包测试了:
npm run build

注册npm账号
https://www.npmjs.com/?track=newUserCreated
姓名:npmusernameguan
密码:123456guanxindi
注册成功后:
npm login //登录npm,需要正确填写用户名、密码及邮箱npm publish //发布到npm

发布成功后,你的注册邮箱会受到来自npm的邮件,提示你的npm包已经成功发布。这时候我们可以去npm与cnpm搜索上传的包:
使用该组件
cnpm install public-element-prompt-component --save-dev //安装发布的npm包
mian.js:
import Vue from 'vue'import App from './App.vue'import { Button, Message, MessageBox } from 'element-ui';Vue.use(Button);Vue.prototype.$message = Message;Vue.prototype.$confirm = MessageBox.confirm;Vue.prototype.$prompt = MessageBox.prompt;Vue.config.productionTip = falsenew Vue({render: h => h(App),}).$mount('#app')
App.vue代码如下:
<template><div class="hello"><el-button @click="showComponent" type="danger" plain>删除</el-button><publicComponent :msgConfig="publicComponentObj.msgConfig" :confirmConfig="publicComponentObj.confirmConfig"></publicComponent></div></template><script>import PublicComponent from 'public-element-prompt-component'export default {name: 'HelloWorld',props: {msg: String},data() {return {publicComponentObj: {confirmConfig: {},msgConfig: {},}}},methods: {showComponent() {const tempObj = {message: `确认移出选中成员吗?`,title: '提示',options: {type: 'warning'},yesCallback: () => {const tempMsgObj = {message: '删除成功',type: 'success',showClose: true,duration: 3000}this.publicComponentObj.msgConfig = tempMsgObj;}}this.publicComponentObj.confirmConfig = tempObj;}},components: {PublicComponent}}</script><!-- Add "scoped" attribute to limit CSS to this component only --><style scoped></style>

若有收获,就点个赞吧
0 人点赞
