uniPush
需要拷贝的文件
需要引入工程的jar/aar文件
需要将以下jar/aar文件放到工程的libs目录下
| 路径 | 文件 |
|---|---|
| SDK\libs | aps-release.aar, aps-unipush-release.aar, gtc-3.1.1.0.aar, gtsdk-3.2.0.0.aar, hwp-3.0.1.aar, mzp-3.0.2.aar, oppo-3.0.3.aar, vivo-3.0.3.aar, xmp-3.0.2.aar, push-3.0.0.aar(HBuilderX 3.3.13及以上), push-internal-4.1.4.aar(HBuilderX 3.3.13及以上) |
gradle配置
打开build.gradle,在defaultConfig添加manifestPlaceholders节点,如下图所示,将io.dcloud.HBuilder替换成自己的应用包名,将appid等信息替换成申请之后的appid等。
应用的app id/app key等信息,从开发者后台->unipush->配置管理->应用管理 界面查看 注意:HBuilderX3.1.15之后需要添加GETUI_APPID属性
android {defaultConfig {manifestPlaceholders = ["GETUI_APPID": "unipush的appid","plus.unipush.appid" : "unipush的appid","plus.unipush.appkey" : "unipush的key","plus.unipush.appsecret": "unipush的secret","apk.applicationId":"io.dcloud.HBuilder"]}}
AndroidManifest.xml配置
在io.dcloud.PandoraEntry的Activity标签下追加intent-filter
<intent-filter><action android:name="android.intent.action.VIEW"/><category android:name="android.intent.category.DEFAULT" /><category android:name="android.intent.category.BROWSABLE" /><data android:host="io.dcloud.unipush" android:path="/" android:scheme="unipush" /></intent-filter>
厂商配置
添加下列内容到androidmanifest.xml中(未申请平台无需添加)
<!--小米厂商配置——开始--><meta-dataandroid:name="MIPUSH_APPID"android:value="XM_${XIAOMI_APP_ID}" /><meta-dataandroid:name="MIPUSH_APPKEY"android:value="XM_${XIAOMI_APP_KEY}" /><!--小米厂商配置——结束--><!--魅族厂商配置——开始--><meta-dataandroid:name="MEIZUPUSH_APPID"android:value="MZ_${MEIZU_APP_ID}" /><meta-dataandroid:name="MEIZUPUSH_APPKEY"android:value="MZ_${MEIZU_APP_KEY}" /><!--魅族厂商配置——结束--><!--华为厂商配置——开始--><meta-dataandroid:name="com.huawei.hms.client.appid"android:value="${HUAWEI_APP_ID}" /><!--华为厂商配置——结束--><!--OPPO厂商配置——开始--><meta-dataandroid:name="OPPOPUSH_APPKEY"android:value="OP_${OPPO_APP_KEY}" /><meta-dataandroid:name="OPPOPUSH_APPSECRET"android:value="OP_${OPPO_APP_SECRET}" /><!--OPPO厂商配置——结束--><!--VIVO厂商配置——开始--><meta-dataandroid:name="com.vivo.push.app_id"android:value="${VIVO_APP_ID}" /><meta-dataandroid:name="com.vivo.push.api_key"android:value="${VIVO_APP_KEY}" /><!--VIVO厂商配置——结束-->
修改build.gradle,添加对应平台申请的appkey或appid(键名必须统一,如XIAOMI_APP_ID必须同时存在于build.gradle文件和Androidmanifest.xml文件中),如下所示:
android {defaultConfig {manifestPlaceholders = ["XIAOMI_APP_ID":"ccccccccc","XIAOMI_APP_KEY":"aaaaaaaaaaaaaa"]}}
dcloud_properties.xml配置
在properties中添加如下配置,features节点与services节点必须同时配置!
<properties><features><feature name="Push" value="io.dcloud.feature.aps.APSFeatureImpl"><module name="unipush" value="io.dcloud.feature.unipush.GTPushService"/></feature></features><services><service name="push" value="io.dcloud.feature.aps.APSFeatureImpl"/></services></properties>
其余配置
OPPO推送
oppo集成uniPush时需在Androidmanifest.xml的入口activity中添加如下配置:
<activityandroid:name="io.dcloud.PandoraEntry"><intent-filter><action android:name="android.intent.action.MAIN" /><category android:name="android.intent.category.LAUNCHER" /></intent-filter>/*oppo配置开始*/<intent-filter><action android:name="android.intent.action.oppopush" /><category android:name="android.intent.category.DEFAULT" /></intent-filter>/*oppo配置结束*/</activity>
当添加了push-3.0.0.aar库时
在app目录下的build.gradle内添加
dependencies {implementation 'com.google.code.gson:gson:2.6.2'implementation 'commons-codec:commons-codec:1.6'implementation 'androidx.annotation:annotation:1.1.0'}
华为推送
HBuilder X 3.0.7及以上版本uniPush更新了华为推送,新版本需要添加如下配置
项目根目录下的build.gradle
打开项目根目录下的build.gradle
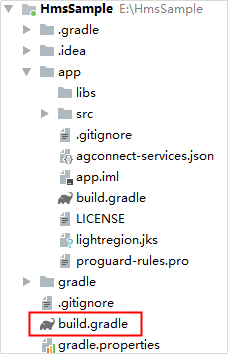
需要在项目根目录下的build.gradle下添加华为推送的仓库地址,如下:
buildscript {repositories {jcenter()google()// 配置HMS Core SDK的Maven仓地址。maven {url 'https://developer.huawei.com/repo/'}}dependencies {classpath 'com.android.tools.build:gradle:3.4.1'// 增加agcp配置。classpath 'com.huawei.agconnect:agcp:1.4.1.300'}}allprojects {repositories {jcenter()google()// 配置HMS Core SDK的Maven仓地址。maven {url 'https://developer.huawei.com/repo/'}}}
项目应用下的build.gradle
打开需要集成华为推送的项目的build.gradle
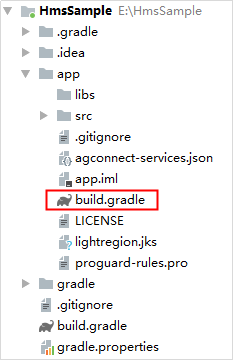
在文件头apply plugin: ‘com.android.application’下一行添加如下配置。
apply plugin: 'com.android.application'apply plugin: 'com.huawei.agconnect'
在“dependencies”中添加如下编译依赖
注意:推送库版本号与uniPush对应,不能随便修改。
dependencies {implementation 'com.huawei.hms:push:5.0.2.300'}
添加添加华为推送的配置文件
登录华为的AppGallery Connect网站,找到需要集成华为推送的应用,在“项目设置 > 常规”页面的“应用”区域,点击“agconnect-services.json”下载配置文件。
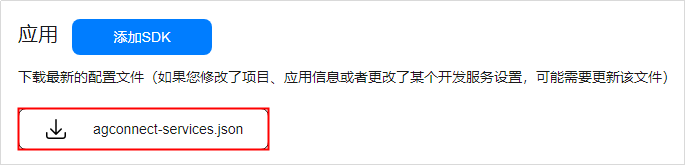
将“agconnect-services.json”文件拷贝到应用级根目录下。

个推推送
需要拷贝的文件
需要引入工程的jar/aar文件
需要将以下jar/aar文件放到工程的libs目录下
| 路径 | 文件 |
|---|---|
| SDK\libs | aps-release.aar, aps-igexin-release.aar |
Androidmainfest.xml文件需要修改的项
需要在application节点前添加权限
因Android L(android 5.0)系统自身限制,多个应用安装时,如果拥有同一个Service权限,会导致权限冲突,只能安装一个带有此权限的应用。对此,个推SDK在声明自定义权限时需要添加apk的包名以避免和其他使用个推的应用冲突。
<uses-permission android:name="android.permission.INTERNET"/><uses-permission android:name="android.permission.READ_PHONE_STATE"/><uses-permission android:name="android.permission.ACCESS_NETWORK_STATE"/><uses-permission android:name="android.permission.WAKE_LOCK"/><uses-permission android:name="android.permission.RECEIVE_BOOT_COMPLETED"/><uses-permission android:name="android.permission.WRITE_EXTERNAL_STORAGE"/><uses-permission android:name="android.permission.VIBRATE"/><uses-permission android:name="android.permission.ACCESS_WIFI_STATE"/><uses-permission android:name="android.permission.CALL_PHONE"/><uses-permission android:name="android.permission.SYSTEM_ALERT_WINDOW"/><uses-permission android:name="getui.permission.GetuiService.$你的APK包名"/><permission android:name="getui.permission.GetuiService.$你的APK包名" android:protectionLevel="normal"/>
<application>节点下配置如下代码
<meta-data android:name="PUSH_APPID" android:value="$你自己的APPID"/><meta-data android:name="PUSH_APPKEY" android:value="$你的appkey"/><meta-data android:name="PUSH_APPSECRET" android:value="$你的appsecret"/><serviceandroid:name="com.igexin.sdk.PushService"android:exported="true"android:label="NotificationCenter"android:process=":pushservice"><intent-filter><action android:name="com.igexin.sdk.action.service.message"/></intent-filter></service><receiver android:name="com.igexin.sdk.PushReceiver"><intent-filter><action android:name="android.intent.action.BOOT_COMPLETED"/><action android:name="android.net.conn.CONNECTIVITY_CHANGE"/><action android:name="android.intent.action.USER_PRESENT"/><action android:name="com.igexin.sdk.action.refreshls"/><action android:name="android.intent.action.MEDIA_MOUNTED"/><action android:name="android.intent.action.ACTION_POWER_CONNECTED"/><action android:name="android.intent.action.ACTION_POWER_DISCONNECTED"/></intent-filter></receiver><activityandroid:name="com.igexin.sdk.PushActivity"android:excludeFromRecents="true"android:exported="false"android:process=":pushservice"android:taskAffinity="com.igexin.sdk.PushActivityTask"android:theme="@android:style/Theme.Translucent.NoTitleBar"/><activityandroid:name="com.igexin.sdk.GActivity"android:excludeFromRecents="true"android:exported="true"android:process=":pushservice"android:taskAffinity="com.igexin.sdk.PushActivityTask"android:theme="@android:style/Theme.Translucent.NoTitleBar"/><receiver android:name="io.dcloud.feature.apsGt.GTNotificationReceiver"android:exported="false"><intent-filter><action android:name="android.intent.action.BOOT_COMPLETED"/><action android:name="填写APK的包名.__CREATE_NOTIFICATION"/><action android:name="填写APK的包名.__REMOVE_NOTIFICATION"/><action android:name="填写APK的包名.__CLEAR_NOTIFICATION"/><action android:name="填写APK的包名.__CLILK_NOTIFICATION"/></intent-filter></receiver><serviceandroid:name="io.dcloud.feature.apsGt.GTNormalIntentService"/>
dcloud_properties.xml需要添加如下代码
dcloud_properties.xml文件在assets/data目录下
features节点下添加
<feature name="Push" value="io.dcloud.feature.aps.APSFeatureImpl"><module name="igexin" value="io.dcloud.feature.apsGt.GTPushService"/></feature>
services节点下添加
<servicename="push"value="io.dcloud.feature.aps.APSFeatureImpl" />
谷歌推送
需要拷贝的文件
需要引入工程的jar/aar文件
需要将以下jar/aar文件放到工程的libs目录下
| 路径 | 文件 |
|---|---|
| SDK\libs | aps-release.aar, aps-unipush-gp-release.aar, aps-igexin-fcm-release.aar |
注意:要想使用谷歌推送必须使用aps-unipush-gp-release.aar
配置指南
gradle配置
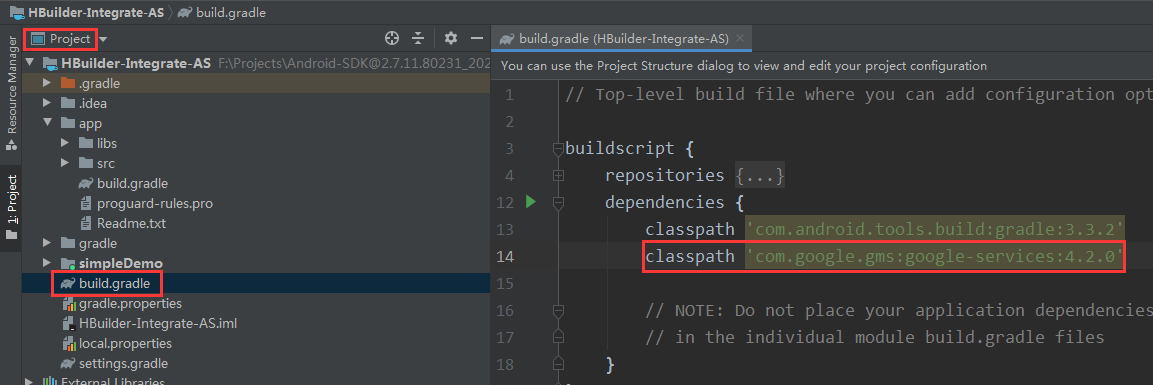
project级的build.gradle配置
在project级的build.gradle的buildscript->dependencies添加下面内容
buildscript {dependencies {classpath 'com.google.gms:google-services:4.2.0'}}
如下图:
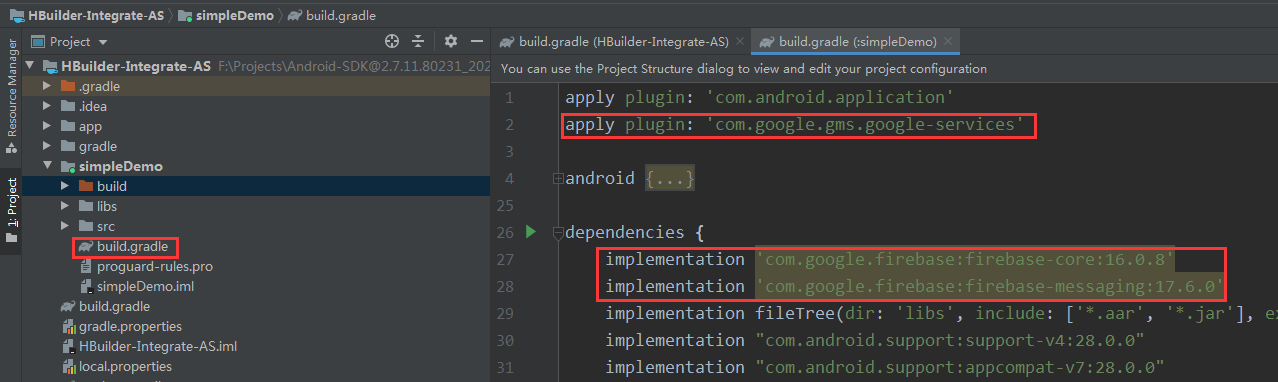
app级的build.gradle配置
- 在build.gradle最前面添加下面内容
apply plugin: 'com.google.gms.google-services'
- 在dependencies节点下添加下面内容
implementation 'com.google.firebase:firebase-core:16.0.8'implementation 'com.google.firebase:firebase-messaging:17.6.0'
如下图
- 添加google-services.json
在创建好Firebase应用时,会有自动弹框指引下载googie-services.json,请根据指引下载google-services.json文件,并根据官网指引将google-services.json文件放在对应的文件夹下, 然后点击continue.
uniPush配置
GooglePlay渠道配置
aar 引用
SDK提供aps-igexin-gp-release.aar和aps-unipush-gp-release.aar,打包应用上传google play时,替换原aps-igexin-release.aar或aps-unipush-release.aar。注意,google play版SDK与原版SDK存在冲突,所以使用时只能保留其中一个。
AndroidManifest.xml配置
- google play版uniPush配置
在AndroidManifest.xml中添加如下配置。
<activityandroid:name="com.igexin.sdk.PrivacyActivity"android:exported="false"/>
- google play版个推配置
在原个推离线配置基础上将如下配置添加到AndroidManifest.xml中。
<serviceandroid:name="io.dcloud.feature.apsGt.GTPushDevService"android:exported="true"android:label="PushService"android:process=":pushservice" /><activityandroid:name="com.igexin.sdk.PrivacyActivity"android:exported="false"/>
其余配置
FCM
Gradle配置
需要在project级的build.gradle设置
buildscript {repositories {google() // Google's Maven repository}dependencies {// ...classpath 'com.google.gms:google-services:4.2.0' // Google Services plugin}}allprojects {// ...repositories {google() // Google's Maven repository// ...}}
app级的build.gradle设置
在build.gradle最前面添加下面内容
apply plugin: 'com.google.gms.google-services' // Google Services plugin
在dependencies下添加下面内容
dependencies {implementation 'com.google.firebase:firebase-messaging:23.0.0'}
Androidmainfest.xml文件需要修改的项
application节点内配置如下代码
<application>//...<serviceandroid:name="io.dcloud.feature.fcm.FCMVendorService"android:exported="false"><intent-filter><action android:name="com.google.firebase.MESSAGING_EVENT" /></intent-filter></service><meta-dataandroid:name="com.google.firebase.messaging.default_notification_channel_id"android:value="%YOUR-CHANNEL-ID%" /><meta-dataandroid:name="com.google.firebase.messaging.default_notification_icon"android:resource="%NOTIFICATION_ICON%" />//...</application>
YOUR-CHANNEL-ID设置为您自定义的通知的channelId ,NOTIFICATION_ICON设置为推送消息的图片
需要拷贝的文件
添加google-services.json
在创建好Firebase应用时,会有自动弹框指引下载googie-services.json,请根据指引下载google-services.json文件,并根据官网指引将google-services.json文件放在对应的文件夹下, 然后点击continue.
需要引入工程的aar文件
需要将以下aar文件放到工程的libs目录下
| 路径 | 文件 |
|---|---|
| SDK\libs | aps-release.aar,aps-fcm-release.aar |
dcloud_properties.xml需要添加如下代码
dcloud_properties.xml文件在assets/data目录下
<feature name="Push" value="io.dcloud.feature.aps.APSFeatureImpl"><module name="fcm" value="io.dcloud.feature.fcm.FCMPushService" /></feature>

若有收获,就点个赞吧
0 人点赞
