MySQL:5.7.36配置文件:/etc/my.cnf数据存储:/var/lib/mysql命令文件:/usr/bin和/usr/sbin
一. 安装mysql
运行以下命令更新YUM源。
rpm -Uvh http://dev.mysql.com/get/mysql57-community-release-el7-9.noarch.rpm
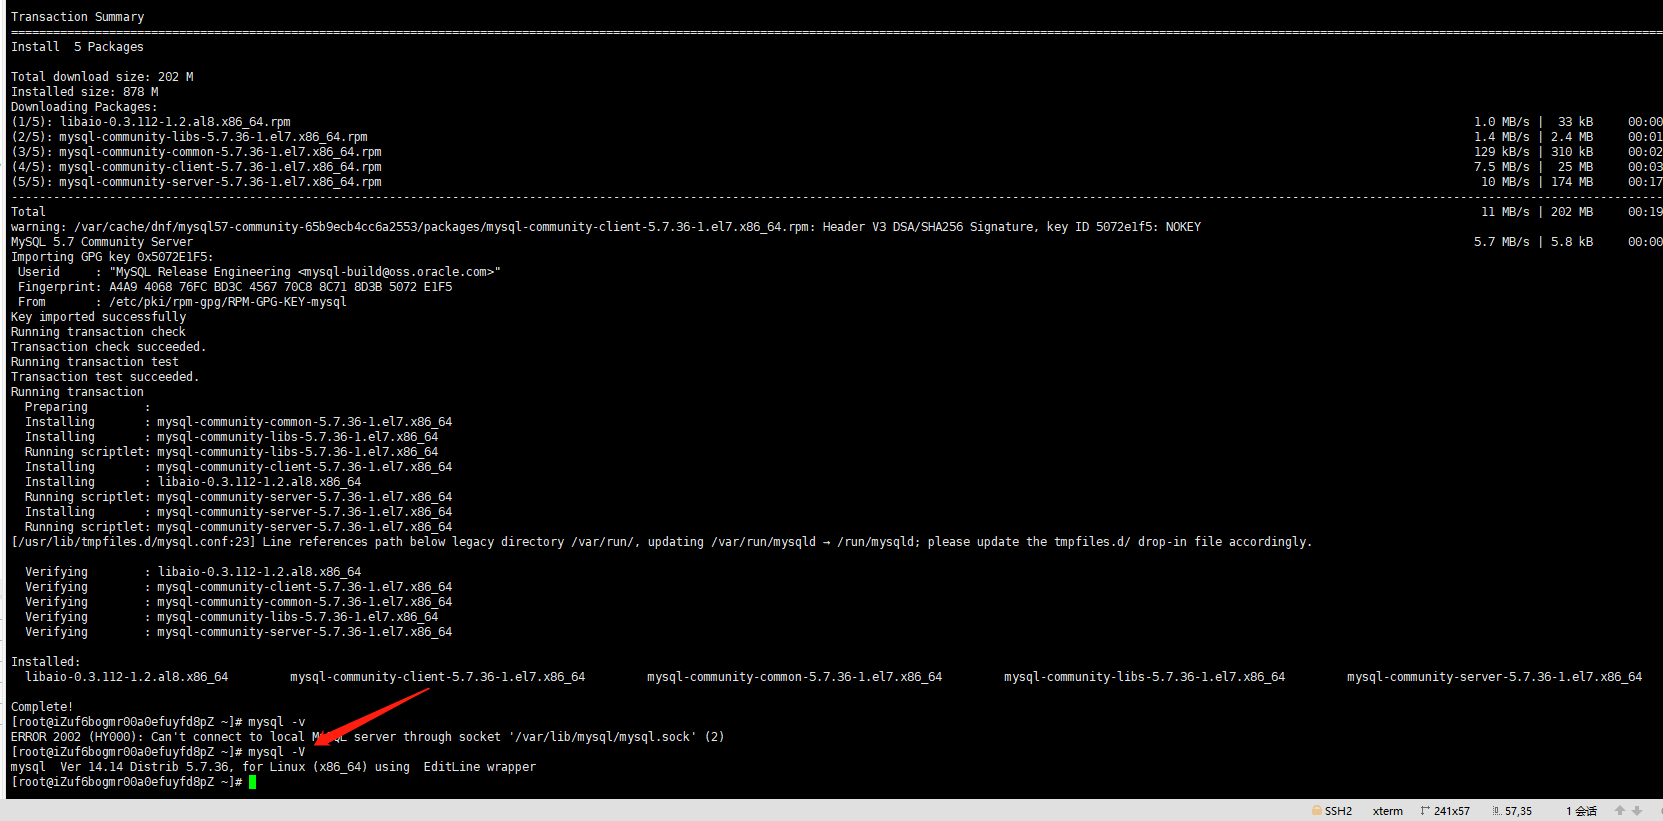
运行以下命令安装MySQL。
yum -y install mysql-community-server
运行以下命令查看MySQL版本号。 ```java mysql -V
返回结果如下,表示MySQL安装成功。
mysql Ver 14.14 Distrib 5.7.31, for Linux (x86_64) using EditLine wrapper
<a name="rPKSB"></a>## 二.配置MySQL1. 启动MySQL服务```javasystemctl start mysqld
设置MySQL服务开机自启动
systemctl enable mysqld
运行以下命令查看/var/log/mysqld.log文件,获取并记录root用户的初始密码 ```java grep ‘temporary password’ /var/log/mysqld.log
执行命令结果示例如下。 2021-11-09T11:30:57.823935Z 1 [Note] A temporary password is generated for root@localhost: +nLl4JF4Jdg1
4. 运行下列命令对MySQL进行安全性配置。```javamysql_secure_installation
重置root用户密码
Enter password for user root: #输入上一步获取的root用户初始密码The 'validate_password' plugin is installed on the server.The subsequent steps will run with the existing configuration of the plugin.Using existing password for root.Estimated strength of the password: 100Change the password for root ? ((Press y|Y for Yes, any other key for No) : Y #是否更改root用户密码,输入YNew password: #输入新密码,长度为8至30个字符,必须同时包含大小写英文字母、数字和特殊符号。特殊符号可以是()` ~!@#$%^&*-+=|{}[]:;‘<>,.?/Re-enter new password: #再次输入新密码Estimated strength of the password: 100Do you wish to continue with the password provided?(Press y|Y for Yes, any other key for No) : Y #是否继续操作,输入Y
删除匿名用户账号。
By default, a MySQL installation has an anonymous user, allowing anyone to log into MySQL without having to have a user account created for them. This is intended only for testing, and to make the installation go a bit smoother. You should remove them before moving into a production environment.Remove anonymous users? (Press y|Y for Yes, any other key for No) : Y #是否删除匿名用户,输入YSuccess.
禁止root账号远程登录。
Disallow root login remotely? (Press y|Y for Yes, any other key for No) : Y #禁止root远程登录,输入YSuccess.
删除test库以及对test库的访问权限。
Remove test database and access to it? (Press y|Y for Yes, any other key for No) : Y #是否删除test库和对它的访问权限,输入Y- Dropping test database...Success.
重新加载授权表。
Reload privilege tables now? (Press y|Y for Yes, any other key for No) : Y #是否重新加载授权表,输入YSuccess.All done!
三.远程访问mysql 数据库
创建远程登录mysql 账号
运行以下命令后,输入root用户的密码登录MySQL。
mysql -uroot -p
依次运行以下命令创建远程登录MySQL的账号。示例账号为dms、密码为123456
mysql> grant all on *.* to 'ml'@'%' IDENTIFIED BY 'Ml123456..'; #使用root替换ml,可设置为允许root账号远程登录。mysql> flush privileges;
登录数据库
阿里云数据库登录需要先设置安全组策略

