首先我们在安卓里面发送网络请求,就要添加网络权限
在安卓的manifest文件里面添加权限
还有就是要知道 安卓开发的两大原则 :
- 只能在主线程里面进行UI操作
- 在子线程里面进行耗时操作(网络请求/传输文件等)
1 HttpURLConnection发送http请求
界面:
我们创建一个按钮,和一个 TextView
点击按钮发送http请求,将服务器返回来的数据,放到文件TextView里面。
<?xml version="1.0" encoding="utf-8"?><LinearLayout xmlns:android="http://schemas.android.com/apk/res/android"xmlns:app="http://schemas.android.com/apk/res-auto"xmlns:tools="http://schemas.android.com/tools"android:layout_width="match_parent"android:orientation="vertical"android:layout_height="match_parent"tools:context=".MainActivity"><Buttonandroid:id="@+id/Send_request"android:layout_width="match_parent"android:layout_height="50dp"android:text="http请求"/><ScrollViewandroid:layout_width="match_parent"android:layout_height="match_parent"><TextViewandroid:id="@+id/ResponseText"android:layout_width="match_parent"android:layout_height="wrap_content"/></ScrollView></LinearLayout>
1.1 发送get请求
后端程序
public class MainActivity extends AppCompatActivity {private Button bt;private TextView showResp;private String RESPONSE_MSG ;@Overrideprotected void onCreate(Bundle savedInstanceState) {super.onCreate(savedInstanceState);setContentView(R.layout.activity_main);//textViewshowResp = findViewById(R.id.ResponseText);bt = findViewById(R.id.Send_request);bt.setOnClickListener(new View.OnClickListener() {@Overridepublic void onClick(View view) {//点击以后发送http请求// Toast.makeText(MainActivity.this, "rrrrr", Toast.LENGTH_SHORT).show();sendRequestWithHttpUrlConnection();}});}/*** 使用 httpUrlConnection这对象* 发送http请求的一个方法 ,网络请求等一些耗时一定要放到 子线程里面进行*/private void sendRequestWithHttpUrlConnection() {//开启线程发送网络请求new Thread(new Runnable() {@Overridepublic void run() {HttpURLConnection connection = null;BufferedReader reader = null;try {//这里你可以设置为www.baidu.com 试试URL url = new URL("https://open.iot.10086.cn/studio/debug/api/application?version=1&action=QueryDeviceProperty&project_id=ZIVS7i&product_id=FkWRPqXmGF&device_name=CWBW_02");//这里还是要使用httpsconnection = (HttpURLConnection) url.openConnection();//设置请求方法 POST 或者GETconnection.setRequestMethod("GET");//在请求头里面设置数据 请求的同时将 这个键值对发送给服务器connection.setRequestProperty("Authorization","version=2020-05-29&res=userid%2F274573&et=1680617906&method=sha1&sign=aJq4RknOXahqFwgPvZUOYAg8cH4%3D");//设置连接超时时间connection.setConnectTimeout(8000); //ms//设置读取超时时间connection.setReadTimeout(8000);//获得输入流, 读取服务器返回来的数据InputStream in = connection.getInputStream();//输入流转为 高效流reader = new BufferedReader(new InputStreamReader(in));//转为字符StringBuilder reaponse = new StringBuilder();String line;while ((line = reader.readLine()) != null) {reaponse.append(line);}//给textvie设置数据RESPONSE_MSG = reaponse.toString() ;showResponse(RESPONSE_MSG);} catch (IOException e) {e.printStackTrace();} finally {//不管是否出现异常都释放资源if (reader != null) {try {reader.close();} catch (IOException e) {e.printStackTrace();}}if (connection != null) {connection.disconnect();}}}}).start(); //开启线程}//显示到textView 里面 ,但是现在是在子线程里面,不能在子线程里面更新UI 所以我们要转到UI线程private void showResponse(final String reaponse){runOnUiThread(new Runnable() {@Overridepublic void run () {showResp.setText(reaponse);}});}}
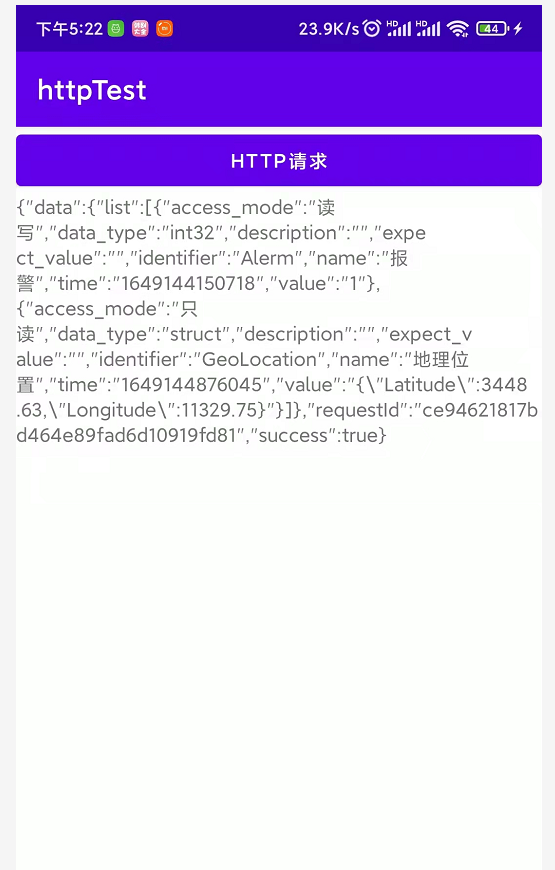
 效果图
效果图
1.2 发送post请求
其实学习计算机的我们知道 请求网络的方法 有6 7 种的但是最长使用的就是 post和get请求。
二者的区别就是,get方法在向服务器传递数据的时候是用明文显示的,可以直接将参数放到 url里面。
就像是上面这样
从 ? 开始添加参数,不同的参数之间用&符号连接
https://open.iot.10086.cn/studio/debug/api/application?version=1&action=QueryDeviceProperty
post在想服务器发送数据的时候是不能将数据放到url里面的。
安卓里面提交数据给服务器的时候,将http里面将请求方法改为 post, 并且在获取输入流之前将数据给写入就可以了。数据与数据之间也是用&符号连接。
connection.setRequestMethod("POST");DataOutputStream outputStream = new DataOutputStream(connection.getOutputStream());outputStream.writeBytes("username=admine&password=123456");//获得输入流, 读取服务器返回来的数据InputStream in = connection.getInputStream();//输入流转为 高效流reader = new BufferedReader(new InputStreamReader(in));//转为字符StringBuilder reaponse = new StringBuilder();while ((line = reader.readLine()) != null) {reaponse.append(line);}//给textvie设置数据RESPONSE_MSG = reaponse.toString() ;
2 OKHttp发送http请求
使用 OKHttp对象首先我们要先在app:gradle 里面添加Okhttp的包
implementation ‘com.squareup.okhttp3:okhttp:3.4.1’
2.1 发送get请求
前面的话
首先我们要创建一个OkHttpClient的对象
OkHttpClient client = new OkHttpClient();
如果我们想发送一个http请求要 创建一个 请求对象 Request对象
Request request = new Request.Builder().build();
当然现在这个对象是空的,我们要在他build之前丰富这个对象,比如说要设置目标网络的地址
Request request = new Request.Builder()//创建请求
.url(“https://www.baidu.com“)
.build();
我们还可以给这个请求添加请求头
Request request = new Request.Builder()//创建请求
.url(“https://www.baidu.com“)
.header(“键的名字”,”值”)
.build();
然后调起客户端对象,给请求的网址“打电话call“,获取服务器的数据
Response response = okHttpClient.newCall(request).execute();
response就是服务器返回来的数据,要把他转为字符串
String responsedata = response.body().string();
代码的实现
前端界面代码
<?xml version="1.0" encoding="utf-8"?><LinearLayout xmlns:android="http://schemas.android.com/apk/res/android"xmlns:app="http://schemas.android.com/apk/res-auto"xmlns:tools="http://schemas.android.com/tools"android:layout_width="match_parent"android:orientation="vertical"android:layout_height="match_parent"tools:context=".MainActivity"><Buttonandroid:id="@+id/Send_Http"android:layout_width="match_parent"android:layout_height="wrap_content"android:text="使用OKHttp发送http请求"/><ScrollViewandroid:layout_width="match_parent"android:layout_height="match_parent"><TextViewandroid:id="@+id/ResponseText"android:layout_width="match_parent"android:layout_height="wrap_content"/></ScrollView></LinearLayout>
活动的代码
public class MainActivity2 extends AppCompatActivity {private TextView textView ;@Overrideprotected void onCreate(Bundle savedInstanceState) {super.onCreate(savedInstanceState);setContentView(R.layout.activity_main2);//我们要使用过OKHttp首先就是要 在app.gradle里面引入一个包 implementation 'com.squareup.okhttp3:okhttp:3.4.1'textView = findViewById(R.id.ResponseText);Button sendOKHTTP = findViewById(R.id.Send_Http);sendOKHTTP.setOnClickListener(new View.OnClickListener() {@Overridepublic void onClick(View view) {sendHttpWithOKHttp();}});}//发送http请求的方法private void sendHttpWithOKHttp(){//网络请求放在一个新的线程里面 只能在子线程里面发送网络请求new Thread(new Runnable() {@Overridepublic void run() {//得到Okhttp对象OkHttpClient client = new OkHttpClient();//创建请求对象Request request = new Request.Builder().url("https://open.iot.10086.cn/studio/debug/api/application?version=1&action=QueryDeviceProperty&project_id=ZIVS7i&product_id=FkWRPqXmGF&device_name=CWBW_02").header("authorization","version=2020-05-29&res=userid%2F274573&et=1680617906&method=sha1&sign=aJq4RknOXahqFwgPvZUOYAg8cH4%3D").build();// 调用客户端,给服务器”打电话“ 接收服务器返回来的数据String resp = "" ;try {Response response = client.newCall(request).execute();//回来的数据转为字符串resp = response.body().string();} catch (IOException e) {e.printStackTrace();}//只能在主线程里面更新UIString finalResp = resp;runOnUiThread(new Runnable() {@Overridepublic void run() {textView.setText(finalResp);}});}}).start();}}
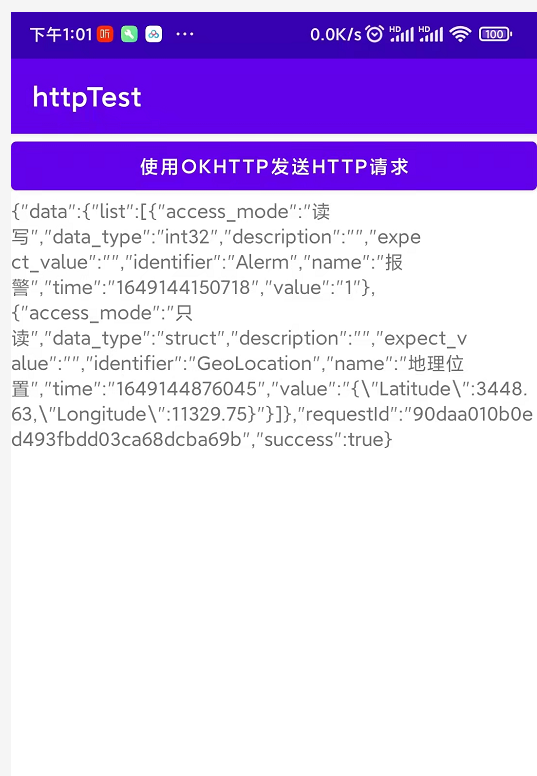
效果展示
2.2 发送POST请求
如果想发送一个post请求。我们要先构建一个RequestBody对象来存放待提交的数据。
RequestBody requestBody = new FormBody.Builder().add("name","admine").add("password","123456").build();//然后在request.builder里面调用一下postRequest request1 = new Request.Builder().url("https://www.baidu.com").post(requestBody).build();//最后调用 OkHttpClient 对象给 url地址打电话 得到服务器返回的对象Response response2 = client.newCall(request1).execute();//报异常的话 try catch 一下就可以了
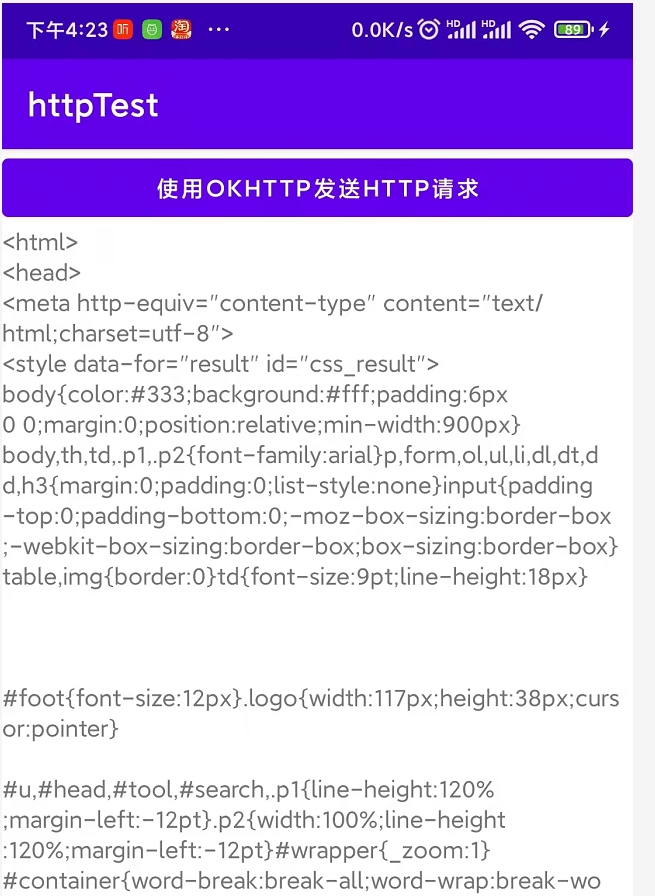
如下图所示
访问https://www.baidu.com
完整代码
public class MainActivity2 extends AppCompatActivity {private TextView textView ;@Overrideprotected void onCreate(Bundle savedInstanceState) {super.onCreate(savedInstanceState);setContentView(R.layout.activity_main2);//我们要使用过OKHttp首先就是要 在app.gradle里面引入一个包 implementation 'com.squareup.okhttp3:okhttp:3.4.1'textView = findViewById(R.id.ResponseText);Button sendOKHTTP = findViewById(R.id.Send_Http);sendOKHTTP.setOnClickListener(new View.OnClickListener() {@Overridepublic void onClick(View view) {sendHttpWithOKHttp();}});}//发送http请求的方法private void sendHttpWithOKHttp(){//网络请求放在一个新的线程里面 只能在子线程里面发送网络请求new Thread(new Runnable() {@Overridepublic void run() {//得到Okhttp对象OkHttpClient client = new OkHttpClient();// //创建请求对象// Request request = new Request.Builder()// .url("https://open.iot.10086.cn/studio/debug/api/application?version=1&action=QueryDeviceProperty&project_id=ZIVS7i&product_id=FkWRPqXmGF&device_name=CWBW_02")// .header("authorization","version=2020-05-29&res=userid%2F274573&et=1680617906&method=sha1&sign=aJq4RknOXahqFwgPvZUOYAg8cH4%3D")// .build();//使用post方式提交请求 并且携带参数RequestBody requestBody = new FormBody.Builder().add("name","admine").add("password","123456").build();//然后在request.builder里面调用一下postRequest request1 = new Request.Builder().url("https://www.baidu.com").post(requestBody).build();//最后调用 OkHttpClient 对象给 url地址打电话 得到服务器返回的对象//Response response2 = client.newCall(request1).execute(); //报异常的话 try catch 一下就可以了// 调用客户端,给服务器”打电话“ 接收服务器返回来的数据String resp = "" ;try {Response response = client.newCall(request1).execute();//回来的数据转为字符串resp = response.body().string();} catch (IOException e) {e.printStackTrace();}String finalResp = resp;runOnUiThread(new Runnable() {@Overridepublic void run() {textView.setText(finalResp);}});}}).start();}}
效果展示 这个就是访问百度返回来的一写数据
3 自己的思考
我们访问百度的网址可以得到数据的返回,我是学习后端的,我使用我的安卓代码,是不是就也可以发访问我本地的tomcat里面的web项目了呢??
因为tomcat里面的项目肯定是 局域网里面的项目,所以我们肯低要和tocmat在同一个局域网里面才可以得到tomcat里面的数据。。。

