1、springboot简介
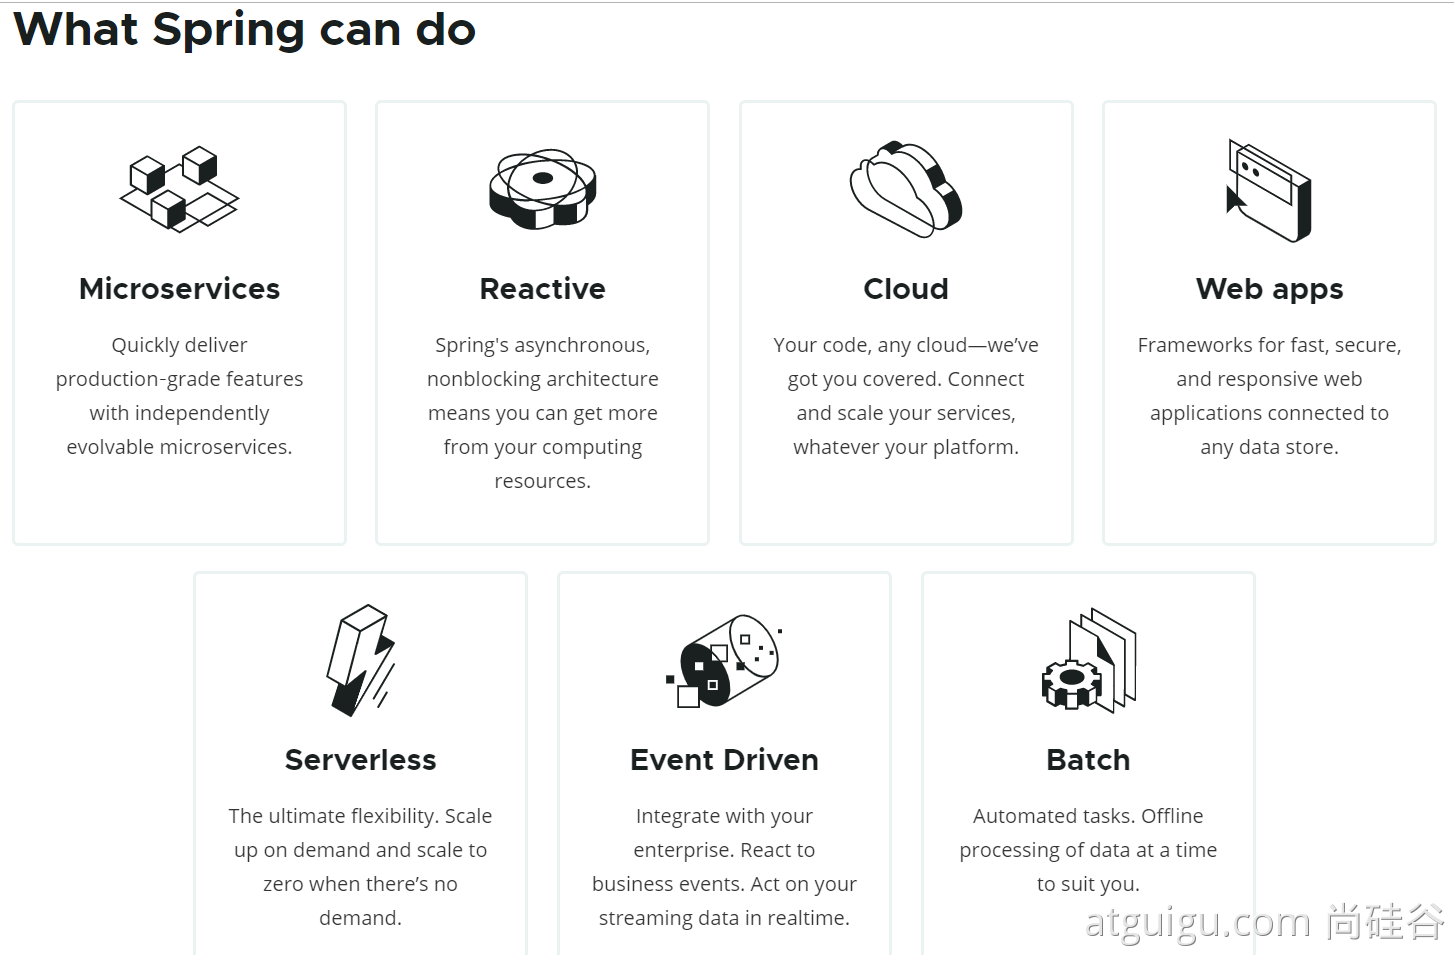
1.1、spring能做什么
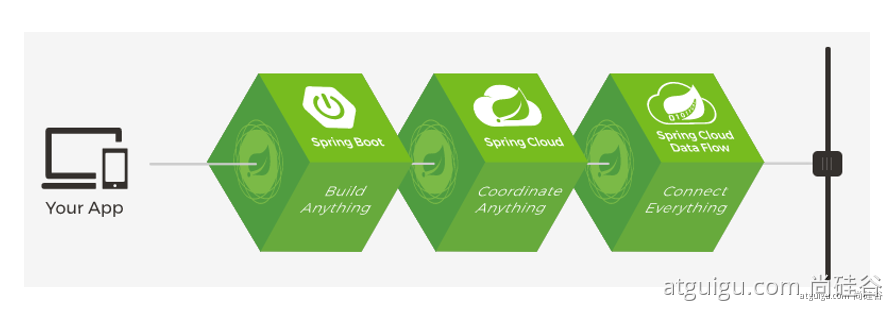
1.2、spring的生态
https://spring.io/projects/spring-boot覆盖了:web开发数据访问安全控制分布式消息服务移动开发批处理......
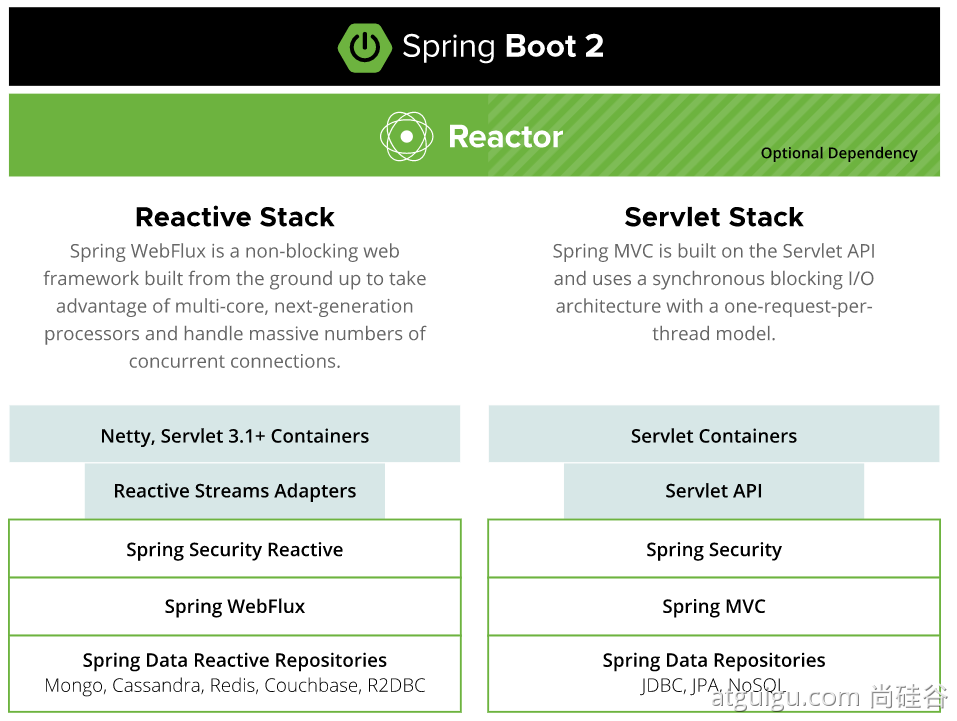
1.3、Spring5重大升级响应式编程
1.4.、SpringBoot优缺点
1、优点
● Create stand-alone Spring applications○ 创建独立Spring应用● Embed Tomcat, Jetty or Undertow directly (no need to deploy WAR files)○ 内嵌web服务器● Provide opinionated 'starter' dependencies to simplify your build configuration○ 自动starter依赖,简化构建配置● Automatically configure Spring and 3rd party libraries whenever possible○ 自动配置Spring以及第三方功能● Provide production-ready features such as metrics, health checks, and externalized configuration○ 提供生产级别的监控、健康检查及外部化配置● Absolutely no code generation and no requirement for XML configuration○ 无代码生成、无需编写XMLSpringBoot是整合Spring技术栈的一站式框架SpringBoot是简化Spring技术栈的快速开发脚手架
2、缺点
● 人称版本帝,迭代快,需要时刻关注变化● 封装太深,内部原理复杂,不容易精通
1.5、时代背景
1、微服务
● 微服务是一种架构风格● 一个应用拆分为一组小型服务● 每个服务运行在自己的进程内,也就是可独立部署和升级● 服务之间使用轻量级HTTP交互● 服务围绕业务功能拆分● 可以由全自动部署机制独立部署● 去中心化,服务自治。服务可以使用不同的语言、不同的存储技术
2、分布式
(1)分布式的困难● 远程调用● 服务发现● 负载均衡● 服务容错● 配置管理● 服务监控● 链路追踪● 日志管理● 任务调度● ......(2)分布式的解决● SpringBoot + SpringCloud
3、云原生
原生应用如何上云。 Cloud Native上云的困难● 服务自愈● 弹性伸缩● 服务隔离● 自动化部署● 灰度发布● 流量治理● ......
2、maven构建springboot项目
- Java 8 & 兼容java14 .
- Maven 3.3+
- idea 2019.1.2
1、maven设置
<mirrors><mirror><id>nexus-aliyun</id><mirrorOf>central</mirrorOf><name>Nexus aliyun</name><url>http://maven.aliyun.com/nexus/content/groups/public</url></mirror></mirrors><profiles><profile><id>jdk-1.8</id><activation><activeByDefault>true</activeByDefault><jdk>1.8</jdk></activation><properties><maven.compiler.source>1.8</maven.compiler.source><maven.compiler.target>1.8</maven.compiler.target><maven.compiler.compilerVersion>1.8</maven.compiler.compilerVersion></properties></profile></profiles>
2、创建maven项目导入依赖
<parent><groupId>org.springframework.boot</groupId><artifactId>spring-boot-starter-parent</artifactId><version>2.6.1</version></parent><dependencies><dependency><groupId>org.springframework.boot</groupId><artifactId>spring-boot-starter-web</artifactId></dependency></dependencies>
3、创建主程序类
@SpringBootApplicationpublic class Application {public static void main(String[] args) {SpringApplication.run(Application.class,args);}}
4、编写业务代码
@RestControllerpublic class HelloController {@RequestMapping("/hello")public String handle01(){return "Hello, Spring Boot 2!";}}
5、简化部署打包jar
1、导入打包插件插件<build><plugins><plugin><groupId>org.springframework.boot</groupId><artifactId>spring-boot-maven-plugin</artifactId></plugin></plugins></build>2、将应用打包
3、package打包后,在target目录下的找到本地的jar包并在cmd命令行运行java -jar [jar包的名字]
3、了解自动化配置原理
3.1、依赖管理及版本修改
(1)依赖管理<parent><groupId>org.springframework.boot</groupId><artifactId>spring-boot-starter-parent</artifactId><version>2.3.4.RELEASE</version></parent>他的父项目<parent><groupId>org.springframework.boot</groupId><artifactId>spring-boot-dependencies</artifactId><version>2.3.4.RELEASE</version></parent>几乎声明了所有开发中常用的依赖的版本号,自动版本仲裁机制(2)无需关注版本号,自动版本仲裁1、引入依赖默认都可以不写版本2、引入非版本仲裁的jar,要写版本号。
(3)可以修改默认版本号1、查看spring-boot-dependencies里面规定当前依赖的版本 用的 key。2、在当前项目里面重写配置<properties><mysql.version>5.1.43</mysql.version></properties>
3.2、自动配置
(1)自动配好Tomcat○ 引入Tomcat依赖。○ 配置Tomcat<dependency><groupId>org.springframework.boot</groupId><artifactId>spring-boot-starter-tomcat</artifactId><version>2.3.4.RELEASE</version><scope>compile</scope></dependency>(2)● 自动配好SpringMVC○ 引入SpringMVC全套组件○ 自动配好SpringMVC常用组件(功能)(3)自动配好Web常见功能,如:字符编码问题○ SpringBoot帮我们配置好了所有web开发的常见场景(4)默认的包结构○ 主程序所在包及其下面的所有子包里面的组件都会被默认扫描进来○ 无需以前的包扫描配置○ 想要改变扫描路径,@SpringBootApplication(scanBasePackages="com.guang")■ 或者在配置类中添加@ComponentScan 指定扫描路径@SpringBootApplication等同于@SpringBootConfiguration@EnableAutoConfiguration@ComponentScan("com.guang.boot")(5)各种配置拥有默认值○ 默认配置最终都是映射到某个类上,如:MultipartProperties○ 配置文件的值最终会绑定每个类上,这个类会在容器中创建对象(6)按需加载所有自动配置项○ 非常多的starter○ 引入了哪些场景这个场景的自动配置才会开启○ SpringBoot所有的自动配置功能都在 spring-boot-autoconfigure 包里面
3.3、容器功能
3.3.1、组件添加
1、@Configuration配置类
● 基本使用● Full模式与Lite模式○ 示例○ 最佳实战■ 配置 类组件之间无依赖关系用Lite模式加速容器启动过程,减少判断■ 配置类组件之间有依赖关系,方法会被调用得到之前单实例组件,用Full模式/*** 1、配置类里面使用@Bean标注在方法上给容器注册组件,默认也是单实例的* 2、配置类本身也是组件* 3、proxyBeanMethods:代理bean的方法* Full(proxyBeanMethods = true)、【保证每个@Bean方法被调用多少次返回的组件都是单实例的】* Lite(proxyBeanMethods = false)【每个@Bean方法被调用多少次返回的组件都是新创建的】* 组件依赖默认使用Full模式。其他默认是否Lite模式*/@Configuration(proxyBeanMethods = false)//告诉SpringBoot这是一个配置类 == 配置文件//配置文件本身也是一个组件public class MyConfig {/*** Full:外部无论对配置类中的这个组件注册方法调用多少次获取的都是之前注册容器中的单实例对象*/@Bean //给容器中添加组件。以方法名作为组件的id。返回类型就是组件类型。返回的值,//就是组件在容器中的实例public User user01(){User zhangsan = new User("zhangsan", 18);//user组件依赖了Pet组件zhangsan.setPet(tomcatPet());//默认获取容器中的组件,false获取的不是单例的return zhangsan;}@Bean("tom")public Pet tomcatPet(){return new Pet("tomcat");}}
2、@Bean、@Component、@Controller、@Service、@Repository
3、@ComponentScan包扫描、@Import 导入组件
/* @Import({User.class, DBHelper.class})*给容器中自动创建出这两个类型的组件、默认组件的名字就是全类名*/@Import({User.class, DBHelper.class})@Configuration(proxyBeanMethods = false)//返回的不是单例//告诉SpringBoot这是一个配置类 == 配置文件public class MyConfig {}
4、@Conditional 条件装配:满足Conditional指定的条件,则进行组件注入
//@ConditionalOnBean(name = "tom")@ConditionalOnMissingBean(name = "tom")//该条件满足时,该配置类下的组件才会被放进容器@Configurationpublic class MyConfig {@Bean//@ConditionalOnBean(name = "tom")//该条件满足时,该组件才会被放进容器public User user01(){User zhangsan = new User("zhangsan", 18);//user组件依赖了Pet组件zhangsan.setPet(tomcatPet());return zhangsan;}@Bean("tom22")public Pet tomcatPet(){return new Pet("tomcat");}}
3.2.2、导入xml组件
<bean id="haha" class="com.guang.boot.bean.User"><property name="name" value="zhangsan"></property><property name="age" value="18"></property></bean>//在配置类或者其他被扫描的类上@ImportResource("classpath:beans.xml")public class MyConfig {}======================测试=================boolean haha = run.containsBean("haha");boolean hehe = run.containsBean("hehe");System.out.println("haha:"+haha);//trueSystem.out.println("hehe:"+hehe);//true
3.2.3、配置文件与组件绑定
application.properties
mycar.brand=BYDmycar.price=100000
方式1:@ConfigurationProperties(组件)
/*** 只有在容器中的组件,才会拥有SpringBoot提供的强大功能*/@Component@ConfigurationProperties(prefix = "mycar")public class Car {private String brand;private Integer price;//getter、setter、toString}
方式2:@EnableConfigurationProperties+ConfigurationProperties (配置类)
@EnableConfigurationProperties(Car.class)//1、开启Car配置绑定功能//2、把这个Car这个组件自动注册到容器中@Configurationpublic class MyConfig {}
//@Component@ConfigurationProperties(prefix = "mycar")public class Car {private String brand;private Integer price;//getter、setter、toString}
3.2.4、自动配置报告
application.properties
debug=true
4、spring initailizr
创建springboot项目并且导入相关的依赖
1、lombok
简化实体类的开发,安装插件并导入依赖,@Slf4j日志方便进行开发
2、dev-tools
方便进行测试,导入依赖后Ctrl+F9项目便会重新编译
4、配置文件
4.1、application.properties
假设两个配置文件设定了同样的配置,会优先加载properties中的配置,
4.2、application.yml
4.2.1、简介
YAML 是 “YAML Ain’t Markup Language”(YAML 不是一种标记语言)的递归缩写。在开发的这种语言时,YAML 的意思其实是:”Yet Another Markup Language”(仍是一种标记语言)。
4.2.2、基本语法
● key: value;kv之间有空格
● 大小写敏感
● 使用缩进表示层级关系
● 缩进不允许使用tab,只允许空格
● 缩进的空格数不重要,只要相同层级的元素左对齐即可
● ‘#’表示注释
● 字符串无需加引号,如果要加,’’与””表示字符串内容 会被 转义/不转义
即单引号\n作为作为字符串输出,双引号作为换行
4.2.3、数据类型
1、字面量:单个的、不可再分的值。date、boolean、string、number、null
k: v
2、对象:键值对的集合。map、hash、set、object
行内写法: k: {k1:v1,k2:v2,k3:v3}#或k:k1: v1k2: v2k3: v3
3、数组:一组按次序排列的值。array、list、queue
行内写法: k: [v1,v2,v3]#或者k:- v1- v2- v3
4.2.4、示例
@Datapublic class Person {private String userName;private Boolean boss;private Date birth;private Integer age;private Pet pet;private String[] interests;private List<String> animal;private Map<String, Object> score;private Set<Double> salarys;private Map<String, List<Pet>> allPets;}@Datapublic class Pet {private String name;private Double weight;}
# yaml表示以上对象person:userName: zhangsanboss: falsebirth: 2019/12/12 20:12:33age: 18pet:name: tomcatweight: 23.4interests: [篮球,游泳]animal:- jerry- marioscore:english:first: 30second: 40third: 50math: [131,140,148]chinese: {first: 128,second: 136}salarys: [3999,4999.98,5999.99]allPets:sick:- {name: tom}- {name: jerry,weight: 47}- name: tomcatweight: 88health: [{name: mario,weight: 47}]
4.3、application.yml使用提示
1、导入依赖
<dependency><groupId>org.springframework.boot</groupId><artifactId>spring-boot-configuration-processor</artifactId><optional>true</optional></dependency>
2、在打包插件中添加
打包时过滤掉processor
<build><plugins><plugin><groupId>org.springframework.boot</groupId><artifactId>spring-boot-maven-plugin</artifactId><configuration><excludes><exclude><groupId>org.springframework.boot</groupId><artifactId>spring-boot-configuration-processor</artifactId></exclude></excludes></configuration></plugin></plugins></build>
5、web开发-静态资源访问及修改
5.1、静态资源目录
● 只要静态资源放在类路径下: /static /public /resources /META-INF/resources
● 访问 :当前项目根路径/ + 静态资源名 localhost:8080/bug.jpg
● 原理: 静态映射/**。
● 请求进来,先去找Controller看能不能处理。不能处理的所有请求又都交给静态资源处理器。静态资源也找不到则响应404页面
5.2、改变静态资源访问路径
1、添加静态资源访问前缀
spring:mvc:static-path-pattern: /res/**
2、改变静态资源路径
spring:resources:static-locations:[classpath:/haha/]
5.3、webjar
1、导依赖
自动映射 /webjars/**https://www.webjars.org/<dependency><groupId>org.webjars</groupId><artifactId>jquery</artifactId><version>3.5.1</version></dependency>
2、访问地址:http://localhost:8080/webjars/jquery/3.5.1/jquery.js 后面地址要按照依赖里面的包路径
6、欢迎页设置
● 静态资源路径下的 index.html
○ 可以改变静态资源路径
○ 但是不可以配置静态资源的访问前缀。否则导致 index.html不能被默认访问
spring:# mvc:# static-path-pattern: /res/** 这个会导致welcome page功能失效,底层配置/**resources:static-locations: [classpath:/haha/]controller能处理/index
7、自定义favicon
favicon.ico 放在静态资源目录下即可。设置静态资源访问的前缀路径会导致favicon失效spring:# mvc:# static-path-pattern: /res/** 这个会导致 Favicon 功能失效
8、请求参数Restful风格
1、表单提交开启Rest风格
spring:mvc:hiddenmethod:filter:enabled: true #开启页面表单的Rest功能
@GetMapping
@DeleteMapping
@PutMapping
@PostMapping
9、普通参数与注解
@PathVariable、@RequestHeader、@RequestAttribute、@RequestParam、@MatrixVariable、@CookieValue、@RequestBody
9.1、@PathVariable
路径变量
localhost:8080/user/{id}
@GetMapping("/user/{id})public string getUserByid(@PathVariable("id")Integer id){}
9.2、@RequestHeader
获取请求头
@RequestHeader("User-Agent") String userAgent//获取名称为User-Agent的请求头@RequestHeader Map<String,String> header//获取所有的请求头
9.3、@RequestParam
获取请求参数
@RequestParam("age") Integer age //获取名为age的请求参数@RequestParam("inters") List<String> inters//获取请求参数的数组名为inters的数组@RequestParam Map<String,String> params//获取所有的请求参数
9.4、@CookieValue
获取Cookie的值
@CookieValue("_ga") String _ga//获取名为_ga的Cookie@CookieValue("_ga") Cookie cookie)
9.5、@RequestAttribute
@Controllerpublic class RequestController {@GetMapping("/goto")public String goToPage(HttpServletRequest request){request.setAttribute("msg","成功了...");request.setAttribute("code",200);return "forward:/success"; //转发到 /success请求}@GetMapping("/params")public String testParam(Map<String,Object> map,Model model,HttpServletRequest request,HttpServletResponse response){map.put("hello","world666");model.addAttribute("world","hello666");request.setAttribute("message","HelloWorld");Cookie cookie = new Cookie("c1","v1");response.addCookie(cookie);return "forward:/success";}
9.6、@MatrixVariable
矩阵变量:SpringBoot默认是禁用了矩阵变量的功能
1、手动开启:原理。对于路径的处理。UrlPathHelper进行解析。
removeSemicolonContent(移除分号内容)支持矩阵变量的
方式1:
@Configrationpublic class WebConfig implements WebMvcConfigurer{@Overridepublic void configurePathMatch(PathMatchConfigurer configurer) {UrlPathHelper urlPathHelper = new UrlPathHelper();// 不移除;后面的内容。矩阵变量功能就可以生效urlPathHelper.setRemoveSemicolonContent(false);configurer.setUrlPathHelper(urlPathHelper);}}
方式2:
@Configrationpublic class WebConfig {@Beanpublic WebMvcConfigurer webMvcConfigurer(){return new webMvcConfigurer(){@Overridepublic void configurePathMatch(PathMatchConfigure configurer){UrlPathHelper urlPathHelper = new UrlPathHelper();// 不移除;后面的内容。矩阵变量功能就可以生效urlPathHelper.setRemoveSemicolonContent(false);configurer.setUrlPathHelper(urlPathHelper);}}}}
2、
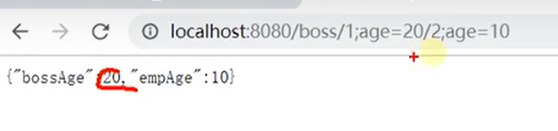
@Controllerpublic class RequestController {//1、语法: 请求路径:/cars/sell;low=34;brand=byd,audi,yd//2、SpringBoot默认是禁用了矩阵变量的功能// 手动开启:原理。对于路径的处理。UrlPathHelper进行解析。// removeSemicolonContent(移除分号内容)支持矩阵变量的//3、矩阵变量必须有url路径变量才能被解析@GetMapping("/cars/{path}")public Map carsSell(@MatrixVariable("low") Integer low,@MatrixVariable("brand") List<String> brand,@PathVariable("path") String path){Map<String,Object> map = new HashMap<>();map.put("low",low);map.put("brand",brand);map.put("path",path);return map;}// /boss/1;age=20/2;age=10//两个相同名字的矩阵变量@GetMapping("/boss/{bossId}/{empId}")public Map boss(@MatrixVariable(value = "age",pathVar = "bossId") Integer bossAge,@MatrixVariable(value = "age",pathVar = "empId") Integer empAge){Map<String,Object> map = new HashMap<>();map.put("bossAge",bossAge);map.put("empAge",empAge);return map;}}
10、复杂参数
Map、Model(map、model里面的数据会被放在request的请求域 request.setAttribute)、Errors/BindingResult、RedirectAttributes( 重定向携带数据)、ServletResponse(response)、SessionStatus、UriComponentsBuilder、ServletUriComponentsBuilder
10.1、Map、Model
@GetMapping("/params")public String testParam(Map<String,Object> map,Model model,HttpServletRequest request,HttpServletResponse response){map.put("hello","world666");model.addAttribute("world","hello666");request.setAttribute("message","HelloWorld");Cookie cookie = new Cookie("c1","v1");response.addCookie(cookie);return "forward:/success";}@ResponseBody@GetMapping("/success")public Map success(HttpServletRequest request){Map<String,Object> map = new HashMap<>();Object hello = request.getAttribute("hello");Object world = request.getAttribute("world");Object message = request.getAttribute("message");map.put("reqMethod_msg",msg1);map.put("annotation_msg",msg);map.put("hello",hello);map.put("world",world);map.put("message",message);return map;}
11、数据绑定(POJO)
前端的参数名与后端实体类的参数名一致会自动封装到实体类中。
1、实体类
/*** 姓名: <input name="userName"/> <br/>* 年龄: <input name="age"/> <br/>* 生日: <input name="birth"/> <br/>* 宠物姓名:<input name="pet.name"/><br/>* 宠物年龄:<input name="pet.age"/>*/@Datapublic class Person {private String userName;private Integer age;private Date birth;private Pet pet;}@Datapublic class Pet {private String name;private String age;}
2、处理请求接口
' /*** 数据绑定:页面提交的请求数据(GET、POST)都可以和对象属性进行绑定* @param person* @return*/@PostMapping("/saveuser")public Person saveuser(Person person){return person;}
12、自定义Converter(改变数据绑定规则)
姓名: <input name="userName"/> <br/>年龄: <input name="age"/> <br/>生日: <input name="birth"/> <br/>转变成这种模式去绑定时,需要自定义Converter宠物<input name=pet value="啊猫,3"/>
自定义Converter
@Configrationpublic class WebConfig {@Beanpublic WebMvcConfigurer webMvcConfigurer(){return new webMvcConfigurer(){@Overridepublic void addFormatters(FormatterRegistry registry) {registry.addConverter(new Converter<String, Pet>() {@Overridepublic Pet convert(String source) {// 啊猫,3if(!StringUtils.isEmpty(source)){Pet pet = new Pet();String[] split = source.split(",");pet.setName(split[0]);pet.setAge(Integer.parseInt(split[1]));return pet;}return null;}});}}}}
13、数据响应与内容协商
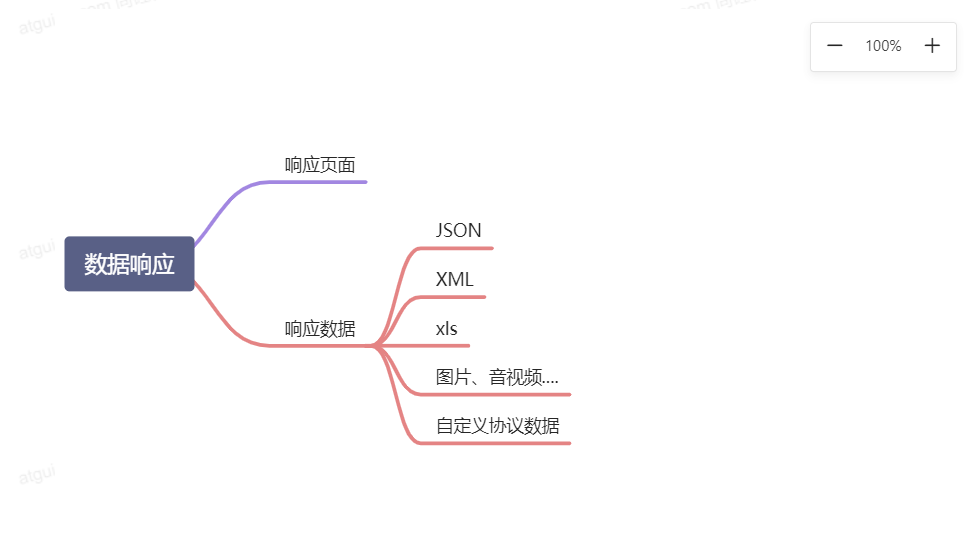
13.1、响应JSON
1、导入依赖
<dependency><groupId>org.springframework.boot</groupId><artifactId>spring-boot-starter-web</artifactId></dependency>web场景自动引入了json场景<dependency><groupId>org.springframework.boot</groupId><artifactId>spring-boot-starter-json</artifactId><version>2.3.4.RELEASE</version><scope>compile</scope></dependency>
2、接口
@ResponseBody //利用返回值处理器里面的消息转换器进行处理@GetMapping(value = "/test/person")public Person getPerson(){Person person = new Person();person.setAge(28);person.setBirth(new Date());person.setUserName("zhangsan");return person;}
13.2、SpringMVC支持哪些返回值
ModelAndViewModelViewResponseEntityResponseBodyEmitterStreamingResponseBodyHttpEntityHttpHeadersCallableDeferredResultListenableFutureCompletionStageWebAsyncTask有 @ModelAttribute 且为对象类型的@ResponseBody 注解 ---> RequestResponseBodyMethodProcessor;
13.3、内容协商(改变响应数据的模式)
1、导入xml依赖
<dependency><groupId>com.fasterxml.jackson.dataformat</groupId><artifactId>jackson-dataformat-xml</artifactId></dependency>
2、接口不变
@ResponseBody //利用返回值处理器里面的消息转换器进行处理@GetMapping(value = "/test/person")public Person getPerson(){Person person = new Person();person.setAge(28);person.setBirth(new Date());person.setUserName("zhangsan");return person;}
13.4、开启基于参数的内容协商
1、配置文件
spring:contentnegotiation:favor-parameter: true #开启请求参数内容协商模式
2、访问方式
localhost:8080/test/person?format=json
localhost:8080/test/person?format=xml
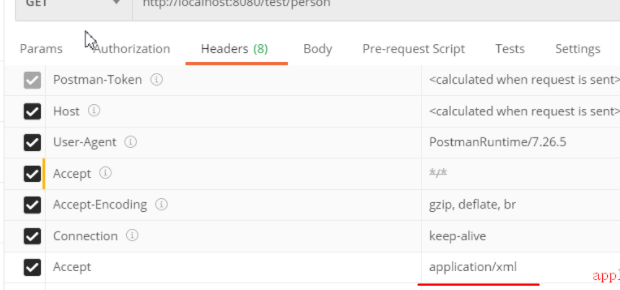
13.5、自定义内容协商(请求头)
MessageConverter,自定义请求头的内容协商后,基于参数的内容协商会失效
1、接口代码及要求(appliaction/x-guigu)
/*** 1、浏览器发请求直接返回 xml [application/xml] jacksonXmlConverter* 2、如果是ajax请求 返回 json [application/json] jacksonJsonConverter* 3、如果硅谷app发请求,返回自定义协议数据 [appliaction/x-guigu] xxxxConverter* 属性值1;属性值2;** 步骤:* 1、添加自定义的MessageConverter进系统底层* 2、系统底层就会统计出所有MessageConverter能操作哪些类型* 3、客户端内容协商 [guigu--->guigu]** 作业:如何以参数的方式进行内容协商* @return*/@ResponseBody //利用返回值处理器里面的消息转换器进行处理@GetMapping(value = "/test/person")public Person getPerson(){Person person = new Person();person.setAge(28);person.setBirth(new Date());person.setUserName("zhangsan");return person;}
2、自定义MessageConverter
public class GuiguMessageConverter implements HttpMessageConverter<Person> {@Overridepublic boolean canRead(Class<?> clazz, MediaType mediaType) {return false;}@Overridepublic boolean canWrite(Class<?> clazz, MediaType mediaType) {return clazz.isAssignableFrom(Person.class);}/*** 服务器要统计所有MessageConverter都能写出哪些内容类型** application/x-guigu* @return*/@Overridepublic List<MediaType> getSupportedMediaTypes() {return MediaType.parseMediaTypes("application/x-guigu");}@Overridepublic Person read(Class<? extends Person> clazz, HttpInputMessage inputMessage) throws IOException, HttpMessageNotReadableException {return null;}@Overridepublic void write(Person person, MediaType contentType, HttpOutputMessage outputMessage) throws IOException, HttpMessageNotWritableException {//自定义协议数据的写出String data = person.getUserName()+";"+person.getAge()+";"+person.getBirth();//写出去OutputStream body = outputMessage.getBody();body.write(data.getBytes());}}
3、将自定义MessageConverter添加到容器
@Configrationpublic class WebConfig {@Beanpublic WebMvcConfigurer webMvcConfigurer(){return new WebMvcConfigurer() {@Overridepublic void extendMessageConverters(List<HttpMessageConverter<?>> converters) {converters.add(new GuiguMessageConverter());}}}}
13.6、自定义内容协商(请求参数)
自定义请求参数的内容协商后,基于请求头的内容协商会失效,这里添加了请求头的内容协商,支持两种方式
@Configuration(proxyBeanMethods = false)public class WebConfig /*implements WebMvcConfigurer*/ {//1、WebMvcConfigurer定制化SpringMVC的功能@Beanpublic WebMvcConfigurer webMvcConfigurer(){return new WebMvcConfigurer() {/*** 自定义内容协商策略* @param configurer*/@Overridepublic void configureContentNegotiation(ContentNegotiationConfigurer configurer) {//Map<String, MediaType> mediaTypesMap<String, MediaType> mediaTypes = new HashMap<>();mediaTypes.put("json",MediaType.APPLICATION_JSON);mediaTypes.put("xml",MediaType.APPLICATION_XML);mediaTypes.put("gg",MediaType.parseMediaType("application/x-guigu"));//指定支持解析哪些参数对应的哪些媒体类型ParameterContentNegotiationStrategy parameterStrategy = new ParameterContentNegotiationStrategy(mediaTypes);// parameterStrategy.setParameterName("ff");//不添加请求头的方式的话,基于请求头的内容协商则会失效HeaderContentNegotiationStrategy headeStrategy = new HeaderContentNegotiationStrategy();configurer.strategies(Arrays.asList(parameterStrategy,headeStrategy));}}}}
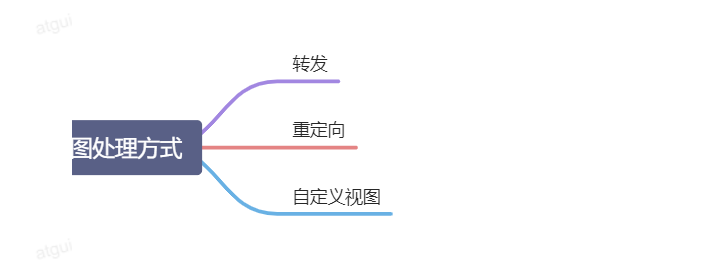
14、视图解析与模板引擎
视图解析:SpringBoot默认不支持 JSP,需要引入第三方模板引擎技术实现页面渲染。
14.1、视图解析
14.2、模板引擎-Thymeleaf
1、thymeleaf简介
Thymeleaf is a modern server-side Java template engine for both web and standalone environments, capable of processing HTML, XML, JavaScript, CSS and even plain text.
现代化、服务端Java模板引擎
2、基本语法
1、表达式
| 表达式名字 | 语法 | 用途 |
|---|---|---|
| 变量取值 | ${…} | 获取请求域、session域、对象等值 |
| 选择变量 | *{…} | 获取上下文对象值 |
| 消息 | #{…} | 获取国际化等值 |
| 链接 | @{…} | 生成链接 |
| 片段表达式 | ~{…} | jsp:include 作用,引入公共页面片段 |
2、字面量
文本值: ‘one text’ , ‘Another one!’ ,…数字: 0 , 34 , 3.0 , 12.3 ,…布尔值: true , false
空值: null
变量: one,two,…. 变量不能有空格
3、文本操作
字符串拼接: +
变量替换: |The name is ${name}|
4、数学运算
运算符: + , - , * , / , %
5、布尔运算
运算符: and , or
一元运算: ! , not
6、比较运算
比较: > , < , >= , <= ( gt , lt , ge , le )等式: == , != ( eq , ne )
7、条件运算
If-then: (if) ? (then)
If-then-else: (if) ? (then) : (else)
Default: (value) ?: (defaultvalue)
8、特殊操作
14.3、thymeleaf的HelloWorld
1、导入依赖
<dependency><groupId>org.springframework.boot</groupId><artifactId>spring-boot-starter-thymeleaf</artifactId></dependency>
2、接口代码
@Controllerpublic class ViewTestController {@GetMapping("/atguigu")public String atguigu(Model model){//model中的数据会被放在请求域中 request.setAttribute("a",aa)model.addAttribute("msg","你好 guigu");model.addAttribute("link","http://www.baidu.com");return "success";}}
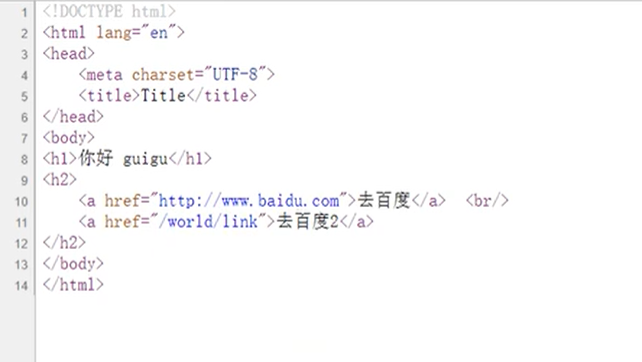
3、html页面
<!DOCTYPE html><html lang="en" xmlns:th="http://www.thymeleaf.org"><head><meta charset="UTF-8"><title>Title</title></head><body><h1 th:text="${msg}">哈哈</h1><h2><a href="www.atguigu.com" th:href="${link}">去百度</a> <br/>//会将访问前缀与/link拼接<a href="www.atguigu.com" th:href="@{/link}">去百度2</a></h2></body></html>
4、配置文件设置访问前缀
server:servlet:context-path: /world
15、搭建简易的后台管理系统
1、去到登录页面
@GetMapping(value = {"/","/login"})public String loginPage(){return "login";}
2、登录表单提交
@PostMapping("/login")public String main(User user, HttpSession session, Model model){ //RedirectAttributesif(StringUtils.hasLength(user.getUserName()) && "123456".equals(user.getPassword())){//把登陆成功的用户保存起来session.setAttribute("loginUser",user);//登录成功重定向到main.html; 重定向防止表单重复提交return "redirect:/main.html";}else {model.addAttribute("msg","账号密码错误");//回到登录页面return "login";}}
<form class="form-signin" action="index.html" method="post" th:action="@{/login}">
3、解决登录后重复表单提交
后面利用拦截器,过滤器替换此解决方案
@GetMapping("/main.html")public String mainPage(HttpSession session,Model model){log.info("当前方法是:{}","mainPage");//是否登录。 拦截器,过滤器Object loginUser = session.getAttribute("loginUser");if(loginUser != null){return "main";}else {//回到登录页面model.addAttribute("msg","请重新登录");return "login";}}
4、抽取公共页面
5、登录拦截器
1、编写一个拦截器实现HandlerInterceptor接口
@Slf4jpublic class LoginInterceptor implements HandlerInterceptor {/*** 目标方法执行之前* @param request* @param response* @param handler* @return* @throws Exception*/@Overridepublic boolean preHandle(HttpServletRequest request, HttpServletResponse response, Object handler) throws Exception {String requestURI = request.getRequestURI();log.info("preHandle拦截的请求路径是{}",requestURI);//登录检查逻辑HttpSession session = request.getSession();Object loginUser = session.getAttribute("loginUser");if(loginUser != null){//放行return true;}//拦截住。未登录。跳转到登录页request.setAttribute("msg","请先登录");// re.sendRedirect("/");request.getRequestDispatcher("/").forward(request,response);return false;}/*** 目标方法执行完成以后* @param request* @param response* @param handler* @param modelAndView* @throws Exception*/@Overridepublic void postHandle(HttpServletRequest request, HttpServletResponse response, Object handler, ModelAndView modelAndView) throws Exception {log.info("postHandle执行{}",modelAndView);}/*** 页面渲染以后* @param request* @param response* @param handler* @param ex* @throws Exception*/@Overridepublic void afterCompletion(HttpServletRequest request, HttpServletResponse response, Object handler, Exception ex) throws Exception {log.info("afterCompletion执行异常{}",ex);}}
2、拦截器注册到容器中(实现WebMvcConfigurer的addInterceptors)
3、指定拦截规则【如果是拦截所有,静态资源也会被拦截】
@Configurationpublic class AdminWebConfig implements WebMvcConfigurer{@Overridepublic void addInterceptors(InterceptorRegistry registry) {registry.addInterceptor(new LoginInterceptor()).addPathPatterns("/**") //所有请求都被拦截包括静态资源.excludePathPatterns("/","/login","/css/**","/fonts/**","/images/**","/js/**","/aa/**"); //放行的请求}}
6、单与多文件上传
1、配置文件设置单文件与多文件上传大小
spring.servlet.multipart.max-file-size=10MBspring.servlet.multipart.max-request-size=100MB
2、接口处理文件存储
/*** MultipartFile 自动封装上传过来的文件* @param email* @param username* @param headerImg* @param photos* @return*/@PostMapping("/upload")public String upload(@RequestParam("email") String email,@RequestParam("username") String username,@RequestPart("headerImg") MultipartFile headerImg,@RequestPart("photos") MultipartFile[] photos) throws IOException {log.info("上传的信息:email={},username={},headerImg={},photos={}",email,username,headerImg.getSize(),photos.length);if(!headerImg.isEmpty()){//保存到文件服务器,OSS服务器String originalFilename = headerImg.getOriginalFilename();headerImg.transferTo(new File("H:\\cache\\"+originalFilename));}if(photos.length > 0){for (MultipartFile photo : photos) {if(!photo.isEmpty()){String originalFilename = photo.getOriginalFilename();photo.transferTo(new File("H:\\cache\\"+originalFilename));}}}return "main";}
3、html
<form method="post" action="/upload" enctype="multipart/form-data"><input type="file" name="file"><br><input type="submit" value="提交"></form><div class="form-group"><label for="exampleInputFile">头像</label><input type="file" name="headerImg" id="exampleInputFile"></div><div class="form-group"><label for="exampleInputFile">生活照</label><input type="file" name="photos" multiple></div>
7、异常处理
1、错误处理
1、默认规则
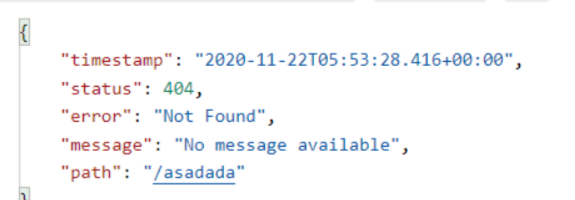
- 默认情况下,Spring Boot提供
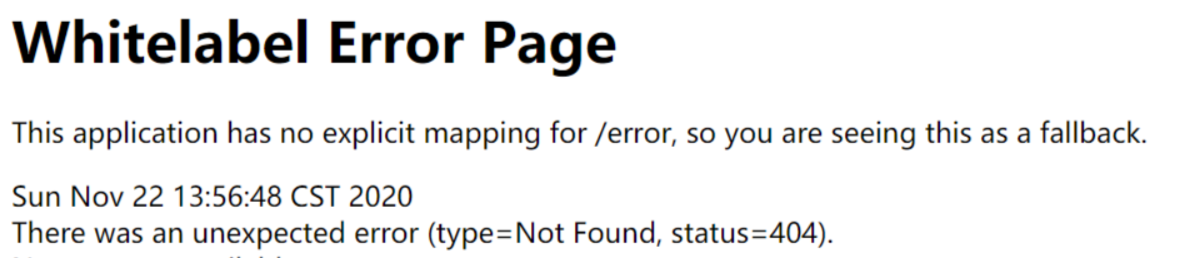
/error处理所有错误的映射 - 对于机器客户端,它将生成JSON响应,其中包含错误,HTTP状态和异常消息的详细信息。对于浏览器客户端,响应一个“ whitelabel”错误视图,以HTML格式呈现相同的数据
- 要对其进行自定义,添加
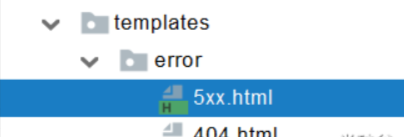
**View**解析为**error** - 要完全替换默认行为,可以实现
ErrorController并注册该类型的Bean定义,或添加ErrorAttributes类型的组件以使用现有机制但替换其内容。 error/下的4xx,5xx页面会被自动解析;
2、@ControllerAdvice+@ExceptionHandler处理全局异常;底层是 ExceptionHandlerExceptionResolver 支持的
/*** 处理整个web controller的异常*/@Slf4j@ControllerAdvicepublic class GlobalExceptionHandler {@ExceptionHandler({ArithmeticException.class,NullPointerException.class}) //处理异常public String handleArithException(Exception e){log.error("异常是:{}",e);return "login"; //视图地址}}
3、@ResponseStatus+自定义异常 ;底层是 ResponseStatusExceptionResolver ,把responsestatus注解的信息底层调用 response.sendError(statusCode, resolvedReason);tomcat发送的/error ```java @ResponseStatus(value= HttpStatus.FORBIDDEN,reason = “用户数量太多”) public class UserTooManyException extends RuntimeException {
public UserTooManyException(){
} public UserTooManyException(String message){
super(message);
} }
4、Spring底层的异常,如 参数类型转换异常;**DefaultHandlerExceptionResolver 处理框架底层的异常。**- response.sendError(HttpServletResponse.**SC_BAD_REQUEST**, ex.getMessage());- 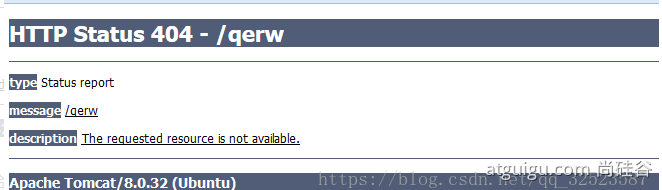5、自定义实现 HandlerExceptionResolver 处理异常;可以作为默认的全局异常处理规则- 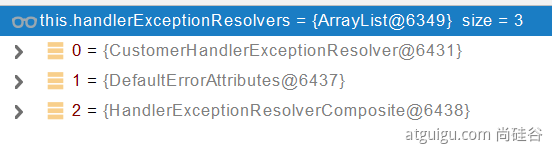```java@Order(value= Ordered.HIGHEST_PRECEDENCE) //优先级,数字越小优先级越高@Componentpublic class CustomerHandlerExceptionResolver implements HandlerExceptionResolver {@Overridepublic ModelAndView resolveException(HttpServletRequest request,HttpServletResponse response,Object handler, Exception ex) {try {response.sendError(511,"我喜欢的错误");} catch (IOException e) {e.printStackTrace();}return new ModelAndView();}}
6、ErrorViewResolver 实现自定义处理异常;
- response.sendError 。error请求就会转给controller
- 你的异常没有任何人能处理。tomcat底层 response.sendError。error请求就会转给controller
- basicErrorController 要去的页面地址是 ErrorViewResolver ;

若有收获,就点个赞吧
0 人点赞
