🐶 Husky x LintStaged
上一章说到我们不能保证所有人提交的代码都是 fix 好的。
比如有的人经常忘记开启 ESLint 插件,提交代码时还以为自己代码写的贼 6,没啥报错,但到队友那 git pull 满屏都是红的。
所以,更好的做法是在代码入库(Commit 和 Push)的时候可以做一次 ESLint 的检查。
正好 Git 提供了很多 Git Hooks:
- pre-commit: 提交代码前做一些事
- pre-push: 推代码前做一些事
- pre-merge: 合并代码前做一些事
- pre-rebase: rebase 前做一些事
- …
这些 Hooks 可以使得我们在操作 Git 的某些阶段做一些事情。 Husky 可以在这些 Git Hooks 回调时执行我们定义好的 Bash 脚本。 如果我们把 ESLint 的修复命令放在这些的 Bash 脚本中,那就可以实现 Git Commit/Push/Merge/… 前的 ESLint 自动修复了!
 )
)
注意:Husky v4 和 v7 有非常大的差异,大家一定要注意甄别,最好直接看官网,这里使用最新版跟大家讲解。
# 安装哈士奇npm install husky -D# 添加 prepare 命令npm set-script prepare "husky install"# prepare 创建 bash 脚本,安装 git hooksnpm run prepare# 添加 pre-commit 的 git hook 脚本npx husky add .husky/pre-commit "npx eslint src --fix"
运行之后会发现在 ./.husky/pre-commit 里看到 git commit 前会运行的脚本:
#!/bin/sh. "$(dirname "$0")/_/husky.sh"# git commit 前先 eslint fix 一波npx eslint src --fix
但是这样的命令会让每次 commit 前都把整个 src 都扫描并 fix 一次,速度太慢了,而且很容易把别人的屎山也 fix 掉,然后提交上去。
我们更希望只针对提交的文件进行 Lint 操作。
LintStaged
Prettier 在 文档的 Pre-commit Hook 已经介绍了很多只针对提交文件做 fix 的工具。这里以 lint-staged 做介绍。
# 安装npm i -D lint-staged
然后添加 .lintstagedrc.js 配置文件,里面对提交不同的文件进行 eslint --fix 操作。
module.exports = {'**/*.{ts,tsx,js,jsx}': ["eslint --cache --fix",],"**/*.vue": ["eslint --cache --fix",],"**/*.{css,less}": ["stylelint --cache --fix",]}
lint-staged 配置的含义是对提交上来不同类型的文件执行对应的 lint fix 命令。
最后在刚刚创建的 ./.husky/pre-commit 里改成执行 lint-staged 命令:
#!/bin/sh. "$(dirname "$0")/_/husky.sh"npx lint-staged
以后每次 commit 前都会跑一次 lint-staged,而 lint-staged 又会对提交的文件进行 ESLint Fix。
命令行
如果细心的同学会发现上面提到关于 eslint 的自动修复命令一共有两条:eslint src --fix 以及 eslint --cache --fix。
如果你直接在命令行里跑 eslint --fix,那什么事都不会发生,因为你没有指定要 fix 的文件以及文件目录。
那为什么在 lint-staged 里就可以 eslint --cache --fix 呢?
因为 lint-staged 会把前面的 *.{js,jsx,ts,tsx} 来匹配提交的文件,并把它们作为参数传到 eslint --cache --fix 后面。所以虽然写的是 eslint --cache --fix 时实际上是执行了 eslint 要修复的文件 --cache --fix。
性能问题
或许有的同学会发现每次 eslint --fix 的时候跑的有点慢,如果你在前面加一个 TIMING=1:
TIMING=1 eslint src --fix
就可以看到哪个规则跑了多久:
Rule | Time (ms) | Relative:---------------------------------------|----------:|--------:prettier/prettier | 207.532 | 79.8%@typescript-eslint/no-unused-vars | 12.738 | 4.9%@typescript-eslint/no-floating-promises | 8.053 | 3.1%@typescript-eslint/no-unsafe-assignment | 7.509 | 2.9%vue/attributes-order | 7.424 | 2.9%no-unused-vars | 1.977 | 0.8%no-redeclare | 1.539 | 0.6%react/display-name | 1.219 | 0.5%no-global-assign | 0.873 | 0.3%@typescript-eslint/no-unsafe-argument | 0.795 | 0.3%
毕竟 prettier/prettier 是一大堆的 Prettier 代码风格规则,所以肯定是跑得慢的。
当然也有很多人会很在意这个点,所以也有了 这个 Issue 。
不过这个 Issue 也没能给出太好的解决方案,如果你有更好的方案可以 在这里提 Issue 。
LintStaged x TypeScript
你以为到这就完了么?Too yong too simple!如果你在 .d.ts 定义一个 interface:
type Hello = {name: string;age: number;};
然后在另一个 .ts 里错误地使用它:
// 注意:这里没有 import Hello 是正常的,因为 Hello 是在 .d.ts 里定义const hello: Hello = {name: "xx",age: 11,xxx: 11, // Error};
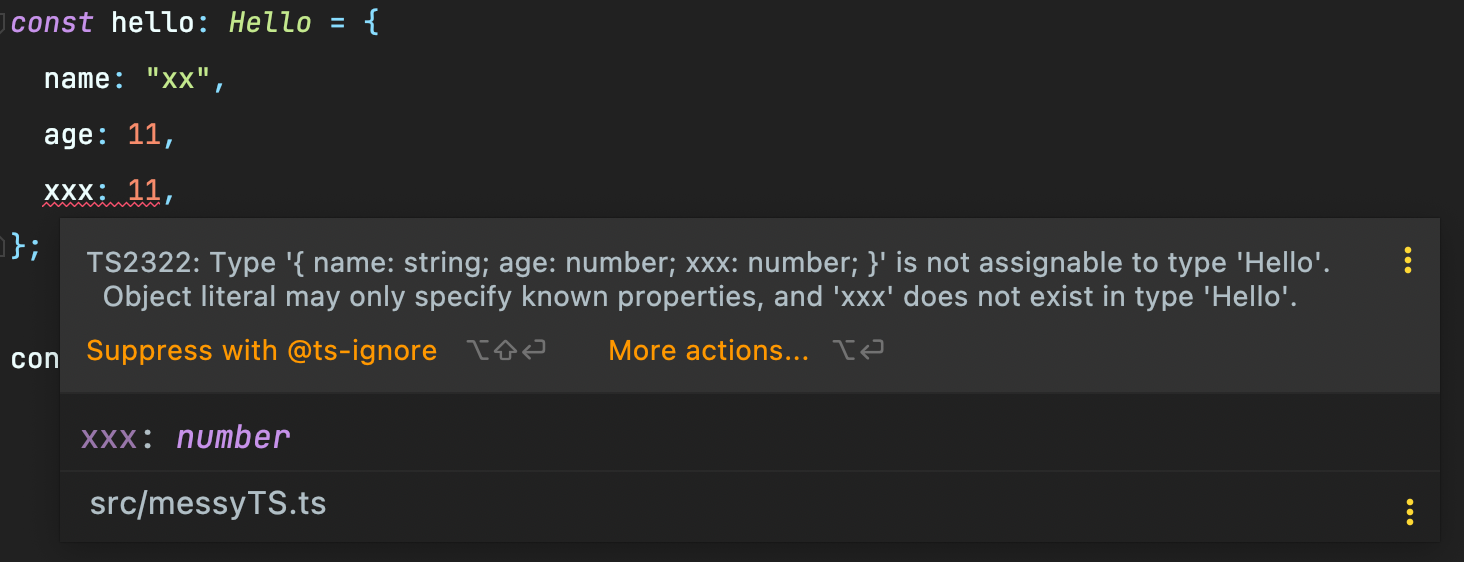
然后直接强行 git add ./, git commit -m 'update',发现竟然可以直接通过而不报错!
不报错的原因是因为:ESLint 本身就不会做类型校验(Type Check)。 理由如下(具体可见 这个 Issue):
- ESLint 只是作为 TypeScript Type Checking 的补充,只做 Type Checking 之外的一些工作
- 大多数人用 TS 的 Parser,但是不用
parserOptions.project,所以这种情况下也不能 Type Check - 和 TypeScript 相对完整的错误校验上报体系相比,ESLint 只完成了一半的工作
总的来说就是你用 tsc --noEmit 就能做类型检查,ESLint 就不用再重复造一次轮子了,再看看隔离 Babel 大哥,它就是转译器,它也不做 TS 的语法校验呀,还是一个工作做一件事的好。

有些同学估计都会抢答了:我知道我知道,直接在 .lintstagedrc.js 里添加一行 tsc 不就完事了?
module.exports = {'**/*.{ts,tsx}': ["tsc", // 检查 TypeScript"eslint --cache --fix",],'**/*.{js,jsx}': ["eslint --cache --fix",],"**/*.vue": ["eslint --cache --fix",],"**/*.{css,less}": ["stylelint --cache --fix",]}
年轻人,依然 Too young too naive!让我们走进下一章,看看 tsc 会给我们带来什么样的难题吧。

若有收获,就点个赞吧
0 人点赞
