配置项目
新建 module,选择 gradle web 项目,填写项目信息后完成。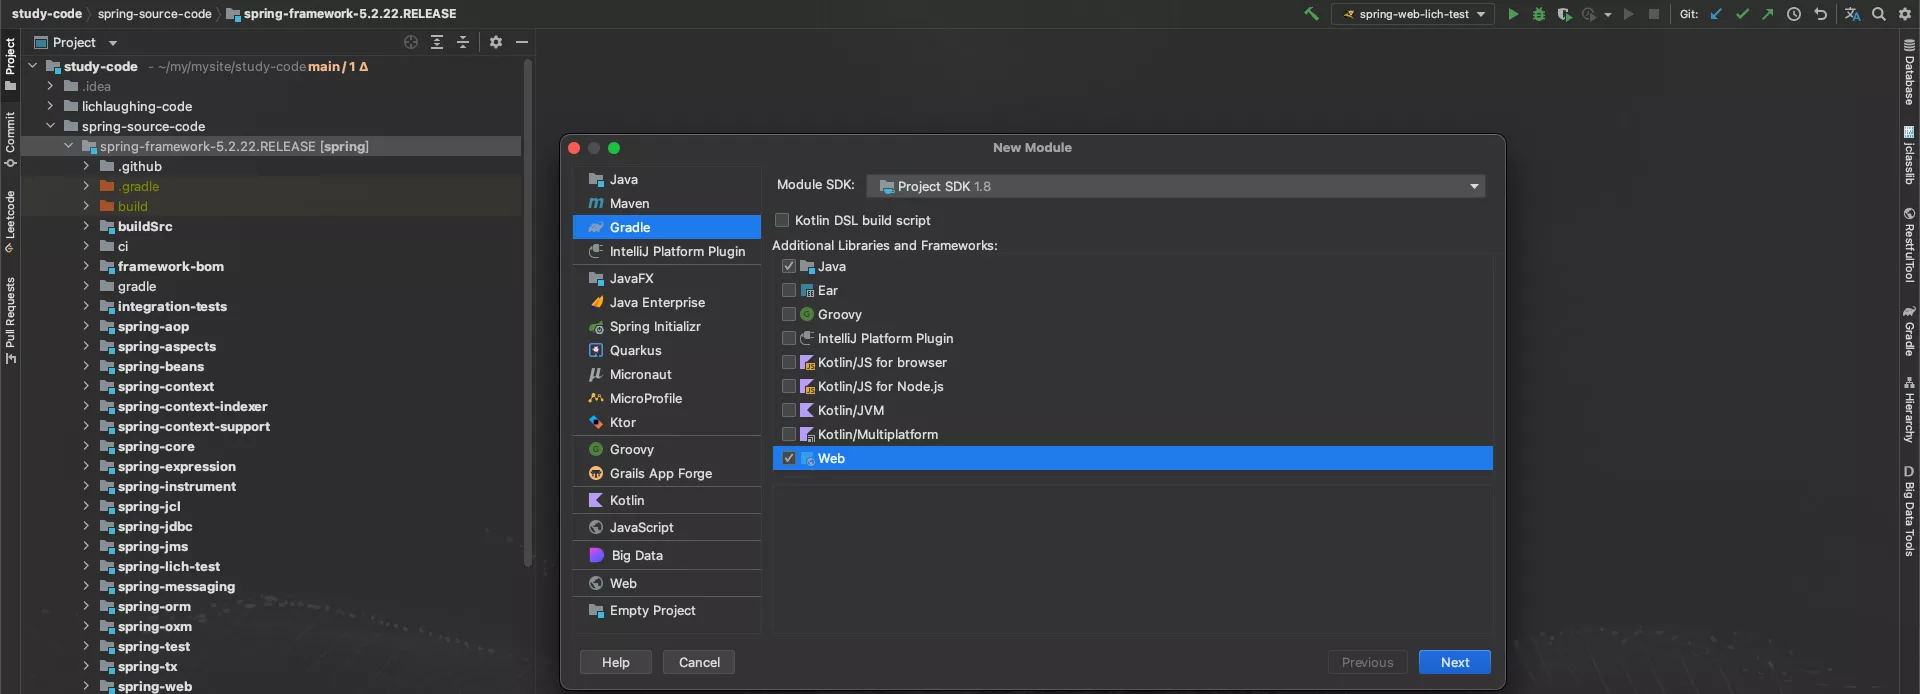
修改构建文件 build.gradle
- 增加项目依赖
- 增加servlet依赖即可 ```properties plugins { id ‘war’ id ‘java’ }
group ‘org.springframework’ version ‘5.2.22.RELEASE’
repositories { mavenCentral() mavenCentral() }
dependencies { compile(project(“:spring-context”)) compile(project(“:spring-web”)) compile(project(“:spring-webmvc”)) providedCompile group: ‘javax.servlet’, name: ‘javax.servlet-api’, version: ‘3.1.0’ providedCompile group: ‘javax.servlet’, name: ‘jsp-api’, version: ‘2.0’ testImplementation ‘junit:junit:4.11’ testImplementation ‘org.junit.jupiter:junit-jupiter-api:5.8.1’ testRuntimeOnly ‘org.junit.jupiter:junit-jupiter-engine:5.8.1’ }
test { useJUnitPlatform() }
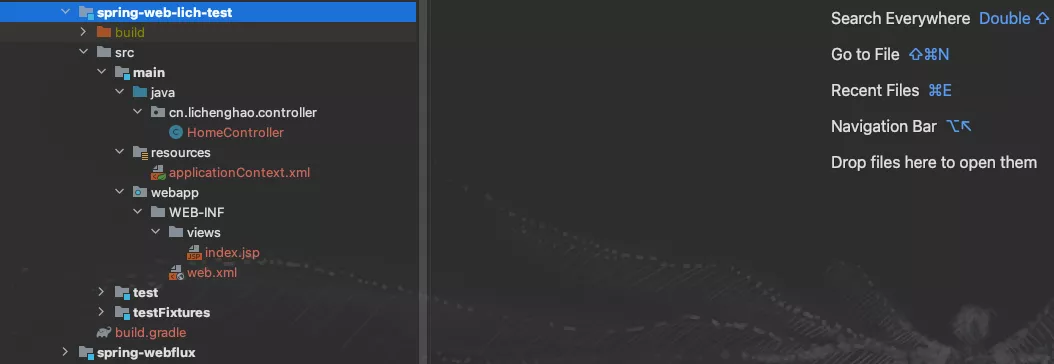
因为是spring web项目,所以需要mvc的配置文件,applicationContext.xml。在 resouces 文件夹下新建配置文件:```xml<?xml version="1.0" encoding="UTF-8"?><beans xmlns:xsi="http://www.w3.org/2001/XMLSchema-instance"xmlns:mvc="http://www.springframework.org/schema/mvc"xmlns:context="http://www.springframework.org/schema/context"xmlns="http://www.springframework.org/schema/beans"xsi:schemaLocation="http://www.springframework.org/schema/mvchttp://www.springframework.org/schema/mvc/spring-mvc-4.2.xsdhttp://www.springframework.org/schema/contexthttp://www.springframework.org/schema/context/spring-context-4.2.xsdhttp://www.springframework.org/schema/beanshttp://www.springframework.org/schema/beans/spring-beans-4.2.xsd "><context:component-scan base-package="cn.lichenghao"/><mvc:annotation-driven/><bean class="org.springframework.web.servlet.view.InternalResourceViewResolver"><property name="prefix" value="/WEB-INF/views/"/><property name="suffix" value=".jsp"/></bean><mvc:default-servlet-handler/></beans>
web.xml。
<?xml version="1.0" encoding="UTF-8"?><web-app xmlns="http://xmlns.jcp.org/xml/ns/javaee"xmlns:xsi="http://www.w3.org/2001/XMLSchema-instance"xsi:schemaLocation="http://xmlns.jcp.org/xml/ns/javaee http://xmlns.jcp.org/xml/ns/javaee/web-app_4_0.xsd"version="4.0"><context-param><param-name>contextConfigLocation</param-name><param-value>classpath:applicationContext.xml</param-value></context-param><listener><listener-class>org.springframework.web.context.ContextLoaderListener</listener-class></listener><servlet><servlet-name>dispatcherServlet</servlet-name><servlet-class>org.springframework.web.servlet.DispatcherServlet</servlet-class><init-param><param-name>contextConfigLocation</param-name><param-value>classpath:applicationContext.xml</param-value></init-param><load-on-startup>1</load-on-startup><async-supported>true</async-supported></servlet><servlet-mapping><servlet-name>dispatcherServlet</servlet-name><url-pattern>/</url-pattern></servlet-mapping></web-app>
按照配置文件的包路径新建测试类。
package cn.lichenghao.controller;import org.springframework.stereotype.Controller;import org.springframework.web.bind.annotation.RequestMapping;@Controllerpublic class HomeController {@RequestMapping("/")public String home() {return "index";}}
部署运行
部署在tomcat下运行,新增 Run Configurations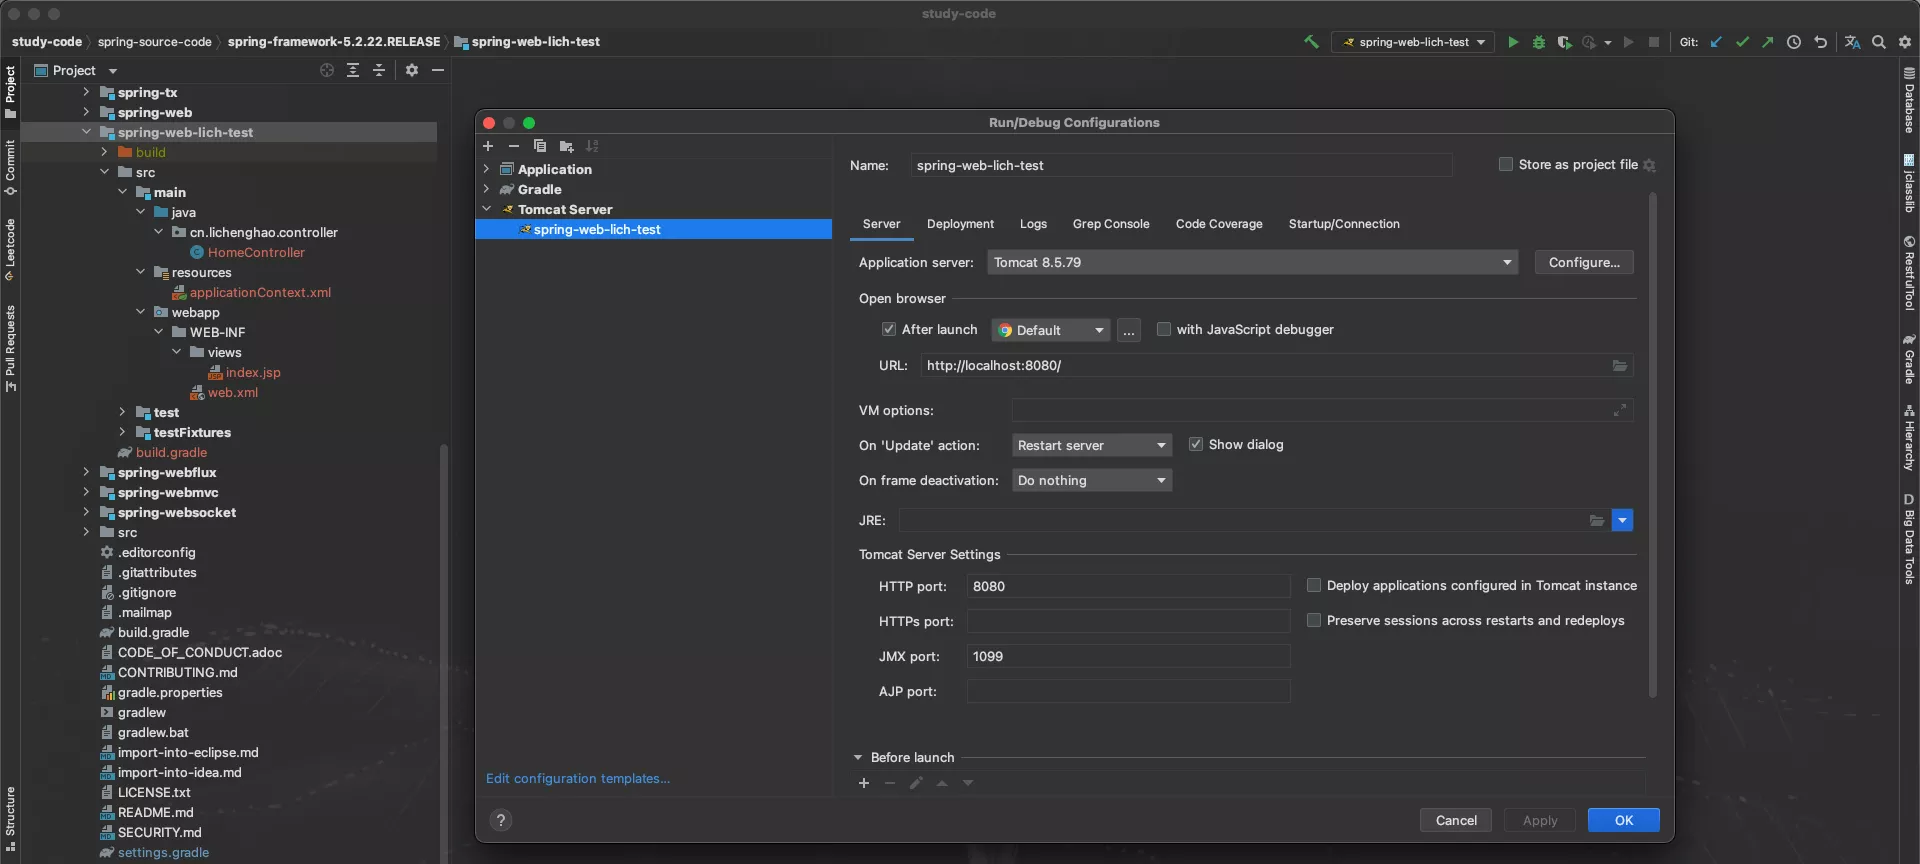
Deployment 选择我们的项目即可,运行访问即可。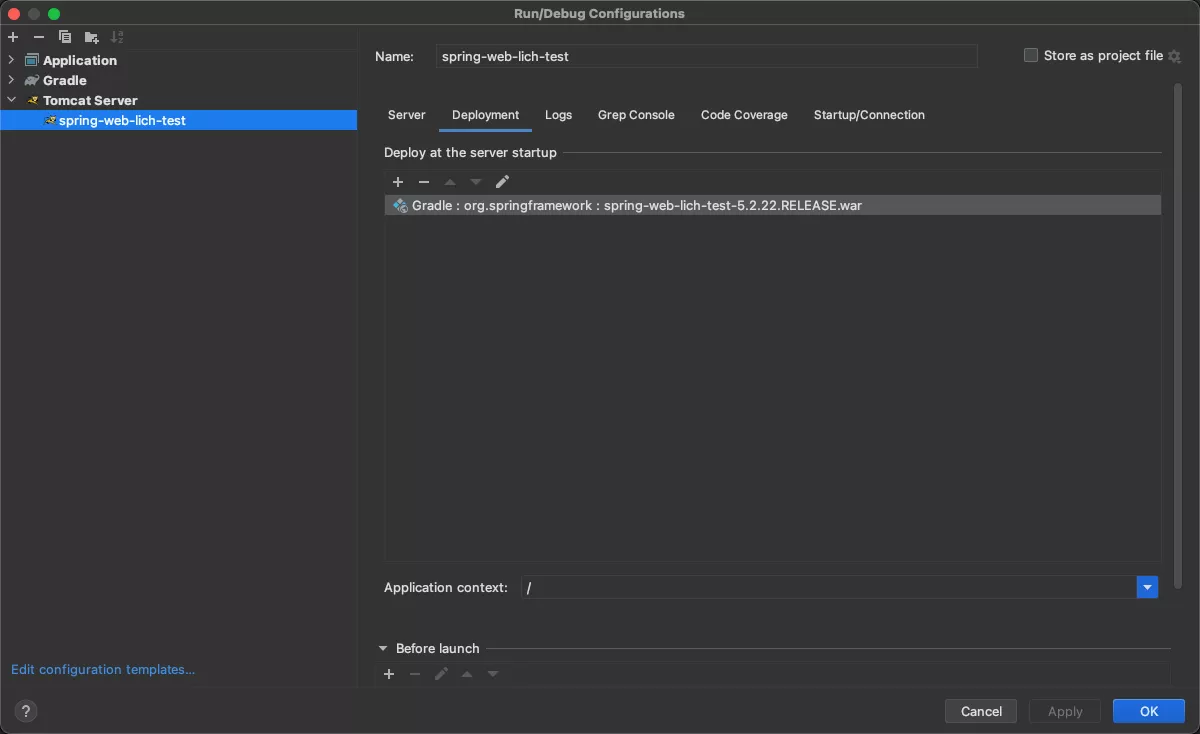

若有收获,就点个赞吧
0 人点赞
