概述
- Spring是轻量级的开源的JavaEE框架,可以解决企业应用开发的复杂性
- Spring有两个核心部分:IOC和AOP
- IOC:控制反转,把创建对象过程交给Spring管理
- AOP:面向切面,不修改源代码进行功能增强
- 特点
- 方便解耦,简化开发
- AOP编程支持
- 方便程序测试
- 方便和其他框架进行整合
- 方便进行事务操作
- 降低API开发
简单示例
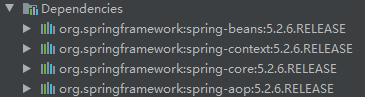
首先需要引入这些依赖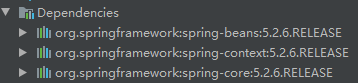
新建一个类
MyUserpublic class MyUser {public void add(){System.out.println("1111111111111");}}
写一个bean文件
bean1.xml<?xml version="1.0" encoding="UTF-8"?><beans xmlns="http://www.springframework.org/schema/beans"xmlns:xsi="http://www.w3.org/2001/XMLSchema-instance"xsi:schemaLocation="http://www.springframework.org/schema/beans http://www.springframework.org/schema/beans/spring-beans.xsd"><!--配置user对象--><bean id="user" class="com.example.MyUser"/></beans>
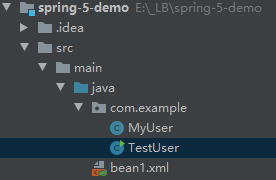
Test一下该类,新建
TestUserpublic class TestUser {public static void main(String[] args) {//加载spring配置文件ApplicationContext context = new ClassPathXmlApplicationContext("file:E:\\_LB\\spring-5-demo\\src\\main\\java\\bean1.xml");//获取创建的对象MyUser user = context.getBean("user", MyUser.class);user.add();System.out.println(user);}}
文件目录如下
程序打印结果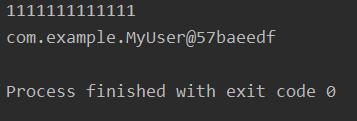
IOC容器
IOC,控制反转,把对象创建和对象之间的调用过程交给Spring进行管理
使用IOC的目的,是为了耦合度降低
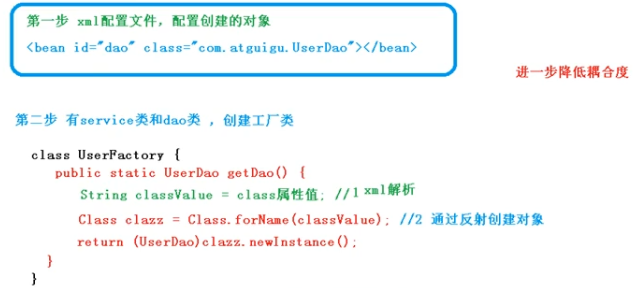
底层原理:xml解析、工厂模式、反射
- IOC的过程
- IOC接口
IOC思想基于IOC容器完成,IOC容器底层就是对象工厂
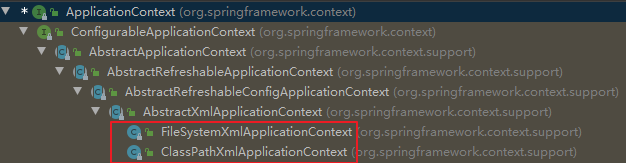
Spring提供IOC容器实现的两种方式(两个接口):
- BeanFactory:IOC容器的基本实现,是Spring内部的使用接口,不提供开发人员进行使用。在加载配置文件的时候不会创建对象,在获取对象(使用)才去创建对象
- ApplicationContext:是BeanFactory接口的子接口,提供更多更强大的功能,一般由开发人员进行使用。在加载配置文件的时候就会把对象进行创建
IOC操作Bean管理(基于xml方式)
- 什么是Bean管理
Bean管理指的是两个操作:Spring创建对象、Spring注入属性
在Spring配置文件中,使用bean标签,标签里面添加对应属性,就可以实现对象创建
<!--配置user对象--><bean id="user" class="com.example.MyUser"/>
常用属性
- id:唯一标识
- class:类的全路径
- name:与id类似,区别是id中不能有特殊符号,而name中可以有特殊符号(
/等)
创建对象的时候,默认也是执行无参构造方法
- 基于xml方式注入属性
DI:依赖注入,就是注入属性
有这么几种注入方式:
1、set方法注入
<!--配置user对象--><bean id="user" class="com.example.MyUser"><property name="userName" value="Jack"></property><property name="userDesc" value="a man"></property></bean>
public class MyUser {private String userName;private String userDesc;public void setUserName(String userName) {this.userName = userName;}public void setUserDesc(String userDesc) {this.userDesc = userDesc;}public void test(){System.out.println("1111111111111");System.out.println(userName+"--"+userDesc);}}
测试代码
public static void main(String[] args) {//加载spring配置文件ApplicationContext context = new ClassPathXmlApplicationContext("bean1.xml");//获取创建的对象MyUser user = context.getBean("user", MyUser.class);user.test();}
2、有参构造注入
<!--配置user对象--><bean id="anotherUser" class="com.example.AnotherUser"><constructor-arg name="userName" value="Rose"></constructor-arg><constructor-arg name="userDesc" value="a woman"></constructor-arg></bean>
public class AnotherUser {private String userName;private String userDesc;public AnotherUser(String userName, String userDesc){this.userName = userName;this.userDesc = userDesc;}public void test(){System.out.println(userName+"--"+userDesc);}}
测试一下
ApplicationContext context = new ClassPathXmlApplicationContext("bean2.xml");AnotherUser anotherUser = context.getBean("anotherUser", AnotherUser.class);anotherUser.test();
3、还有一种p名称空间注入,这个用的不多。使用p名称空间注入,简化基于xml配置方式
先要添加p名称空间在配置文件中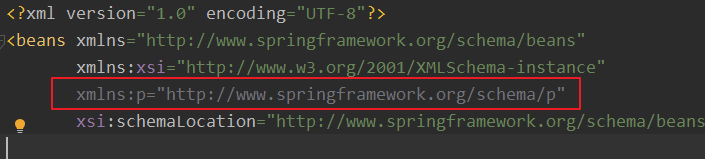
再进行属性注入,在bean标签里面进行操作
<?xml version="1.0" encoding="UTF-8"?><beans xmlns="http://www.springframework.org/schema/beans"xmlns:xsi="http://www.w3.org/2001/XMLSchema-instance"xmlns:p="http://www.springframework.org/schema/p"xsi:schemaLocation="http://www.springframework.org/schema/beans http://www.springframework.org/schema/beans/spring-beans.xsd"><bean id="user" class="com.example.MyUser" p:userName="jack" p:userDesc="boy"></bean></beans>
xml注入其他类型属性
字面量
null值
<bean id="user" class="com.example.MyUser"><property name="userName" value="Jack"></property><property name="userDesc"><null></null></property></bean>
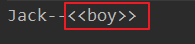
属性值包含特殊符号
例如属性值含有特殊符号<``>,可以进行转义<``>,也可以把带特殊符号内容写到CDATA
<bean id="user" class="com.example.MyUser"><property name="userName" value="Jack"></property><property name="userDesc"><value><![CDATA[<<boy>>]]></value></property></bean>
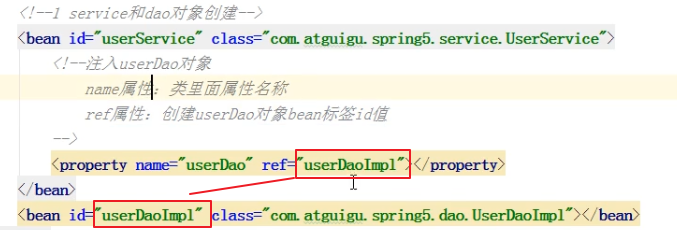
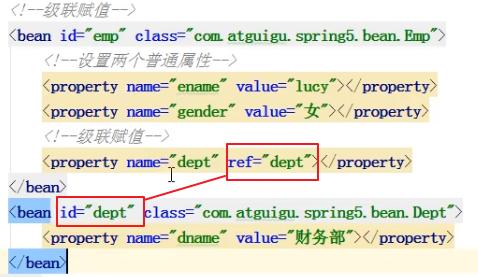
外部bean
例如,在service中引入Dao实现类
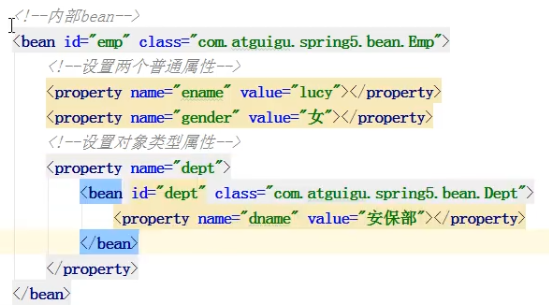
内部bean和级联赋值
一对多关系,例如一个部门有多个员工
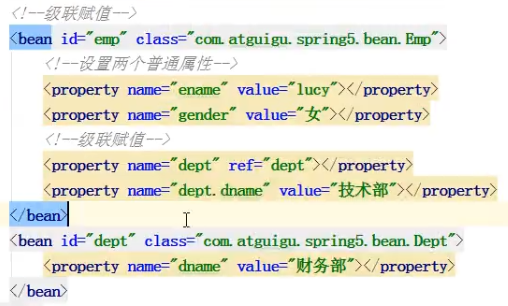
级联赋值

集合属性
数组类型属性
<bean id="stu" class="com.example.Stu"><!-- 数组类型属性注入 --><property name="courses"><array><value>java</value><value>mysql</value></array></property></bean>
List集合
简单的list
<bean id="stu" class="com.example.Stu"><!-- list类型属性注入 --><property name="courses"><list><value>java</value><value>mysql</value></list></property></bean>
复杂的list,list中属性是对象
<bean id="stu" class="com.example.Stu"><!-- list类型属性注入 --><property name="courses"><list><ref bean="course1">java</ref><ref bean="course2">java</ref></list></property></bean><!-- 创建多个course对象 --><bean id="course1" class="com.example.Course"><property name="cname" value="java"></property></bean><bean id="course2" class="com.example.Course"><property name="cname" value="mysql"></property></bean>
还可以将list集合抽取出来使用,这里就需要引入名称空间util
<?xml version="1.0" encoding="UTF-8"?><beans xmlns="http://www.springframework.org/schema/beans"xmlns:xsi="http://www.w3.org/2001/XMLSchema-instance"xmlns:util="http://www.springframework.org/schema/util"xsi:schemaLocation="http://www.springframework.org/schema/beans http://www.springframework.org/schema/beans/spring-beans.xsdhttp://www.springframework.org/schema/util http://www.springframework.org/schema/util/spring-util.xsd"><!-- 提取list集合类型属性注入 --><util:list id="bookList"><value>java</value><value>mysql</value><value>redis</value></util:list><!-- list集合类型属性注入使用 --><bean id="book" class="com.example.Book"><property name="list" ref="bookList"></property></bean></beans>
Map集合
<bean id="stu" class="com.example.Stu"><!-- map类型属性注入 --><property name="courses"><map><entry key="java" value="Java"></entry><entry key="mysql" value="MySQL"></entry></map></property></bean>
Set集合
<bean id="stu" class="com.example.Stu"><!-- set类型属性注入 --><property name="courses"><set><value>java</value><value>mysql</value></set></property></bean>
IOC操作Bean管理(FactoryBean)
Spring有两种类型Bean,一种普通Bean,另一种工厂Bean(FactoryBean)。
- 普通Bean:在配置文件中定义的Bean类型就是返回类型
- 工厂Bean:在配置文件定义的Bean类型可以和返回类型不一样
创建工厂Bean的步骤:
- 创建类,让这个类作为工厂Bean,实现接口FactoryBean
- 实现接口里面的方法,在实现的方法中定义返回的Bean类型
代码示例
<?xml version="1.0" encoding="UTF-8"?><beans xmlns="http://www.springframework.org/schema/beans"xmlns:xsi="http://www.w3.org/2001/XMLSchema-instance"xsi:schemaLocation="http://www.springframework.org/schema/beans http://www.springframework.org/schema/beans/spring-beans.xsd"><bean id="myBean" class="com.example.MyBean"></bean></beans>
MyBean实现Factory接口,这里使用泛型,重写getObject方法
public class MyBean implements FactoryBean<MyUser> {@Overridepublic MyUser getObject() {MyUser myUser = new MyUser();myUser.setUserName("111");return myUser;}@Overridepublic Class<?> getObjectType() {return null;}@Overridepublic boolean isSingleton() {return false;}}
接的时候,拿MyUser类型来接
ApplicationContext context = new ClassPathXmlApplicationContext("bean3.xml");MyUser myBean = context.getBean("myBean", MyUser.class);System.out.println(myBean);
运行,拿到的就是Myuser类
Bean作用域
在Spring里,设置创建Bean实例是单实例还是多实例,默认情况下Bean是单实例对象
- 在Spring配置文件Bean标签里面有属性(scope)用于设置单实例还是多实例
- 默认值
singleton,表示单例。加载Spring配置文件的时候就会创建单实例对象 prototype,多实例对象。不在加载Spring配置文件时创建对象,而是在调用getBean方法时创建多实例对象- 此外scope还有属性值
request、session,用于Web请求
- 默认值
Bean生命周期
指从对象创建到对象销毁的过程
- 通过构造器创建Bean实例(无构造参数)
- 为Bean的属性设置值和对其他Bean引用(调用set方法)
- 调用Bean的初始化方法(需要进行配置)
Bean标签中配置init-method属性,属性值为初始化的方法名
- Bean可以进行使用,被对象获取
- 当容器关闭的时候,调用Bean的销毁方法(需要进行配置销毁的方法)
Bean标签中配置destroy-method属性,属性值为销毁的方法名,并且在需要销毁时调用close方法
xml自动装配
根据指定装配规则(属性名称或者属性类型),Spring自动将匹配的属性值进行注入
通过Bean标签属性autowire,配置自动装配
autowire属性常用两个值byName:根据属性名称注入,注入Bean的id值要和类属性名称一样
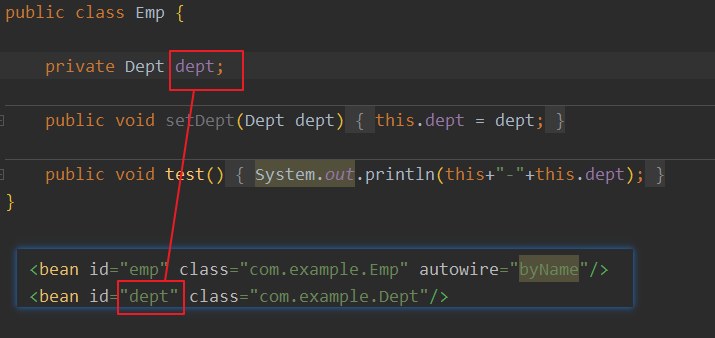
byType:根据属性类型注入
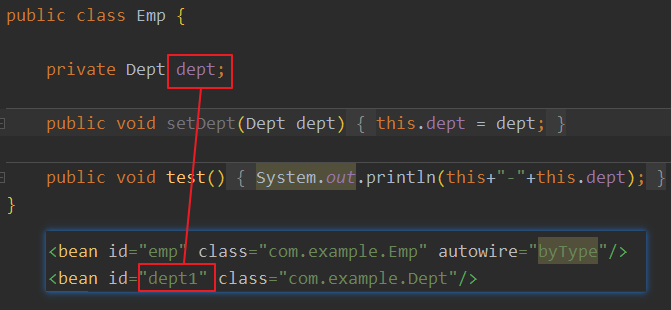
名称可以随便取,但是Bean文件中只能有一个Dept类
外部属性文件(Druid连接池)
这里举一个引入Druid数据库连接池的例子
先配置连接池文件jdbc.properties
prop.driverClassName=com.mysql.jdbc.Driverprop.url=jdbc:mysql://localhost:3306/exampleprop.username=rootprop.password=root
然后修改xml文件的命名空间
<?xml version="1.0" encoding="UTF-8"?><beans xmlns="http://www.springframework.org/schema/beans"xmlns:xsi="http://www.w3.org/2001/XMLSchema-instance"xmlns:context="http://www.springframework.org/schema/context"xsi:schemaLocation="http://www.springframework.org/schema/beans http://www.springframework.org/schema/beans/spring-beans.xsdhttp://www.springframework.org/schema/context http://www.springframework.org/schema/context/spring-context.xsd"><!--配置连接池--><bean id="dataSource" class="com.alibaba.druid.pool.DruidDataSource"><property name="driverClassName" value="${prop.driverClassName}"/><property name="url" value="${prop.url}"/><property name="username" value="${prop.username}"/><property name="password" value="${prop.password}"/></bean><!-- 引入外部属性文价--><context:property-placeholder location="jdbc.properties"/></beans>
IOC操作Bean管理(基于注解方式)
注解是代码里的特殊标记,格式:@注解名称(属性名称=属性值,属性名称=属性值……)
注解可以作用在类、方法、属性上面
使用注解目的:简化xml配置
Spring针对Bean管理中创建对象提供了下面的注解:
@Component@Service@Controller@Repository
上面四个注解功能都是一样的,都可以用来创建Bean实例
基本使用
- 首先要引入依赖,除了上面用到的三个依赖,还需要增加
spring-aop
开启组件扫描,如果扫描多个包可以用逗号隔开
<?xml version="1.0" encoding="UTF-8"?><beans xmlns="http://www.springframework.org/schema/beans"xmlns:xsi="http://www.w3.org/2001/XMLSchema-instance"xmlns:context="http://www.springframework.org/schema/context"xsi:schemaLocation="http://www.springframework.org/schema/beans http://www.springframework.org/schema/beans/spring-beans.xsdhttp://www.springframework.org/schema/context http://www.springframework.org/schema/context/spring-context.xsd"><context:component-scan base-package="com.example"/></beans>
这里插一嘴,还有其他用法,可以添加过滤器,下面的写法表示只扫描
com.example包下的@Controller注解<context:component-scan base-package="com.example" use-default-filters="false"><context:include-filter type="annotation" expression="org.springframework.stereotype.Controller"/></context:component-scan>
还可以设置不去扫描哪些注解,下面的写法表示扫描
com.example包中除了@Controller之外的其他注解<context:component-scan base-package="com.example"><context:exclude-filter type="annotation" expression="org.springframework.stereotype.Controller"/></context:component-scan>
创建类,在类上面添加创建对象注解
注解里面的value属性值可以省略不写,默认值是类名称,首字母小写
注入属性
@AutoWired:根据属性类型进行自动装配@Qualifier:根据属性名称进行注入,需要和@AutoWired一起使用,这里的属性名要在其他接口先声明@AutoWired@Qualifier(value = "userDaoImpl")private UserDao userDao;
@Resource:可以根据类型注入;也可以根据名称注入@Resource(name="")
但是这里注意了,
注意这个包名,@Resource是javax下的属于Java的扩展包,@AutoWired和@Qualifier都是Spring官方的,因此Spring推荐使用前两个注解
@Value:注入普通类型属性
这里的name属性就已经通过注解注入了属性值“jack”@Value(value = "jack")private String name;
完全注解开发
完全注解开发就舍弃了xml文件,不需要在xml文件中配置Bean相关内容,这就需要用配置类来替代,这里配置类是SpringConfig.java
@Configuration@ComponentScan(basePackages = {"com.example"})public class SpringConfig {}
相应的调用也有变化
AnnotationConfigApplicationContext context = new AnnotationConfigApplicationContext(SpringConfig.class);UserService userService = context.getBean("userService", UserService.class);userService.test();
但是一般这种开发都会使用SpringBoot
AOP
AOP(Aspect Oriented Programming)面向切面编程,是OOP的延续。利用AOP可以对业务逻辑的各个部分进行隔离,从而使得业务逻辑各部分之间的耦合度降低,提高程序的可重用性,同时提高开发效率
AOP底层使用动态代理:
有接口的情况,使用JDK动态代理,创建接口实现类的代理对象;没有接口的情况,使用CGLIB动态代理,创建当前类子类的代理对象增强类的方法
JDK动态代理
JDK动态代理,使用Proxy(java.lang.reflect.Proxy)类里面的方法创建代理对象,调用newProxyInstance _(_ClassLoader loader, Class_<_?_>[] _interfaces, InvocationHandler h_)_方法。该方法有三个参数,分别是类加载器、增强方法所在的接口(支持多个接口)、增强的方法所在的接口。
对于第三个参数,要实现InvocationHandler接口,创建代理对象,写增强的方法
下面有个简单的示例
有个接口UserDao.java
public interface UserDao {Integer add(Integer a, Integer b);String update(String id);}
接口的实现类 `UserDaoImpl.java`
public class UserDaoImpl implements UserDao {public Integer add(Integer a, Integer b) {return a+b;}public String update(String id) {return id;}}
代理对象 `UserInvocationHandler.java`
public class UserInvocationHandler implements InvocationHandler {public Object object;public UserInvocationHandler(Object object){this.object = object;}public Object invoke(Object proxy, Method method, Object[] args) throws Throwable {System.out.println("方法执行前");System.out.println(method.getName());System.out.println(Arrays.toString(args));Object res = method.invoke(object, args);System.out.println("方法执行后");System.out.println(object);return res;}}
调用该代理
public class JDKProxy {public static void main(String[] args) {Class[] interfaces = {UserDao.class};// Proxy.newProxyInstance(JDKProxy.class.getClassLoader(), interfaces, new InvocationHandler() {// public Object invoke(Object proxy, Method method, Object[] args) throws Throwable {// return null;// }// });UserDao instance = (UserDao) Proxy.newProxyInstance(JDKProxy.class.getClassLoader(), interfaces, new UserInvocationHandler(new UserDaoImpl()));Integer add = instance.add(1, 2);System.out.println(add);}}
调用代理的时候有两种方法,一种是直接写个内部类,另一种是把代理拿出来新写一个类,这里是后者<br />打印结果<br />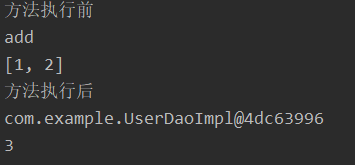
相关术语
- 连接点:指类里面可以被增强的方法。上述例子中的连接点为
UserDaoImpl的add()、update()方法 - 切入点:实际真正被增强的方法。
UserDaoImpl的add()方法 - 通知(增强):实际增强的逻辑部分
通知有以下几种类型:
- 前置通知:在切入点之前
- 后置通知:在切入点之后
- 环绕通知:在切入点前后都有
- 异常通知:切入点出现异常时通知
- 最终通知:无论如何都会通知,类似于
try、catch、finally的finally- 切面:把通知应用到切入点的过程
AOP操作
Spring框架一般基于AspectJ实现AOP操作。AspectJ不是Spring组成部分,它独立于AOP框架,一般把AspectJ和Spring框架一起使用进行AOP操作
有两种基于AspectJ实现AOP的操作,基于xml配置文件实现、基于注解方式实现,一般都是使用后者
先引入相关依赖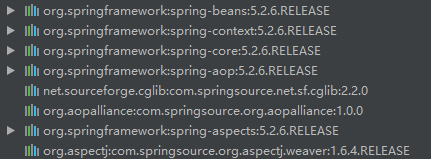
再写切入表达式
切入表达式表明对哪个类里面的哪个方法进行增强,结构:execution([权限修饰符][返回类型][类全路径][方法名称][参数列表])。例如对com.example.UserDao的add()方法进行增强,则切入表达式为execution(* com.example.UserDao.add(..)),其中*表示任意权限修饰符都行
创建被增强的类UserDao.java和增强类UserProxy.java,并在类上添加注解
@Componentpublic class UserDao {public void add(){System.out.println("run add");}}
@Component@Aspectpublic class UserProxy {public void before(){System.out.println("before");}}
在xml文件( `bean1.xml`)中配置开启注解扫描、开启AspectJ生成代理对象
<?xml version="1.0" encoding="UTF-8"?><beans xmlns="http://www.springframework.org/schema/beans"xmlns:xsi="http://www.w3.org/2001/XMLSchema-instance"xmlns:context="http://www.springframework.org/schema/context"xmlns:aop="http://www.springframework.org/schema/aop"xsi:schemaLocation="http://www.springframework.org/schema/beans http://www.springframework.org/schema/beans/spring-beans.xsdhttp://www.springframework.org/schema/context http://www.springframework.org/schema/context/spring-context.xsdhttp://www.springframework.org/schema/aop http://www.springframework.org/schema/aop/spring-aop.xsd"><!--开启注解扫描--><context:component-scan base-package="com.example"/><!--开启AspectJ生成代理对象--><aop:aspectj-autoproxy/></beans>
配置不同类型的通知,这里是前置通知
@Component@Aspectpublic class UserProxy {//@Before表示前置通知@Before(value = "execution(* com.example.UserDao.add(..))")public void before(){System.out.println("before");}}
测试一下
ClassPathXmlApplicationContext context = new ClassPathXmlApplicationContext("bean1.xml");UserDao userDao = context.getBean("userDao", UserDao.class);userDao.add();
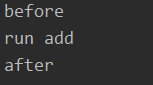
结果如下<br />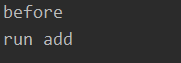<br />增强的注解有`@Before`、`@After`、`@AfterReturning`、`@AfterThrowing`、`@Around`,`@After`无论如何最后都会通知,`@AfterReturning`是有返回结果后才通知<br />环绕通知`@Around`注解的使用方法不太一样,这里演示一下
@Around(value = "execution(* com.example.UserDao.add(..))")public void around(ProceedingJoinPoint proceedingJoinPoint) throws Throwable{System.out.println("before");proceedingJoinPoint.proceed();System.out.println("after");}
此外,还可以把切入点抽取出来
@Pointcut(value = "execution(* com.example.UserDao.add(..))")public void demoTest(){}@Before(value = "demoTest()")public void before(){System.out.println("before");}
<br />有多个类对同一个方法进行增强时,可以设置增强类的优先级。在增强类上面添加注解`@Order(数值)`,数值越小优先级越高
除了使用注解的方式,还可以使用xml配置文件
<?xml version="1.0" encoding="UTF-8"?><beans xmlns="http://www.springframework.org/schema/beans"xmlns:xsi="http://www.w3.org/2001/XMLSchema-instance"xmlns:context="http://www.springframework.org/schema/context"xmlns:aop="http://www.springframework.org/schema/aop"xsi:schemaLocation="http://www.springframework.org/schema/beans http://www.springframework.org/schema/beans/spring-beans.xsdhttp://www.springframework.org/schema/context http://www.springframework.org/schema/context/spring-context.xsdhttp://www.springframework.org/schema/aop http://www.springframework.org/schema/aop/spring-aop.xsd"><bean id="userDao" class="com.example.UserDao"/><bean id="userProxy" class="com.example.UserProxy"/><aop:config><aop:pointcut id="p" expression="execution(* com.example.UserDao.add(..))"/><aop:aspect ref="userProxy"><aop:before method="before" pointcut-ref="p"/></aop:aspect></aop:config></beans>
当然,也可以不写任何配置文件,完全使用注解开发,这就需要写配置类
@Configuration@ComponentScan(basePackages = {"com.example"})@EnableAspectJAutoProxy(proxyTargetClass = true)public class ProxyConfig {}
JdbcTemplate
Spring框架对JDBC进行封装,使用JdbcTemplate方便实现对数据库的操作
首先要引入依赖,在前面的基础之上在加几个依赖
配置好数据库连接池Druid,详细步骤见IOC容器
配置JdbcTemplate对象,注入DataSource。同时,在配置文件开启注解扫描
<?xml version="1.0" encoding="UTF-8"?><beans xmlns="http://www.springframework.org/schema/beans"xmlns:xsi="http://www.w3.org/2001/XMLSchema-instance"xmlns:context="http://www.springframework.org/schema/context"xsi:schemaLocation="http://www.springframework.org/schema/beans http://www.springframework.org/schema/beans/spring-beans.xsdhttp://www.springframework.org/schema/context http://www.springframework.org/schema/context/spring-context.xsd"><!--配置连接池--><bean id="dataSource" class="com.alibaba.druid.pool.DruidDataSource"><property name="driverClassName" value="${prop.driverClassName}"/><property name="url" value="${prop.url}"/><property name="username" value="${prop.username}"/><property name="password" value="${prop.password}"/></bean><!-- 引入外部属性文价--><context:property-placeholder location="jdbc.properties"/><!--JdbcTemplate对象--><bean id="jdbcTemplate" class="org.springframework.jdbc.core.JdbcTemplate"><!--注入dataSource--><property name="dataSource" ref="dataSource"/></bean><context:component-scan base-package="com.example"/></beans>
在UserDao里面简单调用一下方法
@Repositorypublic class UserDao {@Autowiredprivate JdbcTemplate jdbcTemplate;public void addUser(People people){int update = jdbcTemplate.update("insert into people values(?,?,?,?)", people.getId(), people.getName(), people.getAddress(), people.getAge());System.out.println(update);}}
事务
事务是数据库操作最基本单元,逻辑上一组操作要么都成功,要么都失败
事务四个特性(ACID):
- 原子性
- 一致性
- 隔离性
- 持久性
在Spring进行事务管理操作有两种方式:编程式事务管理(类似上面的示例)和声明式事务管理,一般使用后者
编程式事务管理
基本做法:
try {//开启事务//进行业务操作//没有发生异常,提交事务}catch (Exception e){//出现异常,事务回滚}
声明式事务管理
声明式事务管理有基于注解的方式和基于xml配置文件的方式。在Spring进行声明式事务管理,底层使用AOP
Spring提供一个接口,代表事务管理器,这个接口针对不同的框架提供不同的实现类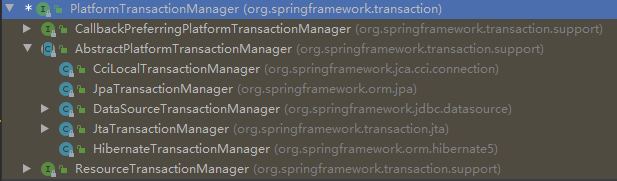
JDBC和MyBatis框架使用DataSourceTransactionManager,Hibernate框架使用HibernateTransactionManager
基于注解方式
先配置,开启事务注解的时候要引入tx空间
<?xml version="1.0" encoding="UTF-8"?><beans xmlns="http://www.springframework.org/schema/beans"xmlns:xsi="http://www.w3.org/2001/XMLSchema-instance"xmlns:context="http://www.springframework.org/schema/context"xmlns:tx="http://www.springframework.org/schema/tx"xsi:schemaLocation="http://www.springframework.org/schema/beans http://www.springframework.org/schema/beans/spring-beans.xsdhttp://www.springframework.org/schema/context http://www.springframework.org/schema/context/spring-context.xsdhttp://www.springframework.org/schema/tx http://www.springframework.org/schema/tx/spring-tx.xsd"><!--配置连接池--><bean id="dataSource" class="com.alibaba.druid.pool.DruidDataSource"><property name="driverClassName" value="${prop.driverClassName}"/><property name="url" value="${prop.url}"/><property name="username" value="${prop.username}"/><property name="password" value="${prop.password}"/></bean><!-- 引入外部属性文价--><context:property-placeholder location="jdbc.properties"/><!--JdbcTemplate对象--><bean id="jdbcTemplate" class="org.springframework.jdbc.core.JdbcTemplate"><!--注入dataSource--><property name="dataSource" ref="dataSource"/></bean><context:component-scan base-package="com.example"/><!--创建事务管理器--><bean id="transactionManager" class="org.springframework.jdbc.datasource.DataSourceTransactionManager"><!--注入dataSource--><property name="dataSource" ref="dataSource"/></bean><!--开启事务注解--><tx:annotation-driven transaction-manager="transactionManager"/></beans>
在需要开启事务的 **类**或**方法**上开启注解`@Transactional`,该注解里面有很多参数可以配置(也可以不配置)
主要有这些参数:
propagation:事务传播行为- 多事务方法(对数据库的增删改查)直接进行调用,这个过程中事务是如何进行管理的
- Spring框架事务传播行为有7种,默认是
REQUIRED 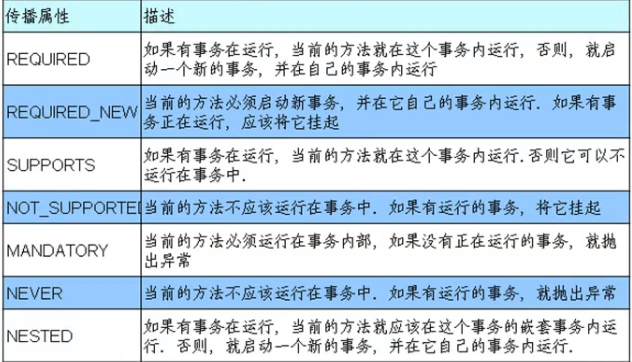
ioslation:事务隔离级别- 事务有隔离性,不考虑隔离性会产生脏读、不可重复读、虚(幻)读
- 脏读:一个未提交事务读取到另一个未提交事务的数据
- 不可重复读:一个未提交事务读取到另一提交事务的修改数据
- 幻读:一个未提交事务读取到另一提交事务的添加数据
| | 脏读 | 不可重复读 | 幻读 |
| —- | —- | —- | —- |
| READ_UNCOMMITTED
(读未提交) | 有 | 有 | 有 | | READ_COMMITTED
(读已提交) | 无 | 有 | 有 | | REPEATABLE_READ
(可重复读) | 无 | 无 | 有 | | SERIALIZABLE
(串行化) | 无 | 无 | 无 |
- 事务有隔离性,不考虑隔离性会产生脏读、不可重复读、虚(幻)读
timeout:超时时间- 事务需要在一定时间内进行提交,如果不提交就进行回滚
- 默认值是 -1,表示永不超时,设置时间以秒为单位
readOnly:是否只读- 读:查询操作;写:添加修改删除操作
- 默认值false,表示增删改查均可;设置为true则只能查询
rollbackFor:回滚- 设置出现哪些异常进行事务回滚
- 默认值是
UncheckedException,包括了RuntimeException和Error,不指定值时Exception及其子类都不会触发回滚
noRollBackFor:不回滚- 设置出现哪些异常不进行事务回滚
基于xml方式
配置事务管理器、配置通知、配置切入点和切面
<?xml version="1.0" encoding="UTF-8"?><beans xmlns="http://www.springframework.org/schema/beans"xmlns:xsi="http://www.w3.org/2001/XMLSchema-instance"xmlns:context="http://www.springframework.org/schema/context"xmlns:tx="http://www.springframework.org/schema/tx" xmlns:aop="http://www.springframework.org/schema/aop"xsi:schemaLocation="http://www.springframework.org/schema/beans http://www.springframework.org/schema/beans/spring-beans.xsdhttp://www.springframework.org/schema/context http://www.springframework.org/schema/context/spring-context.xsdhttp://www.springframework.org/schema/tx http://www.springframework.org/schema/tx/spring-tx.xsd http://www.springframework.org/schema/aop https://www.springframework.org/schema/aop/spring-aop.xsd"><!--配置连接池--><bean id="dataSource" class="com.alibaba.druid.pool.DruidDataSource"><property name="driverClassName" value="${prop.driverClassName}"/><property name="url" value="${prop.url}"/><property name="username" value="${prop.username}"/><property name="password" value="${prop.password}"/></bean><!-- 引入外部属性文价--><context:property-placeholder location="jdbc.properties"/><!--JdbcTemplate对象--><bean id="jdbcTemplate" class="org.springframework.jdbc.core.JdbcTemplate"><!--注入dataSource--><property name="dataSource" ref="dataSource"/></bean><!--创建事务管理器--><bean id="transactionManager" class="org.springframework.jdbc.datasource.DataSourceTransactionManager"><!--注入dataSource--><property name="dataSource" ref="dataSource"/></bean><!--配置通知--><tx:advice id="advice"><tx:attributes><tx:method name="test" propagation="REQUIRED"/></tx:attributes></tx:advice><!--配置切入点和切面--><aop:config><!--配置切入点--><aop:pointcut id="pt" expression="execution(* com.example.UserDao.*(..))"/><!--配置切面--><aop:advisor advice-ref="advice" pointcut-ref="pt"/></aop:config></beans>
完全注解开发
下面使用完全注解开发来进行声明式事务管理
创建配置类,使用配置类替代xml配置文件
package com.example;import com.alibaba.druid.pool.DruidDataSource;import org.springframework.context.annotation.Bean;import org.springframework.context.annotation.ComponentScan;import org.springframework.context.annotation.Configuration;import org.springframework.jdbc.core.JdbcTemplate;import org.springframework.jdbc.datasource.DataSourceTransactionManager;import org.springframework.transaction.annotation.EnableTransactionManagement;import javax.sql.DataSource;@Configuration@ComponentScan(basePackages = "com.example")@EnableTransactionManagementpublic class TransactionConfig {/*** 创建数据库连接池* @return 数据库连接池*/@Beanpublic DruidDataSource getDataSource(){DruidDataSource druidDataSource = new DruidDataSource();druidDataSource.setDriverClassName("${prop.driverClassName}");druidDataSource.setUrl("${prop.url}");druidDataSource.setUsername("${prop.username}");druidDataSource.setPassword("${prop.password}");return druidDataSource;}/*** 创建JdbcTemplate对象* @param dataSource 数据源* @return JdbcTemplate对象*/@Beanpublic JdbcTemplate getJdbcTemplate(DataSource dataSource){JdbcTemplate jdbcTemplate = new JdbcTemplate();jdbcTemplate.setDataSource(dataSource);return jdbcTemplate;}/*** 创建事务管理器* @param dataSource 数据源* @return 事务管理器*/@Beanpublic DataSourceTransactionManager getDataSourceTransactionManager(DataSource dataSource){DataSourceTransactionManager dataSourceTransactionManager = new DataSourceTransactionManager();dataSourceTransactionManager.setDataSource(dataSource);return dataSourceTransactionManager;}}
Spring5新功能
整个Spring5框架的代码基于Java8,运行时兼容JDK9,许多不建议使用的类和方法在代码库中删除
整合Log4j2框架
Spring5框架自带了通用的日志封装,移除了Log4jConfigListener,官方建议使用Log4j2
引入jar包
创建log4j2.xml配置文件,文件名是固定的
<?xml version="1.0" encoding="UTF-8" ?><!--日志级别优先级:OFF->FATAL->ERROR->WARN->INFO->DEBUG->TRACE->ALL,约往右优先级越高--><configuration status="INFO"><appenders><console name="Console" target="SYSTEM_OUT"><PatternLayout pattern="%d{yyyy-MM-dd HH:mm:ss.SSS} [%t] %-5level %logger{36} - %msg%n"/></console></appenders><loggers><root level="info"><appender-ref ref="Console"/></root></loggers></configuration>
@Nullable注解
Spring5框架核心容器支持@Nullable注解@Nullable可以用在方法上面,表示方法返回可以为空;可以用在属性上面,表示属性值可以为空;可以用在参数上面,表示参数值可以为空
函数式风格
Spring5核心容器支持函数式风格GenericApplicationContext
SpringWebFlux
Spring5添加的新模块,一个基于reactive的spring-webmvc,完全的异步非阻塞,旨在使用enent-loop执行模型和传统的线程池模型。
传统的Web框架,比如SpringMVC,基于Servlet容器。Webflux是一种异步非阻塞的框架,异步非阻塞的框架在Servlet3.1以后才支持,核心是基于Reactor的相关API实现的。
异步和同步:针对调用者。调用者发送请求,如果等着对方回应之后才去做其他事情就是同步,如果发送请求之后不等对方回应就去做其他事情就是异步。 阻塞和非阻塞:针对被调用者。被调用者收到请求后,做完请求任务之后才给出反馈就是阻塞,马上给出反馈然后再去做事情就是非阻塞。
WebFlux特点:
- 非阻塞式:在有限资源下,提高系统吞吐量和伸缩性,以Reactor为基础实现相应式编程
- 函数式编程:Spring5框架基于Java8,WebFlux使用函数式编程方式实现路由请求
SpringMVC采用命令式编程,Webflux采用异步响应式编程
响应式编程:响应式编程是一种面向数据流和变化传播的编程范式。这意味着可以在编程语言中很方便地表达静态或动态的数据流,而相关的计算模型会自动将变化的值通过数据流进行传播 Java8及其之前版本,提供观察者模式两个类
Observer和Observable,Java9及之后采用Flow类
Reactor实现响应式编程
响应式编程中,Reactor满足Reactive规范框架
Reactive有两个核心类 Mono、Flux,这两个类实现接口Publisher,提供丰富的操作符。Flux对象实现发布者,返回N个元素;Mono实现发布者,返回0或1个元素Flux和Mono都是数据流的发布者,使用Flux和Mono都可以发出三种数据信号:元素值、错误信号、完成信号,错误信号、完成信号代表终止信号,终止信号用于告诉订阅者数据流结束了,错误信号终止数据流的同时把错误信息传递给订阅者
三种信号特点:
- 错误信号和完成信号都是终止信号,但是不能共存
- 如果没有发送任何元素值,而是直接发送错误或者完成信号,表示是空数据流
- 如果没有错误信号和完成信号,表示是无限数据流
调用 `just`或其他方法只是声明数据流,数据流并没有发出,只有进行订阅之后才会触发数据流,不订阅什么都不会发生<br />下面代码演示了`Flux`对数组、List集合、stream流的数据流发布
Flux<Integer> flux = Flux.just(1, 2, 3);flux.subscribe(System.out::println);Integer[] arr = {1,2,3,4,5};Flux.fromArray(arr).subscribe(System.out::println);Flux.fromIterable(Arrays.asList(arr)).subscribe(System.out::println);Flux.fromStream(Arrays.stream(arr)).subscribe(System.out::println);
SpringWebFlux基于注解编程模型
SpringWebFlux基于Reactor,默认使用的容器是Netty,Netty是高性能同步非阻塞NIO框架
SpringWebFlux核心控制器DispatchHandler,实现接口WebHandler
实现函数式编程,两个接口:RouterFunction(路由处理)、HandlerFunction(处理函数)
先引入Webflux依赖
<dependency><groupId>org.springframework.boot</groupId><artifactId>spring-boot-starter-webflux</artifactId></dependency>
示例
public class TestService {private final Map<Integer, People> peopleMap = new HashMap<>();public TestService() {this.peopleMap.put(1, new People("Jack",18));this.peopleMap.put(2, new People("Rose",20));}public Mono<People> getPeopleById(Integer id) {return Mono.justOrEmpty(this.peopleMap.get(id));}public Flux<People> getPeopleList(){return Flux.fromIterable(this.peopleMap.values());}public Mono<Void> addPeople(Mono<People> peopleMono){return peopleMono.doOnNext(p -> this.peopleMap.put(this.peopleMap.size()+1, p)).thenEmpty(Mono.empty());}}
<br />SpringMVC方式,同步阻塞的方式,基于SpringMVC+Servlet+Tomcat;<br />SpringWebflux方式,异步非阻塞方式,基于SpringWebflux+Reactor+Netty

若有收获,就点个赞吧
0 人点赞
