1. 环境
conda create -n bertuse python=3.7.6conda activate bertuse
只有把Python版本降下来,才能安装对应的Tensorflow1.X版本。
2. PIP 安装
版本一定要保持一致。
pip install protobuf==3.20.0 -i https://pypi.mirrors.ustc.edu.cn/simple/pip install tensorflow==1.14.0 -i https://pypi.mirrors.ustc.edu.cn/simple/pip install bert-serving-serverpip install bert-serving-client
3. SHELL 开启 Bert-SERVER
进入到Google or 哈工大的Library,以Google为例:chinese_L-12_H-768_A-12
bert-serving-start -model_dir D:/chinese_L-12_H-768_A-12/ -num_worker=4 -max_seq_len=50# -model_dir 预训练Lib的位置;# -num_worker 线程数,表示同时可以处理多少个并发请求# -pooling_strategy 默认是句向量;-pooling_strategy NONE是词向量# -max_seq_len 句子最大长度
开启成功后,Bert在Shell中开启监听模式: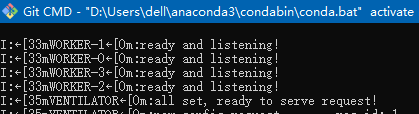
4. Python 调用
> from bert_serving.client import BertClient> bc = BertClient(ip='localhost')# Bert—Embedding> test=bc.encode(['你好','bert'])OUTPUT:array([[ 0.28940165, -0.13572706, 0.07591117, ..., -0.1409121 ,0.54629964, -0.30118048],[-0.06168841, 0.15839505, -0.5834469 , ..., 0.18099746,-0.12812363, -0.28579813]],dtype=float32)
5. Python 直接开Server
需要在bertuse中安装JUPYTER:
activate bertusepip install ipykernel ipythonipython kernel install --user --name bertuse
开启Server:
from bert_serving.server.helper import get_args_parserfrom bert_serving.server import BertServerargs = get_args_parser().parse_args(['-model_dir', 'D:/chinese_L-12_H-768_A-12/','-pooling_strategy', 'NONE','-max_seq_len','60'])server = BertServer(args)server.start()

若有收获,就点个赞吧
0 人点赞
