一般情况下,如果我们做小型项目,前端用一个nginx做反向代理即可,大概是这样的
但是,作为互联网项目,纯2C的话必然需要做高可用,不仅后端的Server有N个,Nginx同样需要有N个,一主N备,当有一个服务器挂掉的时候,服务能瞬间切换到其他服务器,大概是这样的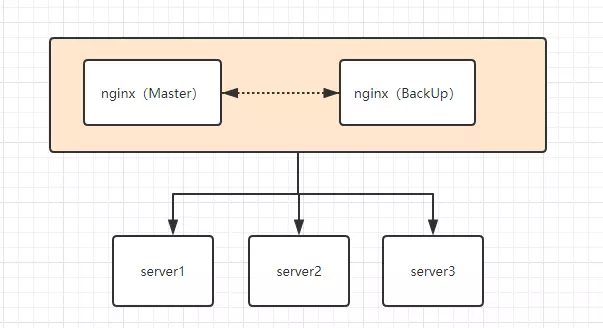
下面就以上图为例,说明一下如何实现server的高可用。
1.环境准备
| 名称 | IP | 虚拟IP | 操作系统 |
|---|---|---|---|
| 虚拟机1(VM1) | 192.168.127.134 | 192.168.127.200 | centos7.6 |
| 虚拟机2(VM2) | 192.168.127.135 | 192.168.127.200 | centos7.6 |
systemctl stop firewalld && systemctl disable firewalldsetenforce 0 && sed -i 's/^SELINUX=.*/SELINUX=disabled/' /etc/selinux/config
2.修改欢迎页面
192.168.136.134:192.168.136.134
192.168.136.135:192.168.136.135
3.安装keepalived
yum -y install keepalived
如果找不到安装到哪儿了,可以使用whereis nginx查看,这里不再赘述
yum install -y keepalived(截至本篇日志,keepalived已经更新至1.3.5版本)指定版本下载:yum install -y openssl*yum install -y openssl-develwget http://www.keepalived.org/software/keepalived-1.3.5.tar.gztar -zxvf keepalived-1.3.5.tar.gz./configure --prefix=/home/wangpl/mine/soft/keepalived-1.3.5make && make install查看keepalived版本信息:keepalived -version
4.修改keepalived的配置文件
主nginx
默认配置文件:/etc/keepalived/keepalived.conf! Configuration File for keepalivedglobal_defs {# notification_email {# acassen@firewall.loc# failover@firewall.loc# sysadmin@firewall.loc# }# notification_email_from Alexandre.Cassen@firewall.loc# smtp_server 192.168.200.1# smtp_connect_timeout 30router_id LVS_DEVEL# vrrp_skip_check_adv_addr# vrrp_strict# vrrp_garp_interval 0# vrrp_gna_interval 0}vrrp_script chk_nginx {script "/etc/keepalived/nginx_check.sh"interval 2weight -20}vrrp_instance VI_1 {state MASTER # 标识为主服务interface ens33 #绑定虚拟机的IPvirtual_router_id 51 # 虚拟路由id,和从机保持一致priority 100 #权重,需要高于从机mcast_src_ip 192.168.127.134 ## 本机 IP 地址advert_int 1authentication {auth_type PASSauth_pass 1111}track_script {chk_nginx ## 执行 Nginx 监控的服务}virtual_ipaddress {192.168.127.200 #/32 brd 255.255.255.0 dev ens33 label ens33:vip #虚拟IP地址# 192.168.200.17# 192.168.200.18}}
从nginx
! Configuration File for keepalivedglobal_defs {# notification_email {# acassen@firewall.loc# failover@firewall.loc# sysadmin@firewall.loc# }# notification_email_from Alexandre.Cassen@firewall.loc# smtp_server 192.168.200.1# smtp_connect_timeout 30router_id dreamer1# vrrp_skip_check_adv_addr# vrrp_strict# vrrp_garp_interval 0# vrrp_gna_interval 0}vrrp_script chk_nginx {script "/etc/keepalived/nginx_check.sh" ## 检测 nginx 状态的脚本路径interval 2 ## 检测时间间隔weight -20 ## 如果条件成立,权重-20}vrrp_instance VI_1 {state BACKUPinterface ens33virtual_router_id 51priority 90mcast_src_ip 192.168.127.135advert_int 1authentication {auth_type PASSauth_pass 1111}track_script {chk_nginx ## 执行 Nginx 监控的服务}virtual_ipaddress {192.168.127.200#192.168.200.17#192.168.200.18}}
5.编写监测心跳脚本
上面配置中可以看到有一个脚本文件:/etc/keepalived/nginx_check.sh
查看nginx是否启动,如果没启动则启动,如果启动不起来,停掉keepalived服务,此时心跳断掉,服务转向另一个nginx。
#!/bin/bashcounter=$(ps -C nginx --no-heading|wc -l)if [ "${counter}" = "0" ]; then/home/jw/nginx/sbin/nginxsleep 2counter=$(ps -C nginx --no-heading|wc -l)if [ "${counter}" = "0" ]; thenservice keepalived stopfifi
6.开启keepalived
启动 :service keepalived start
停止 :service keepalived stop
重启 :service keepalived restart
开机自启 :service enable keepalived
1.访问
查看134的网络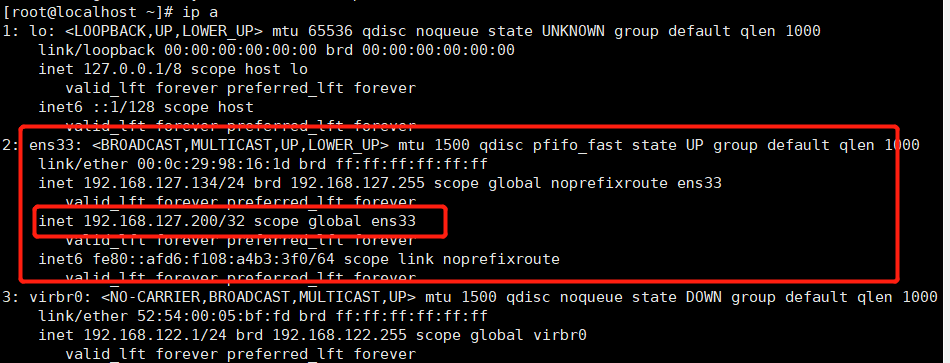
2.此时停掉134上的nginx,访问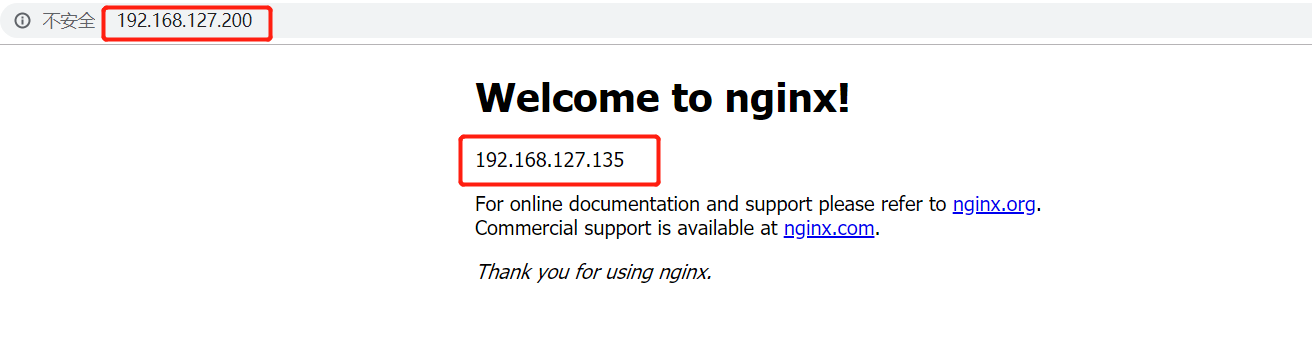
3.开启134上的nginx,访问

若有收获,就点个赞吧
0 人点赞
