使用 maven 创建项目,导入 Spring 依赖:
<dependency><groupId>org.springframework</groupId><artifactId>spring-context</artifactId><version>5.3.16</version></dependency>
一、容器相关注解
1.1 组件添加相关注解
1.1.1 @Configuration
**@Configuration**注解的作用:表示这个类是一个 Spring 配置类。
在 XML 配置文件中,我们需要创建一个beans.xml文件,用来标识这是一个 Spring 的配置文件: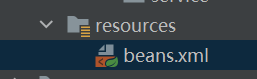
beans.xml文件默认内容如下:
<?xml version="1.0" encoding="UTF-8"?><beans xmlns="http://www.springframework.org/schema/beans"xmlns:xsi="http://www.w3.org/2001/XMLSchema-instance"xsi:schemaLocation="http://www.springframework.org/schema/beans http://www.springframework.org/schema/beans/spring-beans.xsd"></beans>
在注解开发中,我们就不需要创建这一个 XML 配置文件,取而代之的是使用@Configuration注解类,使用如下: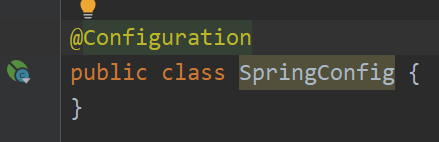
// @Configuration 的作用:标识这个类是一个注解类@Configurationpublic class SpringConfig {}
1.2.2 AnnotationConfigApplicationContext
使用 XML 配置方式获取ApplicationContext:
public static void main(String[] args) {ApplicationContext xmlContext = new ClassPathXmlApplicationContext("beans.xml");}
使用注解方式获取ApplicationContext:
public static void main(String[] args) {ApplicationContext classContext = new AnnotationConfigApplicationContext(SpringConfig.class);}
1.2.3 @Bean
**@Bean**注解作用:将这个对象注入到容器中,可以被 Spring 框架识别。
使用 XML 配置方式注入实体类:
<?xml version="1.0" encoding="UTF-8"?><beans xmlns="http://www.springframework.org/schema/beans"xmlns:xsi="http://www.w3.org/2001/XMLSchema-instance"xsi:schemaLocation="http://www.springframework.org/schema/beans http://www.springframework.org/schema/beans/spring-beans.xsd"><bean id="person" class="com.lbj.bean.Person"><property name="id" value="1"/><property name="name" value="大侠"/></bean></beans>
获取到这个 Person 对象:
public static void xml() {ApplicationContext context = new ClassPathXmlApplicationContext("beans.xml");Person person = (Person) context.getBean("person");System.out.println(person);}
使用注解方式注入实体类:
@Configurationpublic class SpringConfig {@Beanpublic Person person() {return new Person(1, "小侠");}}
获取到这个 Person 对象:
public static void annotation() {ApplicationContext context = new AnnotationConfigApplicationContext(SpringConfig.class);Person person = context.getBean(Person.class);System.out.println(person);// 获取Spring中注册的类型String[] names = context.getBeanDefinitionNames();for (String name : names) {System.out.println(name);}}
在 XML 配置中,id属性指向这个实体类的别名,class属性指向这个实体类的类型。我们可以通过别名或者类型来获取到这个对象。
在注解配置中,方法返回值等于 XML 配置中class属性,而方法名等于 XML 配置中id属性。因此可以通过方法名获取到这个实体类。
如果要修改这个默认的名称,而又不想修改方法名,可以在@Bean注解上添加参数即可:
@Configurationpublic class SpringConfig {@Bean({"1111"}) // 修改默认别名public Person person01() {return new Person(1, "小侠");}}
1.2.4 @ComponentScan
**@ComponentScan**注解作用:扫描指定包下的全部标有 @Component 的类,并注册成 bean。**@ComponentScans**注解作用:可添加多个 @ComponentScan 注解。
在 XML 配置中,使用context:component-scan标签扫描包路径:
<?xml version="1.0" encoding="UTF-8"?><beans xmlns="http://www.springframework.org/schema/beans"xmlns:xsi="http://www.w3.org/2001/XMLSchema-instance"xmlns:context="http://www.springframework.org/schema/context"xsi:schemaLocation="http://www.springframework.org/schema/beanshttp://www.springframework.org/schema/beans/spring-beans.xsdhttp://www.springframework.org/schema/contexthttp://www.springframework.org/schema/context/spring-context.xsd"><!-- context:component-scan 标签作用:扫描指定包下的全部标有@Component 的类,并注册成bean --><!-- base-package:指定包扫描的位置 --><!-- use-default-filters:是否使用默认的规则,默认值为true --><!-- include-filter: 扫描哪些内容 --><!-- exclude-filter:不扫描哪些内容 --><context:component-scan base-package="com.lbj"use-default-filters="false"><!-- type:annotation:指定扫描使用某个注解的类 --><!-- type:aspectj:指定扫描AspectJ表达式相匹配的类 --><!-- type:assignable:指定扫描某个接口派生的类 --><!-- type:custom:指定扫描自定义的实现了org.springframework.core.type.filter.TypeFilter接口的类 --><!-- type:regex:指定扫描符合正则表达式的类 --><context:include-filter type="annotation"expression="org.springframework.stereotype.Controller"/><context:exclude-filter type="annotation"expression="org.springframework.stereotype.Controller"/></context:component-scan></beans>
在注解配置中,使用@ComponentScan配置包扫描路径:
@Configuration@ComponentScan(value = "com.lbj",useDefaultFilters = false,includeFilters = {@ComponentScan.Filter(type = FilterType.ANNOTATION,value = {Controller.class,Service.class}),@ComponentScan.Filter(type = FilterType.ANNOTATION,value = {Service.class})},excludeFilters = {})public class SpringConfig {}
上面需要注意的是,如果需要使用includeFilters和excludeFilters,则必须要将useDefaultFilters的值设为 false,表示不使用默认的规则,这样我们自定义的规则才会生效。
下面是属性@ComponentScan注解的属性说明:
| 注解属性 | XML配置属性 | 属性说明 |
|---|---|---|
| value | base-package | 指定包扫描的位置 |
| useDefaultFilters | use-default-filters | 默认为true,如果使用includeFilters和excludeFilters需要设置为false,否则不会生效 |
| includeFilters | context:include-filter | 指定内容中,扫描哪些内容 |
| excludeFilters | context:exclude-filter | 指定内容中,不扫描哪些内容 |
includeFilters和excludeFilters过滤器具有 5 个类型(type),说明如下:
| Type类型 | 说明 |
|---|---|
| annotation | 指定扫描使用某个注解的类 |
| aspectj | 指定扫描AspectJ表达式相匹配的类 |
| assignable | 指定扫描某个接口派生的类 |
| custom | 指定扫描自定义的实现了org.springframework.core.type.filter.TypeFilter接口的类 |
| regex | 指定扫描符合正则表达式的类 |
常用 过滤规则:annotation_根据指定的注解类型匹配
@ComponentScan.Filter(type = FilterType.ANNOTATION,value = {Controller.class,Service.class})
常用 过滤规则:assignable_根据指定的类匹配,指定某一个特定的类
@ComponentScan.Filter(type = FilterType.ASSIGNABLE_TYPE,value = {BookMapper.class})
过滤规则:custom_自定义规则
使用FilterType.CUSTOM自定义规则时,需要实现TypeFilter接口,源码如下:
所以首先创建自己的规则,实现TypeFilter接口:
public class MyTypeFilter implements TypeFilter {/*** 匹配规则** @param metadataReader 扫描的当前类的信息* @param metadataReaderFactory 可以获取所有类的信息* @return 返回true表示符合规则,返回false表示不合符规则*/@Overridepublic boolean match(MetadataReader metadataReader, MetadataReaderFactory metadataReaderFactory)throws IOException {// 获取注解信息AnnotationMetadata annotationMetadata = metadataReader.getAnnotationMetadata();// 获取类信息ClassMetadata classMetadata = metadataReader.getClassMetadata();// 获取资源信息()Resource resource = metadataReader.getResource();// 获取类的类名String className = classMetadata.getClassName();// 返回类名中含有“Mapper”的结果return className.contains("Mapper");}}
使用自定义规则:
@ComponentScan.Filter(type = FilterType.CUSTOM,value = {MyTypeFilter.class})
最终注入到容器的结果为:
// @BookMapperbookMapper
不常用 过滤规则:aspectj_根据指定的aspectj表达式匹配
过滤规则:regex_使用正则表达式匹配
1.2.4 @Component、@Controller、@Service、@Repository
被@Component标记的类在配置包扫描路径后,默认会被 Spring 容器扫描,并注册成 bean。默认别名是类名首字母小写。
@Controller、@Service、@Repository与@Component作用没有任何区别,只是别名不同,方便程序员标记不同的模块,源码如下:
@Target(ElementType.TYPE)@Retention(RetentionPolicy.RUNTIME)@Documented@Componentpublic @interface Controller {/*** The value may indicate a suggestion for a logical component name,* to be turned into a Spring bean in case of an autodetected component.* @return the suggested component name, if any (or empty String otherwise)*/@AliasFor(annotation = Component.class)String value() default "";}
@AliasFor(annotation = Component.class)就表示@Controller是@Component注解的别名。
1.2.5 @Scope
**@Scope**注解作用:指定 Bean 的作用域。
@Scope 的属性
| @Scope 属性值 | 字符串内容 | 说明 |
|---|---|---|
| ConfigurableBeanFactory.SCOPE_SINGLETON | singleton | 默认值,单实例。 IOC容器启动时会调用方法创建对象放入到IOC容器中。以后每次获取就是直接从容器中获取(map.get())。 |
| ConfigurableBeanFactory.SCOPE_PROTOTYPE | prototype | IOC容器启动时并不会调用方法创建对象放入到容器中,而是每次获取的时候才会调用方法创建对象。 |
| WebApplicationContext.SCOPE_REQUEST | request | 同一次请求创建一个实例 |
| WebApplicationContext.SCOPE_SESSION | session | 同一个session创建一个实例 |
// @Scope 的四种参数@Scope(ConfigurableBeanFactory.SCOPE_SINGLETON)@Scope(ConfigurableBeanFactory.SCOPE_PROTOTYPE)@Scope(WebApplicationContext.SCOPE_REQUEST)@Scope(WebApplicationContext.SCOPE_SESSION)@Bean({"1111"})public Person person01() {return new Person(1, "小侠");}
// 如果@Scope是singleton,则在这里会调用一次person()方法// 如果@Scope是prototype,则在这里不会调用person()方法ApplicationContext context = new AnnotationConfigApplicationContext(SpringConfig.class);// 如果@Scope是singleton,则在这里不会调用person()方法// 如果@Scope是prototype,则在这里会调用一次person()方法Person person = context.getBean(Person.class);// 如果@Scope是singleton,则在这里不会调用person()方法// 如果@Scope是prototype,则在这里会调用一次person()方法Person person2 = context.getBean(Person.class);
1.2.6 @Lazy
**@Lazy**注解的作用:因为单实例@Bean会在 IOC 容器创建时会进行注入。如果我们不希望在 IOC 容器创建时注入,而是希望在使用时注入,则可以使用这个注解,表示懒加载的意思。
@Lazy // 懒加载,针对单实例@Bean({"person"})public Person person() {System.out.println("调用方法一次");return new Person(1, "小侠");}
1.2.7 @Conditional
**@Conditional**注解的作用:按照一定的条件判断,满足条件给容器注册 bean。
通过ApplicationContext获取当前系统名称:
ApplicationContext context = new AnnotationConfigApplicationContext(SpringConfig.class);Environment environment = context.getEnvironment();String property = environment.getProperty("os.name");System.out.println(property); // 输出 Windows 10
现在有以下 2 个Person注册类,我们需要在 Window 系统环境下注册window名称的类,需要在 Linux 系统环境下注册linux类:
@Configurationpublic class SpringConfig {@Bean("linux")public Person linux() {return new Person(1, "linux");}@Bean("window")public Person window() {return new Person(2, "window");}}
可通过下面方法查看注册信息,默认情况下 2 个值都会被注册进容器:
public static void annotation() {ApplicationContext context = new AnnotationConfigApplicationContext(SpringConfig.class);Map<String, Person> personMap = context.getBeansOfType(Person.class);// {linux=Person{id=1, name='linux'}, window=Person{id=2, name='window'}}System.out.println(personMap);}
如果按照上面的需求我们就需要使用到@Conditional注解:
// 该注解可以标注在类和方法上// 标注在方法上表示在满足条件时才会调用该方法注册// 标注在类上表示满足条件时,该类下的所有Bean才会被注入@Target({ElementType.TYPE, ElementType.METHOD})@Retention(RetentionPolicy.RUNTIME)@Documentedpublic @interface Conditional {/*** All {@link Condition} classes that must {@linkplain Condition#matches match}* in order for the component to be registered.* 如果要使用@Conditional注解,就需要实现Condition接口*/Class<? extends Condition>[] value();}
- @Conditional 注解可以标注在类和方法上;
- @Conditional 标注在方法上表示在满足条件时才会调用该方法注册;
- @Conditional 标注在类上表示满足条件时,该类下的所有Bean才会被注入;
- 如果要使用 @Conditional 注解,属性值就需要实现 Condition 接口。
下面是WindowCondition实现类,作用是当当前环境是Window时,返回true:
public class WindowCondition implements Condition {/*** @param context 判断条件能使用到的上下文* @param metadata 注释信息* @return 返回 true 表示条件满足*/@Overridepublic boolean matches(ConditionContext context, AnnotatedTypeMetadata metadata) {// 获取到 IOC 使用的 beanFactoryConfigurableListableBeanFactory beanFactory = context.getBeanFactory();// 获取到类加载器ClassLoader classLoader = context.getClassLoader();// 获取到 bean 定义的注册类BeanDefinitionRegistry registry = context.getRegistry();// 查找是否包含某个Bean的注册信息registry.containsBeanDefinition("");ResourceLoader resourceLoader = context.getResourceLoader();// 获取到当前环境Environment environment = context.getEnvironment();String property = environment.getProperty("os.name");if (property == null) return false;return property.contains("Window");}}
下面是LinuxCondition实现类,作用是当当前环境是Linux时,返回true:
public class LinuxCondition implements Condition {@Overridepublic boolean matches(ConditionContext context, AnnotatedTypeMetadata metadata) {Environment environment = context.getEnvironment();String property = environment.getProperty("os.name");if (property == null)return false;return property.contains("linux");}}
使用@Conditional注解:
@Configurationpublic class SpringConfig {@Conditional({LinuxCondition.class})@Bean("linux")public Person linux() {return new Person(1, "linux");}@Conditional(WindowCondition.class)@Bean("window")public Person window() {return new Person(2, "window");}}
再次运行测试代码就可以看到只注册了其中一个 Bean。
public static void annotation() {ApplicationContext context = new AnnotationConfigApplicationContext(SpringConfig.class);Map<String, Person> personMap = context.getBeansOfType(Person.class);System.out.println(personMap);}输出结果:{window=Person{id=2, name='window'}}
如果需要测试linux是否成功,可以在 Linux 系统环境下进行测试,或者使用VM options模拟数据测试: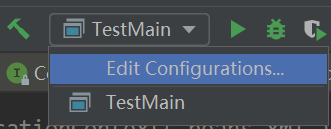
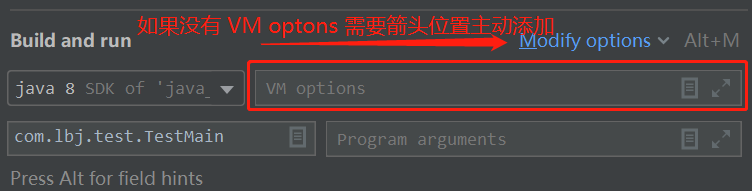
在VM options中输入下面命令:
-Dos.name=linux
再次运行测试结果如下:
public static void annotation() {ApplicationContext context = new AnnotationConfigApplicationContext(SpringConfig.class);Map<String, Person> personMap = context.getBeansOfType(Person.class);System.out.println(personMap);}输出结果:{linux=Person{id=1, name='linux'}}
1.2.8 @Import
在 Spring 中,给容器中注册组件共有 3 种方式:
- 包扫描+组件标注注解(@Controller/@Service/@Repository/@Component):适合自己写的类;
- @Bean:适合导入的第三方包里面的组件;
- @Import:快速给容器中导入一个组件。
@Import 快速导入
定义类,添加@Import注解:
public class Blue { }public class Green { }public class Blue { }@Configuration@Import({Red.class, Green.class, Blue.class})public class SpringConfig {}
测试结果如下:
public static void annotation() {ApplicationContext context = new AnnotationConfigApplicationContext(SpringConfig.class);String[] names = context.getBeanDefinitionNames();System.out.println(Arrays.asList(names));}// 打印结果如下:com.lbj.bean.Red,com.lbj.bean.Green,com.lbj.bean.Blue
通过上面可以知道,通过@Import快速导入的组件的id默认值是该类的全路径。
ImportSelector 接口
实现ImportSelector接口:
public class MyImportSelector implements ImportSelector {/*** @param importingClassMetadata 当前标注@Import注解的类的所有注解信息* @return 返回需要导入类的全类名*/@Overridepublic String[] selectImports(AnnotationMetadata importingClassMetadata) {return new String[]{Green.class.getCanonicalName(),Red.class.getCanonicalName()};}@Overridepublic Predicate<String> getExclusionFilter() {return ImportSelector.super.getExclusionFilter();}}
使用ImportSelector实现类:
@Configuration@Import({MyImportSelector.class, Blue.class})public class SpringConfig {}
测试结果如下:
public static void annotation() {ApplicationContext context = new AnnotationConfigApplicationContext(SpringConfig.class);String[] names = context.getBeanDefinitionNames();for (String name : names) {System.out.println("==> " + name);}}// 打印结果如下:==> com.lbj.bean.Green==> com.lbj.bean.Red==> com.lbj.bean.Blue
ImportBeanDefinitionRegistrar 接口
实现ImportBeanDefinitionRegistrar接口:
public class MyImportBeanDefinitionRegistrar implements ImportBeanDefinitionRegistrar {/*** @param importingClassMetadata 当前类的所有注解信息* @param registry 通过该对象注册Bean*/@Overridepublic void registerBeanDefinitions(AnnotationMetadata importingClassMetadata, BeanDefinitionRegistry registry) {// 判断是否存在这个Beanboolean hasGreen = registry.containsBeanDefinition("com.lbj.bean.Green");boolean hasRed = registry.containsBeanDefinition("com.lbj.bean.Red");boolean hasBlue = registry.containsBeanDefinition("com.lbj.bean.Blue");// 当上面3个Bean都存在时,注册另外一个Beanif (hasGreen && hasRed && hasBlue) {// 设置Bean的所有信息,包括Scope/Lazy等BeanDefinition beanDefinition = new RootBeanDefinition(Yellow.class);// 注册一个Bean,并指定idregistry.registerBeanDefinition("yellow", beanDefinition);}}}
使用ImportBeanDefinitionRegistrar实现类:
@Configuration@Import({Blue.class, MyImportSelector.class, MyImportBeanDefinitionRegistrar.class})public class SpringConfig {}
测试结果如下:
public static void annotation() {ApplicationContext context = new AnnotationConfigApplicationContext(SpringConfig.class);String[] names = context.getBeanDefinitionNames();for (String name : names) {System.out.println("==> " + name);}}// 打印结果如下:==> com.lbj.bean.Blue==> com.lbj.bean.Green==> com.lbj.bean.Red==> yellow
1.2.9 FactoryBean
上面介绍了 3 种注入 Bean 的方式,使用FactoryBean方式可以实现第 4 种注册 Bean 的方式,这种方式是其他框架和 Spring 整合的常用方式。
实现FactoryBean接口:
public class ColorFactoryBean implements FactoryBean<Color> {// 返回类对象@Overridepublic Color getObject() throws Exception {return new Color();}// 返回类类型@Overridepublic Class<?> getObjectType() {return Color.class;}// 是否单例@Overridepublic boolean isSingleton() {return true;}}
注册ColorFactoryBean:
@Configurationpublic class SpringConfig {@Beanpublic ColorFactoryBean colorFactoryBean(){return new ColorFactoryBean();}}
测试结果如下:
public static void annotation() {ApplicationContext context = new AnnotationConfigApplicationContext(SpringConfig.class);String[] names = context.getBeanDefinitionNames();for (String name : names) {System.out.println("==> " + name);}Object obj1 = context.getBean("colorFactoryBean");System.out.println("obj1 = " + obj1);Object obj2 = context.getBean("&colorFactoryBean");System.out.println("obj2 = " + obj2);}// 打印结果如下:==> colorFactoryBeanobj1 = com.lbj.bean.Color@35ef1869obj2 = com.lbj.bean.ColorFactoryBean@c33b74f
从上面结果可知:
- 打印1的结果说明注册了一个 id 名为
colorFactoryBean的Bean。 - 打印2的结果说明通过 id 获取 Bean 并不是
FactoryBean本身,而是该接口的泛型对象。 - 打印3的结果说明要想获取
FactoryBean本身,需要在 id 前面添加&符号。
这是因为通过FactoryBean注入的类,会默认调用其getObject()方法,所以返回泛型对象:
@Overridepublic Color getObject() throws Exception {return new Color();}
而添加&+id方式获取FactoryBean本身,也是因为FactoryBean接口中已有的默认定义: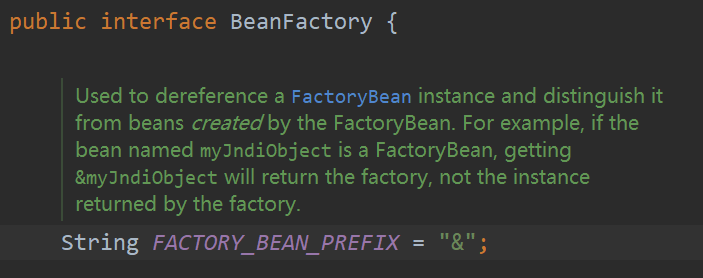
1.2 Bean 生命周期
1.2.1 指定 init() 和 destory() 方法
Bean 的生命周期遵循“创建”-“初始化”-“销毁”过程。
创建一个Car类:
public class Car {public Car() {System.out.println("Car - 构造方法调用");}public void init() {System.out.println("Car - 初始化方法");}public void destory() {System.out.println("Car - 销毁方法");}}
在 XML 配置中,我们定义一个 Bean 的初始化和销毁方法如下:
<bean id="car" class="com.lbj.bean.Car"init-method="init"destroy-method="destory"/>
init-method和destroy-method分别就是指定初始化和销毁方法的属性,要求**指定的方法不能有参数**。
在注解注入中,通过@Bean注解的initMethod和destroyMethod指定初始化和销毁方法:
@Configurationpublic class SpringConfig {@Bean(initMethod = "init", destroyMethod = "destory")public Car car() {return new Car();}}
测试结果如下:
public static void annotation() {// 注意这里是 AnnotationConfigApplicationContext,而不是使用 ApplicationContextAnnotationConfigApplicationContext context = new AnnotationConfigApplicationContext(SpringConfig.class);System.out.println("IOC容器创建");Car car = (Car) context.getBean("car");// 关闭IOC容器context.close();}// 打印结果如下:Car - 构造方法调用Car - 初始化方法IOC容器创建Car - 销毁方法
针对单实例和多实例的生命周期如下:
创建对象时:
- 单实例:在容器启动的时候创建对象;
- 多实例:在每次获取的时候创建对象;
初始化时:
- 单实例:对象创建完成,并赋值好后,调用初始化方法;
- 多实例:和单实例一样;
销毁时:
- 单实例:IOC容器销毁时销毁;
- 多实例:IOC容器不管理多实例,所以IOC容器销毁时不会销毁,如需要销毁则需要我们手动销毁。
1.2.2 实现 InitializingBean 和 DisposableBean 接口
让 Bean 实现InitializingBean和DisposableBean接口:
@Componentpublic class Car implements InitializingBean, DisposableBean {@Overridepublic void afterPropertiesSet() throws Exception {// Properties属性设置好后调用该方法,就是初始化方法}@Overridepublic void destroy() throws Exception {// 销毁方法}}
1.2.3 使用 JSR250
@Componentpublic class Cat {// Properties属性设置好后调用该方法@PostConstructpublic void init() {}// Bean销毁之前调用@PreDestroypublic void destory() {}}
1.2.4 后置处理器 BeanPostProcessor
@Componentpublic class Dog implements BeanPostProcessor {@Overridepublic Object postProcessBeforeInitialization(Object bean, String beanName) throws BeansException {// 在所有初始化方法执行之前调用return BeanPostProcessor.super.postProcessBeforeInitialization(bean, beanName);}@Overridepublic Object postProcessAfterInitialization(Object bean, String beanName) throws BeansException {// 在所有初始化方法执行之后调用return BeanPostProcessor.super.postProcessAfterInitialization(bean, beanName);}}
为什么后置处理器一定会在所有初始化方法执行之前或之后调用呢?
通过在postProcessBeforeInitialization方法上打断点,通过方法栈我们可以找到AbstractAutowireCapableBeanFactory类的initializeBean()方法,该方法源码如下:
protected Object initializeBean(String beanName, Object bean, @Nullable RootBeanDefinition mbd) {if (System.getSecurityManager() != null) {AccessController.doPrivileged((PrivilegedAction<Object>) () -> {invokeAwareMethods(beanName, bean);return null;}, getAccessControlContext());} else {invokeAwareMethods(beanName, bean);}Object wrappedBean = bean;if (mbd == null || !mbd.isSynthetic()) {// 执行后置处理器Before方法wrappedBean = applyBeanPostProcessorsBeforeInitialization(wrappedBean, beanName);}try {// 执行初始化方法invokeInitMethods(beanName, wrappedBean, mbd);} catch (Throwable ex) {throw new BeanCreationException((mbd != null ? mbd.getResourceDescription() : null),beanName, "Invocation of init method failed", ex);}if (mbd == null || !mbd.isSynthetic()) {// 执行后置处理器After方法wrappedBean = applyBeanPostProcessorsAfterInitialization(wrappedBean, beanName);}return wrappedBean;}
而进入invokeInitMethods方法中我们可以发现,这个方法主要是执行几个初始化的方法,包括afterPropertiesSet和initMethod等方法。
因此通过上面代码我们可以知道,3个方法的执行顺序如下:
- applyBeanPostProcessorsBeforeInitialization
- invokeInitMethods
- applyBeanPostProcessorsAfterInitialization
另外,在执行initializeBean()方法的上一步时,如图:
而在populateBean方法的作用就是设置各种 property 属性。因此后置处理器一定是在设置 Bean 属性的后面执行。
1.3 组件赋值相关注解
1.3.1 @Value
**@Value**注解的作用:为 Bean 属性赋值。
在 XML 注入中,为属性注入值如下代码:
<bean id="person" class="com.lbj.bean.Person"><property name="id" value="1"/><property name="name" value="大侠"/></bean>
在注解注入中,为属性注入值如下代码:
public class Person {@Value("1")private Integer id;@Value("张三")private String name;}
@Value中可写的类型有:
- 基本数值。如“1”,“张三”等;
- SpEL表达式。如:#{ 1 + 1};
- ${ }。取出配置文件
properties中的值(在运行环境里面的值)。
1.3.2 @PropertySource 和 @PropertySources
@PropertySource注解的作用:引入 properties 文件到环境变量中。@PropertySources注解的作用:存放多个@PropertySource注解。
新建外部配置文件person.properties:
person.address=beijing
在 XML 注入时,我们需要通过property-placeholder指定外部配置文件:
<context:property-placeholder location="classpath:person.properties"/>
在注解注入时,我们需要通过@PropertySource注入外部文件:
@Configuration@ComponentScan("com.lbj")// 注意:文件前需要添加 “/”@PropertySource("classpath:/person.properties")public class SpringConfig {}
@Componentpublic class Person {@Value("1") // 普通注入private Integer id;@Value("#{1 + 1}") // SpEL表达式private String name;@Value("${person.address}") // 引入环境变量中的值private String address;}
外部配置文件person.properties被引入之后,就可以在环境变量中获取这个值:
public static void annotation() {AnnotationConfigApplicationContext context = new AnnotationConfigApplicationContext(SpringConfig.class);ConfigurableEnvironment environment = context.getEnvironment();System.out.println(environment.getProperty("person.address"));}
1.3.2 @Autowired
@Autowired自动注入的步骤如下:
- 默认优先
按照类型去容器中找对应的组件:
2:如果找到多个相同类型的组件,再将属性的名称作为组件的applicationContext.getBean(BookDao.class);
id去容器中查找: ```java @Autowired private BookDao bookDao01;
// 按照属性名称 “bookDao01” 去容器中查找 applicationContext.getBean(“bookDao01”);
3. 使用`@Qualifier`注解强制使用该注解的属性值作为组件的 id,而不是使用属性名:```java@Qualifier("bookDao")@Autowiredprivate BookDao bookDao01;// 因为 @Qualifier,所以使用 bookDao 去查找组件,而不是使用 bookDao01applicationContext.getBean("bookDao");
- 自动装配默认情况是一定要将属性赋值好,没有就报错;(也就是说一定要找到组件,否则就报错)。
如果希望能找到组件就找到,没找到也不报错可使用下面方法:(第4步的解决方案)
@Servicepublic class BookService {// required值默认是true,修改为false即可@Autowired(required = false)private BookMapper bookMapper;}
如果具有多个相同的 id,我们可以使用
@Primary注解,这个注解表示首选的意思,也就是说多个相同的id,默认使用这个注解标记方法或类。
@Primary注解也只能用来标注方法和类。
@Qualifier和@Primary的区别在于:前者是强制使用的,优先级很高;后者是默认的,再不与前者冲突时,优先使用该注解标记的方法或类:
@Primary@Bean({"person"})public Person person() {return new Person(1, "小侠");}
1.3.4 @Resources
1.3.5 @Inject
1.3.8 @Profile
1.4 组件注入相关注解
1.5 AOP相关注解
1.6 声明式事务相关注解
二、扩展原理
三、Web相关注解

若有收获,就点个赞吧
0 人点赞
