1. 安装扩展
1.1 下载对应的版本
1)地址:https://github.com/phalcon/cphalcon/releases/tag/v3.4.3
2)如图:
1.3 扩展
1)将下载的压缩包解压,复制 .dll 文件到对应的php版本的ext文件夹下
2)php.ini 添加
extension=php_phalcon.dll
1.3 查看
1)重启服务
2)查看 phpinfo() 中的信息,查看 phpclon 扩展是否安装好。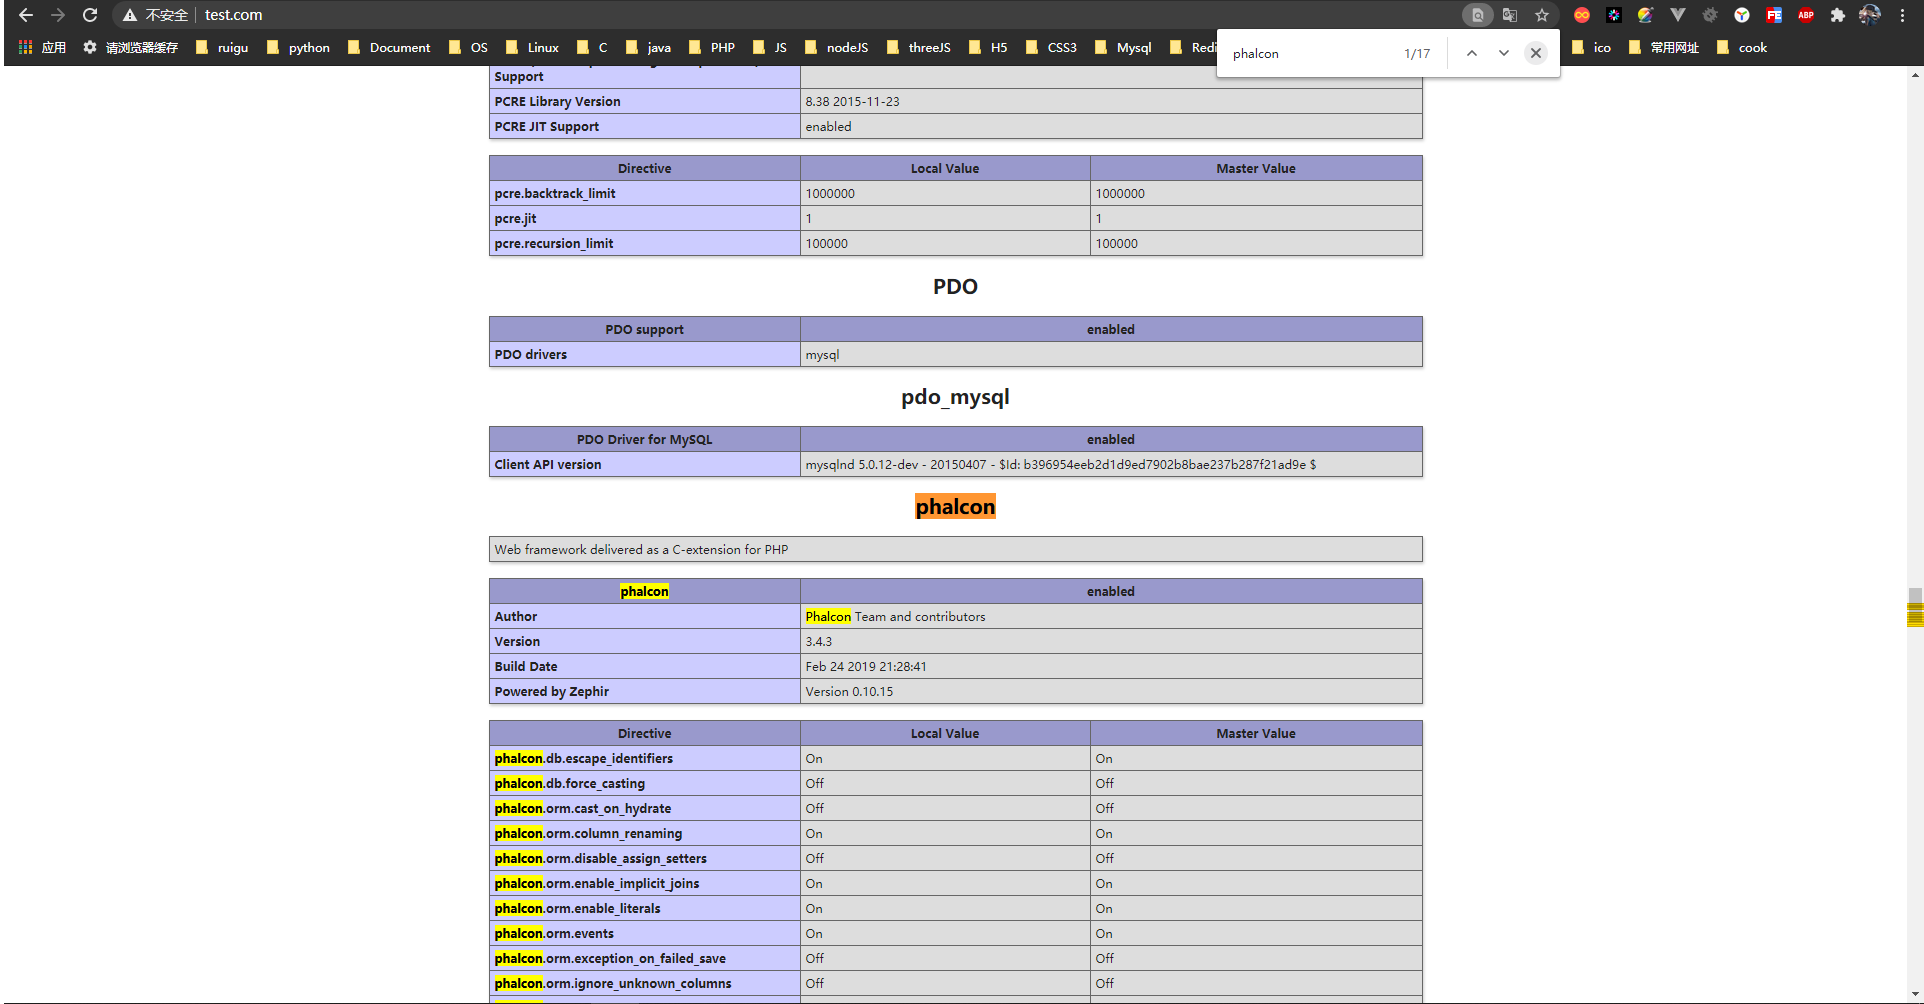
2. 运行本地的 phaclon 3.4 项目
2.1 Apache 的配置
1)项目根目录下:新建 .htaccess文件,写入下面的内容
<IfModule mod_rewrite.c>RewriteEngine onRewriteRule ^$ public/ [L]RewriteRule ((?s).*) public/$1 [L]</IfModule>
2)项目public目录下:新建 .htaccess文件
<IfModule mod_rewrite.c>RewriteEngine OnRewriteCond %{REQUEST_FILENAME} !-dRewriteCond %{REQUEST_FILENAME} !-fRewriteRule ^((?s).*)$ index.php?_url=/$1 [QSA,L]</IfModule>
3)apache 的虚拟主机文件 vhosts.conf 加入下面配置
<VirtualHost *:80>DocumentRoot "D:\phpStudy2018\PHPTutorial\WWW\workRoot\order_service\public"DirectoryIndex index.phpServerName xs.order.service.comServerAlias<Directory "D:\phpStudy2018\PHPTutorial\WWW\workRoot\order_service\public">Options AllAllowOverride AllAllow from all</Directory></VirtualHost>
4)重启服务,访问域名查看

若有收获,就点个赞吧
0 人点赞
