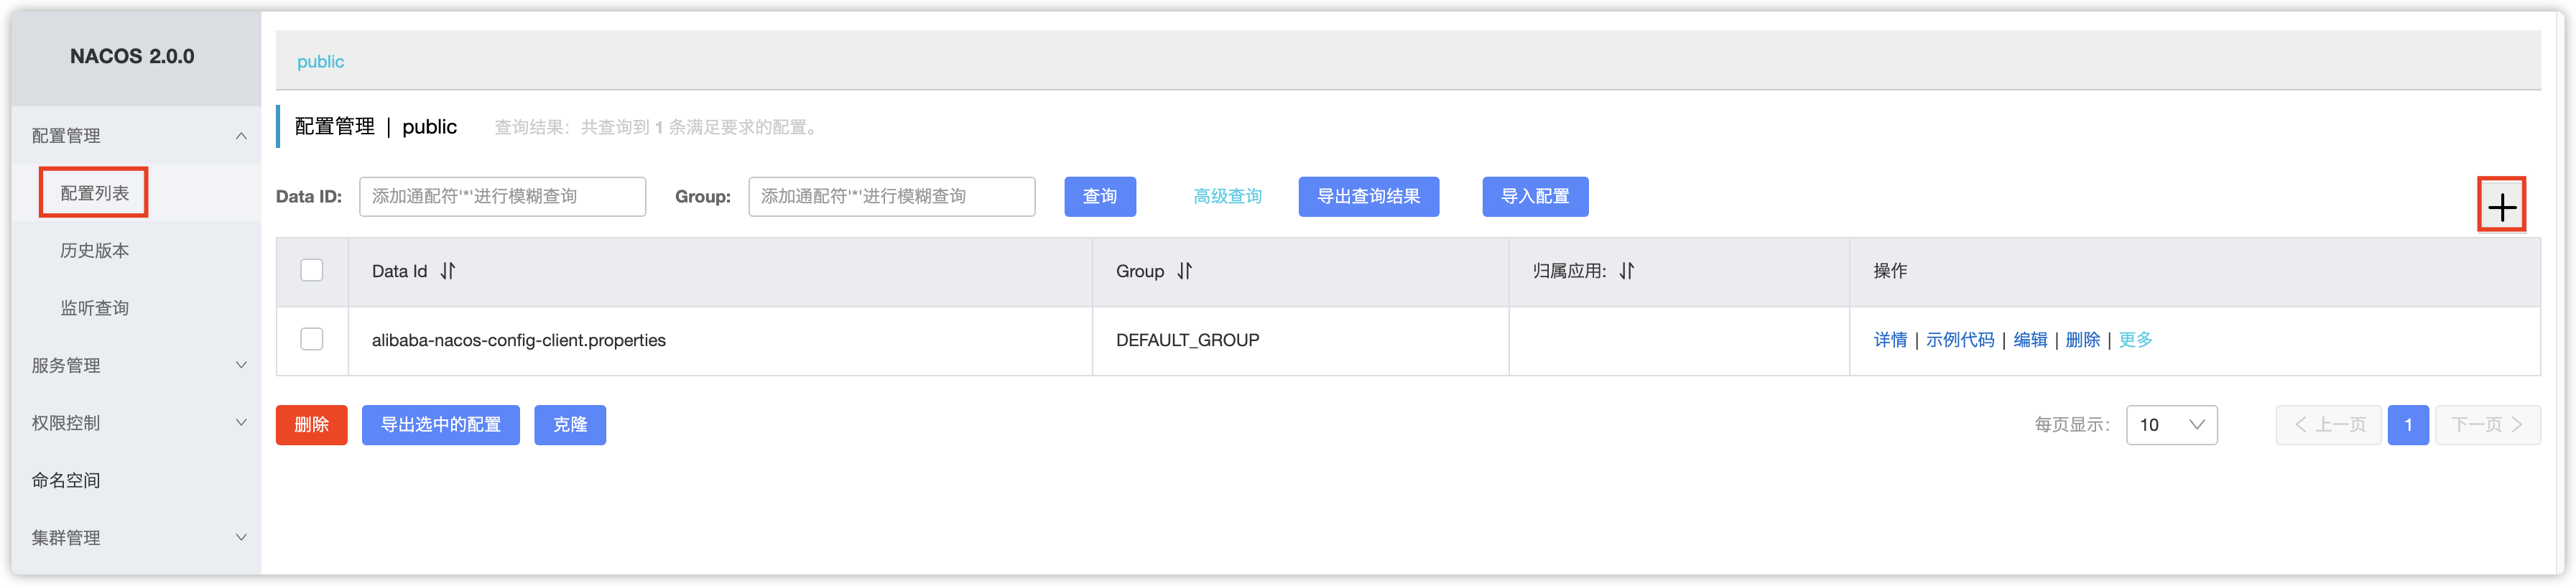
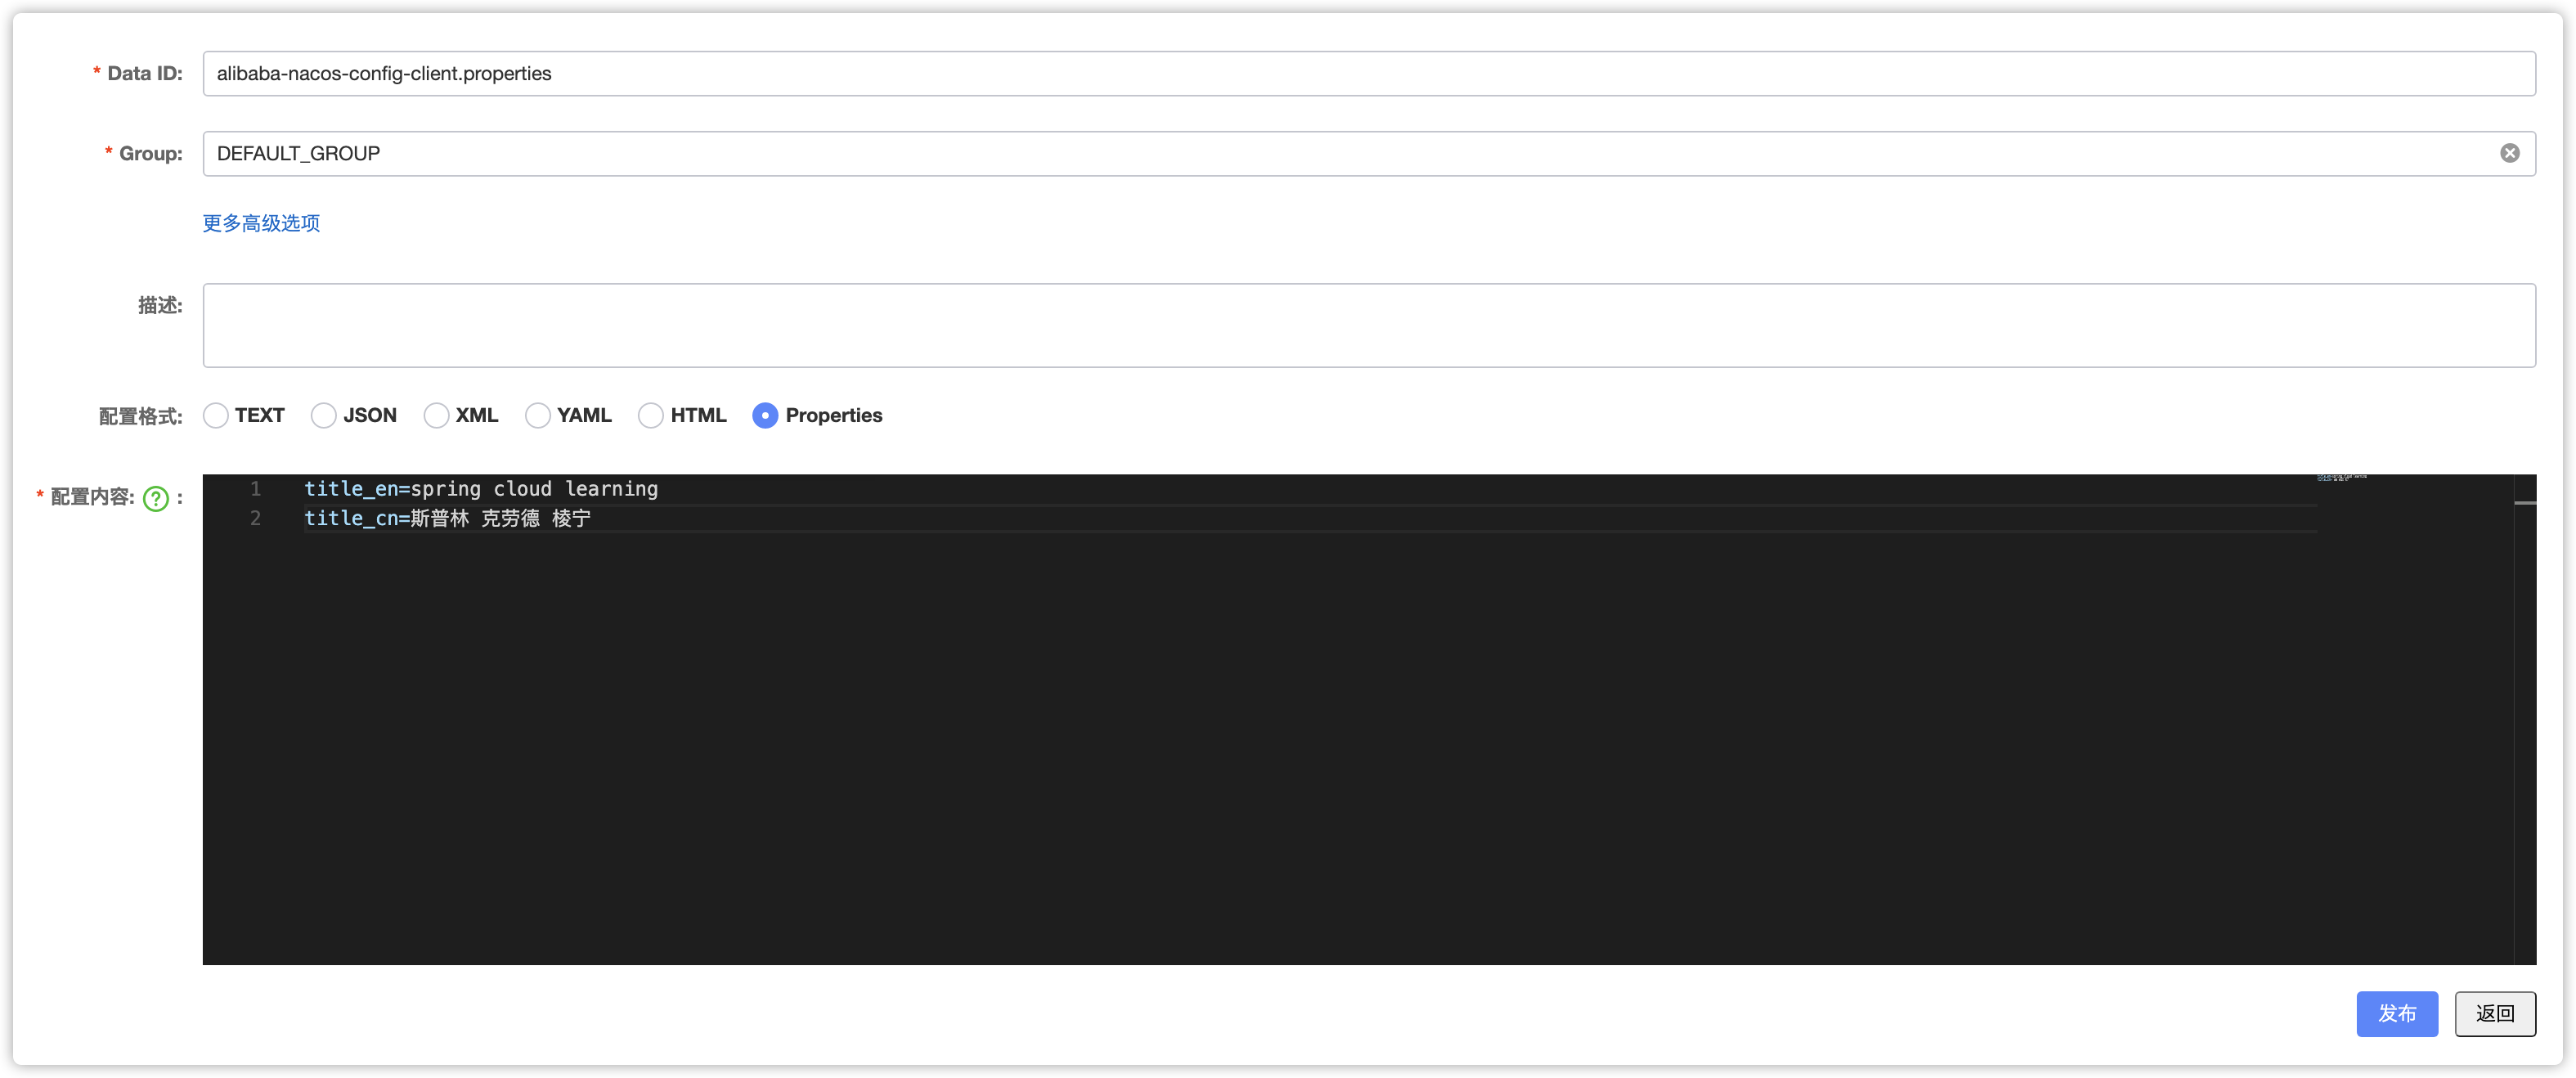
创建配置
其中:
Data ID:填入alibaba-nacos-config-client.propertiesGroup:不修改,使用默认值DEFAULT_GROUP配置格式:选择Properties-
创建应用
第一步:创建SpringBoot应用
alibaba-nacos-config-client
第二步:编辑pom.xml```java <?xml version=”1.0” encoding=”UTF-8”?><artifactId>spring-cloud-learn</artifactId><groupId>com.example</groupId><version>0.0.1-SNAPSHOT</version>
4.0.0 alibaba-nacos-config-client 11 UTF-8 UTF-8 2.3.7.RELEASE 2.2.2.RELEASE Hoxton.SR9 org.springframework.cloud spring-cloud-dependencies ${spring-cloud.version} pom import org.springframework.boot spring-boot-dependencies ${spring-boot.version} pom import com.alibaba.cloud spring-cloud-alibaba-dependencies ${spring-cloud-alibaba.version} pom import org.springframework.boot spring-boot-starter-web com.alibaba.cloud spring-cloud-starter-alibaba-nacos-config org.projectlombok lombok true org.springframework.boot spring-boot-starter-test test org.junit.vintage junit-vintage-engine
**第三步:**创建应用主类```javapackage com.demo;import lombok.extern.slf4j.Slf4j;import org.springframework.beans.factory.annotation.Value;import org.springframework.boot.SpringApplication;import org.springframework.boot.autoconfigure.SpringBootApplication;import org.springframework.cloud.context.config.annotation.RefreshScope;import org.springframework.web.bind.annotation.GetMapping;import org.springframework.web.bind.annotation.RestController;/*** @author wujiawei* @see* @since 2021/4/12 下午9:21*/@SpringBootApplicationpublic class AlibabaNacosConfigClientApplication {public static void main(String[] args) {SpringApplication.run(AlibabaNacosConfigClientApplication.class, args);}@Slf4j@RefreshScope@RestControllerstatic class EchoController {@Value("${title_en}")private String titleEn;@Value("${title_cn}")private String titleCn;@GetMapping("echo")public String echo() {return titleEn + ", " + titleCn;}}}
其中:
- 通过
@RefreshScope注解使这个类下的配置内容支持动态刷新 - 通过
@Value注解获取配置内容
第四步:创建配置文件bootstrap.properties,配置服务名称和Nacos地址
spring.application.name=alibaba-nacos-config-clientserver.port=8002spring.cloud.nacos.config.server-addr=127.0.0.1:8848
注意:这里必须使用
bootstrap.properties。同时,spring.application.name值必须与上一阶段Nacos中创建的配置Data Id匹配(除了.properties或者.yaml后缀)。
第五步:启动应用
2021-04-12 21:36:32.770 WARN 49987 --- [-127.0.0.1_8848] c.a.c.n.c.NacosPropertySourceBuilder : Ignore the empty nacos configuration and get it based on dataId[alibaba-nacos-config-client] & group[DEFAULT_GROUP]2021-04-12 21:36:32.890 INFO 49987 --- [-127.0.0.1_8848] b.c.PropertySourceBootstrapConfiguration : Located property source: [BootstrapPropertySource {name='bootstrapProperties-alibaba-nacos-config-client.properties,DEFAULT_GROUP'}, BootstrapPropertySource {name='bootstrapProperties-alibaba-nacos-config-client,DEFAULT_GROUP'}]
看到类似的日志信息,说明Nacos配置读取成功。
第六步:验证配置内容和动态刷新
用curl访问接口,查看输出的内容。然后修改Nacos中的相关配置,再次访问接口查看内容。
wujiawei@wujiaweideMacBook-Pro ~ % curl http://localhost:8002/echospring cloud learning, 斯普林 克劳德 棱宁wujiawei@wujiaweideMacBook-Pro ~ % curl http://localhost:8002/echospring_cloud_learning_test, 斯普林 克劳德 棱宁 泰斯特
代码示例
- Github:
- Gitee:

若有收获,就点个赞吧
0 人点赞
