什么是Sentinel
Sentinel 是阿里巴巴出品的面向分布式服务架构的高可用防护组件,主要以流量为切入点,从流量控制、熔断降级、系统自适应保护等多个维度来帮助用户保障微服务的稳定性。
安装Sentinel
Sentinel与Nacos类似,需要安装一个控制台程序,安装方法很简单,可以参考官方文档提供的安装教程:传送门,也可以使用我的Docker安装教程
整合Sentinel
第一步:创建SpringBoot模块alibaba-sentinel-rate-limiting
第二步:编辑pom.xml
<?xml version="1.0" encoding="UTF-8"?><project xmlns="http://maven.apache.org/POM/4.0.0"xmlns:xsi="http://www.w3.org/2001/XMLSchema-instance"xsi:schemaLocation="http://maven.apache.org/POM/4.0.0 http://maven.apache.org/xsd/maven-4.0.0.xsd"><parent><artifactId>spring-cloud-learn</artifactId><groupId>com.example</groupId><version>0.0.1-SNAPSHOT</version></parent><modelVersion>4.0.0</modelVersion><artifactId>alibaba-sentinel-rate-limiting</artifactId><properties><java.version>11</java.version><project.build.sourceEncoding>UTF-8</project.build.sourceEncoding><project.reporting.outputEncoding>UTF-8</project.reporting.outputEncoding><spring-boot.version>2.3.7.RELEASE</spring-boot.version><spring-cloud-alibaba.version>2.2.2.RELEASE</spring-cloud-alibaba.version><spring-cloud.version>Hoxton.SR9</spring-cloud.version></properties><dependencyManagement><dependencies><dependency><groupId>org.springframework.cloud</groupId><artifactId>spring-cloud-dependencies</artifactId><version>${spring-cloud.version}</version><type>pom</type><scope>import</scope></dependency><dependency><groupId>org.springframework.boot</groupId><artifactId>spring-boot-dependencies</artifactId><version>${spring-boot.version}</version><type>pom</type><scope>import</scope></dependency><dependency><groupId>com.alibaba.cloud</groupId><artifactId>spring-cloud-alibaba-dependencies</artifactId><version>${spring-cloud-alibaba.version}</version><type>pom</type><scope>import</scope></dependency></dependencies></dependencyManagement><dependencies><dependency><groupId>org.springframework.boot</groupId><artifactId>spring-boot-starter-web</artifactId></dependency><dependency><groupId>com.alibaba.cloud</groupId><artifactId>spring-cloud-starter-alibaba-sentinel</artifactId></dependency><dependency><groupId>org.projectlombok</groupId><artifactId>lombok</artifactId><optional>true</optional></dependency><dependency><groupId>org.springframework.boot</groupId><artifactId>spring-boot-starter-test</artifactId><scope>test</scope><exclusions><exclusion><groupId>org.junit.vintage</groupId><artifactId>junit-vintage-engine</artifactId></exclusion></exclusions></dependency></dependencies></project>
第三步:编辑配置文件application.properties
spring.application.name=alibaba-sentinel-rate-limitingserver.port=8003spring.cloud.sentinel.transport.dashboard=localhost:9260
第四步:创建一个Controller
package com.demo;import lombok.extern.slf4j.Slf4j;import org.springframework.boot.SpringApplication;import org.springframework.boot.autoconfigure.SpringBootApplication;import org.springframework.web.bind.annotation.GetMapping;import org.springframework.web.bind.annotation.RestController;/*** @author wujiawei* @see* @since 2021/4/14 下午1:32*/@SpringBootApplicationpublic class AlibabaSentinelRateLimitingApplication {public static void main(String[] args) {SpringApplication.run(AlibabaSentinelRateLimitingApplication.class, args);}@Slf4j@RestControllerstatic class EchoController {@GetMapping("echo")public String echo() {return "echo";}}}
第五步:启动程序,通过curl反复请求/echo接口
wujiawei@wujiaweideMacBook-Pro sentinel % curl http://localhost:8003/echoecho
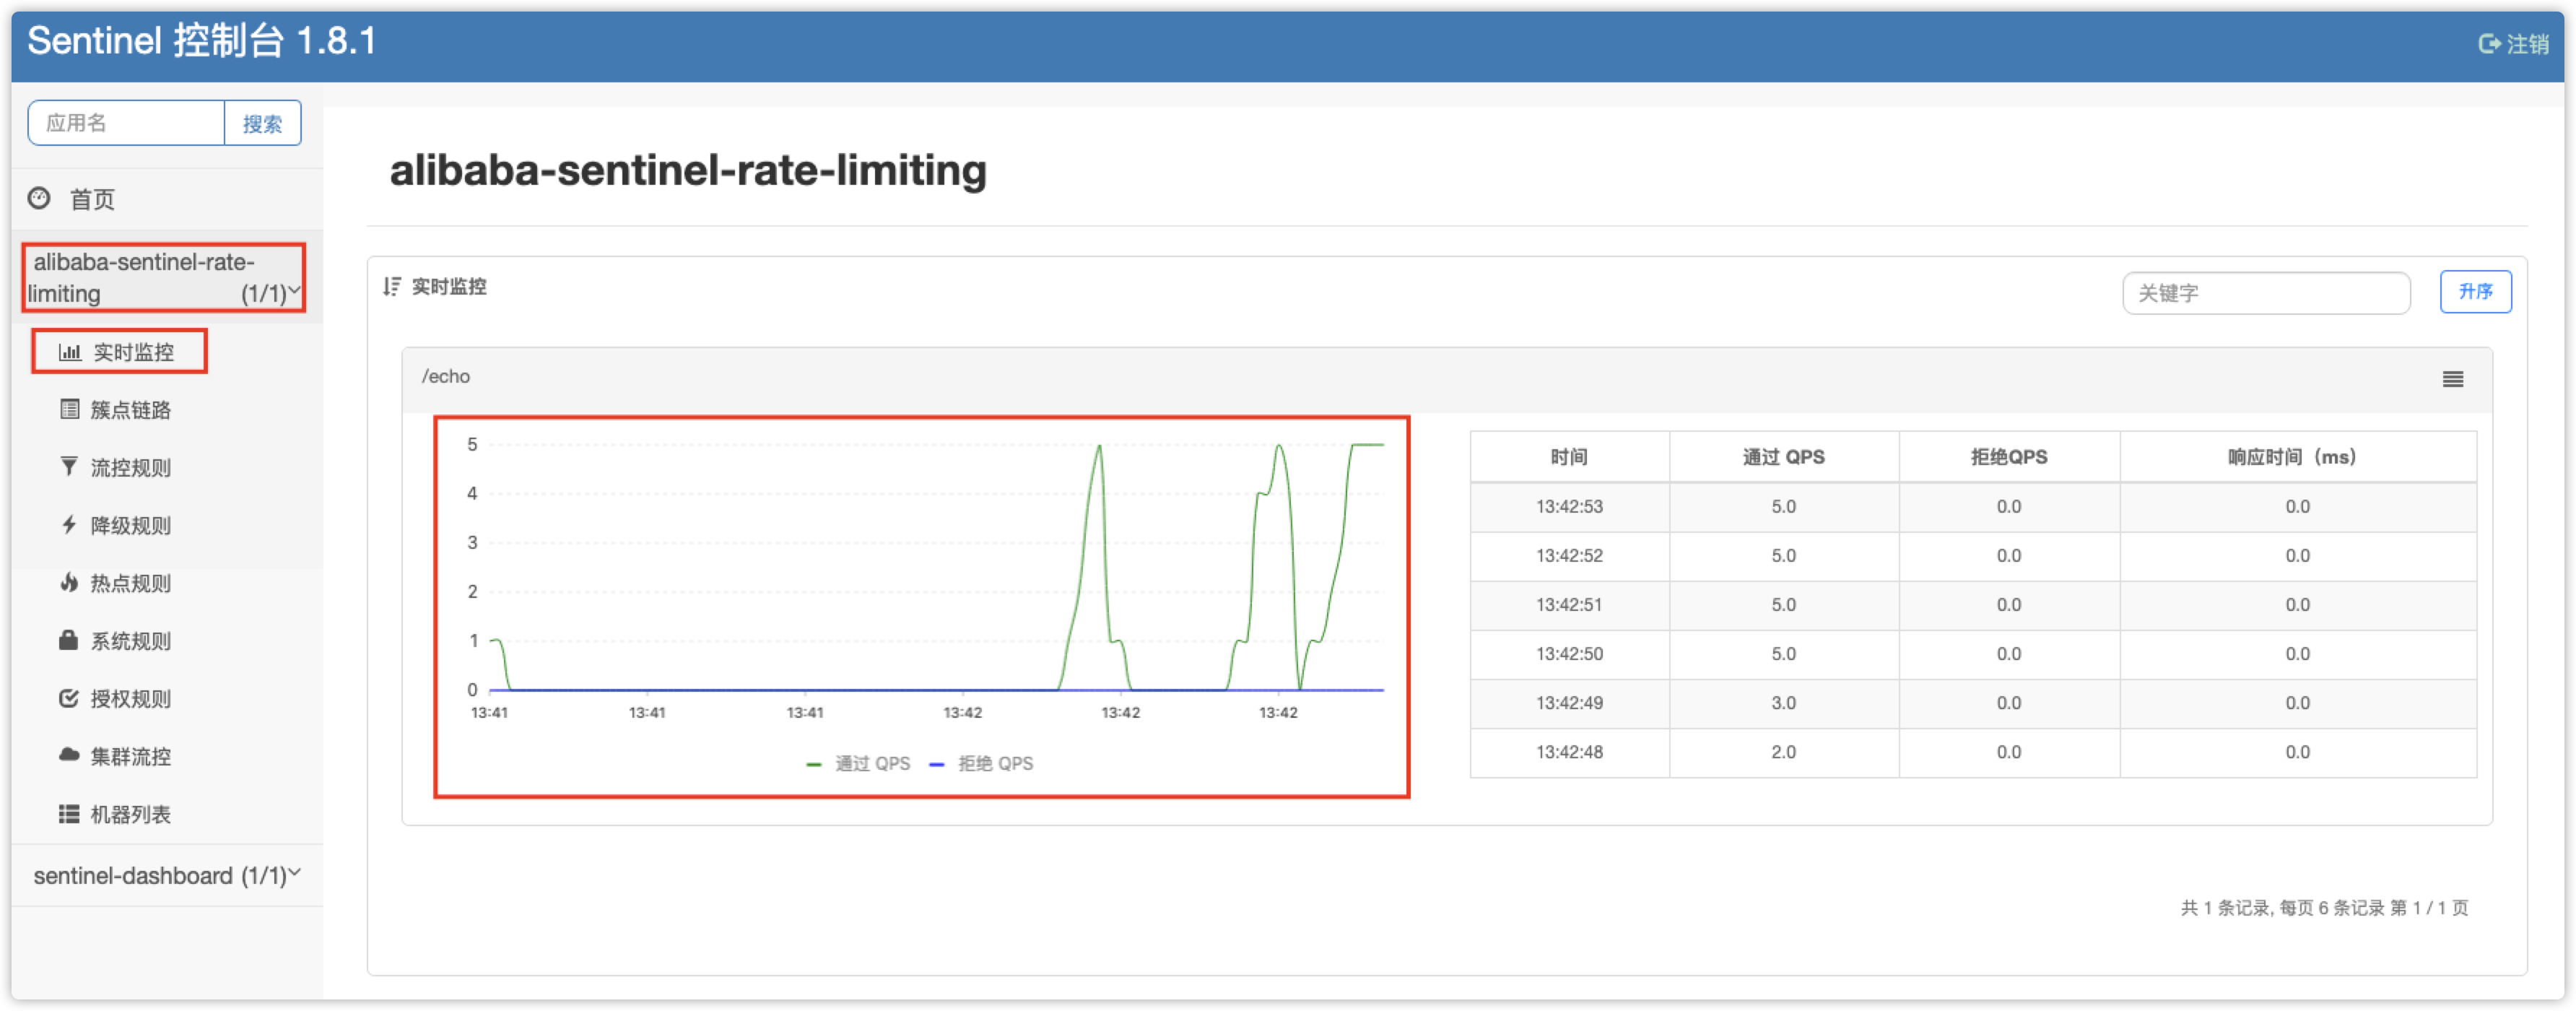
此时在Sentinel控制台出现了我们当前的应用,并且在实时监控菜单中可以看到刚才的请求,如图:
配置限流规则
Sentinel整合完成后,我们尝试使用它的限流功能。
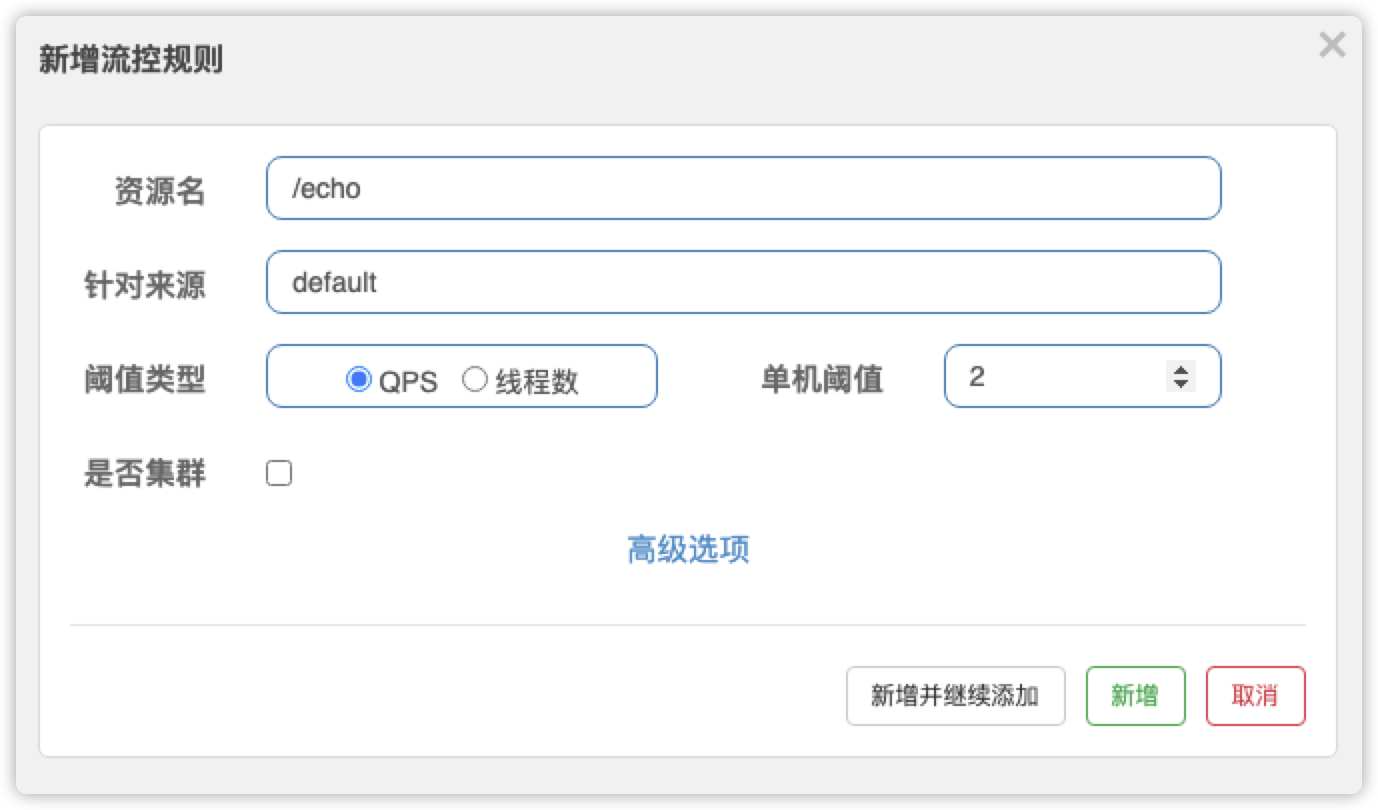
打开控制台,在alibaba-sentinel-rate-limiting服务下,点击簇点链路菜单,可以看到我们调用过的/echo接口。点击流控按钮,为该接口设置流量控制规则。
这里用一个最简单的设置,修改单机阈值为2,其他属性保持不动。这个设置的意思就是每秒最多允许2个请求,超过两个后就会被拒绝。
新增完成后,可以看到流控规则中出现了我们创建的规则。
这时回到curl,再次尝试反复请求/echo接口,注意这里要快快快!可以看到一秒内连续调用两次之后,第三次直接被拦截了。
wujiawei@wujiaweideMacBook-Pro sentinel % curl http://localhost:8003/echoechowujiawei@wujiaweideMacBook-Pro sentinel % curl http://localhost:8003/echoechowujiawei@wujiaweideMacBook-Pro sentinel % curl http://localhost:8003/echoBlocked by Sentinel (flow limiting)
代码示例
- Github:
- Gitee:

