在 mac 安装软件,首选 Homebrew,不知道曾几何也用这样的方式安装的 mysql。今天链接的时间出现了 Can't connect to local MySQL server through socket '/tmp/mysql.sock' (2) ,简单的网上查询了一下,没有追查到底,直接卸载掉。
卸载:
brew 卸载
brew uninstall mysql
再删除文件
sudo rm /usr/local/mysqlsudo rm -rf /usr/local/mysql*sudo rm -rf /Library/StartupItems/MySQLCOMsudo rm -rf /Library/PreferencePanes/My*vim /etc/hostconfig (and removed the line MYSQLCOM=-YES-)rm -rf ~/Library/PreferencePanes/My*sudo rm -rf /Library/Receipts/mysql*sudo rm -rf /Library/Receipts/MySQL*sudo rm -rf /var/db/receipts/com.mysql.*
安装
从 官网 下载 dmg 文件安装,下载的版本 mysql-8.0.17-macos10.14-x86_64
安装后直接直接通过 MySQLWorkbench 链接:
出现这样的错误:
Authentication plugin 'caching_sha2_password'cannot be loaded: dlopen(/usr/local/mysql/lib/plugin/caching_sha2_password.so, 2):image not found
解决办法需要将 root 用户的身份验证器插件已经变为:mysql_native_password
设置native_password
创建链接
打开 iTerm
➜ ~ mysql -u root -pzsh: command not found: mysql
这种情况下需要对命令建立连接
alias mysql=/usr/local/mysql/bin/mysql
为了永久生效
➜ mysql cd ~➜ ~ vim ~/.bashrc#在 .bashrc 文件中加入 alias mysql=/usr/local/mysql/bin/mysql# wq➜ ~ source ~/.bashrc
疑问
第一次如上设置后 ,可以正常登录。下次使用时提示 zsh: command not found: mysql ~/.bashrc 设置没有问题。
改用在 ~/.bash_profile 中设置
#mysqlalias mysql='/usr/local/mysql/bin/mysql'
然后在 source ~/.bash_profile 可以正常连接
为什么?
为什么下次登录后 ~/.bashrc不起作用,通过这个问题搜索答案 https://www.cnblogs.com/firfor/p/4840640.html
造成这些区别的原因是 Mac 的 bash 是一个 loginbash,loginbash会加载的是.bash_profile 不会加载.bashrc 文件
链接
➜ ~ mysql -u root -pEnter password:Welcome to the MySQL monitor. Commands end with ; or \g.Your MySQL connection id is 11Server version: 8.0.17 MySQL Community Server - GPLCopyright (c) 2000, 2019, Oracle and/or its affiliates. All rights reserved.Oracle is a registered trademark of Oracle Corporation and/or itsaffiliates. Other names may be trademarks of their respectiveowners.Type 'help;' or '\h' for help. Type '\c' to clear the current input statement.
这个时候 mysql 正式链接了成功了。
连接远程MySql Server
➜  ~ mysql -h 192.168.5.42 -P 3306 -u admin -p
Enter password:
Welcome to the MySQL monitor.  Commands end with ; or \g.
Your MySQL connection id is 543312
修改root身份验证类型
通过以下命令设置:
mysql> ALTER USER root@localhost IDENTIFIED WITH mysql_native_password
BY '1111@2012';
Query OK, 0 rows affected (0.00 sec)

## 使生效
mysql> FLUSH PRIVILEGES;
Query OK, 0 rows affected (0.01 sec)
查看身份证验证类型
mysql> use mysql;
Reading table information for completion of table and column names
You can turn off this feature to get a quicker startup with -A
Database changed

mysql> SELECT Host, User, plugin from user;
出现: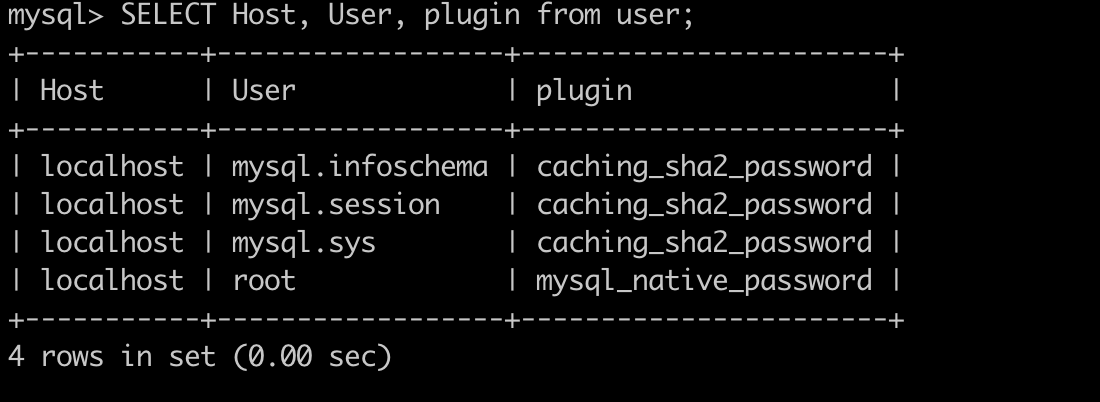
这个时间已经设置成功了。
在进入 MySQLWorkbench 测试连接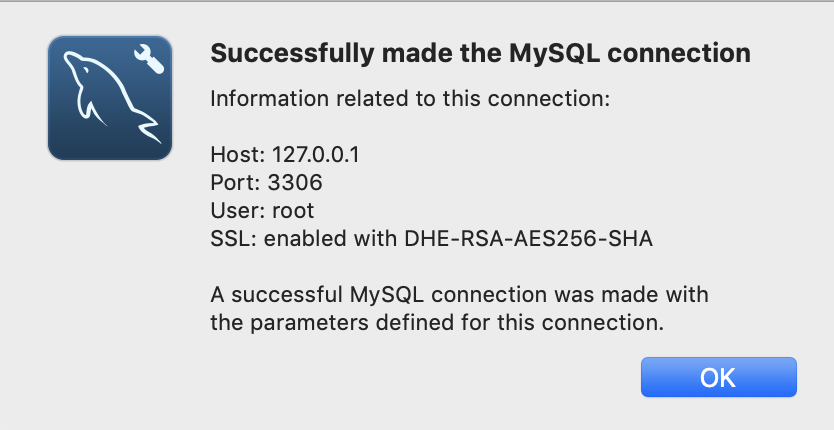
大功搞成。
关于caching_sha2_password密码模式:https://mysqlserverteam.com/mysql-8-0-4-new-default-authentication-plugin-caching_sha2_password/

若有收获,就点个赞吧
0 人点赞
