starter组件作用
Spring Boot或者一些开源组件已经帮助我们提供了非常多的starter组件,但是业务千变万化肯定不能满足企业内部研发人员的要求,这时候就需要开发者自定义企业内部的starter了。
Spring Boot官方元数据文档地址:https://docs.spring.io/spring-boot/docs/current/reference/html/appendix-configuration-metadata.html
我们在自定义starter组件之前,开发者首先需要想清楚,这个starter组件能带来什么,简化开发?或者复用组件的封装供其他同事使用,不写重复代码等等,这些都是需要思考清楚的。自定义starter的场景很多,例如:
- 项目中发送短信对接了不同的云服务商,那么可以封装一个短信的starter,屏蔽对接的细节,开发者只需要配置相应的厂商配置信息就可以使用该服务商发送短信了
- OSS存储对接不同的云服务商,例如阿里云、七牛云、腾讯云等等
- 企业内部中间件封装使用,简化开发配置
- more…
根据笔者的经验,我认为自定义的starter的作用无外乎以下几个方面:
- 充分利用Spring的特性,容器/依赖注入特性,将核心的类组件注入容器中,方便开发者通过注入直接获取拿来使用
- 通过属性初始化中间件的流程,屏蔽具体的细节
- 规范企业内部编码流程,统一各个技术中间件的代码规范
-
准备前知识点:
组件命名规范
starter命名规范根据Spring Boot的官方要求,如果是开发者指定第三方的starter组件,那么命名规范是
yourname-spring-boot-starter,拿Knife4j举例说明如下:<dependency><groupId>com.github.xiaoymin</groupId><artifactId>knife4j-spring-boot-starter</artifactId><version>2.0.8</version></dependency>
而Spring Boot官方维护发布的starter名称规范则是:
spring-boot-starter-name,例如我们引用最多的web组件,引用maven配置如下:<dependency> <groupId>org.springframework.boot</groupId> <artifactId>spring-boot-starter-web</artifactId> </dependency>jar包引用传递依赖机制
这是自定义封装Spring Boot的starter的前提条件,Gradle笔者并未使用过,这里仅以Maven为例进行阐述说明!通常我们在封装一个SDK的jar包时,该jar包可能需要引用到第三方的jar包作为依赖包来辅助我们完成对该jar包的封装,但是我们在引用的时候是有讲究的。(资料参考:https://blog.csdn.net/lingyiwin/article/details/90697997)
针对Spring Boot的自定义starter说到底也是一个jar包,既然是jar包必然会用到第三方的jar(ps:全部都是你写的代码除外),那么我们应该如何明确在starter中的jar包的依赖传递,我认为主要有以下方面: 作为第三方组件使用jar包时,明确第三方组件的版本
- 作为编译期间的包,需要修改默认的scope范围值,仅仅在编译期间生效,最终打包后引用不传递
- 自定义封装starter必须引用Spring Boot官方提供的在定义Spring Boot的第三方starter时,主要用到Maven管理jar包中的两种依赖隔离方式(均可以使用),分别如下:
- 明确使用
<optional>true></optional>属性来强指定jar包不传递 - 使用
<scope>provided</scope>仅仅在编译期间有效,jar包依赖性不传递
一般我们在自定义Spring Boot的starter组件时,都需要引用Spring Boot提供给开发者的依赖包,如下:
<dependency>
    <groupId>org.springframework.boot</groupId>
    <artifactId>spring-boot-autoconfigure</artifactId>
    <version>2.3.0.RELEASE</version>
    <scope>provided</scope>
</dependency>
当然,你也可以使用optional模式,如下:
<dependency>
     <groupId>org.springframework.boot</groupId>
     <artifactId>spring-boot-autoconfigure</artifactId>
     <version>2.3.0.RELEASE</version>
     <optional>true</optional>
</dependency>
Spring Boot框架的自动装载
对于Spring Boot框架自定义的starter组件来说,提供的使用方式而言,我认为目前主要有3种方式,这个主要看封装starter组件的作者如何开放来定
手工@Import导入
第一种情况:使用者使用@Import注解将封装的starter组件的Java编码Configuration配置文件进行导入,假设目前封装的一个简单的Configuration配置如下:
@Configuration
public class DemoAuthConfiguration {
    @Bean
    public DemoClient demoClient(){
        return new DemoClient();
    }
}
开发者通过DemoAutoConfiguration.java向Spring的容器中注入了一个DemoClient的实体Bean,由于隶属于不同的package包路径,自定义的starter组件包路径是:com.demo.spring,而开发者的项目主目录包路径是:com.test,所以Spring Boot框架默认是不会加载该配置的,此时,如果开发者要在Spring的容器中获取DemoClient的实体Bean应该怎么办呢?使用者应该在自己的主配置中使用@Import注解将该配置导入进来交给Spring容器初始化时进行创建,示例如下:
@Import(DemoAutoConfiguration.class)
@SpringBootApplication//只会加载当前启动类路径下的配置文件
public class DemoDemoApplication {

    public static void main(String[] args){
        SpringApplication.run(DemoDemoApplication.class, args);
    }
}
提供便于记忆的注解@EnableXXX
@Enablexxx系列注解相信开发者并不陌生,比如我们要使用Spring Boot的定时任务功能,我们会在启动入口引入@EnableScheduling注解,我们使用Springfox的Swagger组件,我们会引入@EnableSwagger2注解
其实这种方式只是为了让开发者能够更加方便的记忆,一个@Enablexxx系列注解,其所代表的功能特点也基本符合该starter组件,是在上面手工通过@Import注解的升级版本。
毕竟Enable单词所代表的含义是启用,这有利于开发者记忆继续通过上面第一种的示例进行改在,此时,我们可以提供@EnableDemoClient注解,代码示例如下:
@Documented
@Retention(RetentionPolicy.RUNTIME)
@Target(ElementType.TYPE)
@Import(DemoAutoConfiguration.class)
public @interface EnableDemoClient {
}
大家应该也看到了,我们在该@EnableDemoClient注解中,使用了@Import注解的方式导入了DemoAutoConfiguration配置,此时,我们在项目中可以使用@EnableDemoClient注解了,代码示例如下:
@EnableDemoClient
@SpringBootApplication
public class DemoDemoApplication {

    public static void main(String[] args){
        SpringApplication.run(DemoDemoApplication.class, args);
    }
}
当然,@Enable这种注解作用不仅仅局限于此,还可以在该注解上定义外部的配置属性,通过配置该注解的方式达到最终初始化的目的。
自动装载
自动装载是Spring Boot的一重大特点,开发者通过配置文件的方式即可默认加载第三方的starter配置,非常的方便,是上面两种方式的升级版。在之前的基础上,如果开发者希望在Maven的pom.xml工程中引入了该组件,就可以使用DemoClient类,那么此时我们应该怎么做呢?
我们需要在工程中创建spring.factories文件,文件目录:src/resources/META-INF/spring.factories
在spring.factories文件中,配置开发者自定义的configuration类,如下:
org.springframework.boot.autoconfigure.EnableAutoConfiguration=com.demo.spring.DemoAutoConfiguration
配置好后,此时再打包我们自定义的starter组件,Spring Boot框架默认会自动装载该配置类,我们在业务代码中也就可以直接使用了,我们可以在SpringApplication.java源码中看到Spring Boot初始化获取该类列表的过程
private <T> Collection<T> getSpringFactoriesInstances(Class<T> type, Class<?>[] parameterTypes, Object... args) {
        ClassLoader classLoader = getClassLoader();
        // Use names and ensure unique to protect against duplicates
        Set<String> names = new LinkedHashSet<>(SpringFactoriesLoader.loadFactoryNames(type, classLoader));
        List<T> instances = createSpringFactoriesInstances(type, parameterTypes, classLoader, args, names);
        AnnotationAwareOrderComparator.sort(instances);
        return instances;
}
上述方法中的SpringFactoriesLoader.loadFactoryNames方法如下:
public static List<String> loadFactoryNames(Class<?> factoryType, @Nullable ClassLoader classLoader) {
        String factoryTypeName = factoryType.getName();
        return loadSpringFactories(classLoader).getOrDefault(factoryTypeName, Collections.emptyList());
}
private static Map<String, List<String>> loadSpringFactories(@Nullable ClassLoader classLoader) {
    MultiValueMap<String, String> result = cache.get(classLoader);
    if (result != null) {
        return result;
    }
    try {
        //加载META-INF/spring.factories配置,创建MultiValueMap集合放到该集合中
        Enumeration<URL> urls = (classLoader != null ?
                                 classLoader.getResources(FACTORIES_RESOURCE_LOCATION) :
                                 ClassLoader.getSystemResources(FACTORIES_RESOURCE_LOCATION));
        result = new LinkedMultiValueMap<>();
        while (urls.hasMoreElements()) {
            URL url = urls.nextElement();
            UrlResource resource = new UrlResource(url);
            Properties properties = PropertiesLoaderUtils.loadProperties(resource);
            for (Map.Entry<?, ?> entry : properties.entrySet()) {
                String factoryTypeName = ((String) entry.getKey()).trim();
                for (String factoryImplementationName : StringUtils.commaDelimitedListToStringArray((String) entry.getValue())) {
                    result.add(factoryTypeName, factoryImplementationName.trim());
                }
            }
        }
        cache.put(classLoader, result);
        return result;
    }
    catch (IOException ex) {
        throw new IllegalArgumentException("Unable to load factories from location [" +
                                           FACTORIES_RESOURCE_LOCATION + "]", ex);
    }
}
充分利用Spring Boot提供的@Conditional条件注入组件
通过上面的文章介绍,为Spring Boot框架制定一个简单的starter组件相信已经不在话下。但是,这才仅仅开始而已。在上面介绍的自动装载过程中,开发者是否会存在疑问?
当我们在pom.xml引入我们自定义的starter组件后,Spring Boot框架默认会将该组件直接注入到Spring的容器中,这种方式虽然在使用上并没有什么问题,但当我们封装给第三方使用时,这种方式往往会存在冲突,假设开发者自定义的starter组件中包含了向容器中注入Filter等过滤器,那么该过滤器直接生效,会全范围影响整个应用程序.这在实际开发中是不允许的! 那么应该怎么办呢?此时,我们就需要充分利用Spring Boot框架为开发者提供的
@Conditional系列条件注入了
条件注入顾名思义,就是只有使用者满足了组件规定的条件时,组件才会向Spring容器中进行注入Bean或者初始化的操作.这种方式也是将选择权直接交给使用者进行选择,减少非必要的组件冲突,是在Spring Boot自定义starter组件中必不可少的一环。条件注入通常也配合属性类一起来进行使用,提供配置属性选项也是方便使用者在Spring Boot的配置文件application.yml或者application.properties进行配置开启操作,例如我们常见的配置操作如下:
server:
  port: 18568
  servlet:
    context-path: /api
自定义DemoFeignClient接口**
假设我们的
DemoClient是对接外部API接口的封装组件,该组件规定访问外部API时需要提供appid和secret,根据appid及secret获取token,最后根据token才能调用API获取接口数据
第一步:创建配置实体类
@Setter
@Getter //使用Data注解json文件无法触发
@ConfigurationProperties(prefix = "com.huke.demo")
public class DemoProperties {

    /**
     * 是否启用
     */
    private boolean enable = false;

    /**
     * appid
     */
    private String appid;

    /**
     * secret
     */
    private String secret;

}
第二步:创建所需的业务功能类
@Setter
@Getter
public class DemoFeignClient {

    private DemoProperties demoProperties;


    public DemoFeignClient(DemoProperties demoProperties) {
        this.demoProperties = demoProperties;
    }

    /**
     * 方法一:获取token
     */
    public String getToken(){
        //模拟获取token的业务逻辑 ....
        String token = demoProperties.getAppid() + "&&" + demoProperties.getSecret();
        return token;
    }

    /**
     * 方法二:xxxx
     */
    public String funcXXX(){
        //模拟业务逻辑 ....
        return "xxxxxxxx";
    }

}
在上面的代码示例中,如果开发者要使用DemoFeignClient的方法调用第三方的接口资源,那么需要传递DemoProperties参数才能构造实体类,又考虑到我们需要利用Spring Boot的条件注入,只有开发者配置了开启操作,才能在Spring容器中使用DemoFeignClient的方法。所以需要一个条件才能注入业务类的自动配置类
第三步:创建所需的业务功能类
@Configuration
//当属性为true的时候才会开启,DemoProperties 已经注入了
@EnableConfigurationProperties(DemoProperties.class)
@ConditionalOnProperty(name = "com.huke.demo.enable",havingValue = "true")
public class DemoFeignAutoConfig {

    //注入我们的业务类,业务类实现方法的调用
    @Bean
    @ConditionalOnMissingBean(DemoProperties.class)
    public DemoFeignClient getDemoToken(DemoProperties demoProperties){
        if (StringUtils.isBlank(demoProperties.getAppid())){
            throw new IllegalArgumentException("appId 参数为空,请在配置文件配置");
        }
        if (StringUtils.isBlank(demoProperties.getSecret())){
            throw new IllegalArgumentException("secret 参数为空,请在配置文件配置");
        }
        DemoFeignClient demoFeignClient = new DemoFeignClient(demoProperties);
        return demoFeignClient;
    }

}
第四步:配置spring.factories文件
org.springframework.boot.autoconfigure.EnableAutoConfiguration=com.huke.starter.config.DemoFeignAutoConfig
编译测试打包后,会将自动配置的文件在我们的target编译目录下生成对应的spring-configuration-metadata.json文件,对应我们自动配置类的注解上的我们实体类,然后我们在配置类上就能自动显示了。 所以变编译后的代码展示如图: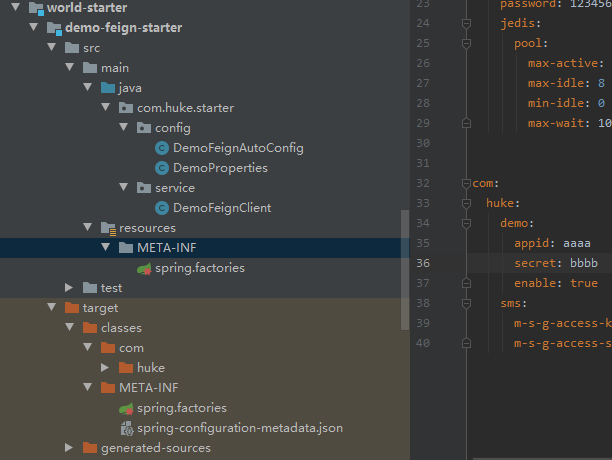
第五步:测试(查看我们的类是否被注入到容器内)
我这里是启动了另外一个项目来验证,通过maven引入其组件来,并在配置文件中写入配置的参数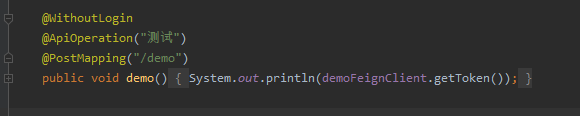

自定义SMS短信组件
第一步:创建配置实体类
/**
 * 阿里短信所需参数
 */
@Setter
@Getter
@ConfigurationProperties(prefix = "com.huke.sms")
public class SmsMsgProperties {

    /**
     * 阿里短信网关
     */
    public String MSG_SendUrl="dysmsapi.aliyuncs.com";

    /**
     * ID用于标识用户
     */
    public String MSG_AccessKeyId="xxxxx";

    /**
     * 是用来验证用户的密钥
     */
    public String MSG_AccessSecret="yyyyy";

    /**
     * 短信签名名称
     */
    public String MSG_SignName="Pandora";

}
第二步:创建所需的业务功能类
package com.huke.starter.service;

import com.huke.starter.config.SmsMsgProperties;
import com.huke.starter.config.MsgTypeEnum;
import com.aliyuncs.CommonRequest;
import com.aliyuncs.CommonResponse;
import com.aliyuncs.DefaultAcsClient;
import com.aliyuncs.IAcsClient;
import com.aliyuncs.exceptions.ClientException;
import com.aliyuncs.http.MethodType;
import com.aliyuncs.profile.DefaultProfile;

public class SmsService {

    private SmsMsgProperties smsMsgProperties;

    public SmsService(SmsMsgProperties smsMsgProperties) {
        this.smsMsgProperties = smsMsgProperties;
    }

    /**
     * @param code 验证码
     * @param type 验证码短信的类型 1注册 2登录 3修改密码
     */
    public void sendMsg(String code,Integer type,String phone){
        String msgType = "";
        if (type == 1){
            msgType = MsgTypeEnum.MSG_Template_One.getMsgTypeContent();
        }else if (type == 2){
            msgType = MsgTypeEnum.MSG_Template_Two.getMsgTypeContent();
        }else if (type == 3){
            msgType = MsgTypeEnum.MSG_Template_Three.getMsgTypeContent();
        }
        DefaultProfile profile = DefaultProfile.getProfile("cn-hangzhou", smsMsgProperties.MSG_AccessKeyId, smsMsgProperties.MSG_AccessSecret);
        IAcsClient client = new DefaultAcsClient(profile);
        CommonRequest request = new CommonRequest();
        request.setSysMethod(MethodType.POST);
        request.setSysDomain(smsMsgProperties.MSG_SendUrl);
        request.setSysVersion("2017-05-25");
        request.setSysAction("SendSms");
        request.putQueryParameter("RegionId", "cn-hangzhou");
        request.putQueryParameter("PhoneNumbers", phone);
        request.putQueryParameter("SignName", smsMsgProperties.MSG_SignName);
        request.putQueryParameter("TemplateCode", msgType);
        request.putQueryParameter("TemplateParam", "{\"code\":\""+code+"\"}");
        try {
            CommonResponse response = client.getCommonResponse(request);
            System.out.println("验证码短信下发的结果" + response.getData());
            //其它业务操作 ...
        } catch (ClientException e) {
            e.printStackTrace();
        }
    }

}
第三步:创建所需的业务功能类
@Configuration
@EnableConfigurationProperties(SmsMsgProperties.class)//注入我们的业务类,业务类实现方法的调用
public class MsgSmsAutoConfig {

    @Bean
    @ConditionalOnMissingBean(SmsMsgProperties.class)
    public SmsService getSmsService(SmsMsgProperties smsMsgProperties){
        //校验下参数 ...
        SmsService smsService = new SmsService(smsMsgProperties);
        return smsService;
    }

}
第四步:配置spring.factories文件
org.springframework.boot.autoconfigure.EnableAutoConfiguration=com.huke.starter.config.MsgSmsAutoConfig
第五步:测试(查看我们的类是否被注入到容器内)

@WithoutLogin
@ApiOperation("测试2")
@PostMapping("/demo2")
public void demo2(){
    smsService.sendMsg("1234",1,"18668014xxx");
}
需要注意的点:
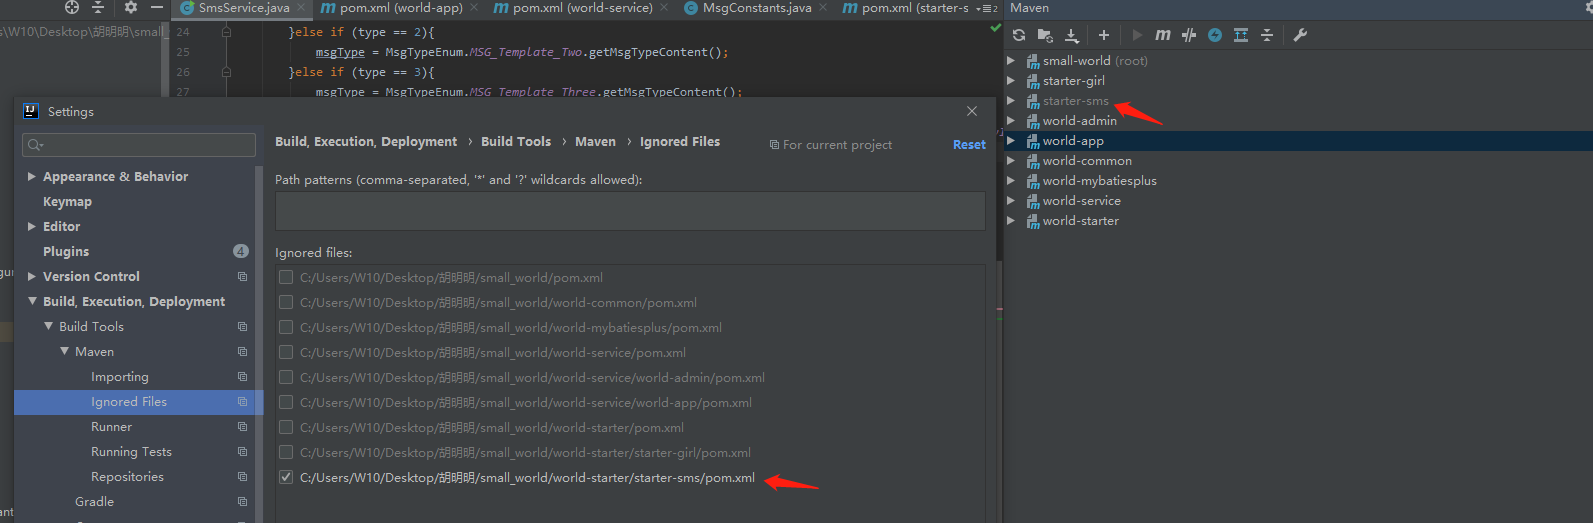
1.创建普通带resource的maven项目,并且项目显示灰色,是因为之前创建了此项目,点击maven中的忽略去掉
2.配置实体属性类的时候,需要使用set和get方法,不要使用@Date注解,会使得在yml文件中无法自动提示

若有收获,就点个赞吧
0 人点赞
