


2.0 FLUME的目录结构
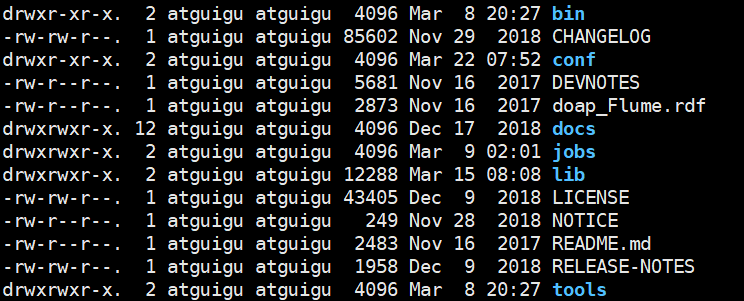
| bin | 可执行文件如:flume-ng |
|---|---|
| conf | 配置文件: 如日志文件 |
| lib | 所有的jar包,也可以将自己写的jar包上传该目录 |
2.1、监控端口数据
2.1.1、编辑配置文件
# example.conf: A single-node Flume configuration# Name the components on this agenta1.sources = r1a1.sinks = k1a1.channels = c1# Describe/configure the sourcea1.sources.r1.type = netcata1.sources.r1.bind = localhosta1.sources.r1.port = 44444# Describe the sinka1.sinks.k1.type = logger# Use a channel which buffers events in memorya1.channels.c1.type = memorya1.channels.c1.capacity = 1000a1.channels.c1.transactionCapacity = 100# Bind the source and sink to the channela1.sources.r1.channels = c1a1.sinks.k1.channel = c1
2.1.2、监听FLUME端口
bin/flume-ng agent --conf conf/ --name a1 --conf-file job/flume-netcat-logger.conf -Dflume.root.logger=INFO,console
bin/flume-ng agent -c conf/ -n a1 -f job/flume-netcat-logger.conf -Dflume.root.logger=INFO,console
| 参数 | 参数描述 | 参数的配置文件位置 |
|---|---|---|
| —conf/-c | 表示配置文件存储在conf/目录 | |
| —name/-n | 表示给agent起名为a1 | |
| —conf-file/-f | flume本次启动读取的配置文件是在job文件夹下的flume-telnet.conf文件。 | |
| -Dflume.root.logger=INFO,console | -D表示flume运行时动态修改flume.root.logger参数属性值,并将控制台日志打印级别设置为INFO级别。日志级别包括:log、info、warn、error。 | /opt/module/flume-1.9.0-bin/conf/log4j.properties |
2.1.3、使用netcat工具向本机的44444端口发送内容
nc localhost 44444
2.2、实时监控单个追加文件
2.2.1、编辑配置文件
# example.conf: A single-node Flume configuration

# Name the components on this agent
a1.sources = r1
a1.sinks = k1
a1.channels = c1

# Describe/configure the source
a1.sources.r1.type = exec
a1.sources.r1.command = tail -f /home/atguigu/flume/log/abc.log

# Describe the sink
a1.sinks.k1.type = hdfs
a1.sinks.k1.hdfs.path = /flume/events/%y-%m-%d/%H%M/%S
a1.sinks.k1.hdfs.filePrefix = events-
a1.sinks.k1.hdfs.round = true
a1.sinks.k1.hdfs.roundValue = 10
a1.sinks.k1.hdfs.roundUnit = minute
a1.sinks.k1.hdfs.fileType = DataStream
a1.sinks.k1.hdfs.useLocalTimeStamp = true

# Use a channel which buffers events in memory
a1.channels.c1.type = memory
a1.channels.c1.capacity = 1000
a1.channels.c1.transactionCapacity = 100

# Bind the source and sink to the channel
a1.sources.r1.channels = c1
a1.sinks.k1.channel = c1
2.2.2、使用命令向文件中发送数据
echo "hello world" >> abc.log
echo "FLUME TEST" >> abc.log
echo "FLUME TEST" >> abc.log
echo "hello world" >> abc.log
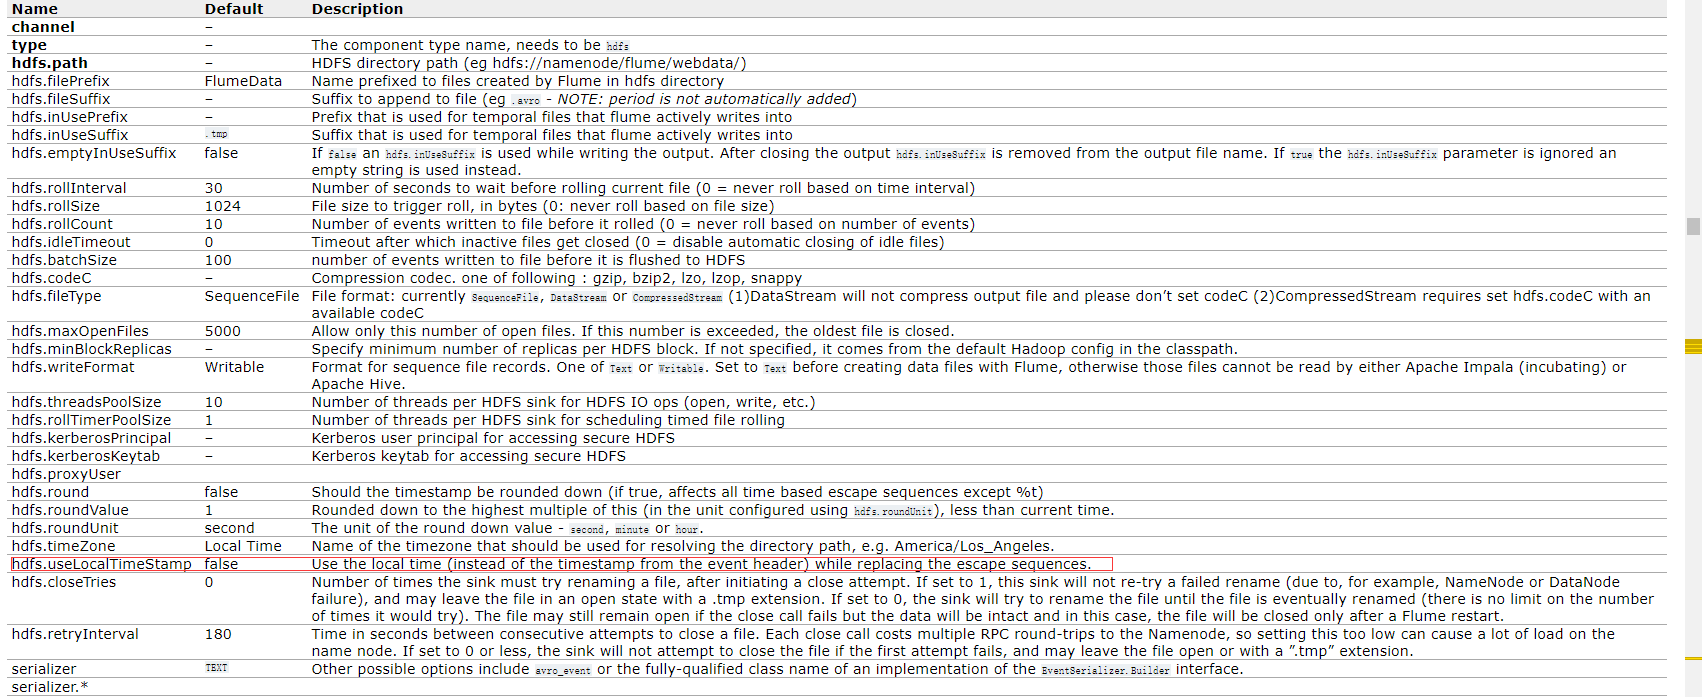
对于所有与时间相关的转义序列,Event Header中必须存在以 “timestamp”的key(除非hdfs.useLocalTimeStamp设置为true,此方法会使用TimestampInterceptor自动添加timestamp)。
a3.sinks.k3.hdfs.useLocalTimeStamp = true
如下:
2.3、实时监控目录下多个新文件
2.3.1 编辑配置文件
# example.conf: A single-node Flume configuration

# Name the components on this agent
a1.sources = r1
a1.sinks = k1
a1.channels = c1

# Describe/configure the source
a1.sources.r1.type = spooldir
a1.sources.r1.spoolDir = /home/atguigu/flume/spool
a1.sources.r1.fileHeader = true
a1.sources.r1.fileSuffix = COMPLETED
a1.sources.r1.includePattern = .*log

# Describe the sink
a1.sinks.k1.type = hdfs
a1.sinks.k1.hdfs.path = /flume/events/%y-%m-%d/%H%M/%S
a1.sinks.k1.hdfs.filePrefix = events-
a1.sinks.k1.hdfs.round = true
a1.sinks.k1.hdfs.roundValue = 10
a1.sinks.k1.hdfs.roundUnit = minute
a1.sinks.k1.hdfs.fileType = DataStream
a1.sinks.k1.hdfs.useLocalTimeStamp = true

# Use a channel which buffers events in memory
a1.channels.c1.type = memory
a1.channels.c1.capacity = 1000
a1.channels.c1.transactionCapacity = 100

# Bind the source and sink to the channel
a1.sources.r1.channels = c1
a1.sinks.k1.channel = c1

若有收获,就点个赞吧
0 人点赞
