一、依赖

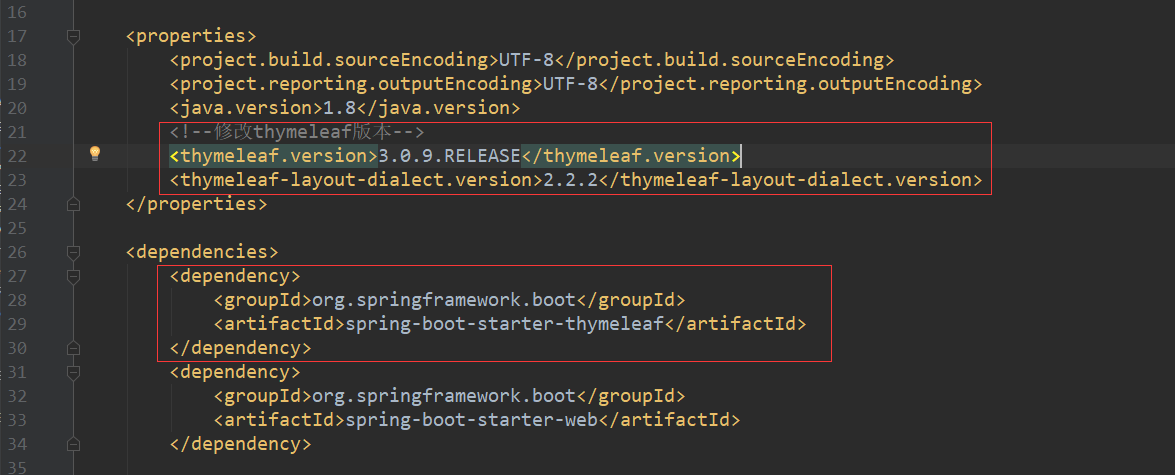
说明:当springboot自动导入的thymeleaf的版本过低时,可以手动修改版本。 如图所示,修改了版本之后,另外一个thymeleaf依赖组件thymeleaf-layout-dialect (布局功能的支持程序)不一定支持该版本的thymeleaf。一般而言,thymeleaf版本为3.x时,layout版本应为2.x以上;当thymeleaf版本为2.x时,layout的版本应为1.x。
二、Thymeleaf的使用
@ConfigurationProperties(prefix = "spring.thymeleaf")public class ThymeleafProperties {private static final Charset DEFAULT_ENCODING = Charset.forName("UTF-8");private static final MimeType DEFAULT_CONTENT_TYPE = MimeType.valueOf("text/html");public static final String DEFAULT_PREFIX = "classpath:/templates/";public static final String DEFAULT_SUFFIX = ".html";
只要我们把HTML页面放在classpath:/templates/ 目录下,thymeleaf就能自动渲染。
实例:
1、导入Thymeleaf的名称空间
<html lang="en" xmlns:th="http://www.thymeleaf.org">
2、使用Thymeleaf语法
<!DOCTYPE html><html lang="en" xmlns:th="http://www.thymeleaf.org"><head><meta charset="UTF-8" /><title>thymeleaf的使用</title></head><body><h1>成功!</h1><!--th:text 将div里面的文本内容设置为 --><div th:text="${hello}">这是显示欢迎信息</div></body></html>
三、语法规则
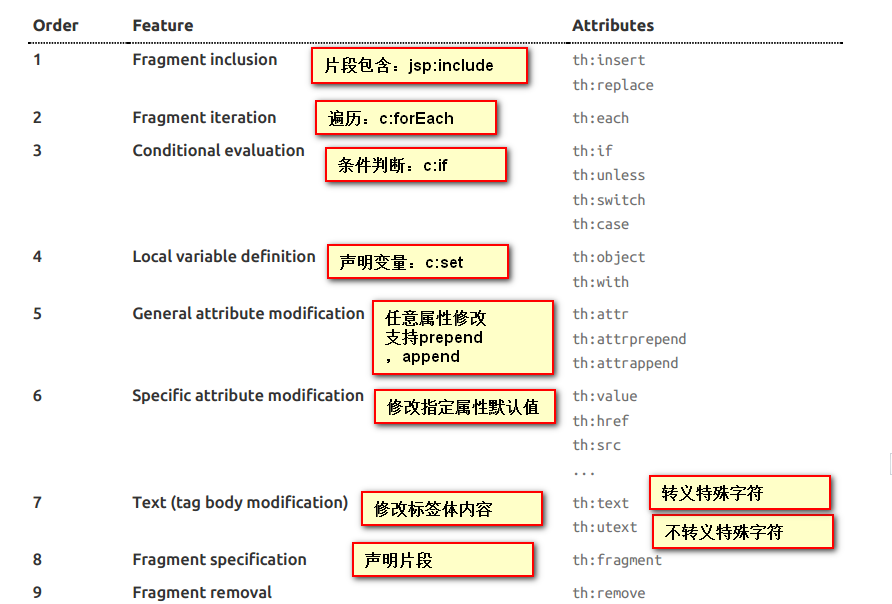
th:text:改变当前元素里面的文本内容。th:任意html属性,来替换原生属性的值
具体参考Thymeleaf官方文档 和 参考博客。

