原文地址:https://blog.csdn.net/xiaoma_2018/article/details/108231658
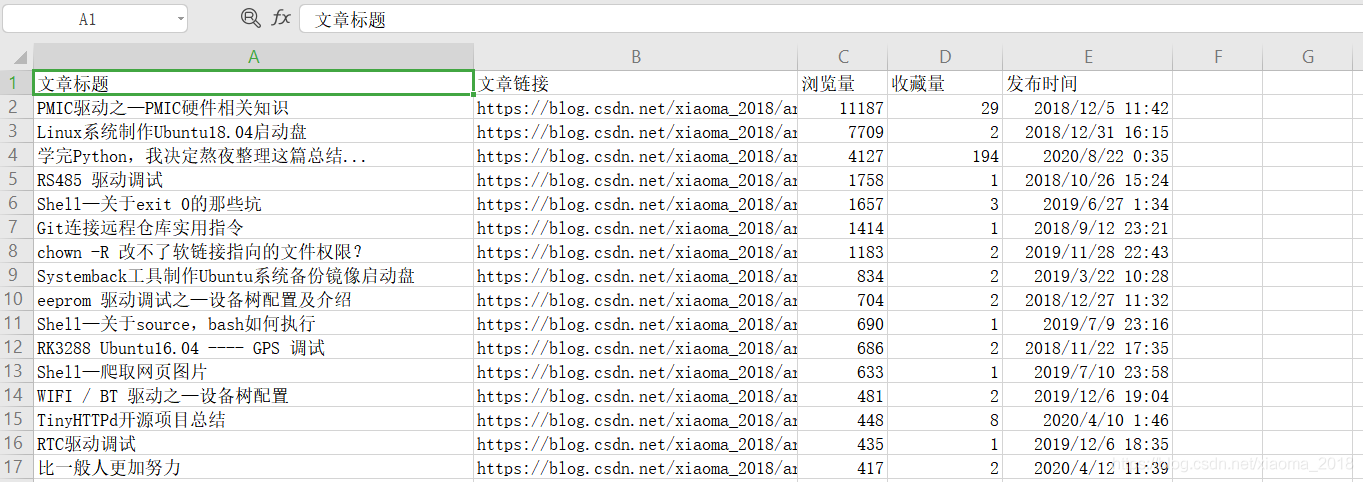
前言:到周末了,产生一个idea,就是获取个人的全部博客标题及链接,发布时间、浏览量、以及收藏量等数据信息,按访问量排序,整理成一份Excel表存储。
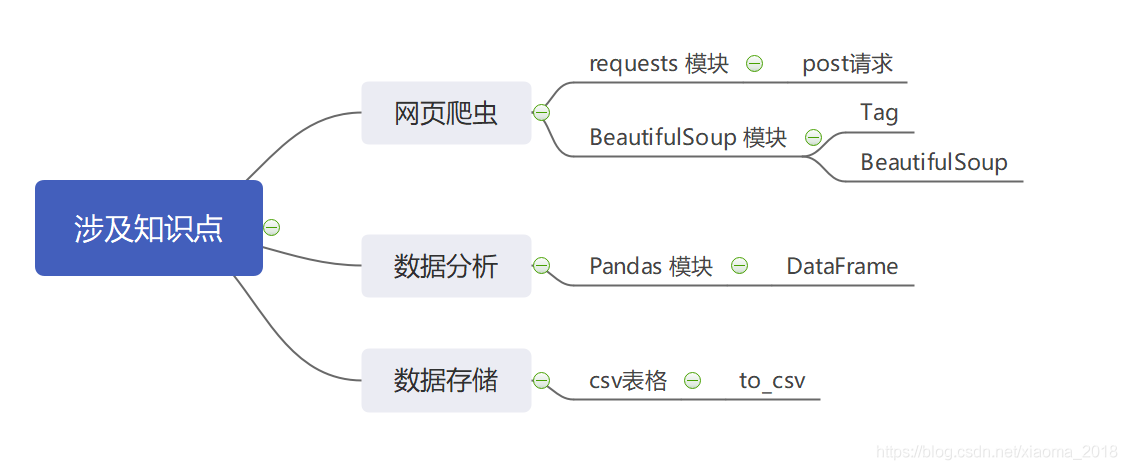
使用时,输入个人博客ID即可,从数据获取到解析存储,用到requests、BeautifulSoup、pandas等三方库,一个完整的Python爬虫实践。

目录
网页分析
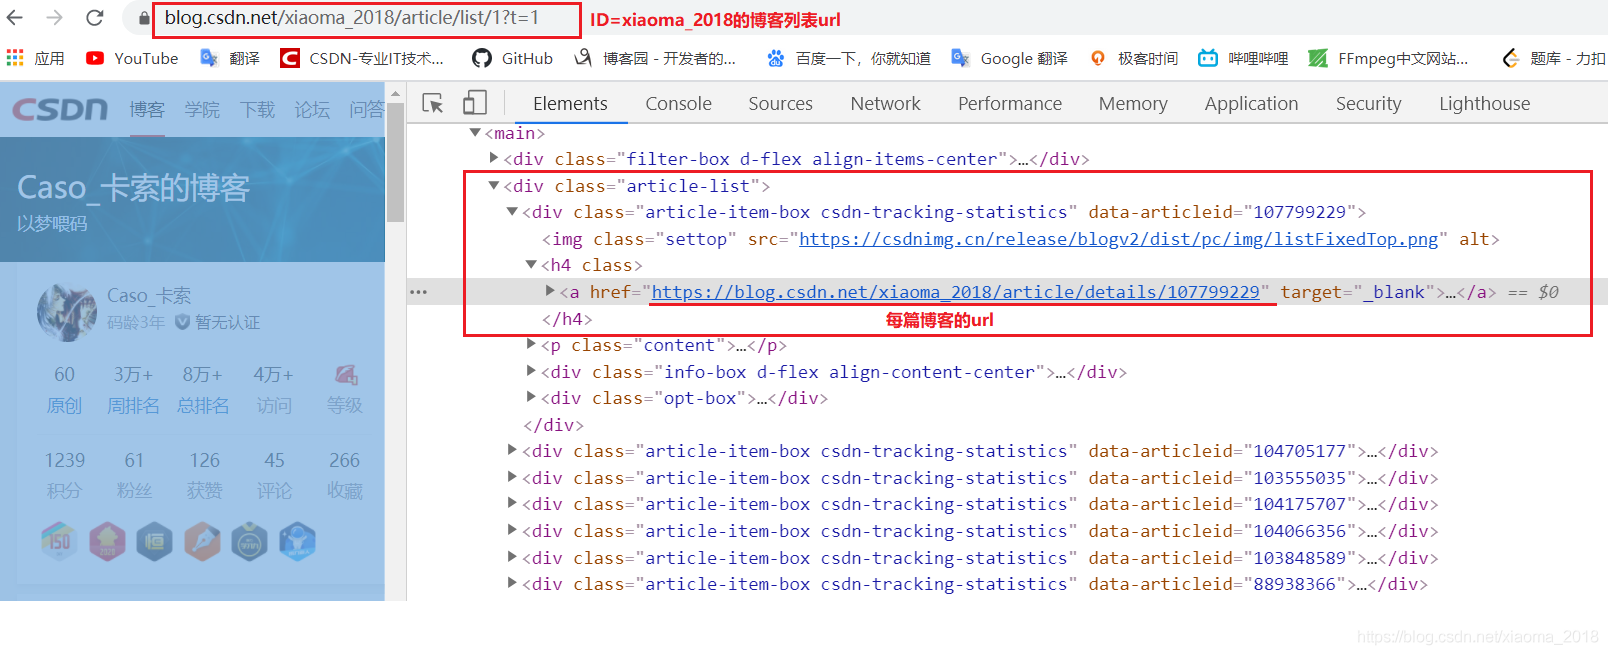
博客列表分析

通过分析我的博客列表网页代码,提取出每篇文章的链接。
我的博客列表url为:https://blog.csdn.net/xiaoma_2018/article/list/1?t=1
注意每个人的博客ID会不同,因此本爬虫使用时要求输入个人的博客ID及页码数,以达到通用的功能。
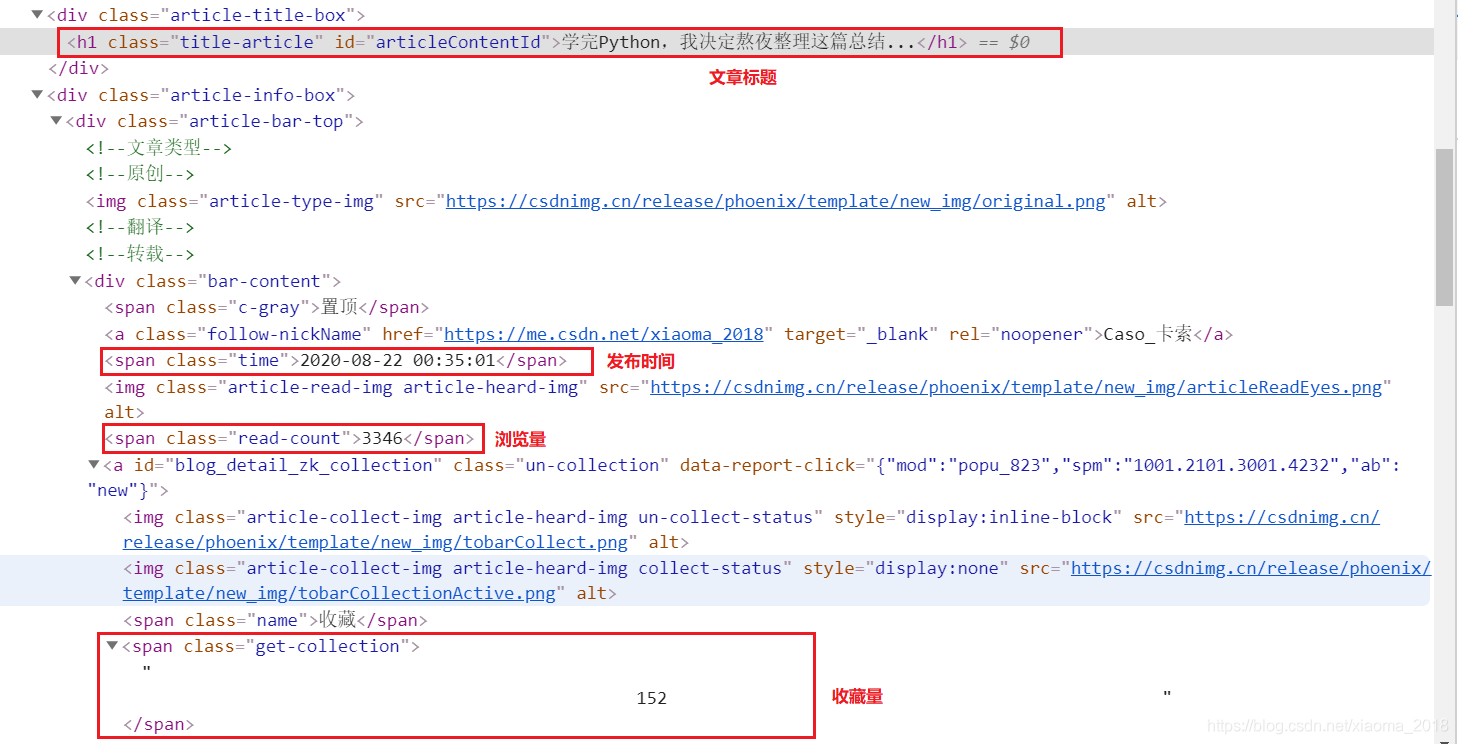
单篇博客分析

通过分析单篇博客的网页源码,从其中获取文章链接、文章标题、发布时间、浏览量、以及收藏量等数据信息。
环境配置
本爬虫程序,运行环境说明 PyCharm 2020.1.1、Python 3.7.5
使用到的第三方依赖库如下:
执行:pip freeze > requirements.txt 导出
beautifulsoup44.9.1
pandas1.1.1 requests==2.24.0
代码实现
代码主要思路是:
- 要求输入博客ID和页面数
- 爬取全部博客链接
- 爬取每一篇博客的数据信息
- 数据存储
config 配置
为了方便爬取不同的博客ID网页,单独写了入一个配置文件来定义爬虫用到的参数及文件路径参数,config.py 文件如下:
'''@Author Caso_卡索@Date 2020-8-30 15:00@Func 爬虫程序用到的请求头信息及文件路径信息@File config.py'''Host = "blog.csdn.net" # 请求头host参数User_Agent = "Mozilla/5.0 (Windows NT 10.0; Win64; x64) AppleWebKit/537.36 (KHTML, like Gecko) Chrome/70.0.3538.102 Safari/537.36 Edge/18.18362"Source = 'html.txt' # 临时保存博客列表html源码EachSource = 'each.txt' # 临时保存每篇博客html源码OUTPUT = "博客信息.csv" # 输出博客信息到 csv 文件1234567891011
其中,User_Agent必须根据自己的浏览器参数配置才能使用,其他参数可默认该配置。
run 代码
'''@Author Caso_卡索@Date 2020-8-25 22:14@Func Python爬虫CSDN博客文章数据,并写入excel表中使用 re 模块正则匹配要获取的 url地址'''import requestsfrom bs4 import BeautifulSoupimport pandas as pdimport osimport refrom config import Host, User_Agent, Source, EachSource,OUTPUTresults = [] # 存储全部数据def parseEachBlog(link):referer = "Referer: " + linkheaders = {"Referer": referer, "User-Agent": User_Agent}r = requests.post(link, headers=headers)html = r.textwith open(EachSource, 'w', encoding='UTF-8') as f:f.write(html)soup = BeautifulSoup(open(EachSource, 'r', encoding='UTF-8'), features="html.parser")readcontent = soup.select('.bar-content .read-count')collection = soup.select('.bar-content .get-collection')readcounts = re.sub(r'\D', "", str(readcontent[0]))collections = re.sub(r'\D', "", str(collection[0]))blogname = soup.select('.title-article')[0].texttime = soup.select('.bar-content .time')[0].texteachBlog = [blogname, link, readcounts, collections, time]return eachBlogdef getBlogList(blogID, pages):listhome = "https://" + Host + "/" + blogID + "/article/list/"pagenums = [] # 转换后的pages页数for i in range(1, int(pages)+1):pagenums.append(str(i))for number in pagenums:url = listhome + number + "?t=1"headers = {"Referer": url, "Host": Host, "User-Agent": User_Agent}response = requests.post(url, headers=headers)html = response.textwith open(Source, 'a', encoding='UTF-8') as f:f.write(html)# 获取全部博客的链接soup = BeautifulSoup(open(Source, 'r', encoding='UTF-8'), features="html.parser")hrefs = []re_patterm = "^https://blog.csdn.net/" + blogID + "/article/details/\d+$"for a in soup.find_all('a', href=True):if a.get_text(strip=True):href = a['href']if re.match(re_patterm, href):if hrefs.count(href) == 0:hrefs.append(href)return hrefsdef parseData():results.sort(key=lambda result:int(result[2]), reverse=True) # 按浏览量排序dataframe = pd.DataFrame(data=results)dataframe.columns = ['文章标题', '文章链接', '浏览量', '收藏量', '发布时间']dataframe.to_csv(OUTPUT, index=False, sep=',')def delTempFile():if os.path.exists(Source):os.remove(Source)if os.path.exists(EachSource):os.remove(EachSource)if __name__ == '__main__':blogID = input("输入你要爬去的博客名: ")pages = input("输入博客列表页数: ")print("获取全部博客链接...")linklist = getBlogList(blogID, pages)print("开始获取数据...")for i in linklist:print("当前获取: %s"%(i))results.append(parseEachBlog(i))print("结束获取数据...")# 开始解析并存储 .csv 文件print("开始解析并存储数据...")parseData()print("删除临时文件...")delTempFile()123456789101112131415161718192021222324252627282930313233343536373839404142434445464748495051525354555657585960616263646566676869707172737475767778798081828384
执行过程
以我自己的博客ID为例,来展示一下执行的过程及结果,我的博客列表目前两页。
开始执行
结束执行
结果显示
代码下载
从想法到实现,再到输出这篇博文结束,还是挺好玩,在此总结分享。
完整的爬虫代码上传到了本人Github上,地址如下:ParseCSDNBlog
作者: Caso_卡索 博客: https://blog.csdn.net/xiaoma_2018 版权声明:未经允许,禁止转载 一个独立、不甘于现状的程序员,喜欢的朋友点赞支持一下,在此感谢,Python专栏后续持续更新…

