一、测试目的
虽然知道很多中间件都用netty做通讯,如zookeeper\dubbo\rocketMq等等,也经常听很多人说机器配置牛的话netty是可以单机支撑上百万连接的。
我们自己线上也在用netty,但我们目前连接数还不算很大,峰值连接在10万左右,所以今天我们也来测试一下,看看到底需要什么样的机器配置才能实现netty单机百万级别的连接,这也方便我们在实际的开发工作当中能很清楚地认识到我们自己所写的netty的服务性能,也对我们实现更强大的集群有很大的帮助。
二、服务器配置以及设置
1.测试机器配置
刚好我有几台4核16G8M带宽的华为云服务器,此时正好能派上用场。
服务器:华为云,centos 8.2,4核16G,部署运行netty-server.jar
客户端:华为云,centos 8.2,4核16G,部署运行netty-client.jar
jdk:1.8
netty:4.1.67.Final
spring-boot:2.3.9.RELEASE
2.查看linux一个进程能够打开的最大文件数连接
ulimit -n
默认如下: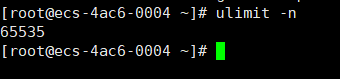
可以通过 ulimit -n 1000000进行临时修改,
注意这个数值不宜过高,我在测试过程中设置2000000时会连接不上系统了,
这个值建议可以设置为1000000进行测试。
也通过vi /etc/security/limits.conf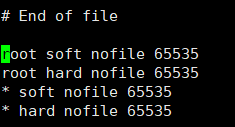
修改为1000000永久配置,修改如下: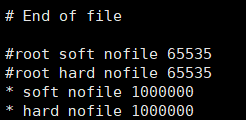
3.查看全局文件句柄限制
cat /proc/sys/fs/file-max
默认如下:8.2默认配置就很高了,可以不修改
ps:centos8.2的默认配置就已经很高了,这里就不改了。
如果你机器默认值过低的话要进行以下修改
echo 1000000> /proc/sys/fs/file-max这个在重启后会失效,
下面这个操作就会永久生效:
vi /etc/sysctl.conf
我们在文件末尾加上
fs.file-max=1000000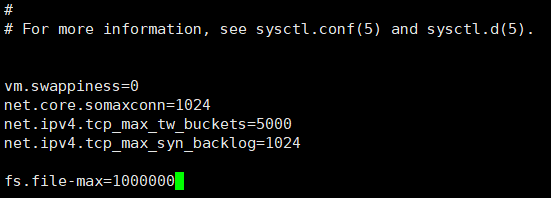
注意,以上配置服务器和客户端都要修改才行,修改完后重启服务器和客户端。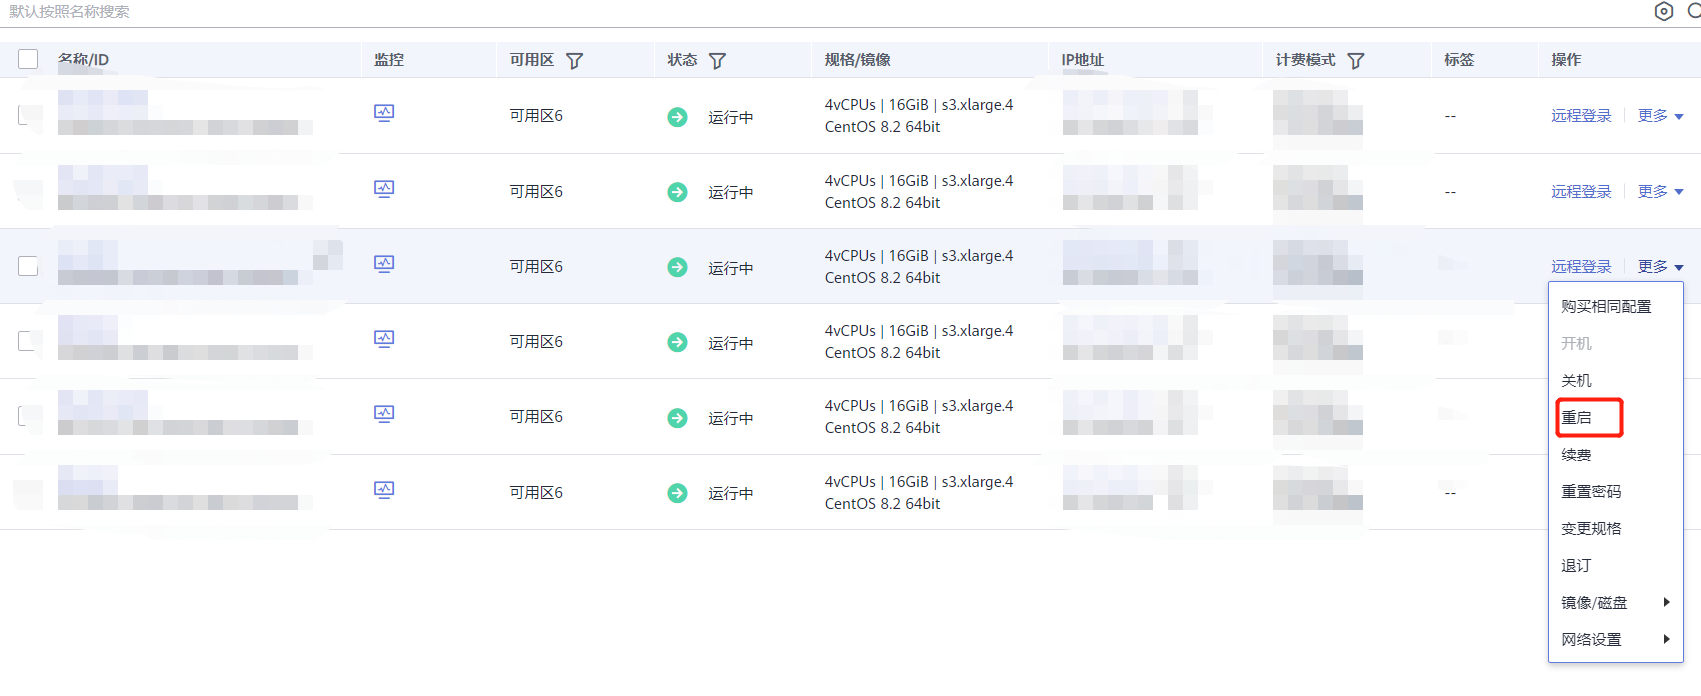
重启后分别查看服务器和客户端的配置是否生效了: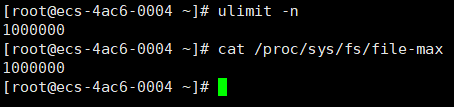
三、编写服务端代码
1.服务端口绑定
通常启动一个服务端会绑定一个端口例如 8000,当客户端去连接端口是有限制的最大是65535加上默认1024及以下的端口,就剩下1024-65535再扣除一些常用的端口,实际可用端口只有6W左右。那么如何实现单机百万连接?
我们在服务端启动例如 8000-8100 这100个端口,100*6W这样就可以连接600W左右的连接,这里是TPC的一个基础的知识,虽然对于客户端来说是同一个端口号,但是对于Server是不同的端口号,由于TCP是一个私源组概念,也就是说它是由源IP源端口号加上目的IP目的端口号为确定的,当你源IP和源端口号是一样的但是你目的端口号不一样那么最终系统底层会把它当做两条TCP连接来处理,所以说我们这里取了个巧开了Server开启了100个端口号,这就是我们单机百万连接的准备工作,接下来看一下代码的实现
2.服务端代码实现
pom.xml
<dependencies><dependency><groupId>io.netty</groupId><artifactId>netty-all</artifactId><version>4.1.67.Final</version></dependency></dependencies><!--打包jar--><build><finalName>netty-server</finalName><plugins><!--spring-boot-maven-plugin--><plugin><groupId>org.springframework.boot</groupId><artifactId>spring-boot-maven-plugin</artifactId><version>2.3.9.RELEASE</version><!--解决打包出来的jar文件中没有主清单属性问题--><executions><execution><goals><goal>repackage</goal></goals></execution></executions></plugin><!--指定maven-compiler版本和<source>编译版本--><plugin><groupId>org.apache.maven.plugins</groupId><artifactId>maven-compiler-plugin</artifactId><version>3.8.1</version><configuration><source>1.8</source><target>1.8</target></configuration></plugin></plugins></build>
服务端
import io.netty.bootstrap.ServerBootstrap;import io.netty.channel.ChannelFutureListener;import io.netty.channel.ChannelOption;import io.netty.channel.EventLoopGroup;import io.netty.channel.nio.NioEventLoopGroup;import io.netty.channel.socket.nio.NioServerSocketChannel;public final class Server {final static int BEGIN_PORT = 8000;final static int N_PORT = 100;public static void main(String[] args) {new Server().start(BEGIN_PORT, N_PORT);}public void start(int beginPort, int nPort) {System.out.println("server starting....");EventLoopGroup bossGroup = new NioEventLoopGroup();EventLoopGroup workerGroup = new NioEventLoopGroup();ServerBootstrap bootstrap = new ServerBootstrap();bootstrap.group(bossGroup, workerGroup);bootstrap.channel(NioServerSocketChannel.class);bootstrap.childOption(ChannelOption.SO_REUSEADDR, true);bootstrap.childHandler(new ConnectionCountHandler());for (int i = 0; i < nPort; i++) {int port = beginPort + i;bootstrap.bind(port).addListener((ChannelFutureListener) future -> {System.out.println("bind success in port: " + port);});}System.out.println("server started!");}}
简单的统计Hanlder
import io.netty.channel.ChannelHandler;import io.netty.channel.ChannelHandlerContext;import io.netty.channel.ChannelInboundHandlerAdapter;import java.util.concurrent.Executors;import java.util.concurrent.TimeUnit;import java.util.concurrent.atomic.AtomicInteger;@ChannelHandler.Sharablepublic class ConnectionCountHandler extends ChannelInboundHandlerAdapter {private AtomicInteger nConnection = new AtomicInteger();public ConnectionCountHandler() {Executors.newSingleThreadScheduledExecutor().scheduleAtFixedRate(() -> {System.out.println("connections: " + nConnection.get());}, 0, 2, TimeUnit.SECONDS);}@Overridepublic void channelActive(ChannelHandlerContext ctx) {nConnection.incrementAndGet();}@Overridepublic void channelInactive(ChannelHandlerContext ctx) {nConnection.decrementAndGet();}}
3.编写启动脚本
我机器是16G的内存,机器上啥都没安装,16G能分15个G给JVM,所以选择了G1。
如果你的机器能配置的JVM内存小于8G的话,那建议用CMS。
#!/bin/bashJAVA_OPTS="-server-Xmx13G-Xms13G-Xmn10G-XX:MetaspaceSize=256M-XX:+UseG1GC-XX:MaxGCPauseMillis=50-XX:G1HeapRegionSize=16M"java $JAVA_OPTS -jar netty-server.jar
我这里做了3个G预留,给JVM配置了13个G的堆内存和新生代10个G
服务器启动脚本:sh start.sh,程序启动打印启动成功结果,等待客户端连接。
然后再启动客户端脚本:sh start.sh。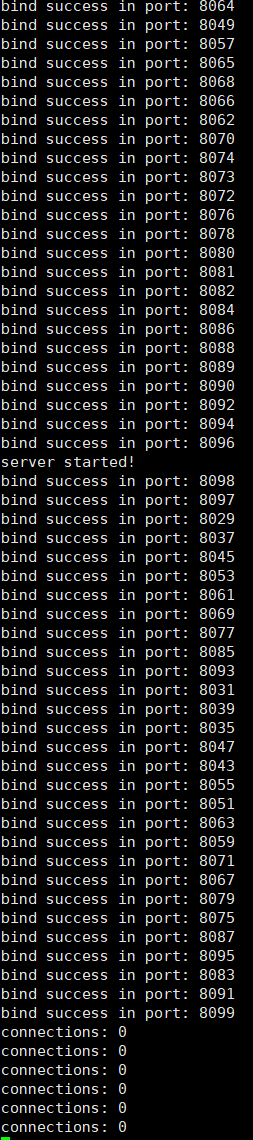
四、编写客户端代码
1.客户端代码实现
import io.netty.bootstrap.Bootstrap;import io.netty.channel.*;import io.netty.channel.nio.NioEventLoopGroup;import io.netty.channel.socket.SocketChannel;import io.netty.channel.socket.nio.NioSocketChannel;public class Client {private static final String SERVER_HOST = "192.168.0.94";final static int BEGIN_PORT = 8000;final static int N_PORT = 100;public static void main(String[] args) {new Client().start(BEGIN_PORT, N_PORT);}public void start(final int beginPort, int nPort) {System.out.println("client starting....");EventLoopGroup eventLoopGroup = new NioEventLoopGroup();final Bootstrap bootstrap = new Bootstrap();bootstrap.group(eventLoopGroup);bootstrap.channel(NioSocketChannel.class);bootstrap.option(ChannelOption.SO_REUSEADDR, true);bootstrap.handler(new ChannelInitializer<SocketChannel>() {@Overrideprotected void initChannel(SocketChannel ch) {}});int index = 0;int port;while (!Thread.interrupted()) {port = beginPort + index;try {ChannelFuture channelFuture = bootstrap.connect(SERVER_HOST, port);System.out.println("port:"+port);channelFuture.addListener((ChannelFutureListener) future -> {if (!future.isSuccess()) {System.out.println("connect failed, exit!");//System.exit(0);}});channelFuture.get();} catch (Exception e) {}if (++index == nPort) {index = 0;}}}}
五、测试结果
一、100万连接测试结果
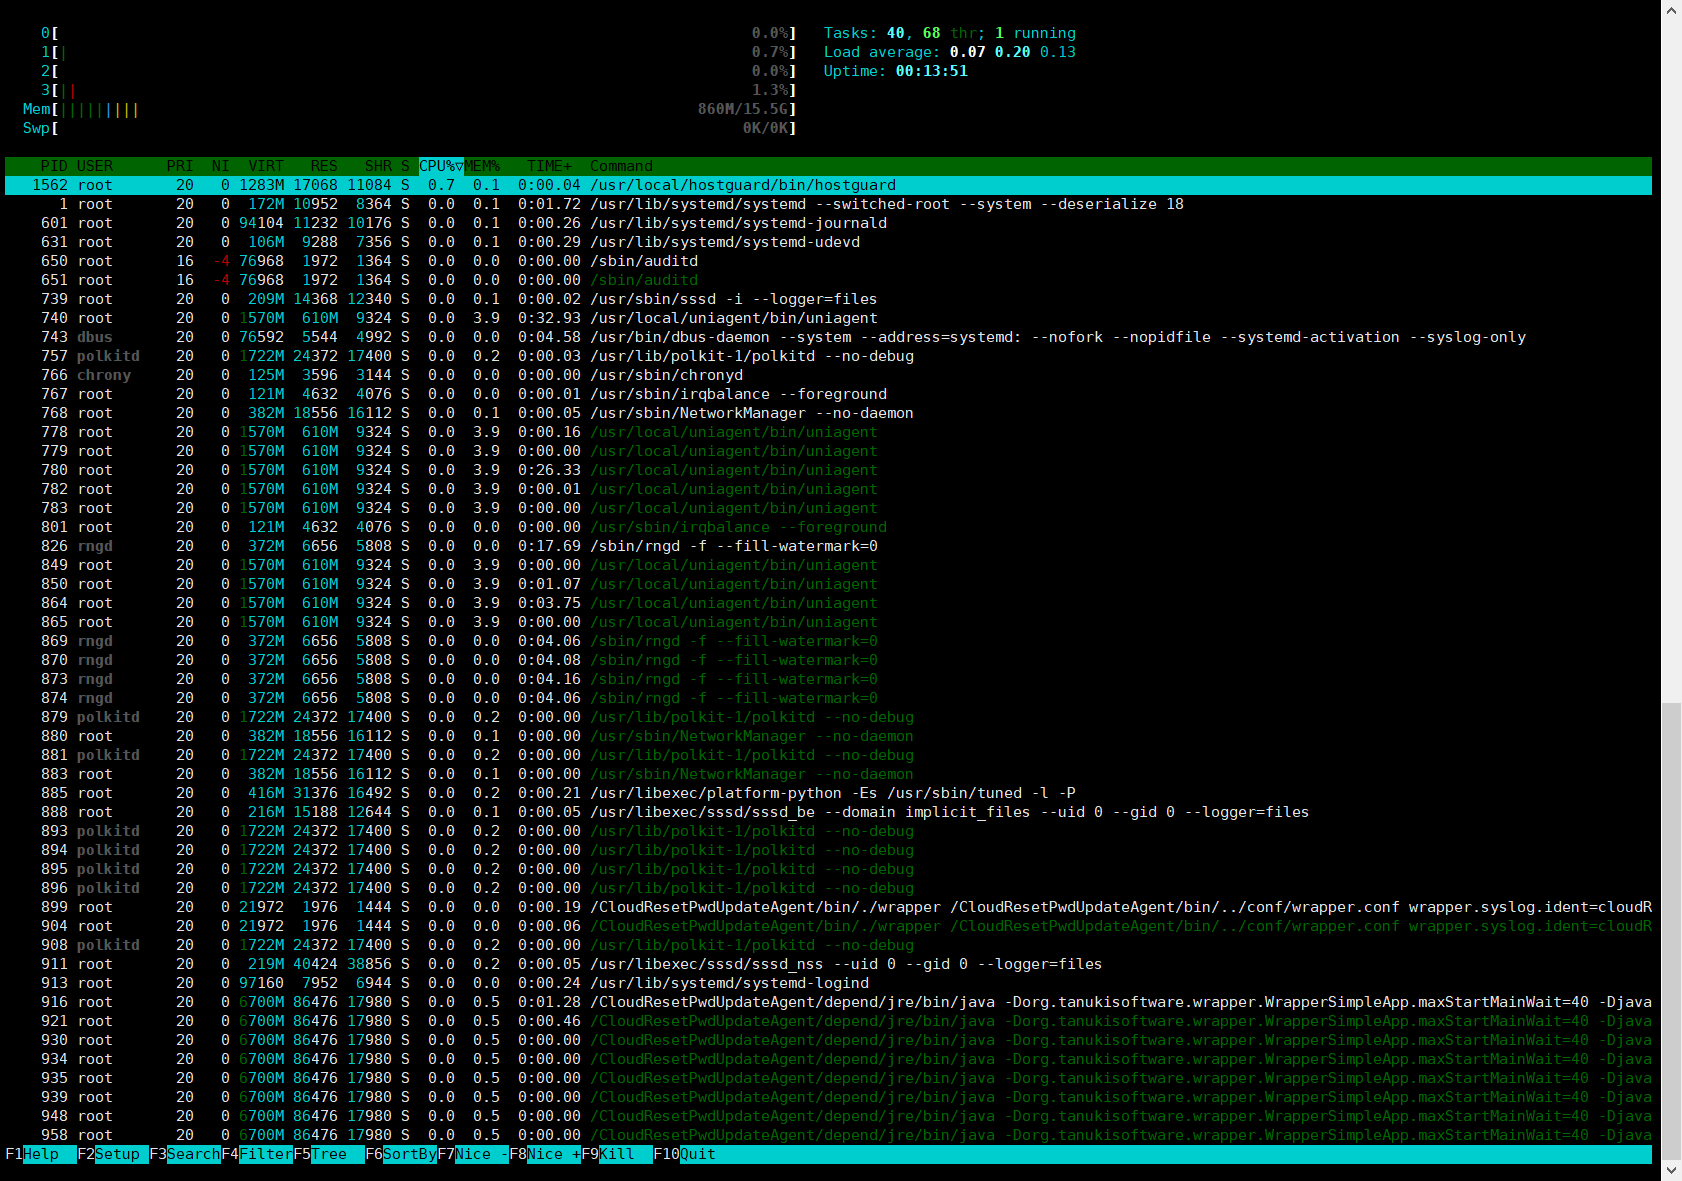
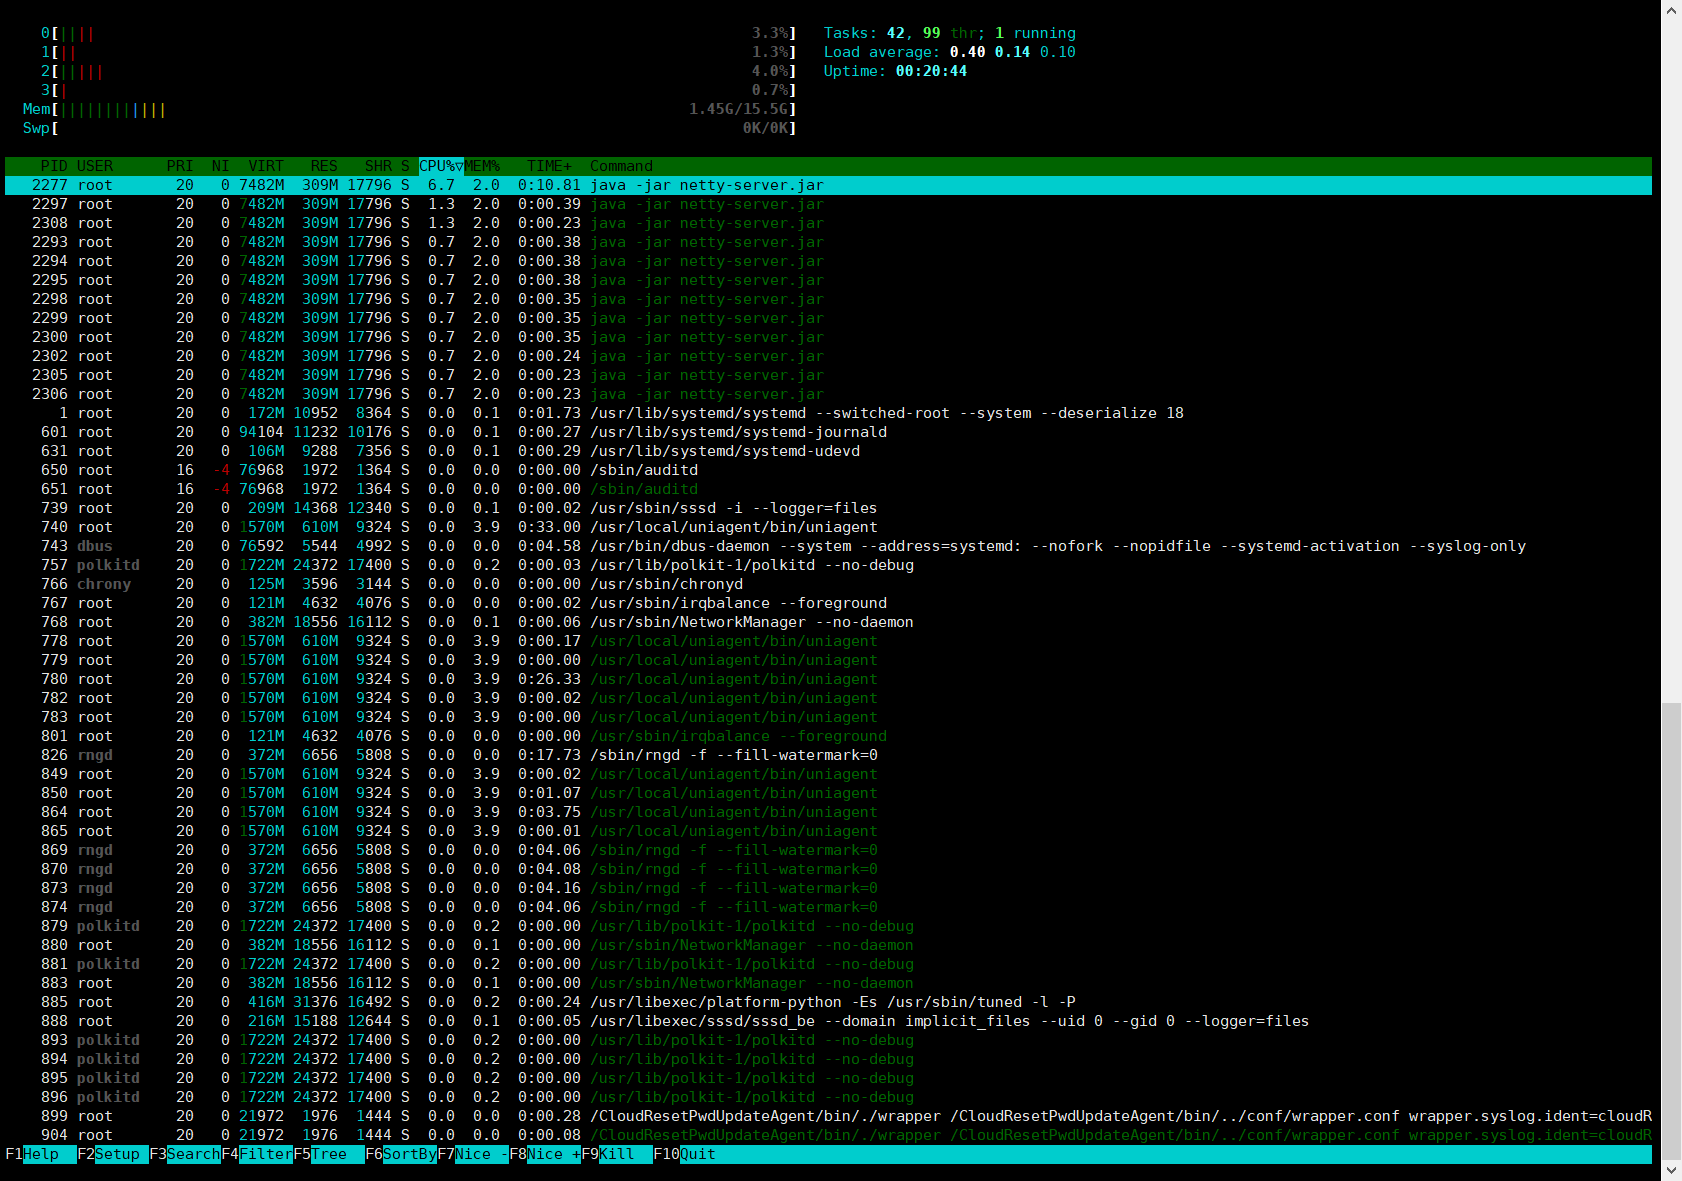
1、0个连接时系统CPU和内存情况
2、10万连接时系统CPU和内存情况
3、50万连接时系统CPU和内存情况
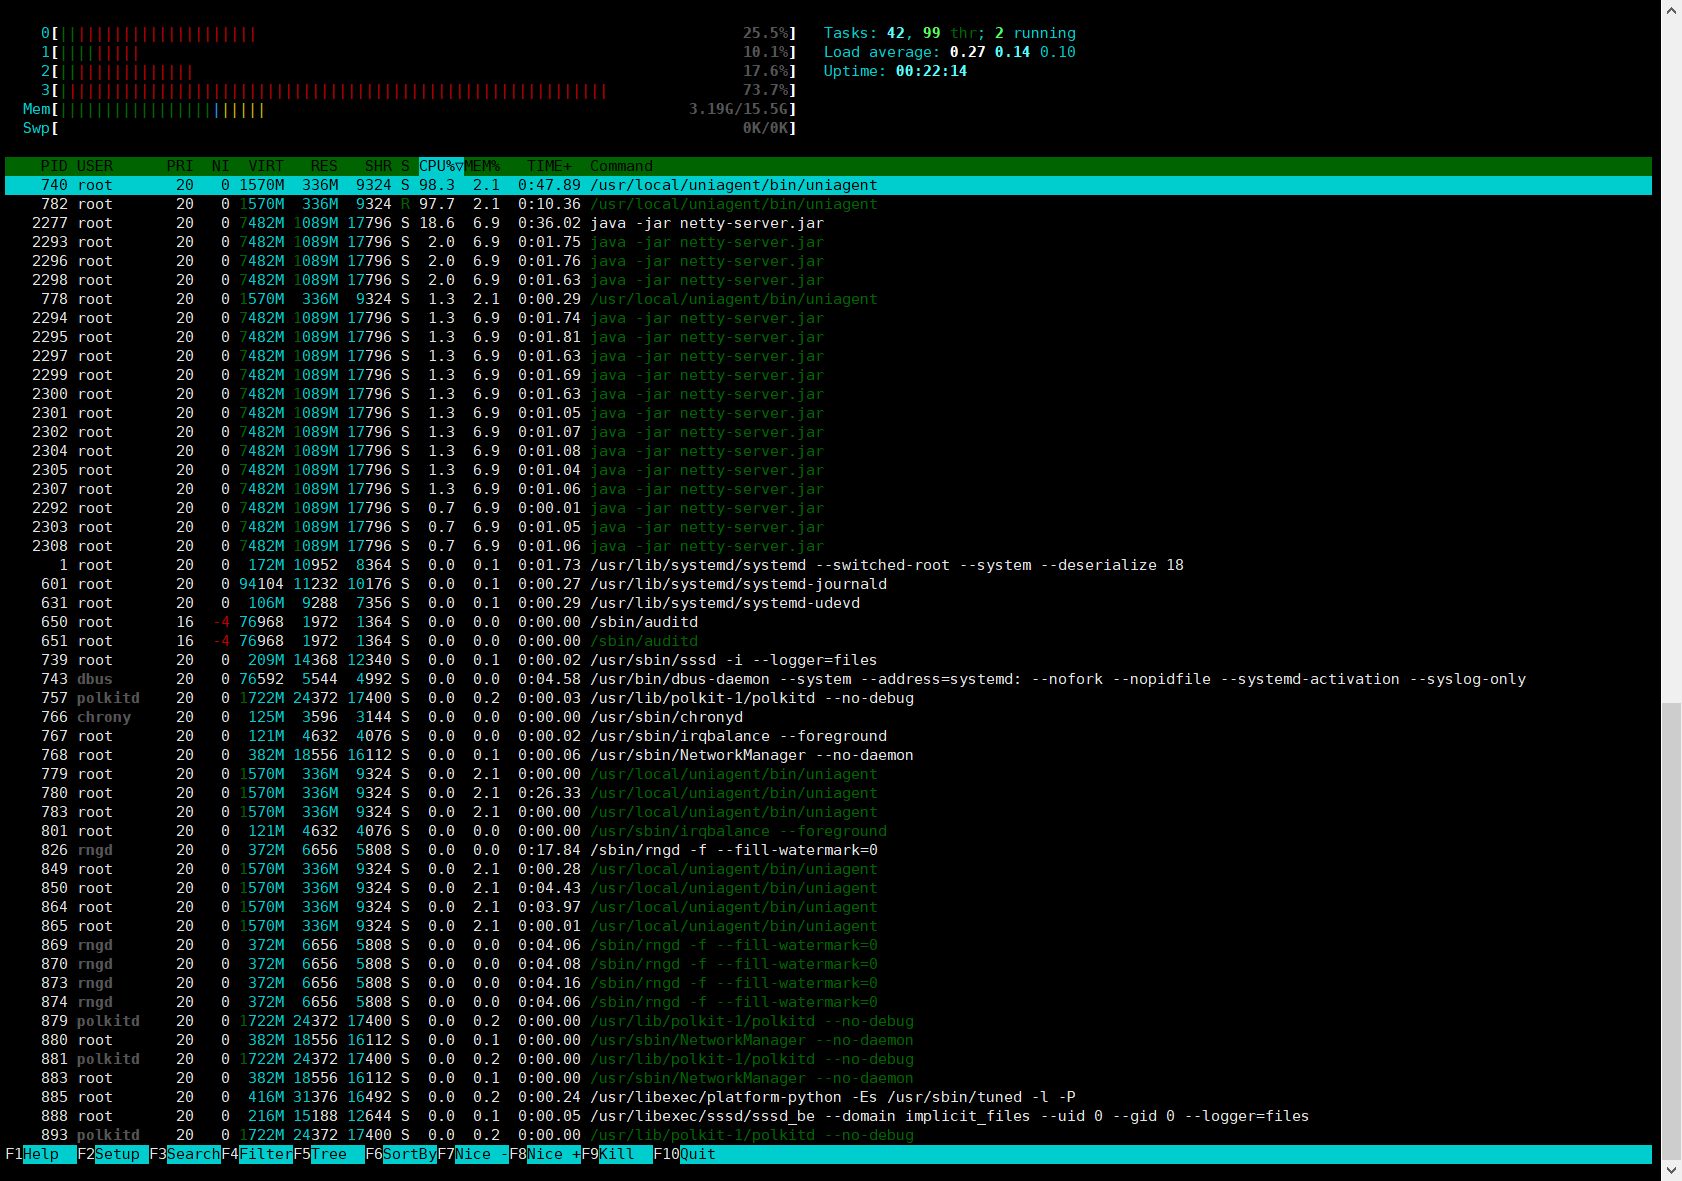
4、80万连接时系统CPU和内存情况

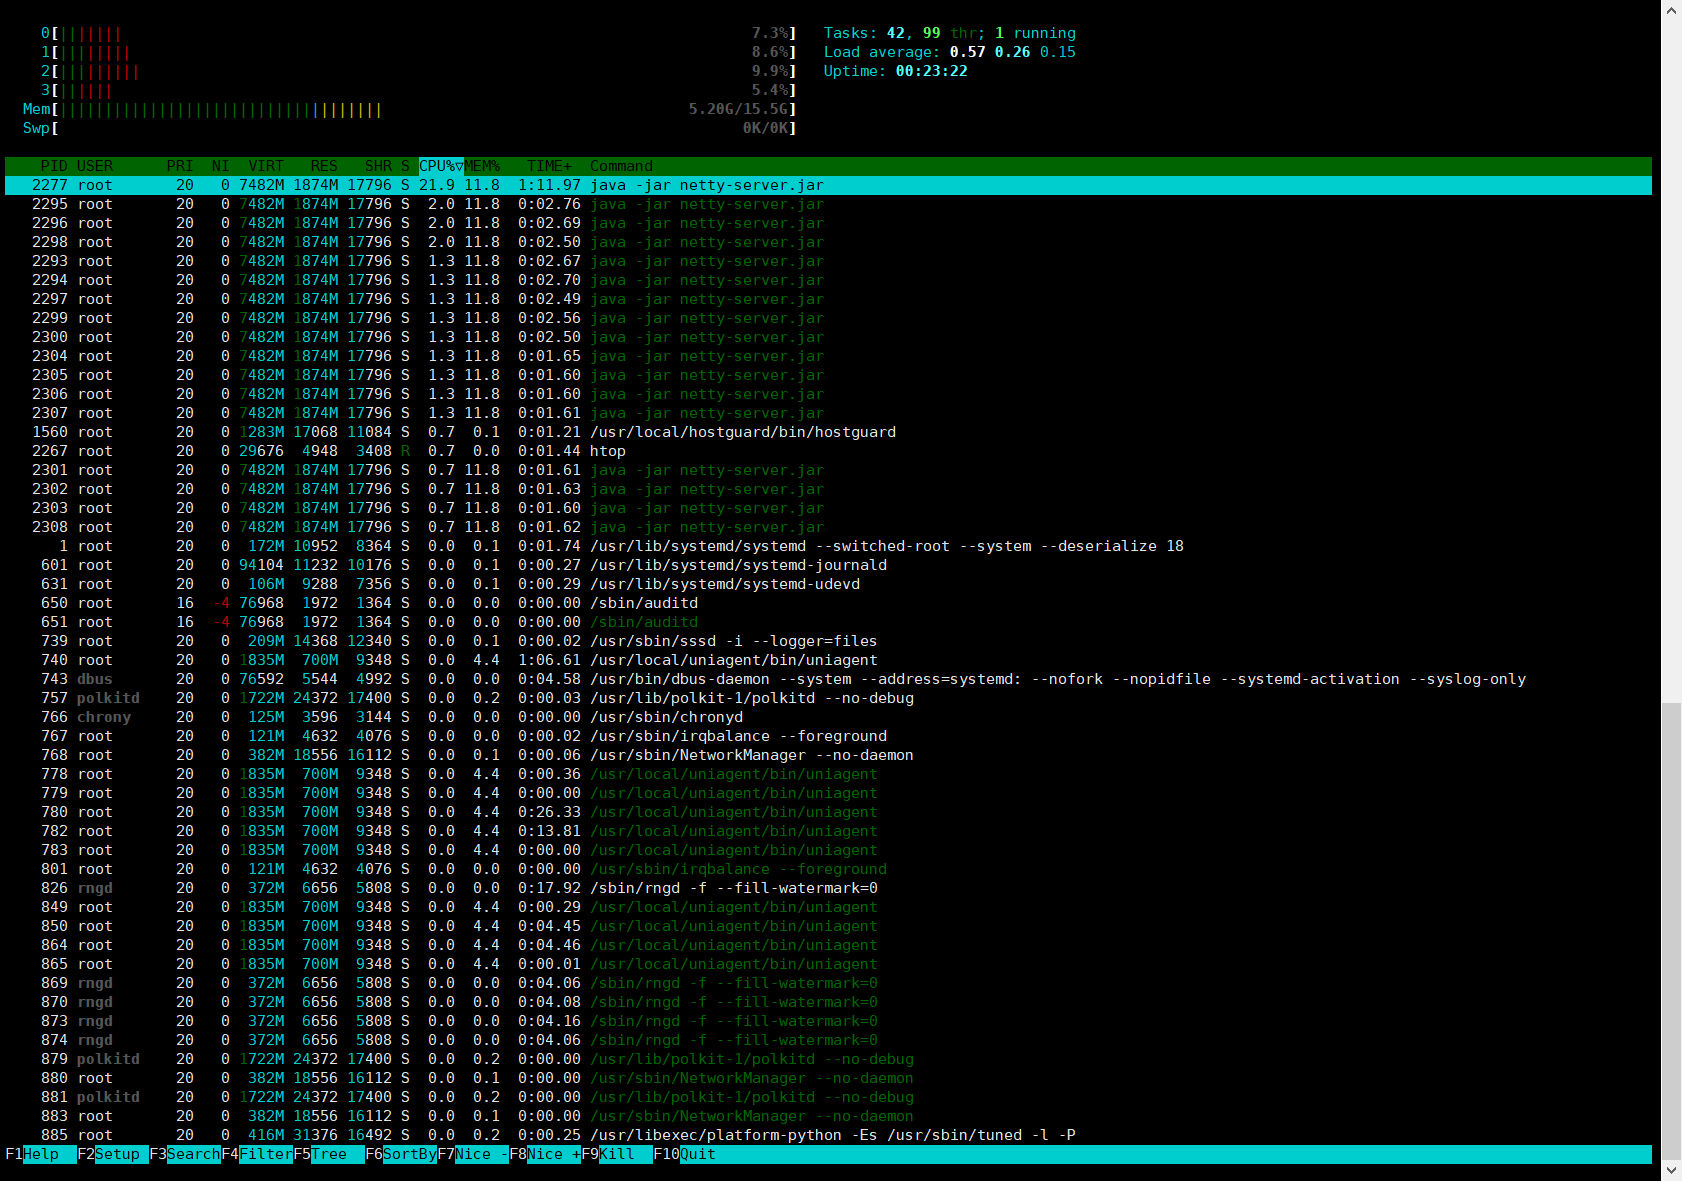
5、100万连接时系统CPU和内存情况
程序实际上没有达到100万连接,在达到99万多接近100万连接的时候程序就抛出打开文件数过多的异常了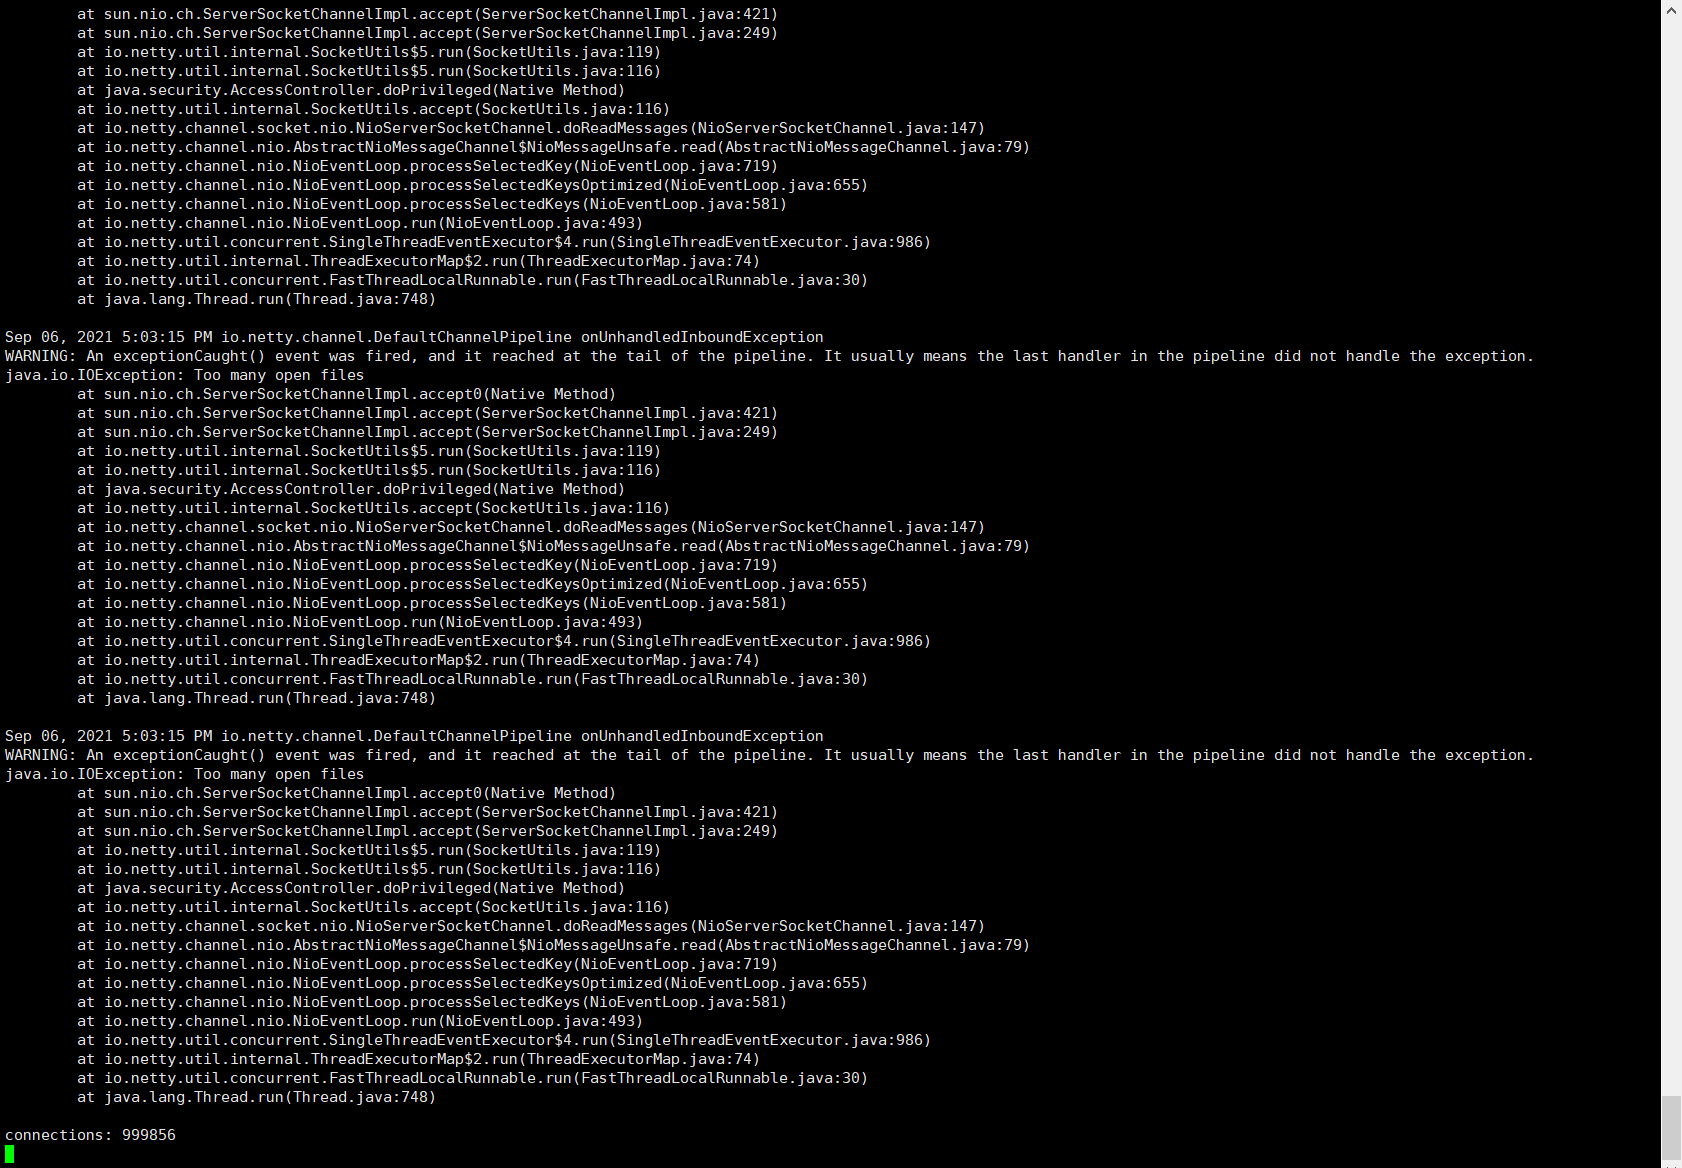
下图是我在华为云服务器控制面板看到的网络瞬间的峰值情况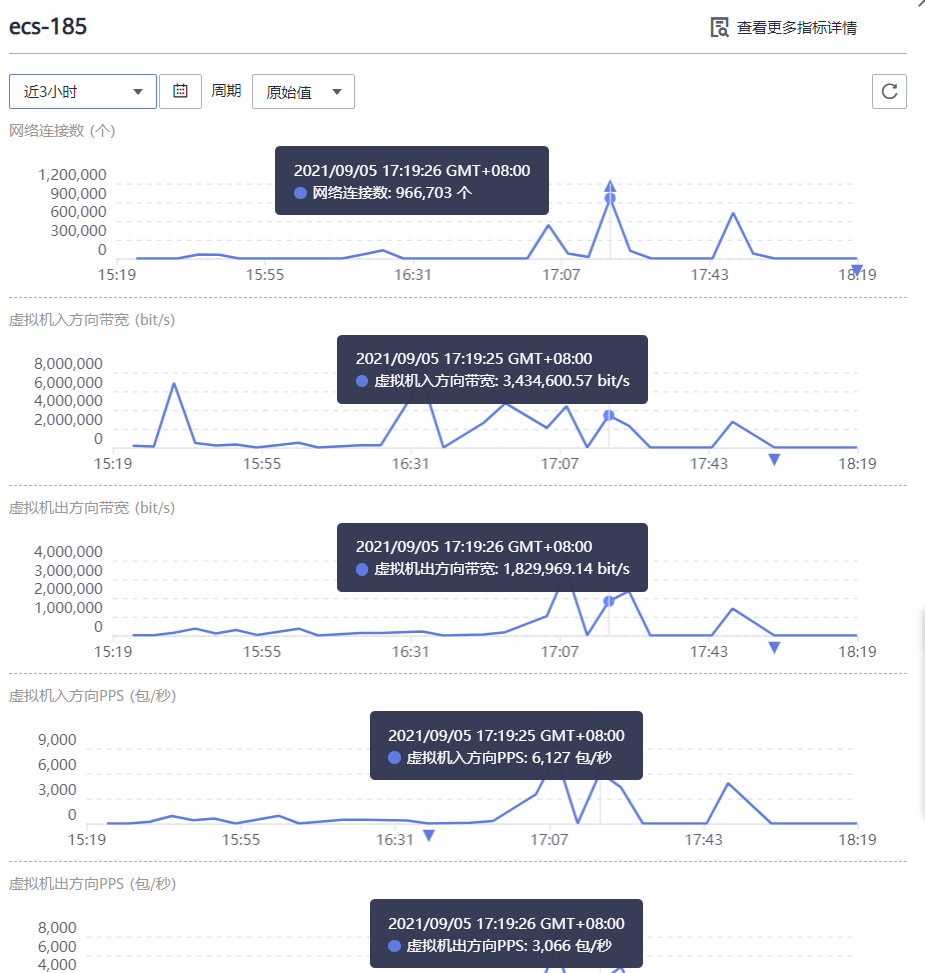
从下图可以看出当接近百万连接时,cpu的使用率还是比较低的,而内存也仅是使用了5.78个G(包含了系统)。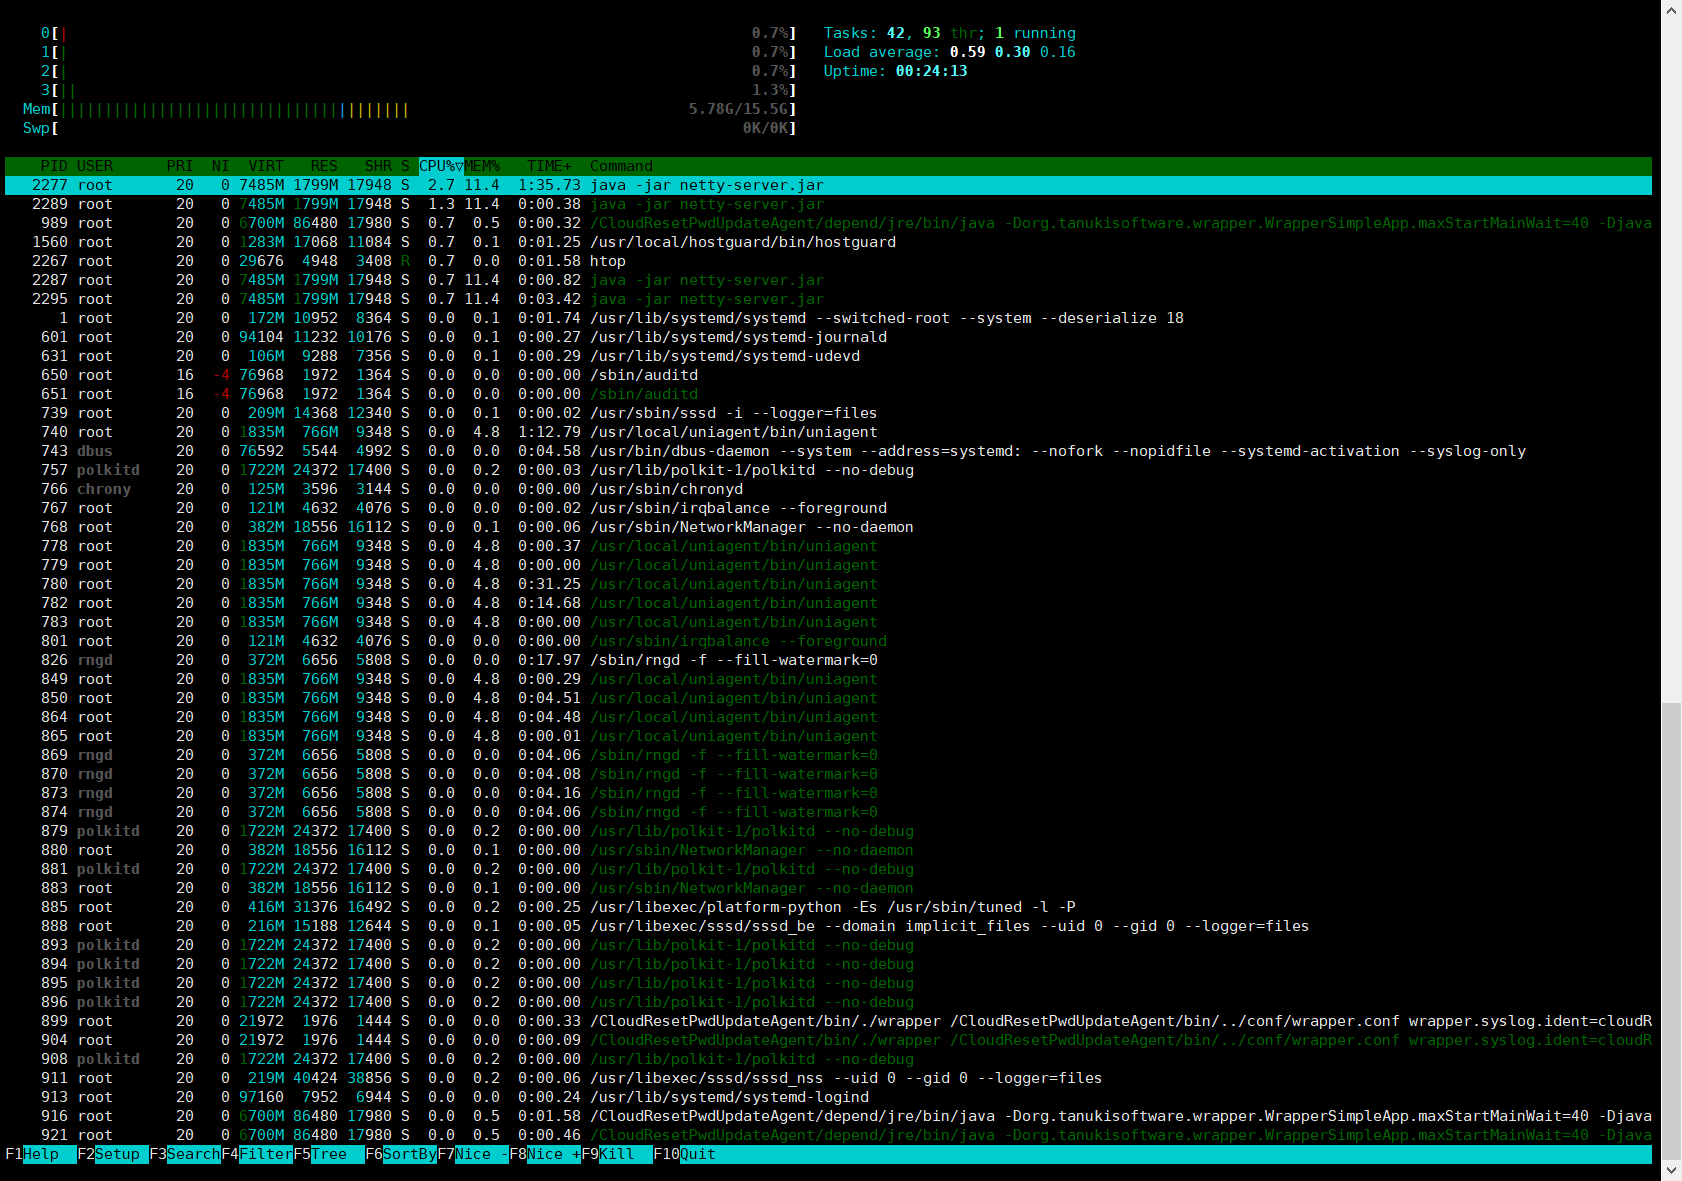
堆使用情况与GC日志情况,一次GC都没产生。
二、测试总结
1.netty在这种普通4核心16G的单台机器就能达到百万级别的长连接,这个性能可以说是非常强悍了。
整体来看netty百万连接对cpu没太大的要求、但比较的吃内存,还有就是高连接高并发下网卡比cpu内存更容易成为瓶颈,有条件尽量还是上万兆网卡。
2.当然,可能也是局限于我机器配置一般吧(穷,买不起那些高性能服务器),没测试到更高连接的情况,大家如果有更高配置的单机测试结果的话,记得喊我去围观一下。
3.当然,上面也仅是测试连接数,并没有测试到消息读写的性能。
后面有时间的话我再写一个单机百万连接下消息读写的性能与netty在zk集群下消息读写的性能对比。

若有收获,就点个赞吧
0 人点赞
