一、基础用法
1、基础
- 通过 yiled 表达一种合作式放弃,即当前函数暂停执行,直到等到通知 ```javascript let x = 1; function* foo() { x++; yield; console.log(‘x: ‘, x); }
const bar = () => { x++; };
const it = foo(); it.next(); console.log(‘x: ‘, x); bar(); console.log(‘x: ‘, x); it.next();
- 输出结果```javascript// 2 (14行)// 3 (16行)// 3 (5行)分析:// const it = foo() 并不会调用 foo()方法,而是生成了一个迭代器// it.next() 会调用方法,并且到第一个 yield 停下,因此第14行输出的是 2// 15行的 bar() 会令 x++,因此第16行输出的是3// 17行继续调用 it.next(),此时的 foo() 从上次 yield 停下的地方继续执行,因此第五行输出3
2、传递参数
yiled 可以通过 next(…) 来接受一个参数,类似于占位符
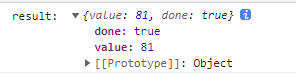
function* foo(x) {
return x * (yield)
            }
const it = foo(9);
it.next();  // 必须先用一次 next 开启 foo()
const result = it.next(9);  // 这里的参数指向才是 yiled
console.log('result: ', result);
输出结果:
Promise + 生成器
1、ES8之前的用法
- 缺点:需要手工控制 main 和 request,且增加了代码耦合性
```javascript
const request = () => {
return new Promise((resolve, reject) => {
setTimeout(() => { // 模拟3秒后完成后端请求
}, 3000); }) }console.log('resolve!!'); resolve(); it.next(); // 完成请求后,必须再这里解锁
function* main() { console.log(‘进入了 main方法’); var result = yield request(); console.log(‘main 完成了!’); }
let it = main();
it.next(); // 必须手动在这里赋值,并打开
<a name="eT2zW"></a>
#### 2、ES8 的用法
```javascript
const request = () => {
  return new Promise((resolve, reject) => {
    setTimeout(() => {  // 模拟3秒后完成后端请求
      console.log('resolve!!');
      resolve();
    }, 3000);
  })
}

async function main() {
  console.log('进入了 main方法');
  var result = await request();
  console.log('main 完成了!');
}
main();

若有收获,就点个赞吧
0 人点赞
