一、pom文件添加依赖
<!--cas oauth实现业务包--><dependency><groupId>org.jasig.cas</groupId><artifactId>cas-server-support-oauth</artifactId><version>4.0.7</version><scope>compile</scope></dependency><!--cas oauth 依赖jackson-databind-2.6.1会出现jar包冲突,索性换一个版本--><dependency><groupId>com.fasterxml.jackson.core</groupId><artifactId>jackson-databind</artifactId><version>2.7.0</version></dependency>
二、配置修改
web.xml
<!--新增-->
<servlet-mapping>
  <servlet-name>cas</servlet-name>
  <url-pattern>/oauth2.0/*</url-pattern>
</servlet-mapping>
deployerConfigContext.xml
<util:list id="registeredServicesList">
  <bean class="org.jasig.cas.services.RegexRegisteredService"
        p:id="0" p:name="HTTP and IMAP" p:description="Allows HTTP(S) and IMAP(S) protocols"
        p:serviceId="^(https|http|imaps)://.*" p:evaluationOrder="10000001" />


  <!-- Oauth支持 -->
  <bean class="org.jasig.cas.support.oauth.services.OAuthCallbackAuthorizeService">
    <property name="id" value="2" />
    <property name="name" value="HTTP" />
    <property name="description" value="oauth wrapper callback url" />
    <property name="serviceId" value="${server.prefix}/oauth2.0/callbackAuthorize" />
  </bean>

  <bean class="org.jasig.cas.support.oauth.services.OAuthRegisteredService">
    <property name="id" value="3" />
    <property name="name" value="key" />
    <property name="description" value="secret" />
    <property name="serviceId" value="${sso.oauthurl}" />
    <property name="clientId" value="key" />
    <property name="clientSecret" value="secret" />
  </bean>
    <!-- Oauth支持end -->

</util:list>
cas.properties
#单点服务域名地址,一定要改
server.name=http://localhost:8001

#单点服务域名地址+contextpath,一定要改
server.prefix=${server.name}

#新增此配置,暂时使用百度域名
sso.oauthurl=http://www.baidu.com
cas-servlet.xml
<bean id="handlerMappingC" class="org.springframework.web.servlet.handler.SimpleUrlHandlerMapping" p:alwaysUseFullPath="true">
    <property name="mappings">
      <util:properties>
        <prop key="/serviceValidate">serviceValidateController</prop>
        <prop key="/proxyValidate">proxyValidateController</prop>
        <prop key="/p3/serviceValidate">v3ServiceValidateController</prop>
        <prop key="/p3/proxyValidate">v3ProxyValidateController</prop>
        <prop key="/validate">legacyValidateController</prop>
        <prop key="/proxy">proxyController</prop>
        <prop key="/authorizationFailure.html">passThroughController</prop>
        <prop key="/status">healthCheckController</prop>
        <prop key="/statistics">statisticsController</prop>
        <!--新增oauth支持  -->
        <prop key="/oauth2.0/*">oauth20WrapperController</prop>
      </util:properties>
    </property>
</bean>

<!--oauth支持  -->
<bean id="oauth20WrapperController" class="org.jasig.cas.support.oauth.web.OAuth20WrapperController"
      p:loginUrl="${server.prefix}/login"
      p:servicesManager-ref="servicesManager"
      p:ticketRegistry-ref="ticketRegistry"
      p:timeout="7200" />
三、oauth测试
方法1、浏览器输入并访问
http://localhost:8001/oauth2.0/authorize?client_id=key&redirect_uri=http://www.baidu.com&response_type=code

最后返回:https://www.baidu.com/?code=ST-1-FA6QAbMLrAYQnAkcb0Fr-CASSSO

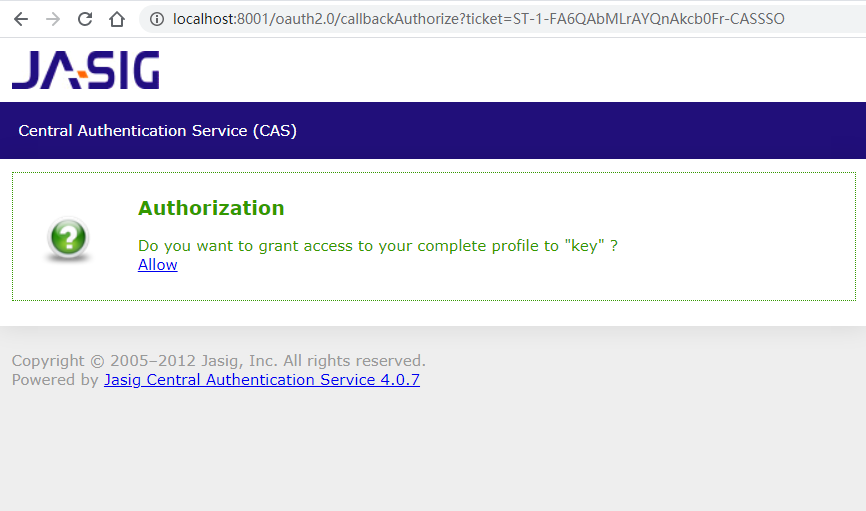
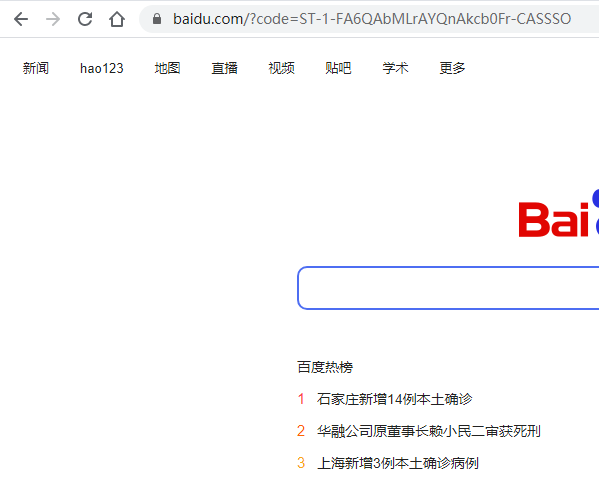
解释: redirect_uri=http://www.baidu.com
—-为可变配置,意为登录授权后,将code信息返回到redirect_uri;且这个地址是需要在org.jasig.cas.support.oauth.services.OAuthRegisteredService中配置的,且只允许此域名授权访问 client_id=key —-固定参数 response_type=code —-固定参数
方法2、浏览器输入或GET/POST请求
注意:POSTMAN或者浏览器访问
http://localhost:8001/oauth2.0/accessToken?client_id=key&client_secret=secret&grant_type=authorization_code&redirect_uri=http://www.baidu.com&code=ST-2-Wt3W9Ew9JxsZwuXgrlM1-CASSSO

返回结果:
access_token=TGT-1-nv69PyMS5spXYTeSZpkridWjthO1RKsXETcxvLtJihnZEEAbrx-CASSSO&expires=6736
====================
解释:
1、方法1中返回的code值需要传递到方法2中
2、redirect_uri=http://www.baidu.com同上,意为授权此域名获取用户token
3、其他几个参数也为固定参数
方法3、浏览器输入或GET/POST请求
注意:POSTMAN或者浏览器访问
http://localhost:8001/oauth2.0/profile?access_token=TGT-1-nv69PyMS5spXYTeSZpkridWjthO1RKsXETcxvLtJihnZEEAbrx-CASSSO

返回结果:
{
"id": "admin",
"attributes": [
              {
              "realname": "%E7%AE%A1%E7%90%86%E5%91%98"
              }
                ]
}
=====================
解释:
access_token为方法2中返回的参数;
调用方法3即可获取用户信息;
返回结果为json格式,id及为用户登录名
四、特别说明
由于上面的测试,我们看到的结果是只能给www.baidu.com使用oauth登录,这就比较悲催了; 解决办法:可以对接口进行封装, 1、将oauth访问入口改成一个CAS的新地址(这个需要新加方法),在方法中重定向到方法/oauth2.0/authorize 2、将sso.oauthurl地址改成CAS的另一个新地址(也需要新增一个方法),在方法中分别REST调用/oauth2.0/accessToken、/oauth2.0/profile来获取用户信息,并返回到外部授权地址; 这样只需要在两个新增的方法中验证外部的授权访问地址; 此为,我之前的解决办法,仅供参考,代码就不展示了;

若有收获,就点个赞吧
0 人点赞
