一、Vue树形表格
安装依赖
yarn add vue-table-with-tree-grid
npm i vue-table-with-tree-grid -S
使用
import Vue from 'vue'import ZkTable from 'vue-table-with-tree-grid'Vue.use(ZkTable)
Or
import Vue from 'vue'import ZkTable from 'vue-table-with-tree-grid'Vue.component(ZkTable.name, ZkTable)
示例:
import TrreTable from 'vue-table-with-tree-grid'Vue.component('tree-table',TrreTable)
二、富文本编辑器
安装
yarn add vue-quill-editor
引入注册
import Vue from 'vue'import VueQuillEditor from 'vue-quill-editor'// require stylesimport 'quill/dist/quill.core.css'import 'quill/dist/quill.snow.css'import 'quill/dist/quill.bubble.css'Vue.use(VueQuillEditor, /* { default global options } */)
客户端使用
<template><!-- bidirectional data binding(双向数据绑定) --><quill-editor v-model="content"ref="myQuillEditor":options="editorOption"@blur="onEditorBlur($event)"@focus="onEditorFocus($event)"@ready="onEditorReady($event)"></quill-editor><!-- Or manually control the data synchronization(或手动控制数据流) --><quill-editor :content="content":options="editorOption"@change="onEditorChange($event)"></quill-editor></template><script>// you can also register quill modules in the componentimport Quill from 'quill'import { someModule } from '../yourModulePath/someQuillModule.js'Quill.register('modules/someModule', someModule)export default {data () {return {content: '<h2>I am Example</h2>',editorOption: {// some quill options}}},// manually control the data synchronization// 如果需要手动控制数据同步,父组件需要显式地处理changed事件methods: {onEditorBlur(quill) {console.log('editor blur!', quill)},onEditorFocus(quill) {console.log('editor focus!', quill)},onEditorReady(quill) {console.log('editor ready!', quill)},onEditorChange({ quill, html, text }) {console.log('editor change!', quill, html, text)this.content = html}},computed: {editor() {return this.$refs.myQuillEditor.quill}},mounted() {console.log('this is current quill instance object', this.editor)}}</script>
四、Echarts
安装
yarn add echarts
导入
局部组件
import echarts from "echarts";
<!DOCTYPE html><html><head><meta charset="utf-8"><title>ECharts</title><!-- 引入 echarts.js --><script src="echarts.min.js"></script></head><body><!-- 为ECharts准备一个具备大小(宽高)的Dom --><div id="main" style="width: 600px;height:400px;"></div><script type="text/javascript">// 基于准备好的dom,初始化echarts实例var myChart = echarts.init(document.getElementById('main'));// 指定图表的配置项和数据var option = {title: {text: 'ECharts 入门示例'},tooltip: {},legend: {data:['销量']},xAxis: {data: ["衬衫","羊毛衫","雪纺衫","裤子","高跟鞋","袜子"]},yAxis: {},series: [{name: '销量',type: 'bar',data: [5, 20, 36, 10, 10, 20]}]};// 使用刚指定的配置项和数据显示图表。myChart.setOption(option);</script></body></html>
五、nprogress进度条
安装
yarn add nprogress
使用
在main.js文件中
//导入NProgress包对应的JS和cssimport NProgress from 'nprogress'import 'nprogress/nprogress.css'/* 配置请求的根路径 */axios.defaults.baseURL = 'http://192.168.14.42:8888/api/private/v1/'//在request拦截器中,展示进度条 NProgress.start()axios.interceptors.request.use(config=>{NProgress.start()config.headers.Authorization = window.sessionStorage.getItem('token')return config})//在response拦截器中,隐藏进度条 NProgress.done()axios.interceptors.response.use(config=>{NProgress.done()return config})Vue.prototype.axios = axios
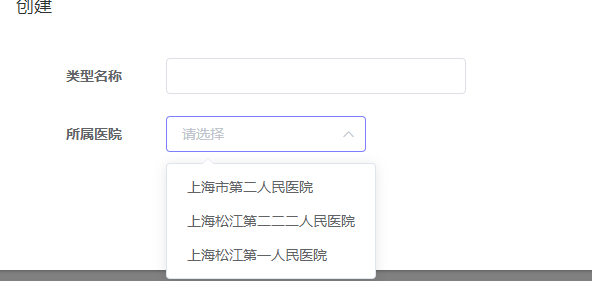
六、select选择器
6-1 常规选择
绑定ID,根据类名获取
<el-form-item label="所属医院"><el-select v-model="dataForm.hospitalId" clearable><el-optionv-for="item in hospitalList":key="item.id":label="item.hospitalName":value="item.id"></el-option></el-select></el-form-item>
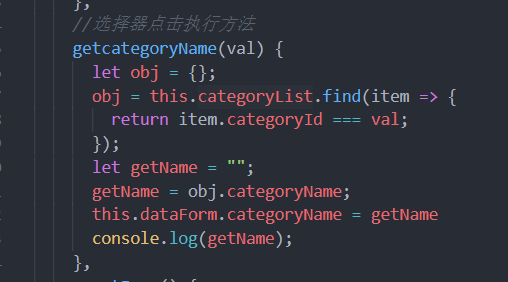
6-2 获取label属性
categoryList:[{categoryName:"***",categoryId:123456}]

6-3 选择器带分页
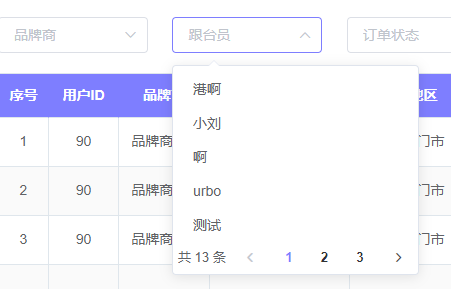
6-3-1 组件封装
<template><el-row><el-col><el-selectv-model="copyValue"filterableclearable:placeholder="place"@change="updateValue"><el-optionv-for="item in dataList":key="item.value":label="item[labelKey]":value="item[valueKey]"></el-option><el-col><div style="float: right; "><el-pagination@current-change="handleCurrentChange":current-page="pageInfo.page":page-size="pageInfo.limit"layout="total, prev, pager, next":total="pageInfo.total"></el-pagination></div></el-col></el-select></el-col></el-row></template><script>export default {name: "NewPageSelect",props: {//绑定值value: String,//下拉列表dataList: Array,//option的label在列表中对应的keylabelKey: String,//option的value在列表中对应的keyvalueKey: String,//分页信息pageInfo: Object,place: String,},watch: {value: {handler: function (val) {this.copyValue = val;},deep: true,},},methods: {//更新值updateValue() {this.$emit("update:value", this.copyValue);},//翻页handleCurrentChange(val) {this.$emit("selectPageChange", val);},},data() {return {copyValue: this.value,};},};</script><style scoped></style>
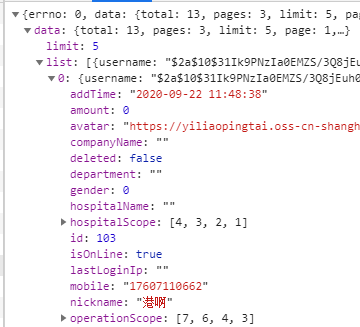
6-3-2 父组件中使用
<newPageSelectclass="filter-item"style="width: 150px; margin-right: 20px":value.sync="listQuery.userId"@selectPageChange="brandUserListSearch":valueKey="'id'":labelKey="'nickname'":pageInfo="brandUserInfo":dataList="brandUserList":place="'品牌商'"></newPageSelect>import NewPageSelect from "@/components/NewPageSelect";data(){return{brandUserInfo: {page: 1,limit: 5,total: 0,userIdentity: 1,},copyValue: this.value,brandUserList: [],}}props: {value: String,},watch: {//监听copyValue值变化copyValue: {handler(newV, oldV) {this.$emit("update:value", this.copyValue);},deep: true,},},created() {this.getList();this.brandUserListSearch();},//父实例查询brandUserListSearch(val) {userList(this.brandUserInfo).then((res) => {this.brandUserList = res.data.data.list;this.brandUserInfo.total = parseInt(res.data.data.total);});this.brandUserInfo.page = val;},
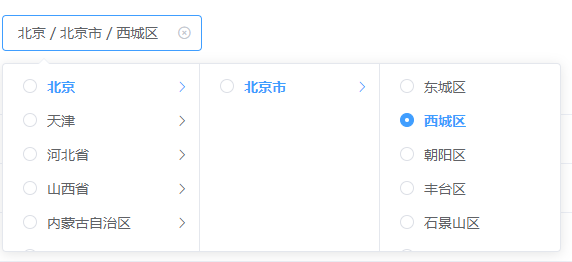
七、区域选择器
<el-cascaderref="loactionCascaderRef"v-model="filter.location_code":placeholder="$t('userlist.region')":options="regions"clearable:props="{ checkStrictly: true }"@change="getUserList(true)"/>
1、watch监听
watch: {filterLocation(nV, oV) {if (this.$refs.loactionCascaderRef) {this.$refs.loactionCascaderRef.dropDownVisible = false}}},
2、引入regions
import regions from '@/mixins/regions'mixins: [regions],
3.封装调用
1.api/common.js
import request from '@/utils/request'export function regions() {return request({url: '/mock/constant/regions',method: 'get'})}
2.store/modules/common.js
import { regions } from '@/api/common'const common = {state: {regions: []},mutations: {SET_REGIONS: (state, regions) => {state.regions = regions}},actions: {GetRegions({ commit }) {return new Promise((resolve, reject) => {regions().then(res => {const regions = res.datacommit('SET_REGIONS', regions)resolve(regions)}).catch(err => {reject(err)})})}}}export default common
3.store/getters.js
const getters = {sidebar: state => state.app.sidebar,language: state => state.app.language,size: state => state.app.size,device: state => state.app.device,visitedViews: state => state.tagsView.visitedViews,cachedViews: state => state.tagsView.cachedViews,token: state => state.user.token,avatar: state => state.user.avatar,name: state => state.user.name,introduction: state => state.user.introduction,status: state => state.user.status,roles: state => state.user.roles,setting: state => state.user.setting,permission_routes: state => state.permission.routes,addRoutes: state => state.permission.addRoutes,regions: state => state.common.regions}export default getters
4.store/index.js
import Vue from 'vue'import Vuex from 'vuex'import app from './modules/app'import permission from './modules/permission'import tagsView from './modules/tagsView'import user from './modules/user'import common from './modules/common'import getters from './getters'Vue.use(Vuex)const store = new Vuex.Store({modules: {app,permission,tagsView,user,common},getters})export default store
5.mixins/regions.js
export default {data() {return {regions: []}},created() {const regions = this.$store.getters.regionsif (regions && regions.length) {this.regions = regions} else {this.$store.dispatch('GetRegions').then(res => {this.regions = res}).catch(err => {console.log(err)})}}}
4.效果
八、侧边栏得自定义修改
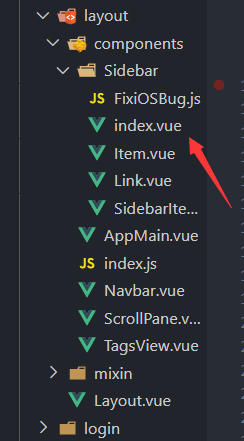
结构层
<el-scrollbar wrap-class="scrollbar-wrapper"><div class="logo"><img class="logo_img" src="../../../../../images/便医精查logo.png" alt /><div>便医精查</div></div><el-menu:show-timeout="200":default-active="$route.path":collapse="isCollapse"mode="vertical"class="el-menu-vertical-demo"><sidebar-itemv-for="route in permission_routers":key="route.path":item="route":base-path="route.path"/></el-menu></el-scrollbar>
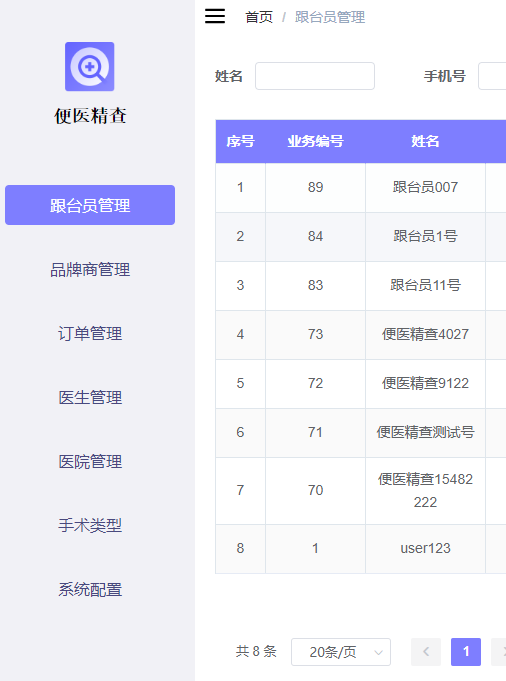
样式层
.logo {text-align: center;margin: 50px 0;font-family: "Palatino Linotype", "Book Antiqua", Palatino, serif;font-weight: bolder;}.logo_img {width: 50px;height: 50px;margin-bottom: 10px;}.el-menu {background-color: #f1f1f6;text-align: center;}.el-menu-item.is-active {color: #fff !important;background-color: #7e7eff !important;}.el-menu-item {background-color: #f1f1f6;color: #49497e;height: 40px;line-height: 40px;margin-bottom: 20px;width: 170px;border-radius: 4px;font-size: 16px;margin: 10px auto;}#app .sidebar-container .submenu-title-noDropdown:hover,#app .sidebar-container .el-submenu__title:hover {background-color: #7e7eff !important;color: #fff !important;}#app .sidebar-container {font-size: 18px;}#app .sidebar-container .is-active > .el-submenu__title {color: #7e7eff !important;}#app .sidebar-container .nest-menu .el-submenu > .el-submenu__title,#app .sidebar-container .el-submenu .el-menu-item {background-color: #f1f1f6 !important;height: 40px;line-height: 40px;margin-bottom: 20px;width: 170px;border-radius: 4px;font-size: 16px;margin: 10px auto;}#app .sidebar-container .el-submenu .is-active {color: #fff !important;background-color: #7e7eff !important;}.el-submenu__title {border-radius: 4px;height: 40px;line-height: 40px;width: 170px;font-size: 16px;color: #49497e;margin: 10px auto;padding: 0 20px;list-style: none;cursor: pointer;position: relative;-webkit-transition: border-color 0.3s, background-color 0.3s, color 0.3s;transition: border-color 0.3s, background-color 0.3s, color 0.3s;-webkit-box-sizing: border-box;box-sizing: border-box;white-space: nowrap;}#app .sidebar-container .el-submenu .el-menu-item:hover {background-color: #7e7eff !important;color: #fff !important;}
效果图
九、table表格中放大图片
9-1 单张图片
<el-table-column align="center" property="backCardImg" label="身份证反面照"><template slot-scope="scope"><el-popover placement="bottom" trigger="click"><!--trigger属性值:hover、click、focus 和 manual--><a :href="scope.row.backCardImg" target="_blank" title="查看最大化图片"><img :src="scope.row.backCardImg" style="width: 560px;height: 560px" /></a><imgslot="reference":src="scope.row.backCardImg"style="width: 80px;height: 80px; cursor:pointer"/></el-popover></template></el-table-column>
9-2 多张图片
<el-table-column label="小票图片" align="center"><template slot-scope="scope"><span v-for="(item,index) in scope.row.smallTicketImg" :key="index"><el-popover placement="left" trigger="click" width="500"><img :src="item" width="100%" /><imgslot="reference":src="item":alt="item"style="max-height: 80px;max-width: 80px; padding: 3px"/></el-popover></span></template></el-table-column>
十、关于时间选择器
10-1 日期格式
使用format指定输入框的格式;使用value-format指定绑定值的格式。
<el-form-item label="开始时间" prop="startTime"><el-date-pickerv-model="dataForm.startTime"value-format="yyyy-MM-dd hh:mm:ss"type="datetime"placeholder="选择日期时间"></el-date-picker></el-form-item>

若有收获,就点个赞吧
0 人点赞
